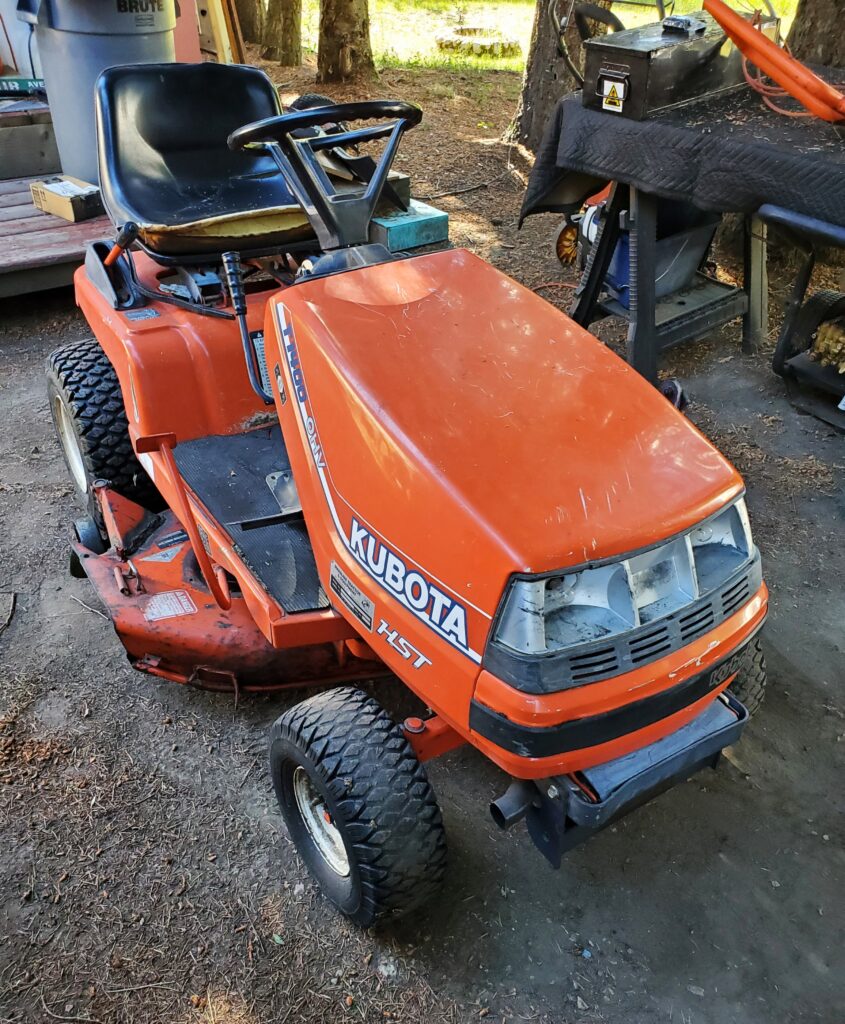
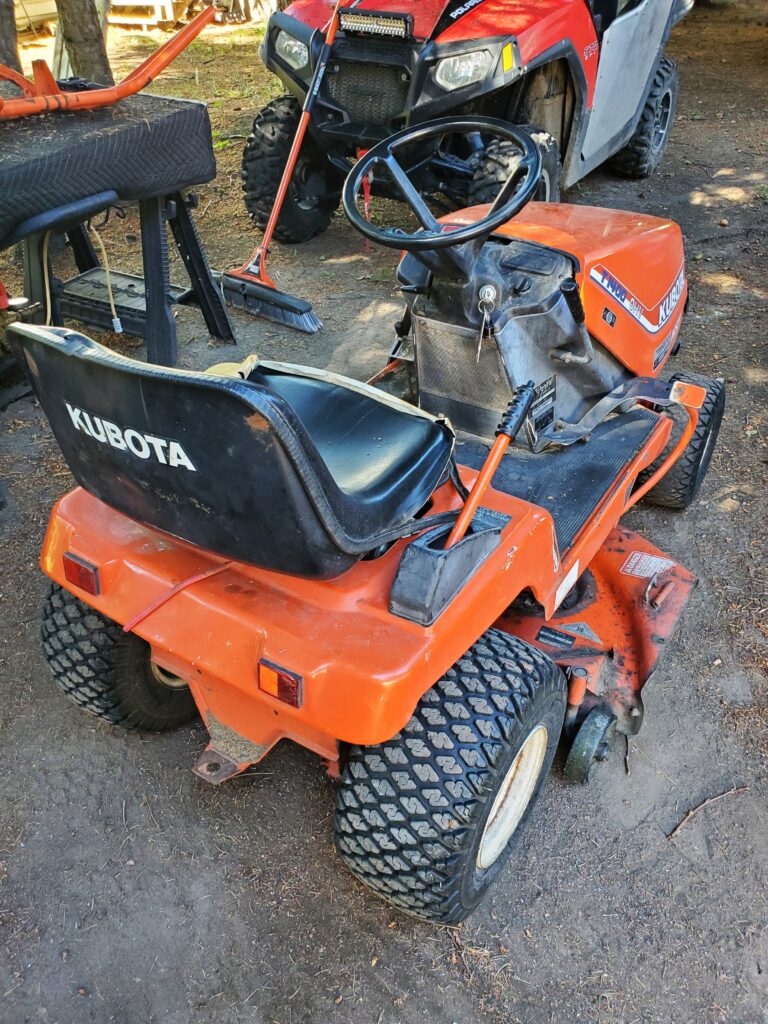
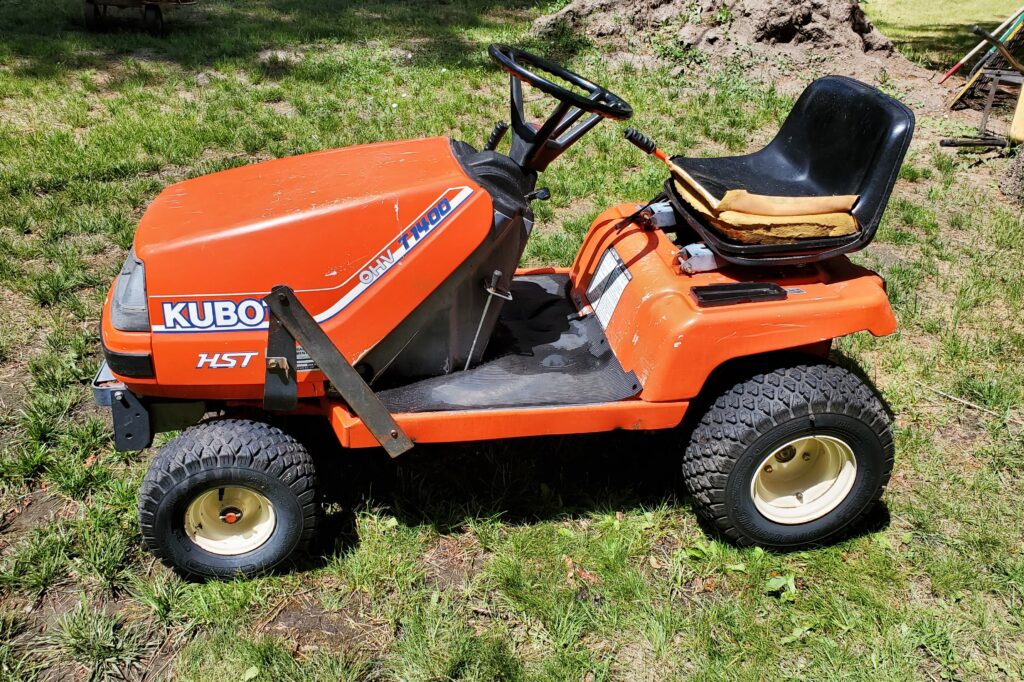
I had the time so I removed the carb and cleaned it. It runs very good but I’m now certian there are some wiring gremlins. However I did cut all the lawn, after straightening out the grass deflector so the clippings don’t clog.
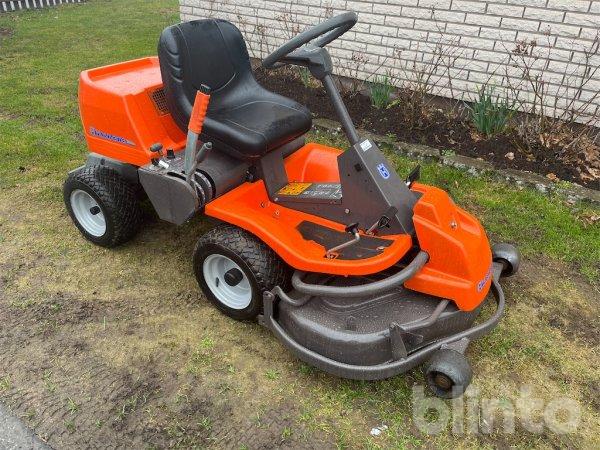
This is to remind me what it could look like..and by the end of this post you will see I’m close !
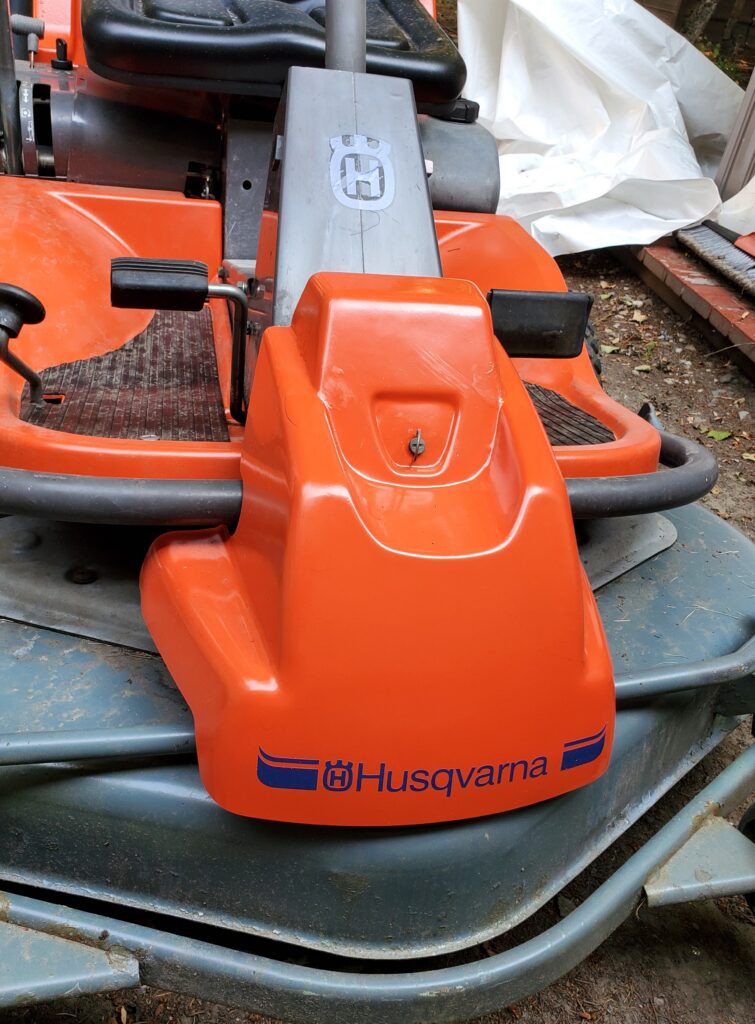
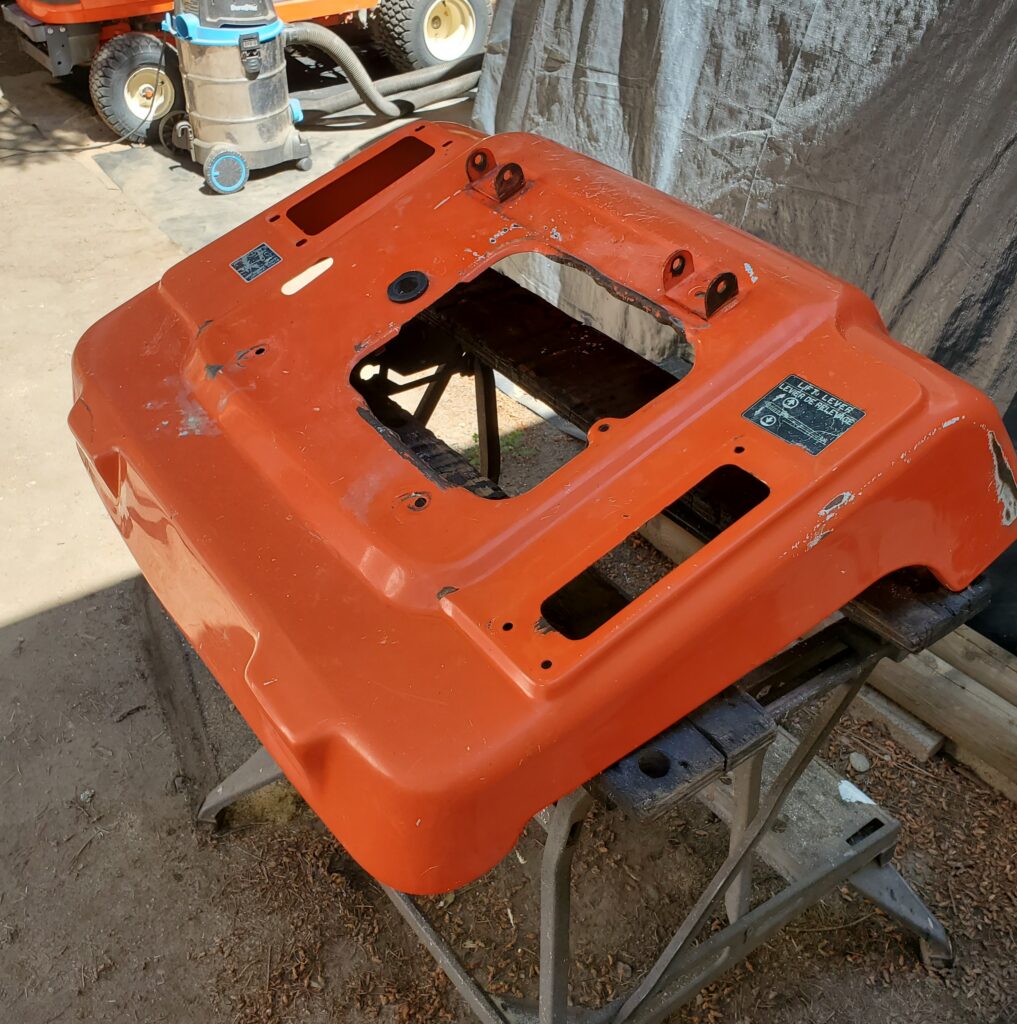
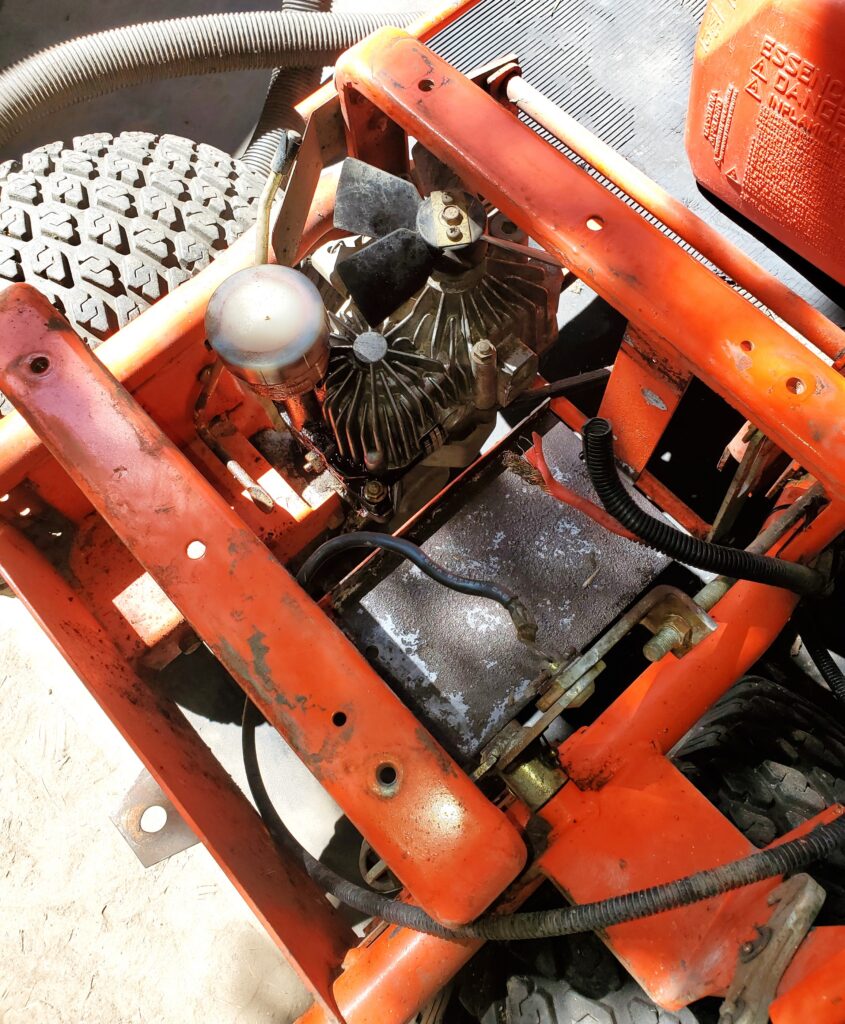
This page will be about fixing the rear cover..and the nose cover too. I was so curious about what I would find between those white panels.
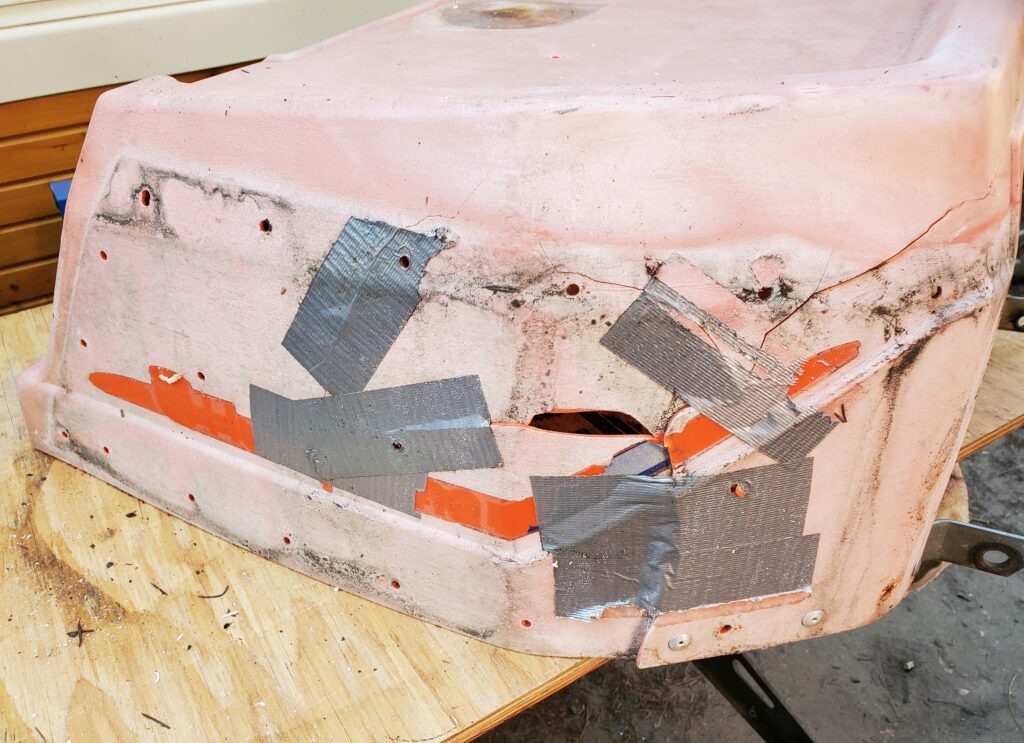
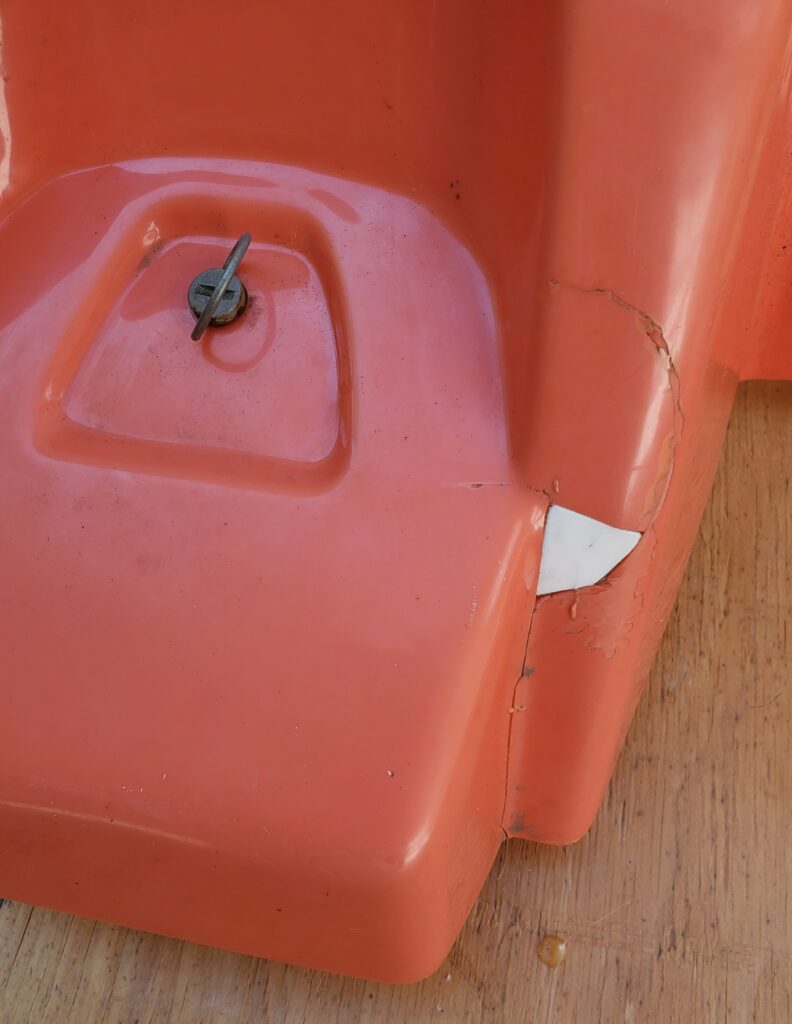
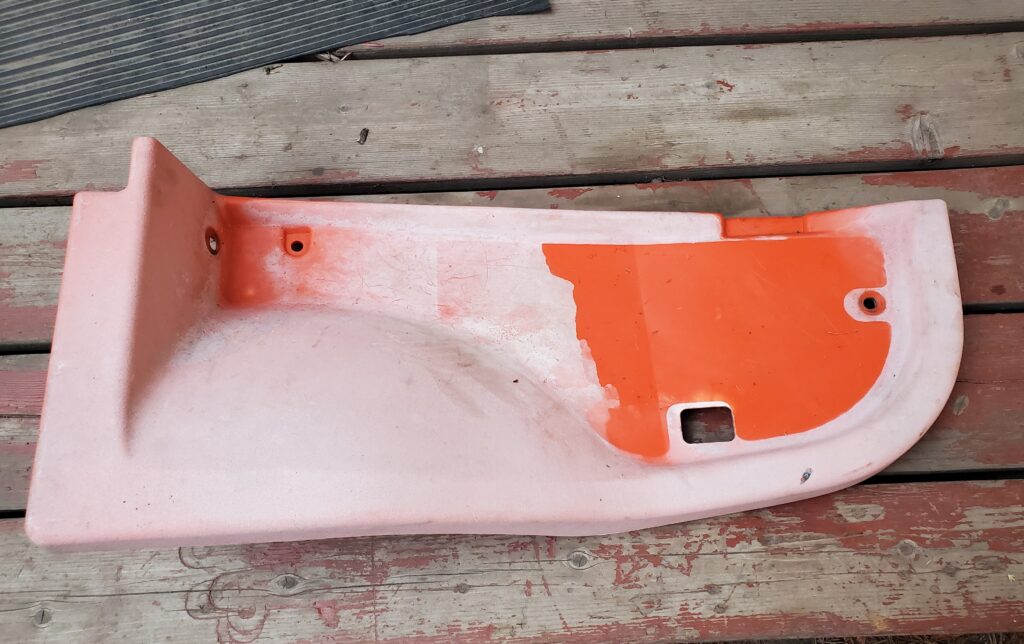
Ok.. Just a small ish piece missing.. And duct tape. Well I know how to deal with this.. I’ve been fixing plastics on ATV’s and other things.. I have a plastic heat stitcher, and I know how to use it..
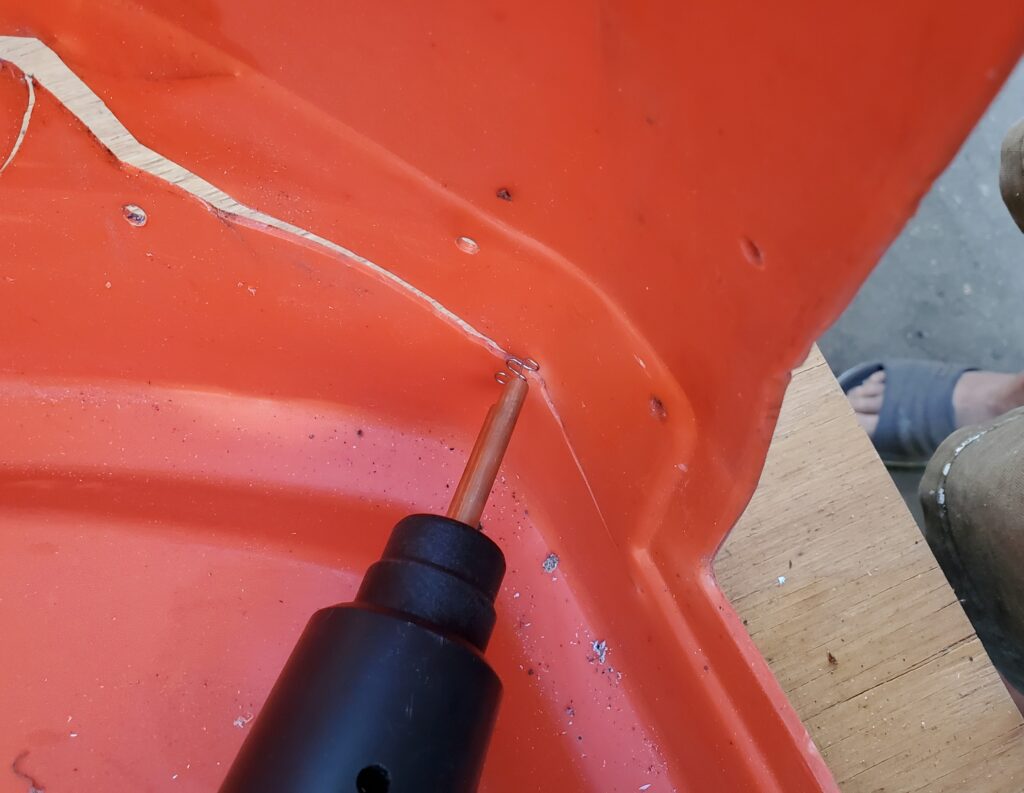
The gun heats up little wire wiggly things and melts them into the plastic. Working on the inside of coarse. The result is a strong hold on the crack.
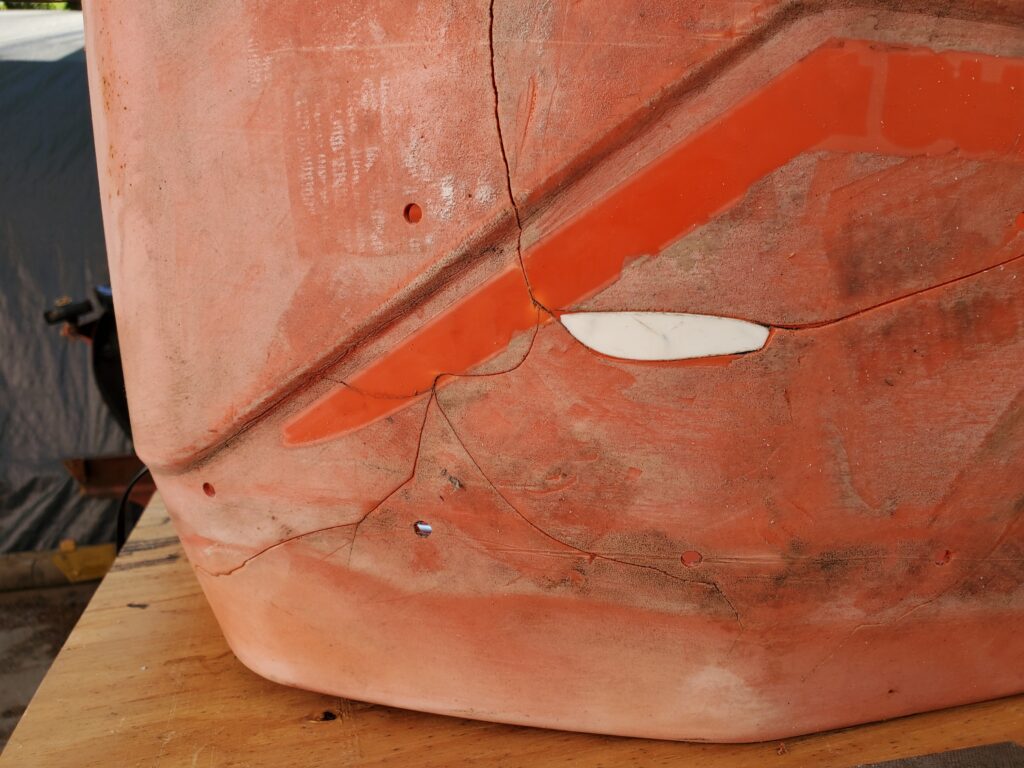
Made a fill piece from the white cover. Now some JB weld to fill in the cracks and sand it all smooth… There is no way that the sun fading and oxidization is going to just sand out. I have resigned myself to having to repaint all the plastics with Kubota orange. I’ll even make some new decals and the stripes with my cricut and vinyl. The nose piece is getting the same done too.
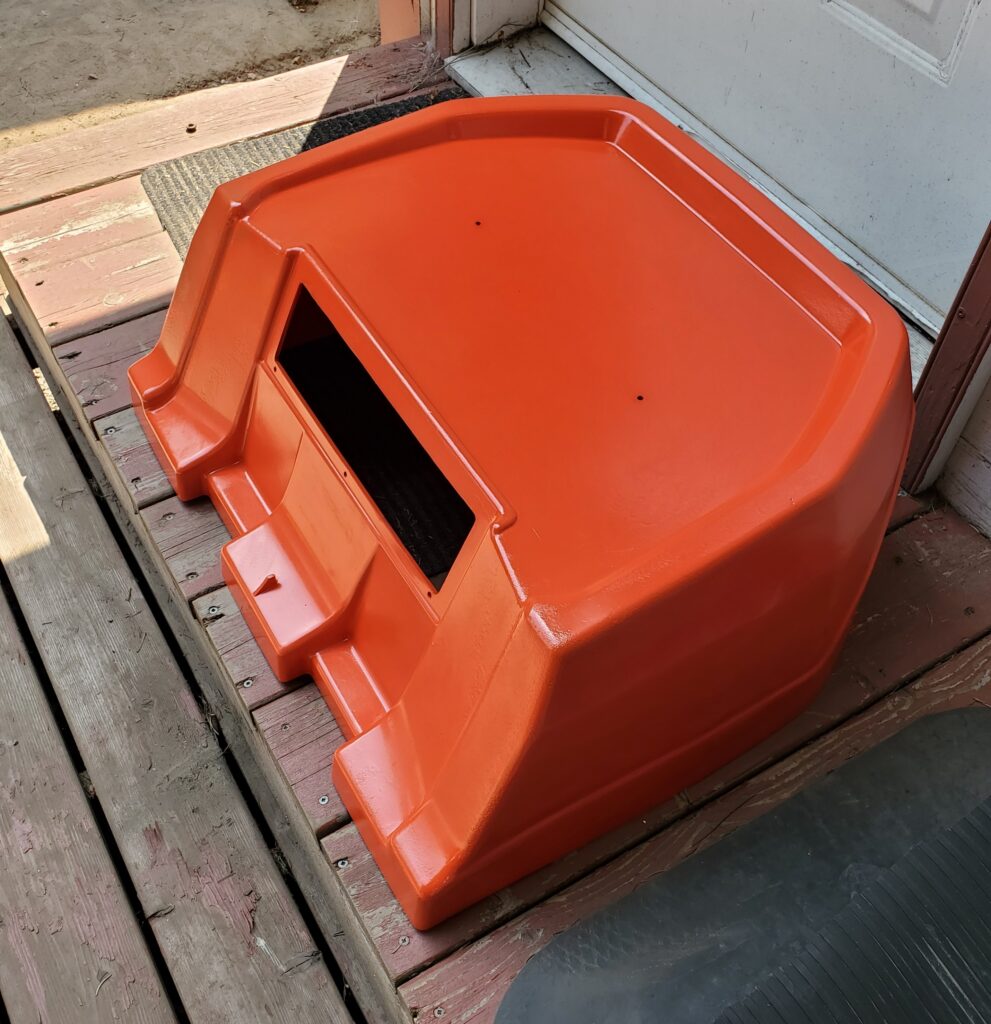
It too was missing a small piece, and cracked on both sides. Got that painted and the hood too.
And that’s better… worthy of being re- installed on the Rider 16. And I made a video about this little side project..
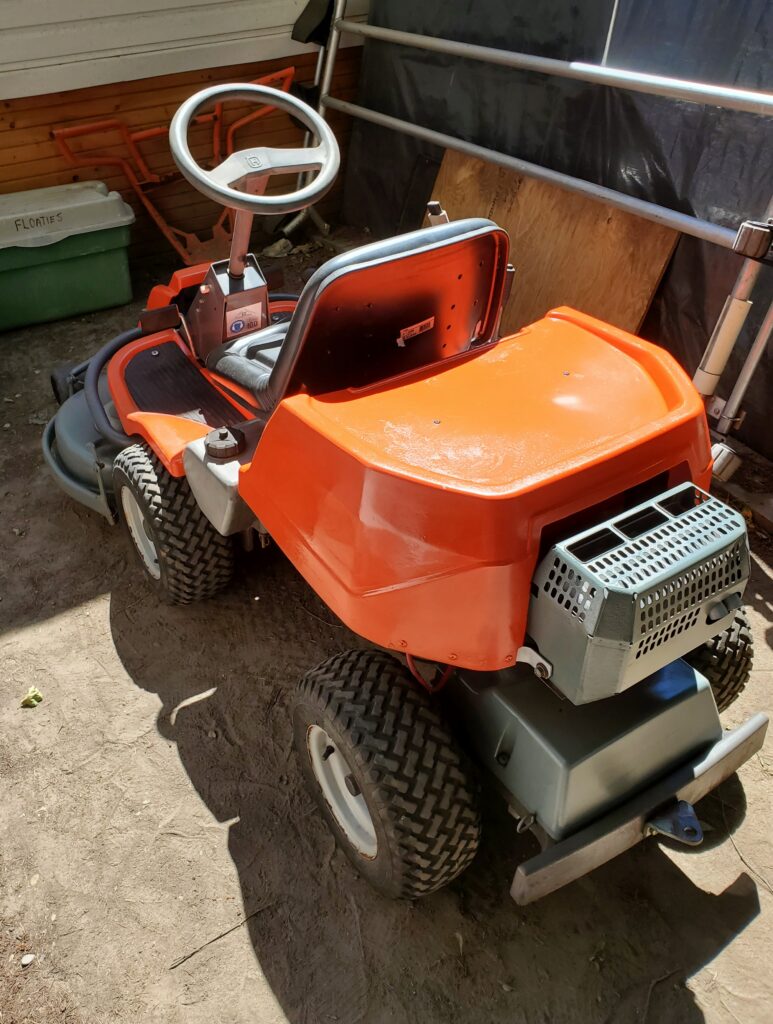
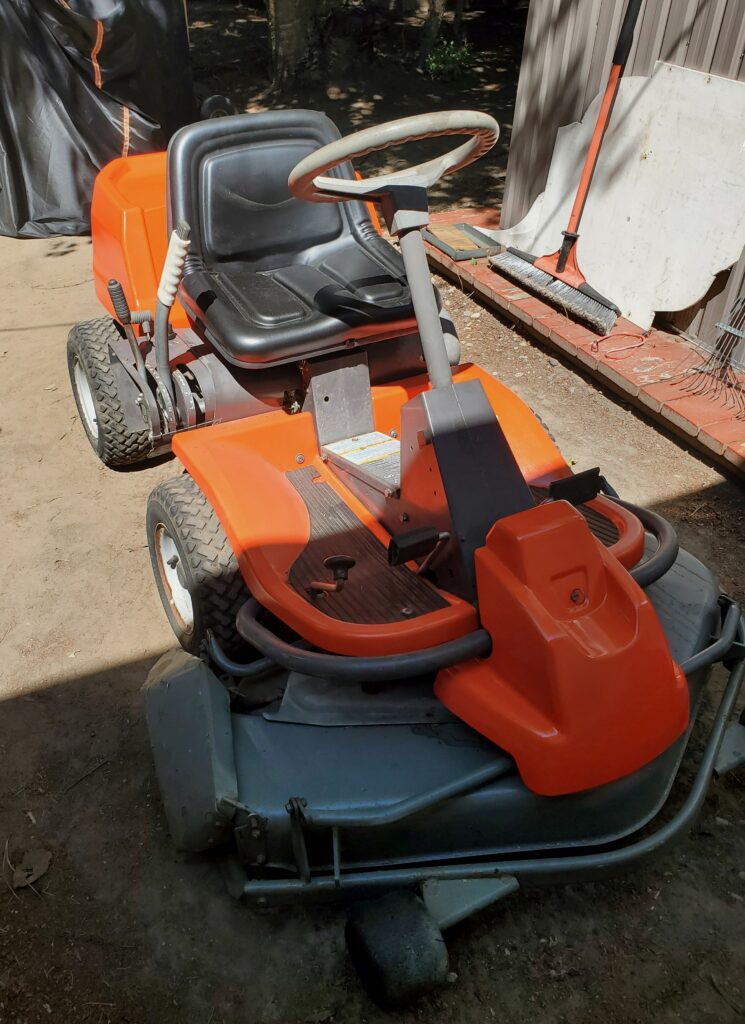
Some new decals have been ordered.. we will see how that goes. And let’s just move on to the finished , cosmetically correct Rider 16…
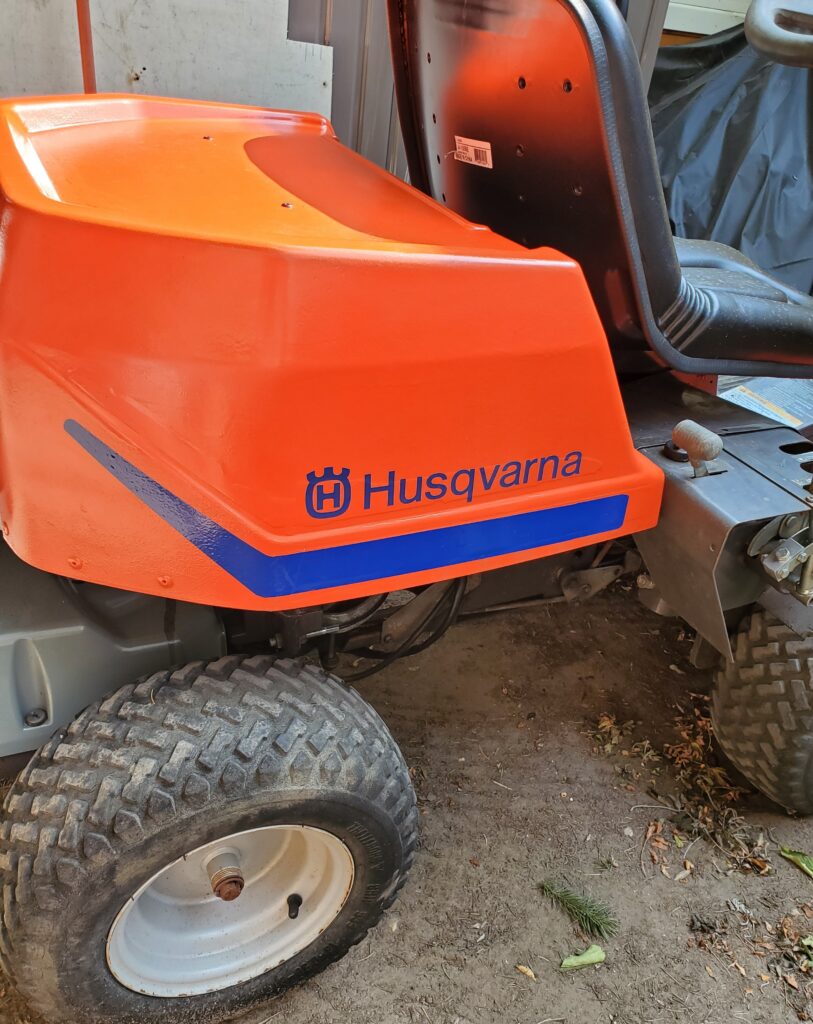
How’s that for taking the ugly away.. My motor hood turned out great.. With some nice blue decals and graphics, we will be the pride of the fleet.
So the new decals arrived and since the paint is well cured let’s finish the spiff up. Starting up front.
Dark blue is the correct colour.. Not getting to crazy with the set of 11 I got.. Just using three.
I had the right colour vinyl so I made the stripe. some day I’ll break out the circut and make “Rider 16” in white as the fishing touch.
For now I will just keep a cover on the Rider and end this page.. Will start a new one with the fine tuning of the motor. See you soon.!
Here’s a photo of a very nice one from a Swedish Auction. You know when I show you this photo first that the one I just bought looks a bit different. I can’t afford ,or find one that nice. SOOO…. I got to make it..
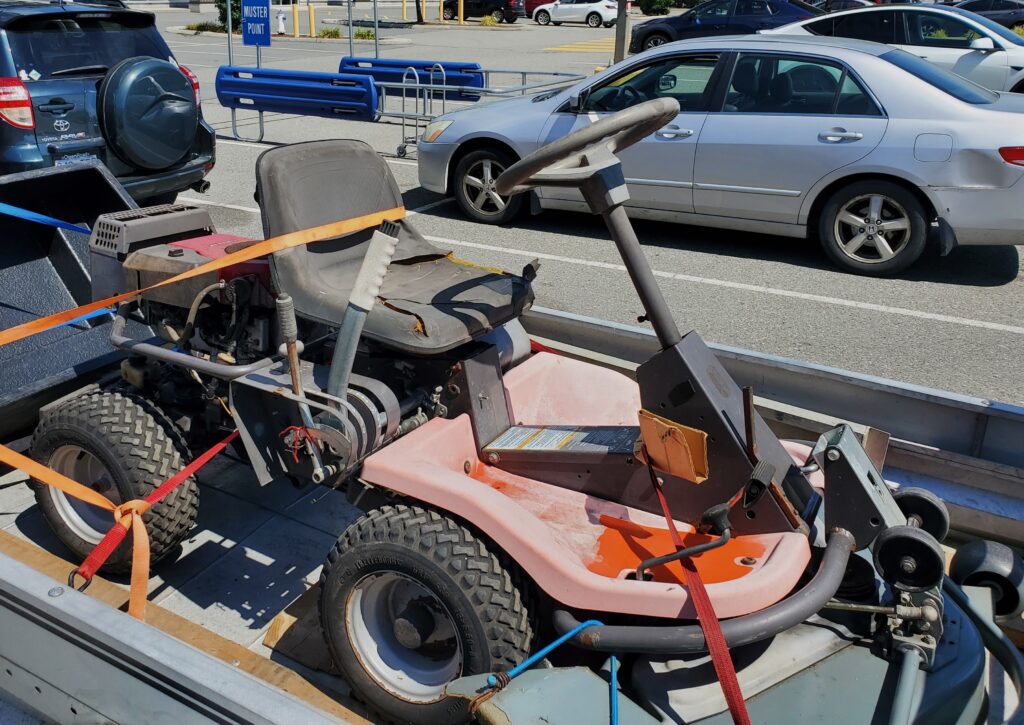
I warned you ! But lets look at the facts here.. It’s 26 years old, It’s had a rough life ..left outside. Plastics are sun baked. However it runs and cuts grass.. because that’s all the fella cared about.. So the deck was rebuilt , new bearings. The steering cables ( that’s what articulates the body) are new. The tires are ok and holding air. That’s all the good, he left me a long list of stuff needing to be fixed. Dave and I drove six hours to Surrey for this gem. Was it worth it ? Hell yes.. These riders hold there value and folks love them.
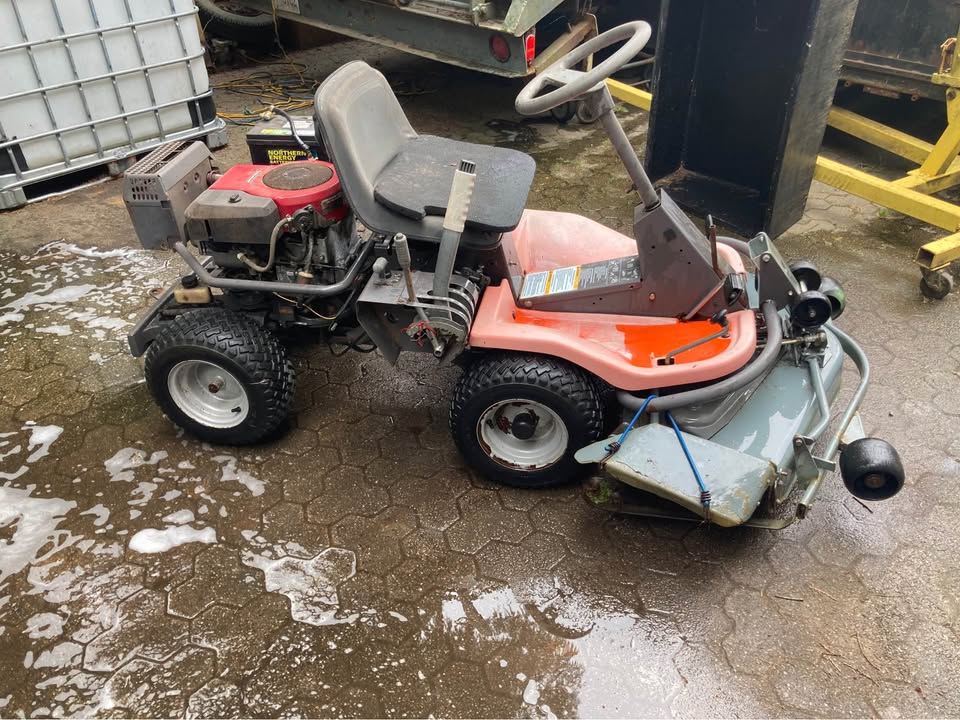
Loaded up and tied down for the long drive home. When I got home the big pin that locks the deck in place was missing.. I see in this photo that it is gone too. Easy to make or find a new one …or even a bolt. And I did… So even with a list of stuff to fix, I would like to cut grass with it and see if I need to add to the list. So I gave it a bath…
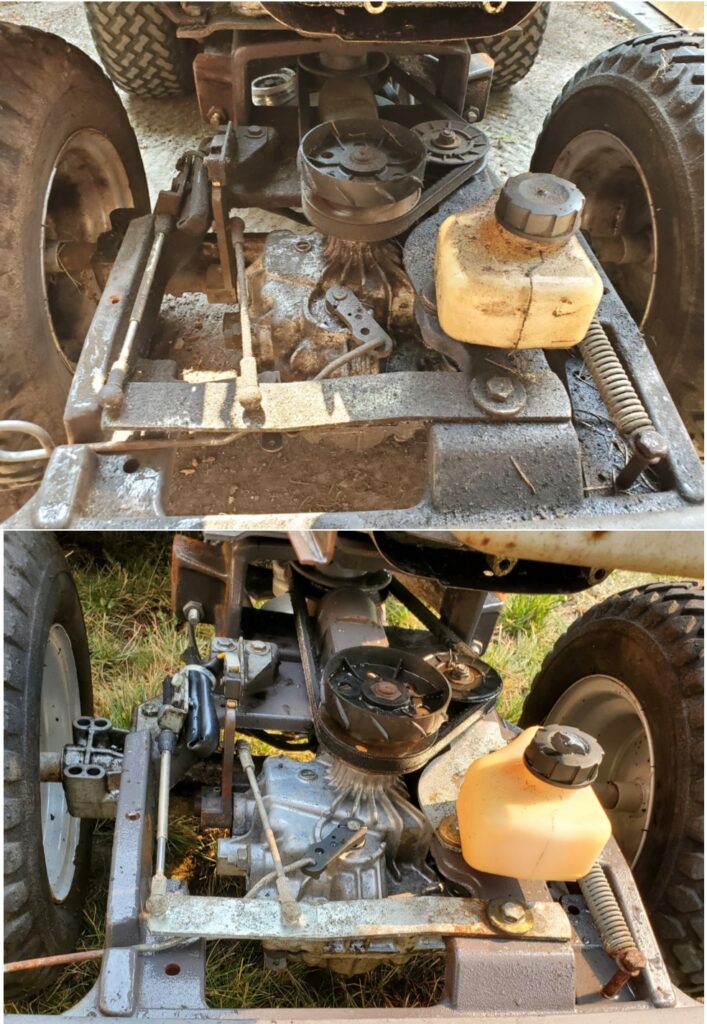
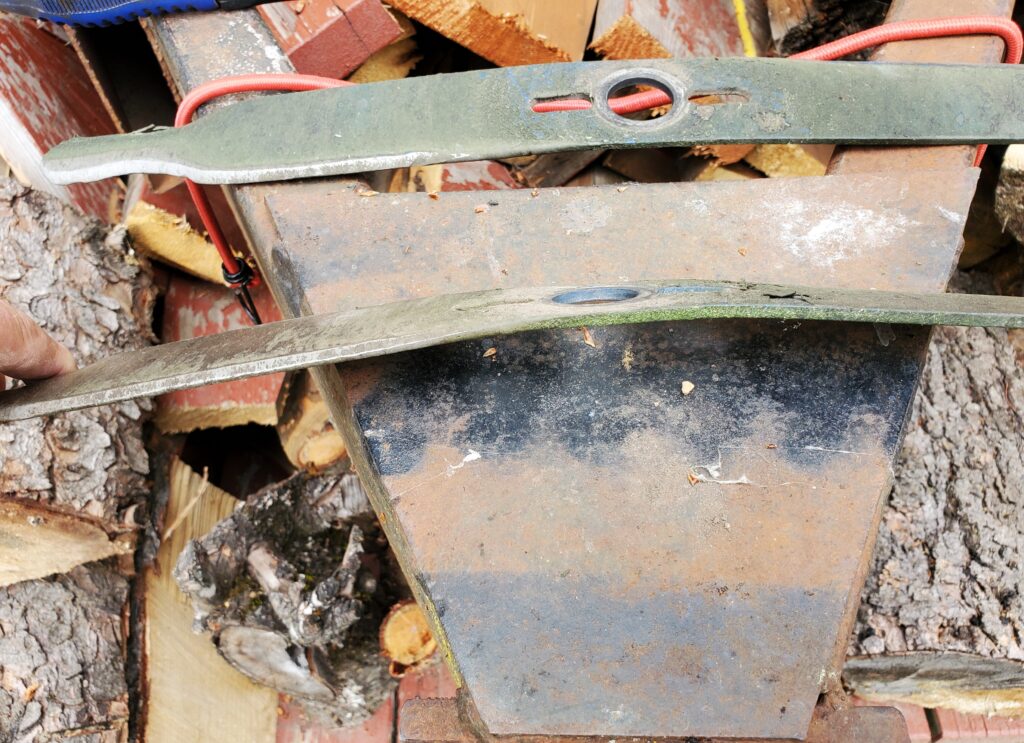
The underside of the deck is very nice…the blades not so much.. But I’ll just sharpen them .. This is a 40″ cut deck and those blades should be 14 inch. New ones for sure at some point. Check out how clean the hydro drive is now.
I don’t see the need to tell you which one is the “before” photo. If there’s a leak I’ll find it now. And yes another fan that needs blades, All of them ! Here’s a intro video that shows more….
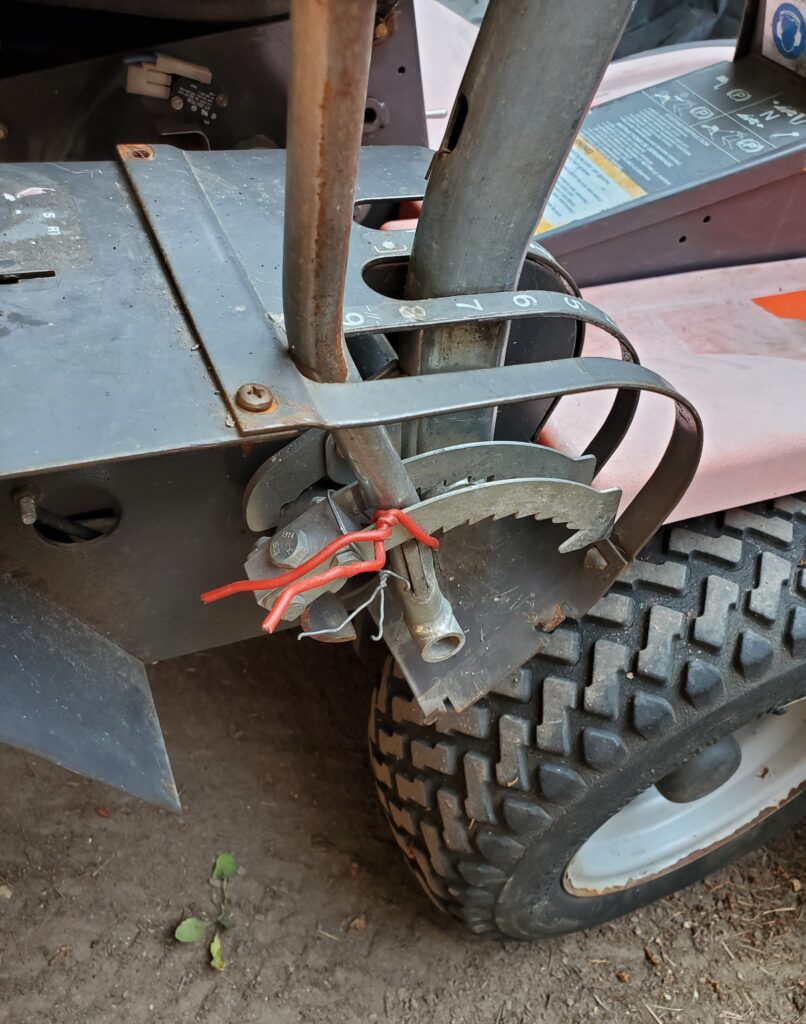
But for now like I said We need to cut some grass and see what else goes wrong. One thing that seams have fixed itself is the cutting height lever. You know the one with ten…I mean nine settings.
I pulled those wires off and sprayed some lube in where the spring is and now it works ! This makes me question some of the other repairs ? Here I thought something was broken or missing and that I would have to take it all apart… Lucky me. Still a little sticky, But mostly you leave it on the setting you use. I ran the motor today and went for a little drive. The motor is not running great,and I suspect a good carb cleaning is needed.
So I’m known to get all enthusiastic and jump the gun at times.
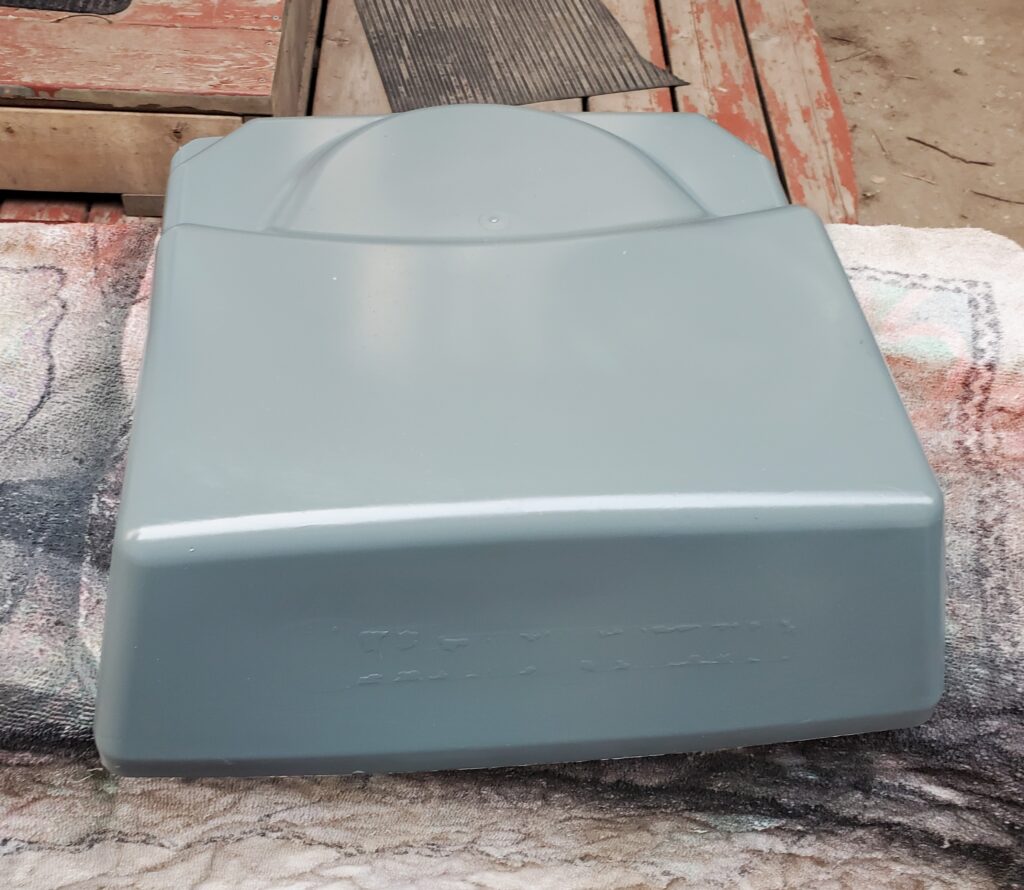
I really need to finish the Kabotabefore this project.. But I could not resist wanting to paint some of these faded / sun baked plastic parts. I started with the cover for the hydro drive and rear axle. I sanded the oxidization ,and cleaned really good..
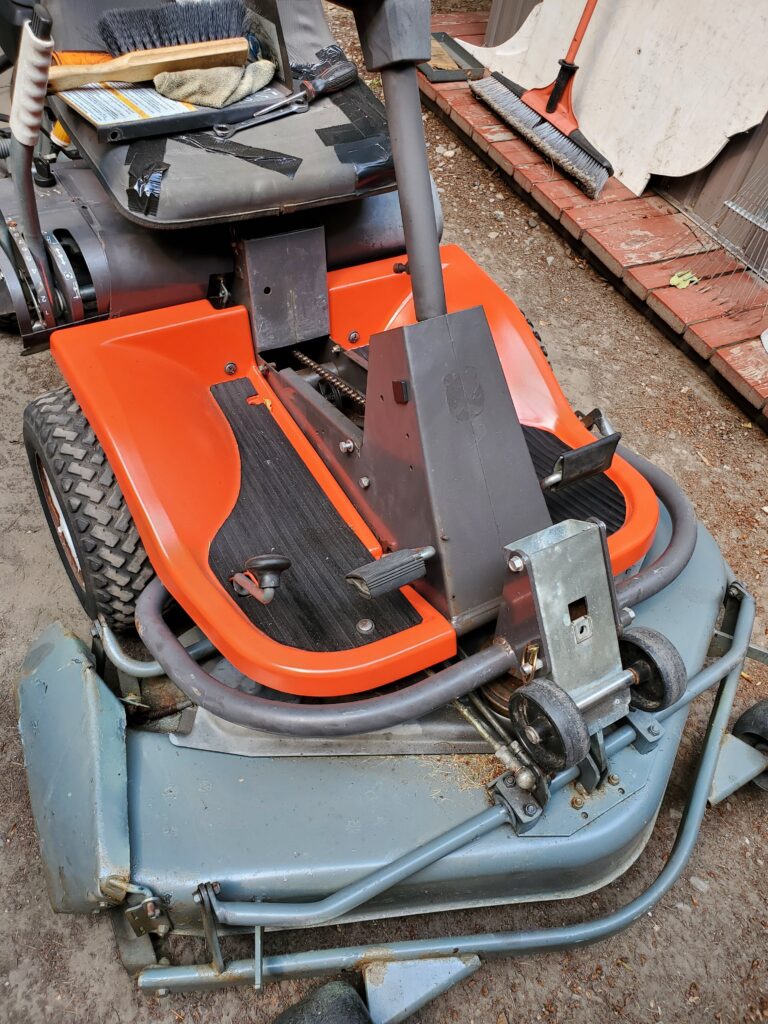
Not bad ! Dying to try something orange.. Today I removed the right side foot well to see about the foot pedal problem.. So let’s see what I can do with this mess..
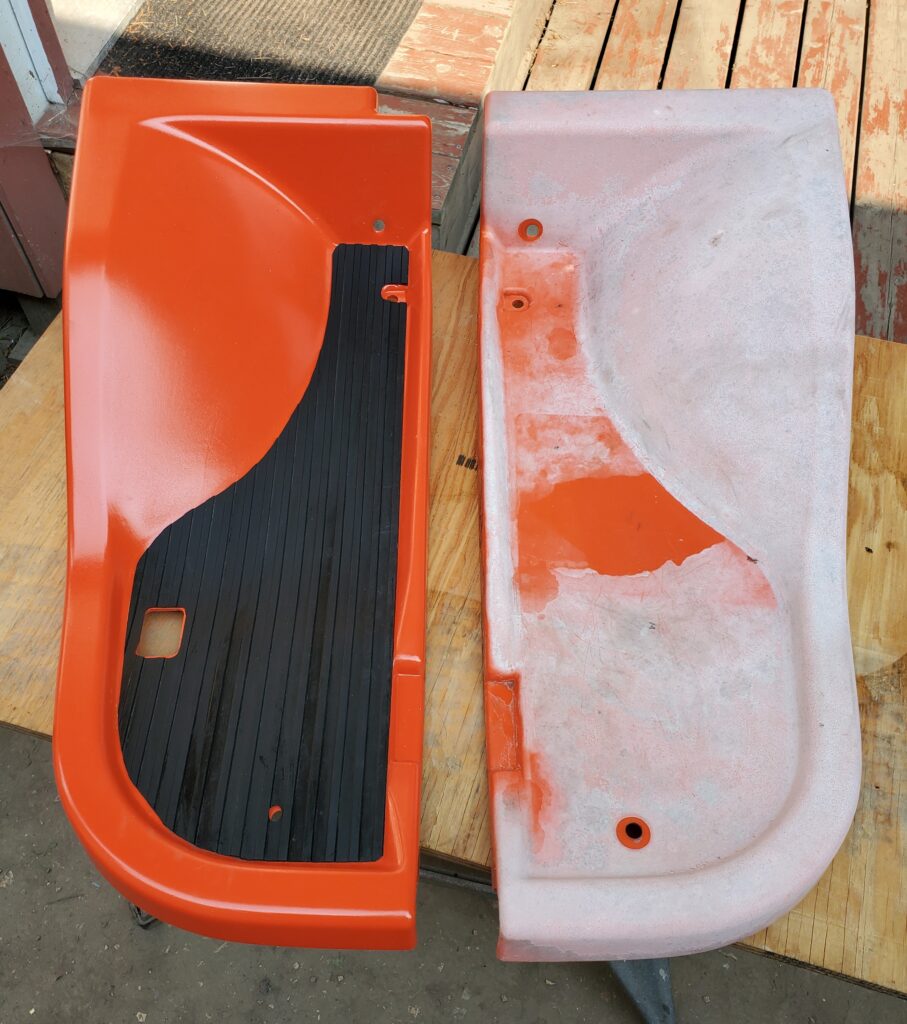
That’s faded bad ! If the oxidization wasn’t so bad , the wet sanding would have brought the orange back. However I have paint…
Slight difference.. And some rubber mat for your feet. I really should leave the R16 be for now and work on the other projects. But I want to finish with this last photo…
And we will leave it at that.. When I return to the R16 I’ll start a new page.. Oh hell let’s just go there…
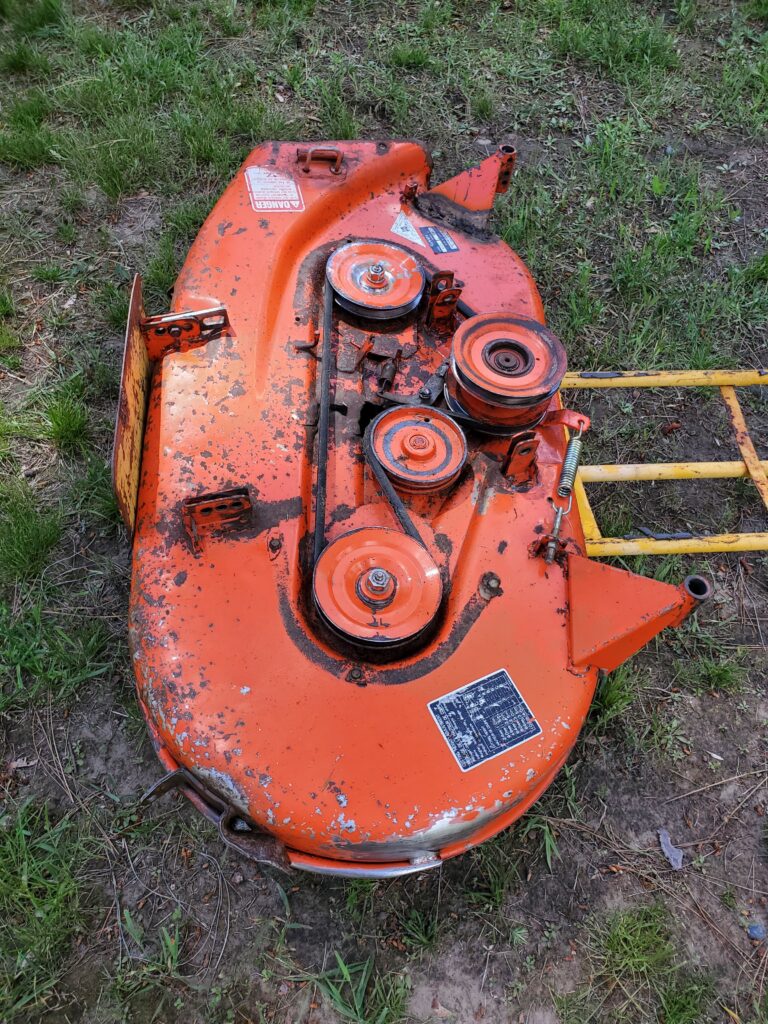
So the first thing to do is release the tension on the deck belt, and remove it. Well the outbound arbour is loose.. Maybe pooched ! not looking good. I’ll need to press the main shaft out to see what is wrong. So I take back what I said earlier about how tough they are. They can be damaged ..but it takes a lot to do it, and it just the one replaceable bearing. I still need to convince the double pulley to free itself from the spindle.. I have ways..
Well that double pulley refuses to part ways with the deck.. So I left it there.
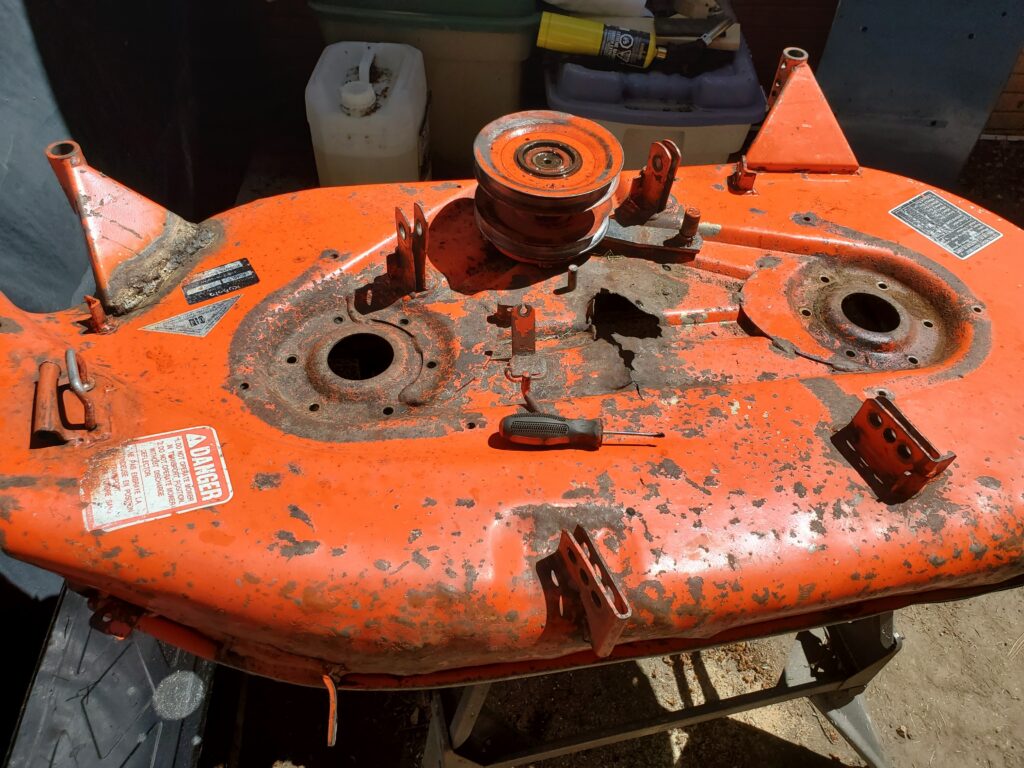
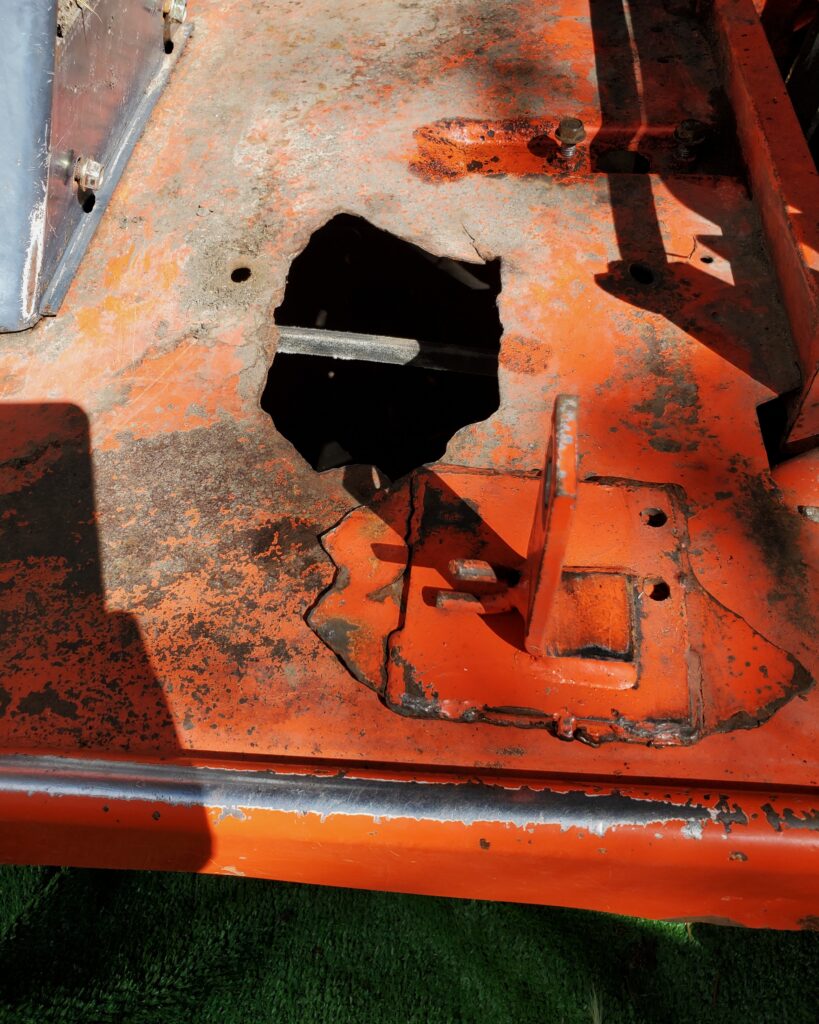
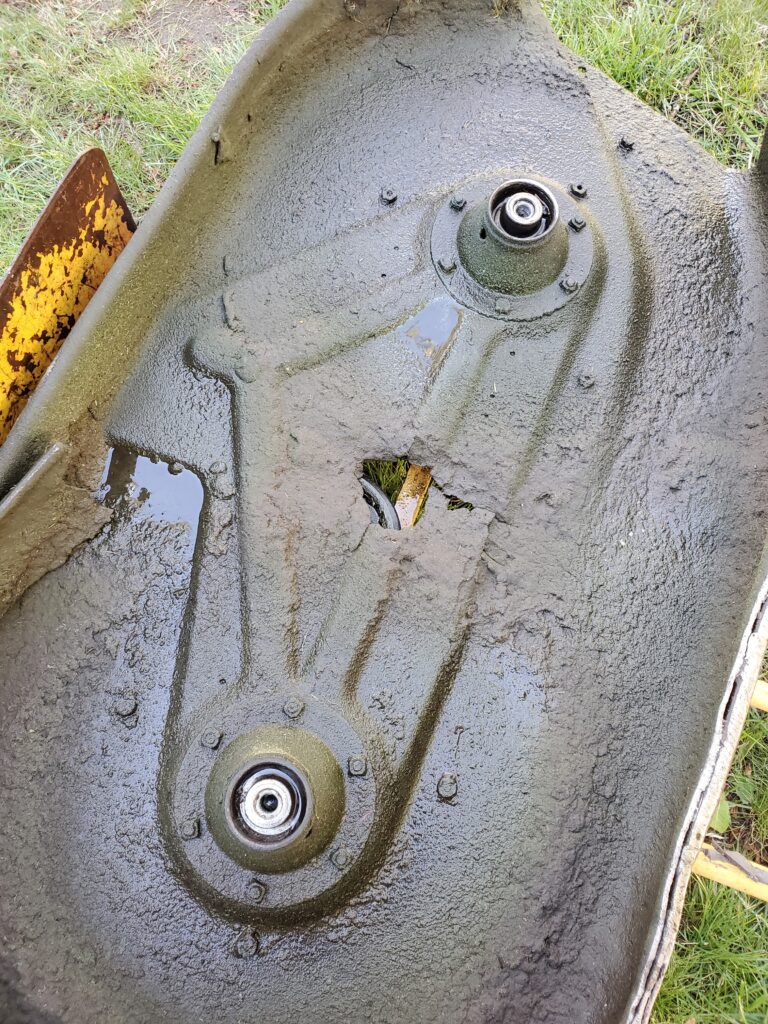
Going to put my efforts into the big hole in the middle of the deck. That is not a rust hole ! Something happened under the deck to punch that hole , ripping the metal. AND ! Forced the deck mounting bracket right up through the floor board on the tractor.
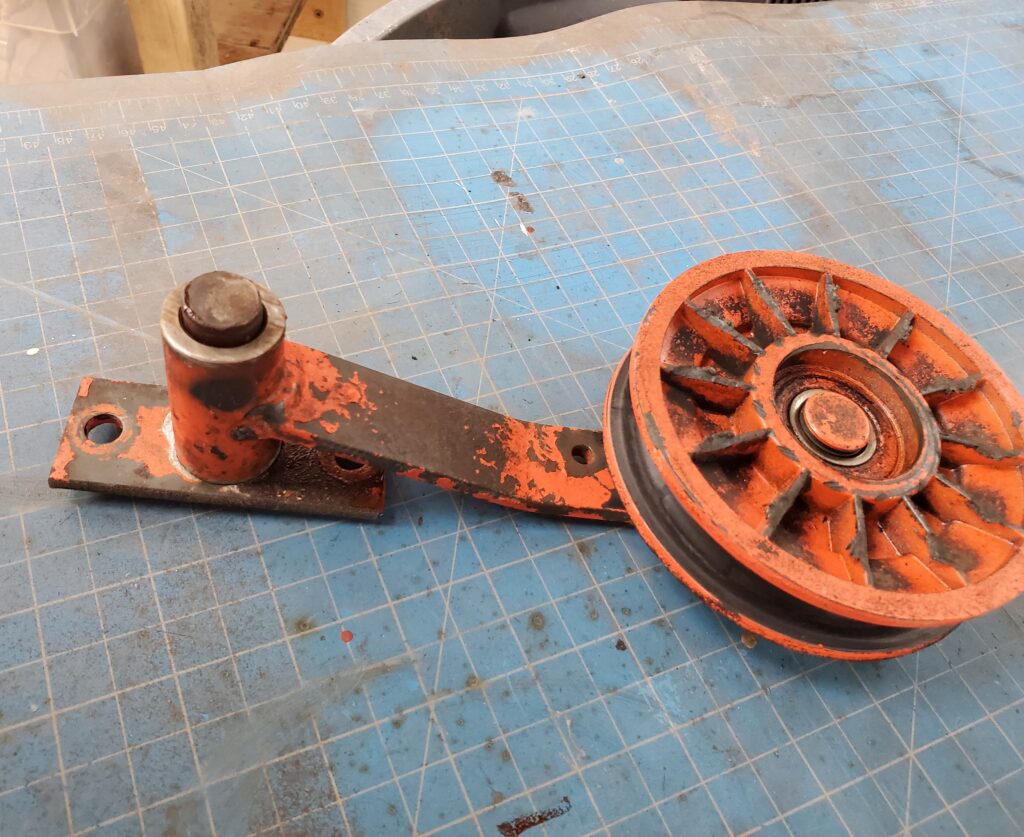
They fixed this with a piece of angle iron bolted across. Nah we will do a better fix using a bigger plate up top, and bolt that through. As for the deck.. It’s got a lot of stress cracks to weld up as well as the patch. No way I can get all the dents out. But it will be functional and repainted. Oh and while I was under the tractor I removed the drive belt tension wheel. It was seized and not doing the job.. Which I’m sure the belt was slipping .
Back to the deck…
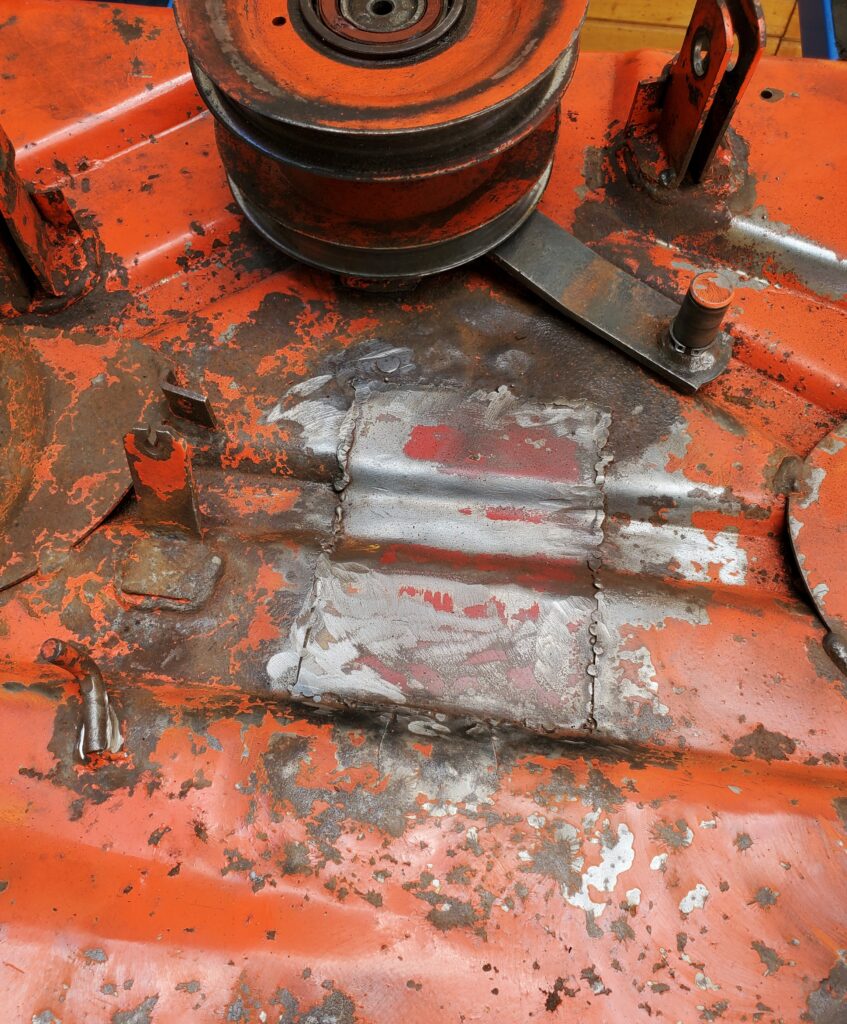
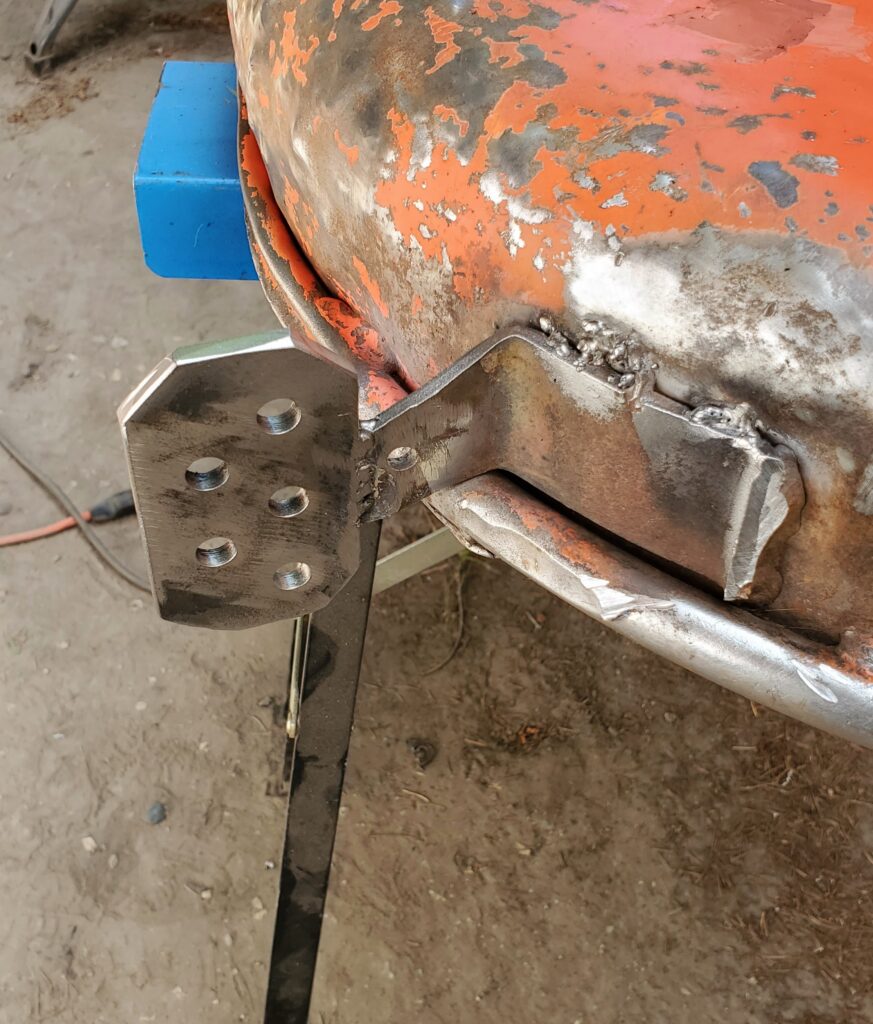
The pulley is ok it’s the swivelling part that did not swivel any more. FIXED ! But let’s get back to the deck fix’n. I did the welding today, the patch and the new front wheel holder’s.
It’s not bodywork on a car.. This just needs to be strong, not pretty. And it’s hiding under the tractor.
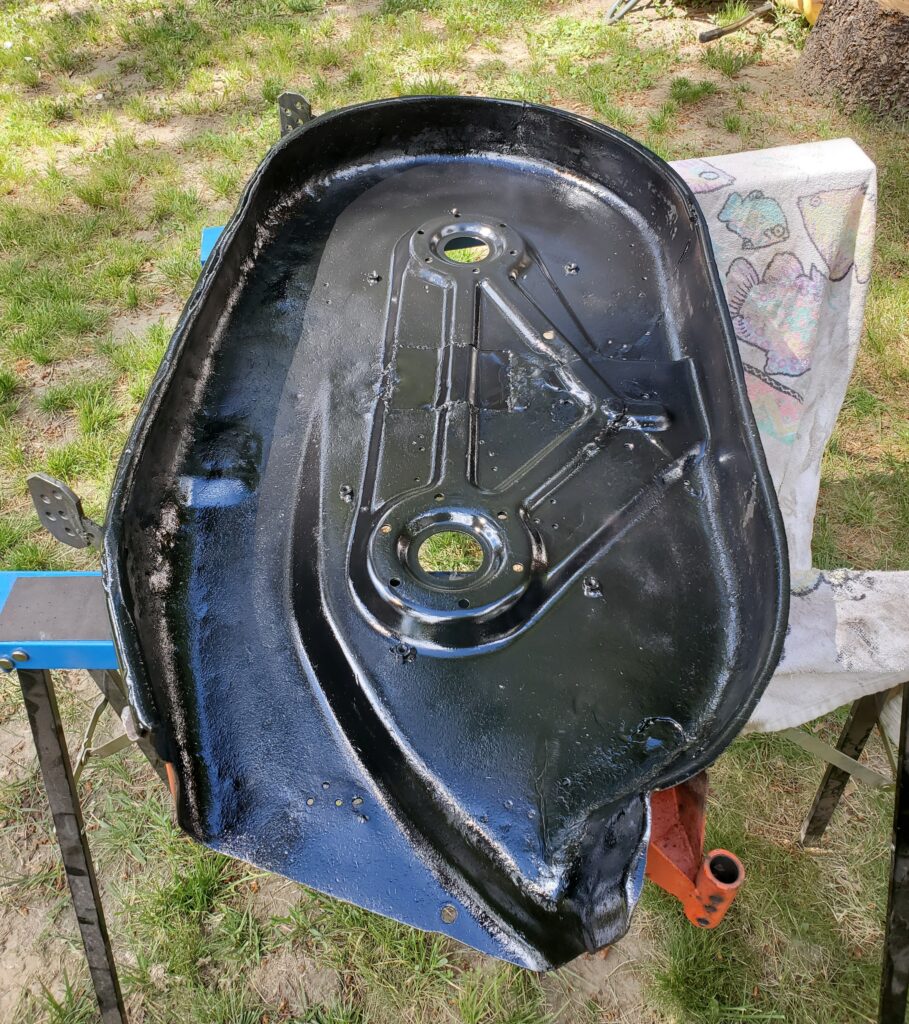
Here’s one of the gauge wheel holder’s. Hope they stand the test of time.. I only welded the new piece on ! Everything got another sanding and de-greasing. Time for the bottom paint first..
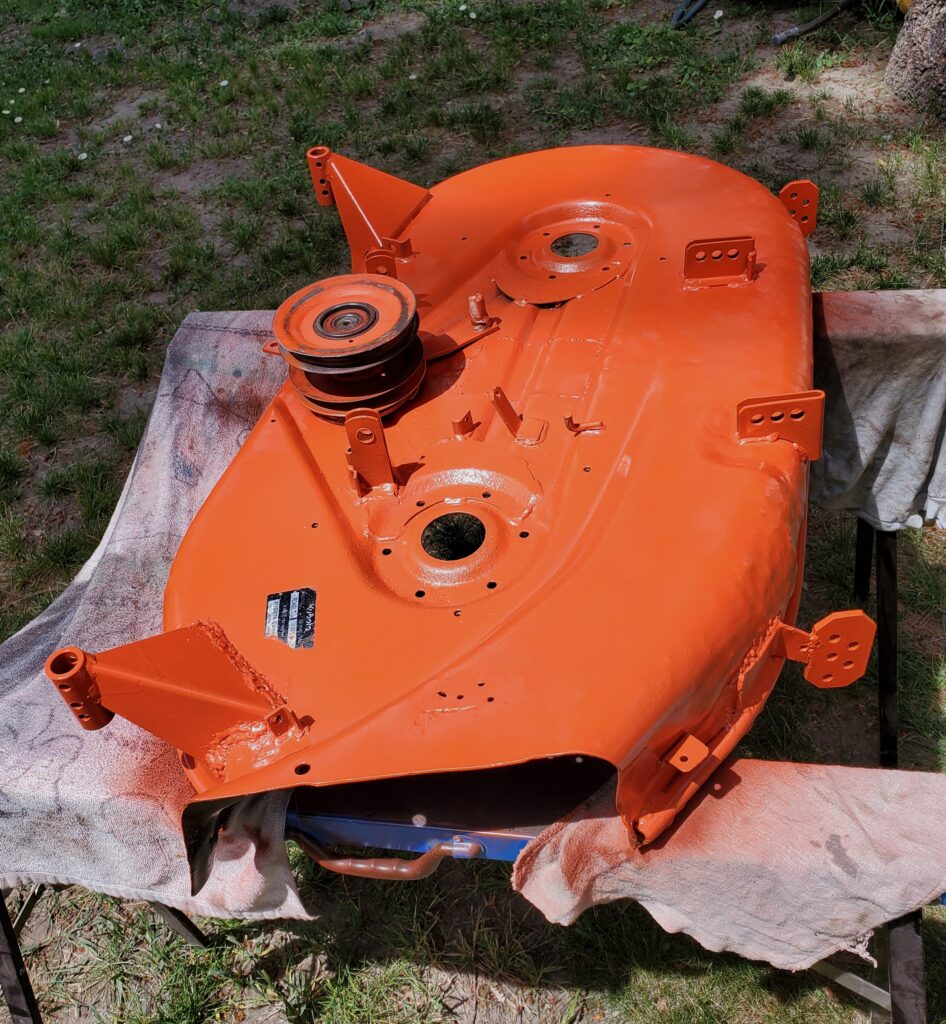
Ta Da ! Once the bottom was dry. The top got a coat of primer.. and then the Kubota orange paint.. Looks as good as can be..
You can really see the dents in the front of the deck. Looks like they were mowing rocks not grass. Today I replaced all four bearings in the arbours… Now they are smooth… I will install them then paint them, so I can paint the bolts too. Need to make a grass deflector and two safety covers. Here’s a bit of an update video…
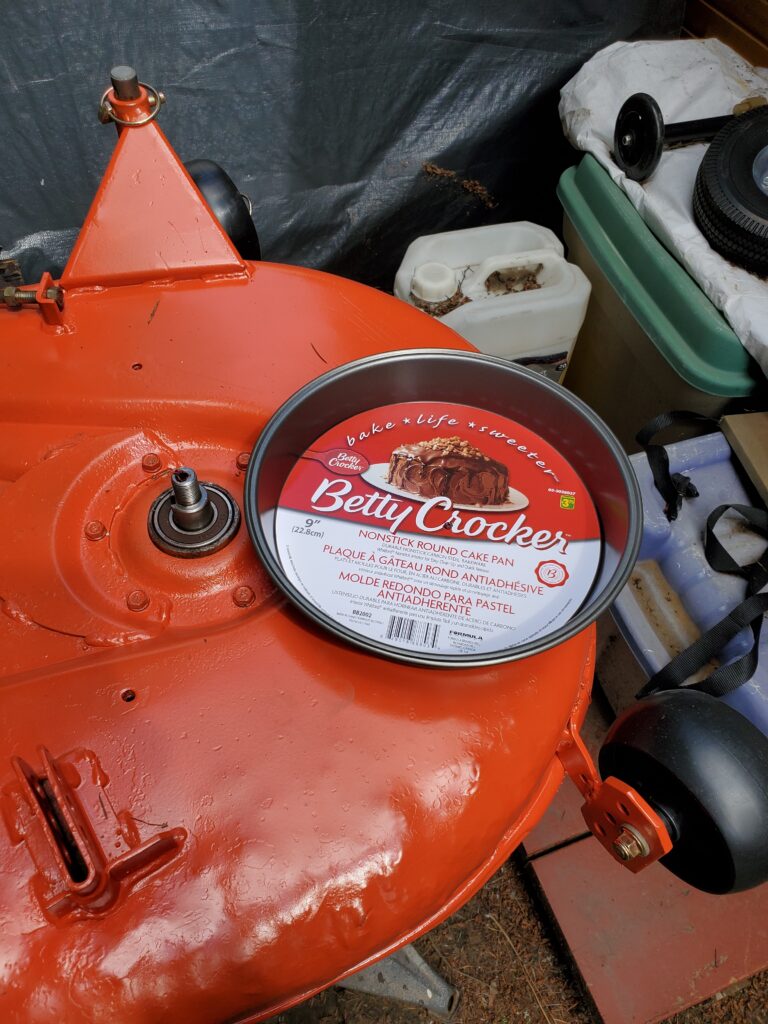
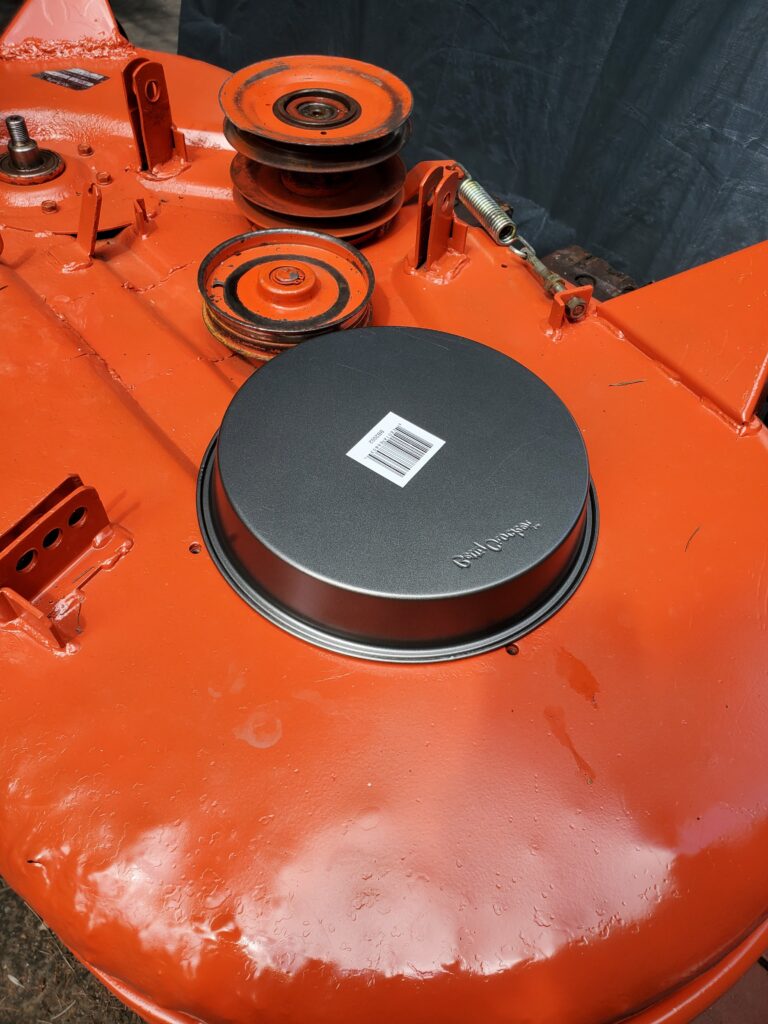
Today I’ll work on the grass defector and the belt covers. This is Funny! Who knew that Betty Crocker made new belt / pulley covers for my Kubota. $3.75 each !
Oh sure they need a bit of a trim..and a hole for the grease zirt.. But the diameter and height is perfect.
This popped up for sale on Market place for a very low price.. Seller said ” only good for parts” I disagree !
It runs and drives ( on to the trailer I mite add ). Sure it’s missing a few things…Battery, gauge wheels for the deck, a grass deflector and the headlight cover. But all and all it’s very complete. Aside from those four things there is also some stuff that needs replacing.. Front tires, seat, blades.
Oh there will be more I’m sure.. like new belts. But most of all … The Motor Starts ! The deck works ! Here’s an intro video…
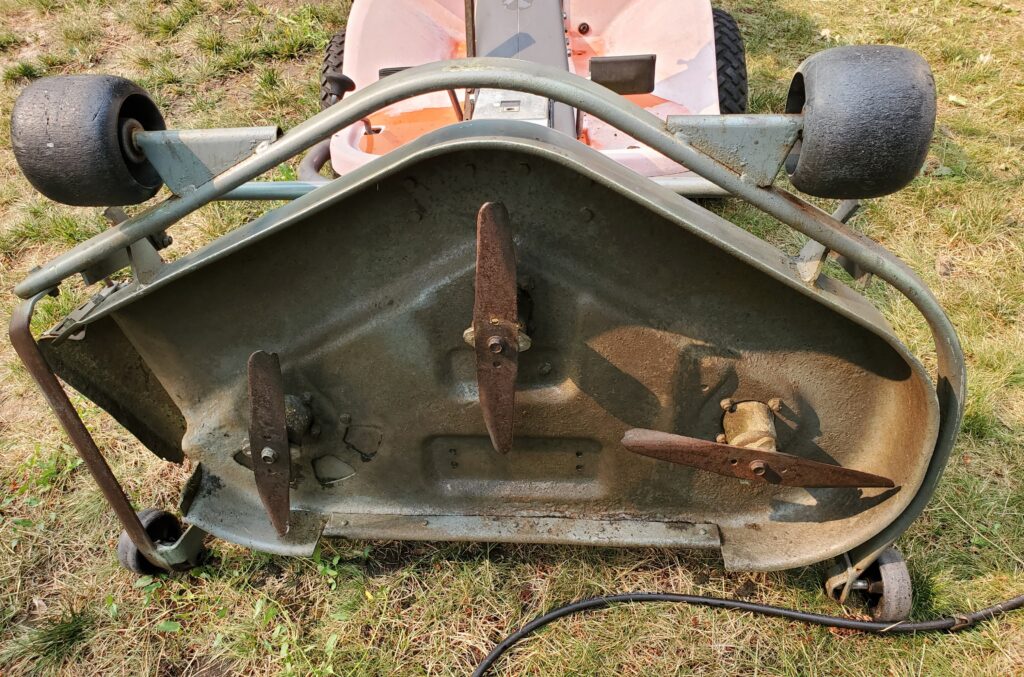
This is 100% my kind of project. I don’t like working on dirty stuff, so time to separate the deck from the tractor. Well that’s the first bad news.. A hole in the middle of the deck.
I have access to some metal and a welder…so we will fix that. Years of grass caked on have now been removed. And the deck is clean !
The guards over the arbour pulley’s are missing. The front wheel mounts are DESTROYED ! And the cable that pulled the blade brake off when engaged is M.I.A. Oh I knew the blades were bad.. but this is bad to a new level.
Bent upward ? What did they hit ! That would have destroyed most lawn tractors arbours. These are very “stout” grease able arbours.. It’s a Kubota.. The tractor got it’s bath too…
Easier to see what you are working on when things are clean. And I’ve seen most everything ..top and bottom. Here’s the part 2 video.
And now I start taking stuff apart. First the seat then the rear body. And it came off with four bolts ! Amazing how little rust there is. Mostly where they made previous repairs.
Why paint this. Let’s just polish and wax it. Ya there’s is worn off paint parts … but adds character. Removing this part allows good access to fix the battery hook ups, and my fan is missing a blade !
This post is getting long, so time for a new page.. And we switch gears to focus on the deck.
You’ll notice the bug is sporting a new seat. (not mounted yet) That’s one thing to do while in here. The list is : install the deck, Re-wire all the electrical. ( going to be dangerous) I’ll need a new battery. Fix some rubber bumper buttons (where the body sits on the frame). Oh there will be other details as well. As soon as it warms up we shall start….. maybe tomorrow.
It’s tomorrow ! And I tore into the wiring.. I have practice.. And I know the colour code for the wires. Let’s do it while things are fresh in my mind. Safety switches are removed and all the excess wires removed too..
Just like the “yard beetle” wires are in a loom and the key switch is taped up. Solenoid moved and everything tidied up.
All tested too. DONE. A few little things to do before I re- install the deck. Like the rubber bumper buttons that the body rests on. Time to mount the seat too. And that is done… four of the holes did line up. The rubber bumpers are on too. Time to deck the halls. But first a new video…
I liked the first one sooo much..I want to collect them.. So why not get a second one.
Different Flavour !
Different year too.. I drove five hours to the Fraser Valley to get this one.. WHY ? Because it was $75 bucks. And only missing a few things. But Yard Bug #1 is also missing a few things. However nothing that would stop it from mowing the lawn. I believe this one is a 2000 model because it has the 8.5 hp motor. The builder’s decal is on this one and again made in Canada !
Should I call that 1-800 number ? Nah. I just gave him the money … we loaded it up an headed home. This time I had help unloading last night and therefore did not have a runaway down the ramps and over my foot.. This morning I went out and had a look at what I’ve paid $75 for.
Here’s the photo in the ad.. Ya.. not much help, but does show the grass bin and a motor ! Doesn’t mention the fourteen thousand pine needles hiding everywhere. I’m not at all disappointed. A quick assessment told me a few things need fixing. For sure the wiring , that rear wheel is off the rim, the cables need lube, two need to be freed up. That would put this little guy back on grass cutting duty. I gave the beetle a bath and then made a video.
Think of how much more it would have sold for if it looked like it does in the video. Now I have more pine needles in my yard.. Stuff is nice to work on when clean. Time to roll the beetle into my little shop.
There you have it.. room to work …no dirt. The green and yellow is growing on me. I’ve ordered some bits and pieces. New key switch, air filter and battery terminal covers. Now to sort out this wiring. Funny thing ! I tested the seat switch from the Beetle and it does the opposite of the Yard Bug.. Weird.. When you sit on the seat Beetle brakes the connection. Yard Bug makes the connection. The mower deck engagement safety switch was just hanging around with a zip tie holding the button in. It does both with four wires.. My head hurts ! So I took the steering wheel and console off to get to the cables for the forward / reverse lever.
This is what’s under that cover. so now I’m pouring the juice down there and slowly work those cables.
The Electrical Stuff:
Let the fun begin.. I’m rewiring the whole Beetle. No more non – working safety stuff… we’re going to live dangerously ! The new key switch arrived today as well as some other bits.
New Key Switch ! With fancy new key! Now I can test some wires to make sure I’m right. Here’s some of the corrosion That may be most of the problem.
If this solenoid works I’ll clean it up. And mount it in a better place, as well as that fuse you can see in the background. Here’s the newest video…
The solenoid is dead.. relay works but no contact.. I have a working one so I’ll use that. Here’s a photo of all the extra wires I’m tossing..
I’ll keep the switches though.. Ya never know. The round one is the seat switch. How about an up date video.. Coming right up….
Going great… the wiring is done all tidy in a loom.. And far less to deal with. The contacts on the new switch are different from the old one, so I swapped some wires around so it does the right thing.
I taped the rubber dust cap to the key switch and that should keep it clean. And like I said we are living dangerously now.. (not really) You can start the motor without sitting on the seat, or pressing on the brake. Even if the shifter was in forward the mower will not move unless you are pushing on the “GO” peddle. I think we will be okay. Moved the (new) solenoid out from under the battery.. New connectors , wires checked,
The 30 amp fuse is easy to get at. (not blown) Now on to the motor… I’m hoping to remove the carb and clean it. The gas line is missing in action.. so need that. With a filter ! I have a new air filter, and gas line now installed. No leaks! And the Beetle got a polishing..
Also taped up the seat with yellow duck tape. So let’s see how this goes, starting the motor! Will it run ? Why yes and the proof is in this video..
I’ll have to admit I’m not overly surprised. There’s no reason for it not to. It’s not on this video but when we turned the key the first time the motor started after only a few cranks. We have a winner ! I sharpened the blade too. So ready for lawn cutting … Except there is 4″ of snow outside. So with that we will sign off on this little Beetle till spring. I’m parking it in the shelter in place of the Yard Bug #1. That will come into the shed / shop to have some work done. I’m leaving you with a final photo… all shiny.
Top of the line tractor, with all the bells and a few whistles too. Yes the bush guard is factory.. Yes there is a mower deck. and that mower deck is a heavy-duty triple blade one.
Right now it has the mulching plate on but came with the deflector as well. This is NOT a thin stamped deck, this is a welded thick sheet steel deck. With a PTO electric blade engage. I made an intro video for this puppy.
Maybe puppy is the wrong term.. .. Anyway this is a full featured lawn tractor.. it even has a 12 volt power outlet ! ANNNDDD
Check out the dash… An ammeter and a hour meter. Do they work ? Not sure yet. But enough about the features.. What makes it a project ? It’s not running yet. We believe it needs a new fuel pump. These do fail, and are a cheap part to buy.. That will most likely get the motor running. Well that and a working battery. Next is an upper bushing for the steering wheel shaft.. That will fix the loose steering wheel.. a typical issue. New belt for the mower deck and the seat needs help.. most likely a seat cover. We may find more stuff.. But for now after those things Time for a good polish and plastic restorer.
It’s the next day after picking the Husky up. I’ve ordered the steering bushing and the fuel pump. The battery is on charge and I’m hopeful because It was low but not dead. If the motor runs good that would mean this tractor is an easy fix, and could be ready to sell quickly. Fingers crossed… In the meantime I’m giving the tractor and the deck a bath.
Oh and the battery charged up and passed the load test. One less thing to buy.
I now have all the parts I need bu it’s too cold outside to do the work. I have instead been working on the “Yard Beetle” which fits in my warm shed where my tools are. BUT because someone I know would like this tractor I decided to move it to a warm shop. And did just that today. Tomorrow I’ll get the work done..
And just like that..it’s tomorrow.. and here’s the new fuel pump installed. And the steering bushing too ! Put some fresh gas in the tank and the motor fired right up. Runs great. Just the deck to get back on now. Had to order a new set of blades, the old ones were toast. I also sprung for a new battery, It’s worth it !
December 15th 2025:
The new blades came today and I installed them and put the deck back on the tractor. Everything works except the headlights.. We drove it around and then up on to the trailer to come home. Here’s proof..
That’s a snow blower on the dolly. And it’s barely used ! However missing a few control parts. I had one of these tractors 15 years ago. Here’s proof… photo taken in 2009.
It was only ten years old then.. and had hydro static drive, and was a lot more shiny. The new one I just picked up is a six speed manual transmission. Otherwise the same. And yes needs a few repairs and a battery, but I’m told it runs. Here’s a better photo.
It shows the extra 15 years of use and abuse ! But I’ll make it better. Missing the floor mats and the battery, I have the other parts and the deck. Needs the starter put back on and the steering fixed ( I have the parts).
Here’s the gross looking deck and it’s only missing the grass deflector. Arbours are good and so are the blades. And here’s a new video..
The weather was good today so I decided to give the tractor a much needed bath with the pressure washer. Especially the mower deck… clogged with grass and dirt. If I let that sit all winter there will be more rust. found two rusted through holes that will need patching.
Yup.. that’s one rusty deck.. I’ve seen worse. However the mechanics of it are still good so I will treat the rust and give it a much needed paint job.
Here’s the now cleaner tractor. The weather is staying nice still for another day so let’s put the starter back in and a battery and hear this motor run.
Got the stater back on with the new ring gear and tried starting the motor. The starter struggled to turn the motor over and started to smoke… Not good ! I’ve seen this before and it’s normally the demise of the starter. They do get old and tired. New starter is ordered.
A new starter is on and the motor fired right up. I have driven the tractor around the yard and it’s all good. So the two things needing to be fixed are the deck and the steering, but it’s too cold to work outside now. So I’m pausing this project till spring or I have a warm place to work.
Here’s a cutie that’s unique and a very SMART Design !
Just picked this up today… got a good deal.. It runs and drives and mows ! This one is the Canadian version of the “YARD BUG” or “Yard Beetle” Sold by Canadian Tire around about 2003. Most of these little guys were made under the “Yard Man” name, but all were made by MTD in the USA and Canada.
Well that’s close to the “John Deere” colours !
They also came out in different flavours (colours).. “Craftsman red” and “Cub Cadet” off white and of coarse the dark green of mine. As far as I can figure out …only for a few years in the early 2000’s. Some very interesting features on these. They could BAG, CHUTE and MULCH the grass.In other words a 3 in 1 mower. 30″ single blade deck. A foot pedal speed drive system and a tight turning radius. Designed to fit through any gate. Heck at 32″ wide it fits through the door of my shed ! Where’s the grass colector you ask ?…
Right in the middle of the mower, on top of the deck. I did say interesting. Oh yes.. AND there’s more. With the exception of the deck height lever everything is cable operated. Ya..SIX cables that I count. The guy I bought it from just replaced two of them.. So cable maintenance will be important. My video I made explains that best.
I wanted to make a video about going to get it and an introduction. I’m learning video editing .. got a long way to go !
So if it works the way it is.. then how can this be a project you ask ?
Well first there is a few “gremlins” in the wiring and safety switches. Those cause intermittent no start. I blame the notorious seat switch.. But it couls be more. Also I’m sure the deck will need work… All the linkages, cables and pulleys need to be checked. And lastly ( for now) some cosmetic stuff. Like the seat and maybe new paint ? For the time being it’s going to have a winter nap. But I’m planning one more video on the uniqueness of these little ride on mowers. I think they should still make them. Anyway here’s a new video I made.
I believe I figured out my DJI mini mic thing for audio. Anyway now each day that is NICE weather (warm) I will start work on the Yard Bug. Removing the deck is first.
Wow that is not very easy.. Lot’s things to do, pins and springs and the belt engage cable. All worth it … easier to clean and access things. And I’m learning how this little mower works. About the deck ? Well check out the photo….
Not at all what I expected.. Could use a bit of a wash.. but do I even need to paint it ? I’m not thinking so.. Let’s wash everything !
Would you look at that ! No rust on the top side. In way better shape then I expected. As I’m cleaning I’m checking all the parts and pieces. Nothing stands out as a problem…Nope.
Even the grass bin is in perfect condition. No broken plastics. The one belt I got to look at (mower belt) is great. This is not much of a project.. Seems the only thing needed is a tail pipe and the electrical gone over or a complete rewire. Oh and I will sharpen the blade while the deck is off and it’s easy to take off.
All clean.. This makes working on the electrical and the cables easy. The battery tray has some rust, so that needs a treatment and some kind of rubber mat. However after I sharpen the blade there is no plans of further work on the bug YET !
There we go.. Blade is clean and sharpened. The blade measures 27.5 ” .. so that would be the cut, even though the deck is 30″. Slowly when I feel like it I’m putzing away on the bug. I drained the gas and ran the motor out of fuel. That’s the way I want it for the winter. And now I have three pieces. I took the body (top) of the bug.. Brought that inside and tried polishing to see if any scratches would come out. They are deep so it’s only a bit better but now shiny !
Notice the ” 3 in 1″ decal is gone and so is the duct tape where the “full bag” window was. good enough for now.. so outside it went.
Quite the collection out there.. Soon the main part of the bug will be coming inside so I can go over the wiring.. Nothing else needs any work.. But first I’m having a look at the seat.. Can it be saved ?
Not thinking so.. It’s rusted badly. This is what happens when mowers are left outside without a cover. The rain soaks though the foam and never really dries out. It’s not rusted through yet and I did treat it.. So the seat pan is maybe okay, and the foam has survived. But the cover is toast.
Dec 25:
This was where I left off. The Bug was parked in the shelter with the body re-installed. The Yard Beetle #2 is all finished now and I’m swapping,so this one is going in the shed. Time for a re wire and a few things. Oh and put the deck back on. So let’s start a new post….