June 2026:
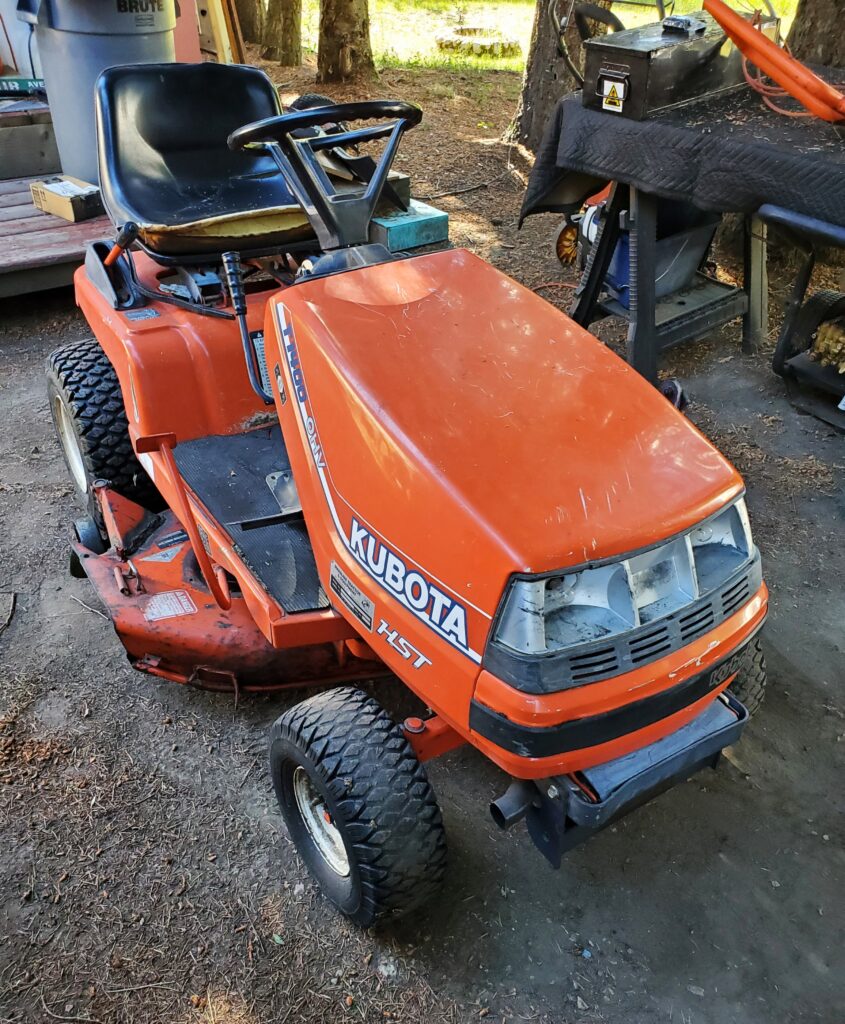
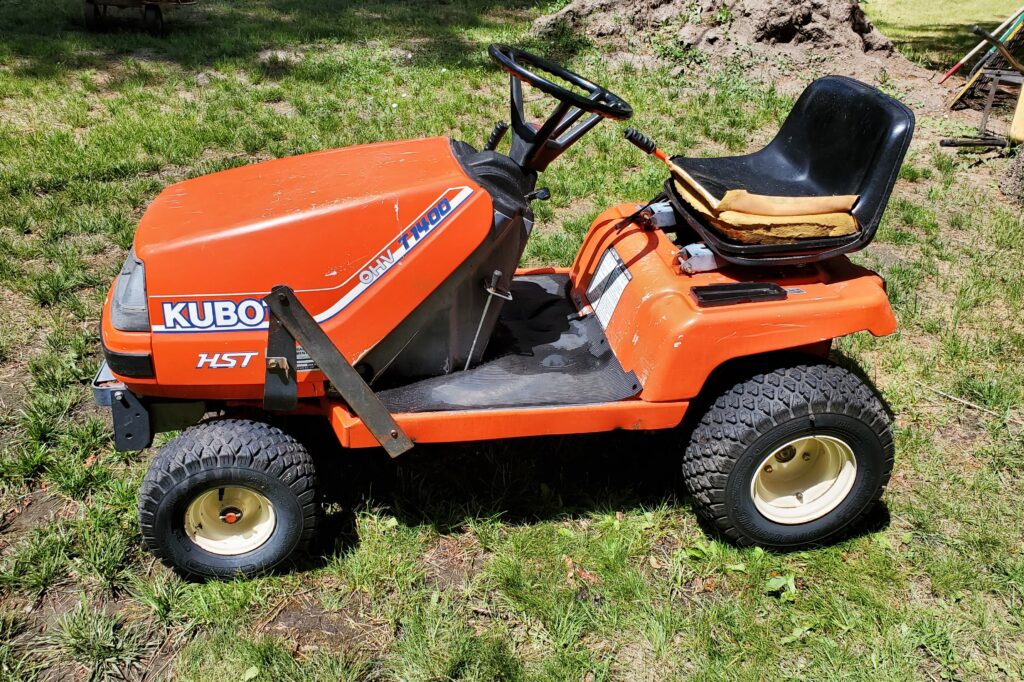
Let’s fix a mower deck !
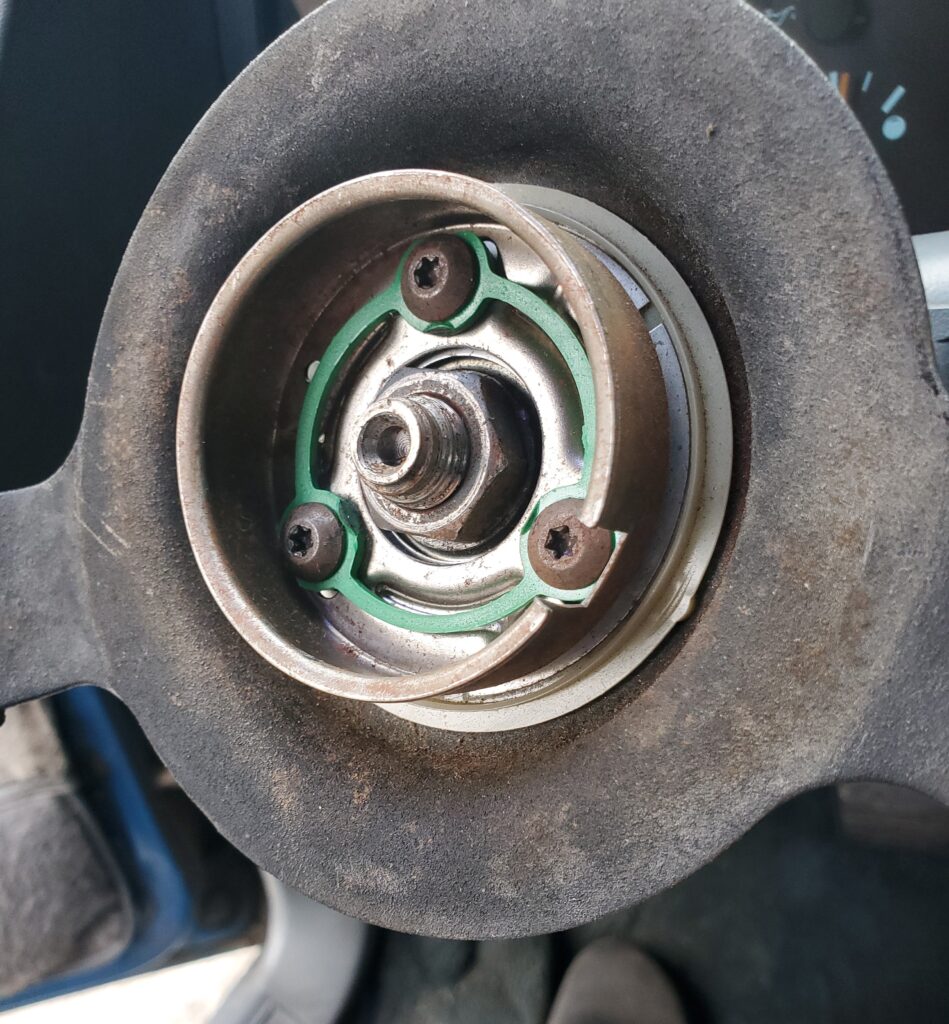
So the first thing to do is release the tension on the deck belt, and remove it. Well the outbound arbour is loose.. Maybe pooched ! not looking good. I’ll need to press the main shaft out to see what is wrong. So I take back what I said earlier about how tough they are. They can be damaged ..but it takes a lot to do it, and it just the one replaceable bearing. I still need to convince the double pulley to free itself from the spindle.. I have ways..
Well that double pulley refuses to part ways with the deck.. So I left it there.
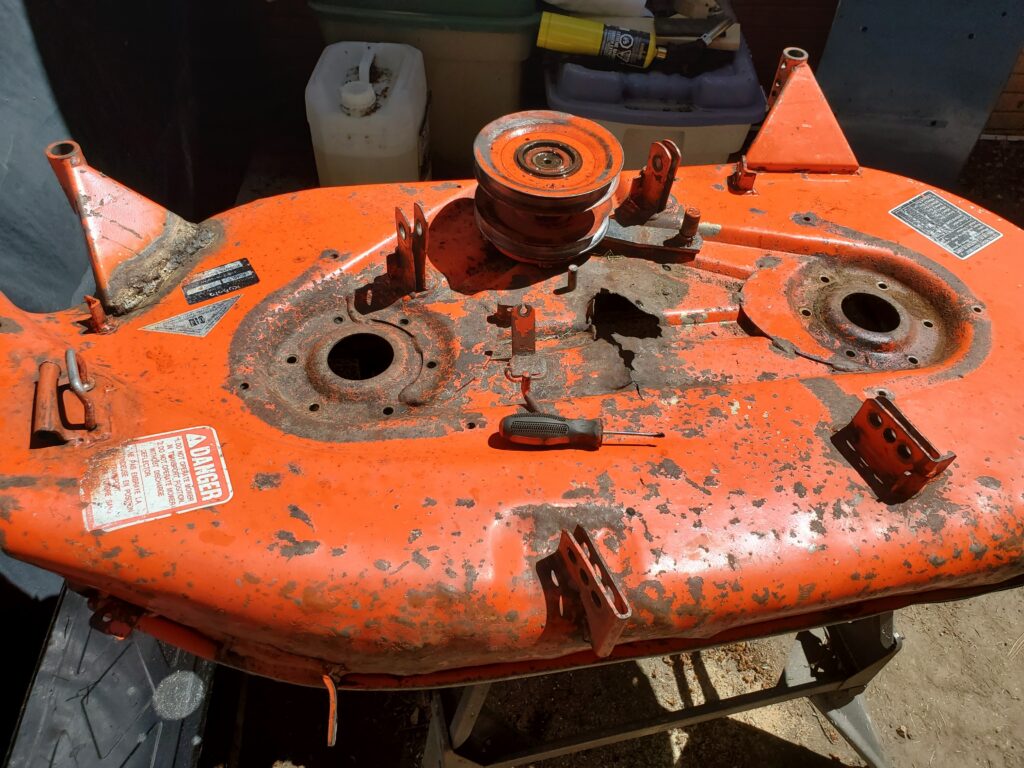
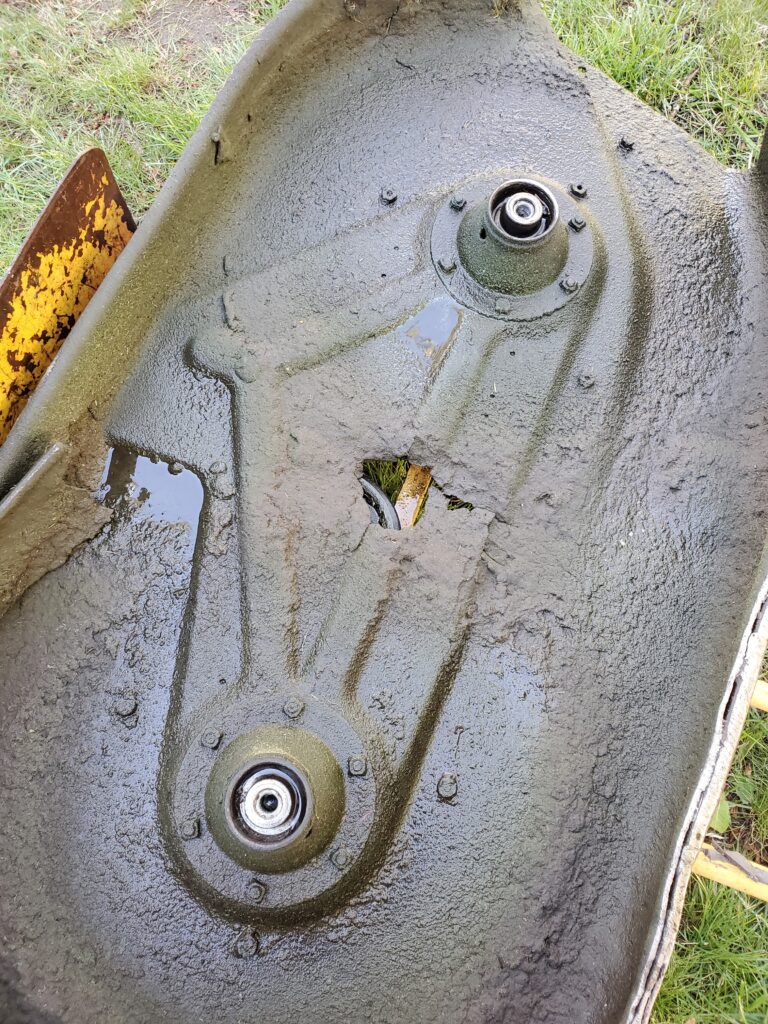
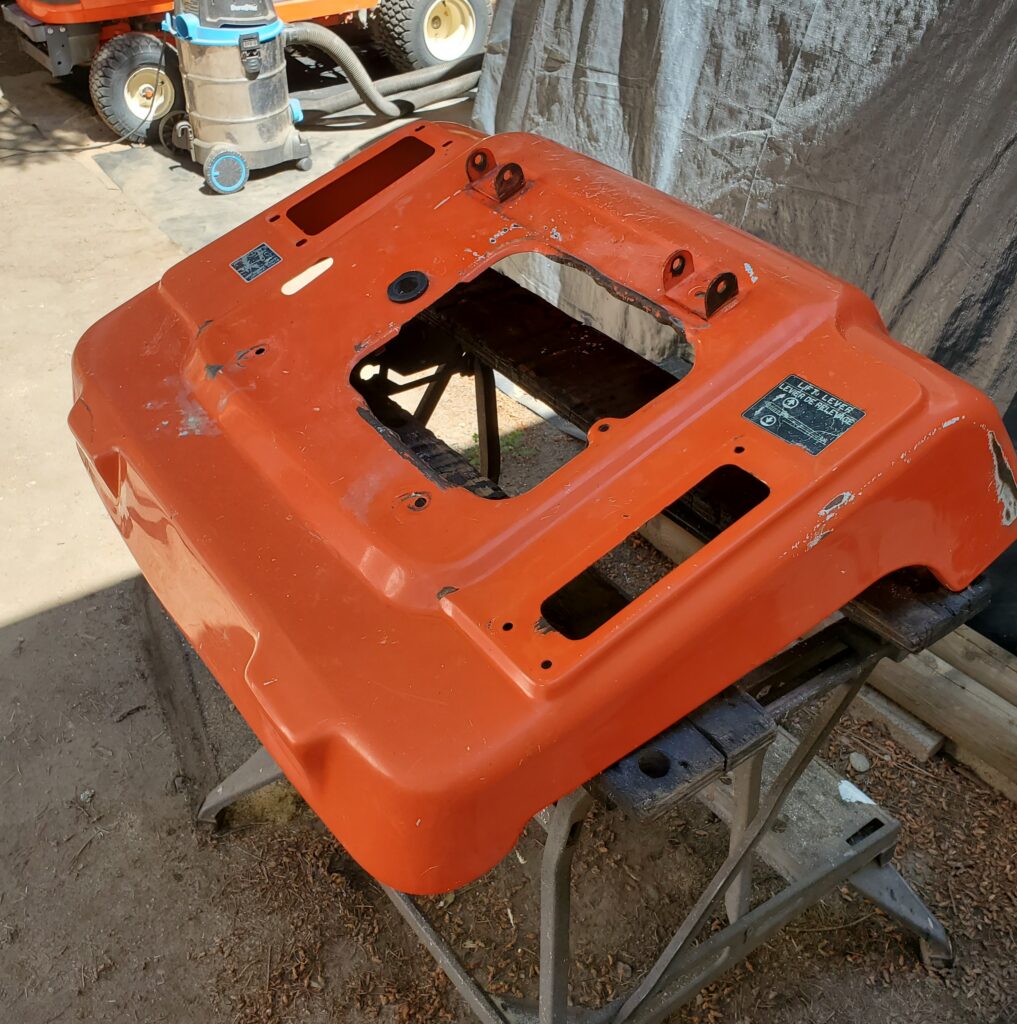
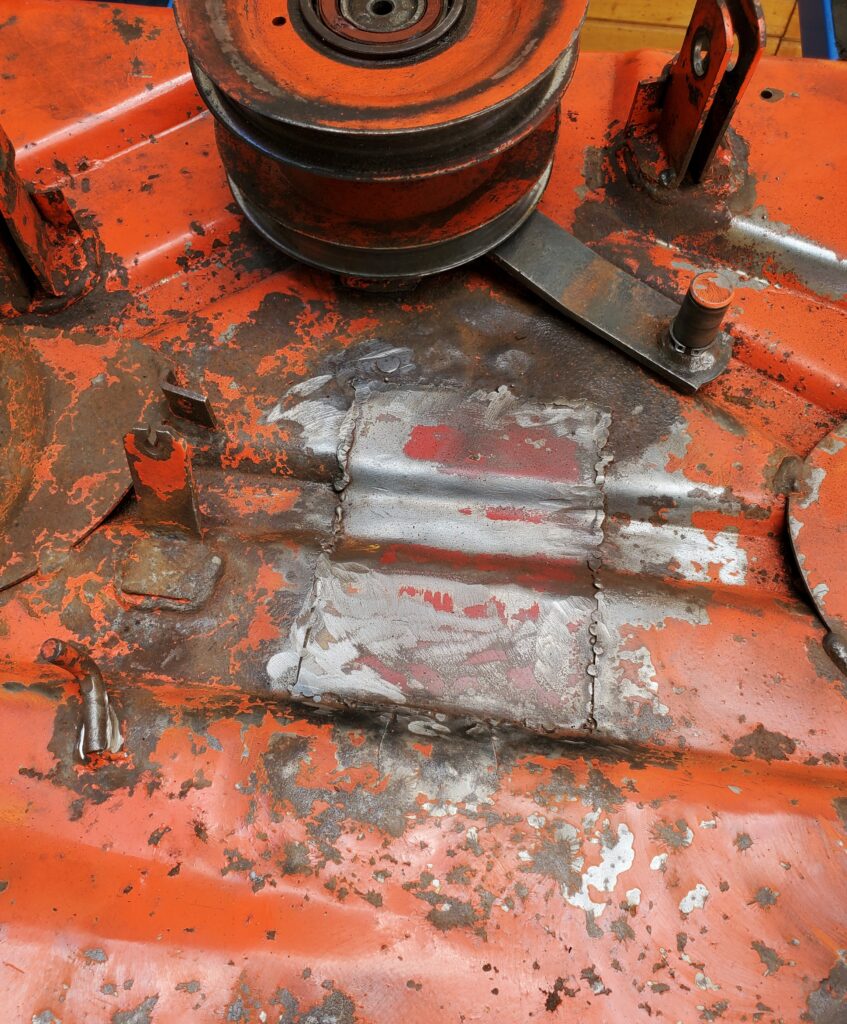
Going to put my efforts into the big hole in the middle of the deck. That is not a rust hole ! Something happened under the deck to punch that hole , ripping the metal. AND ! Forced the deck mounting bracket right up through the floor board on the tractor.
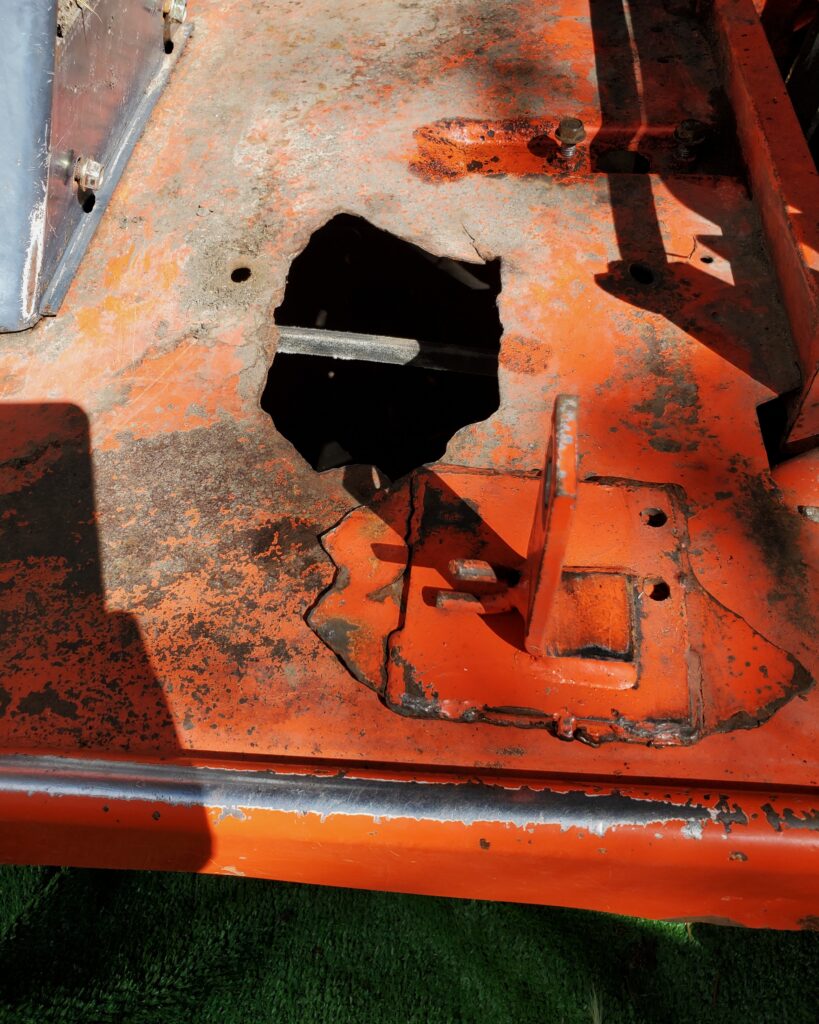
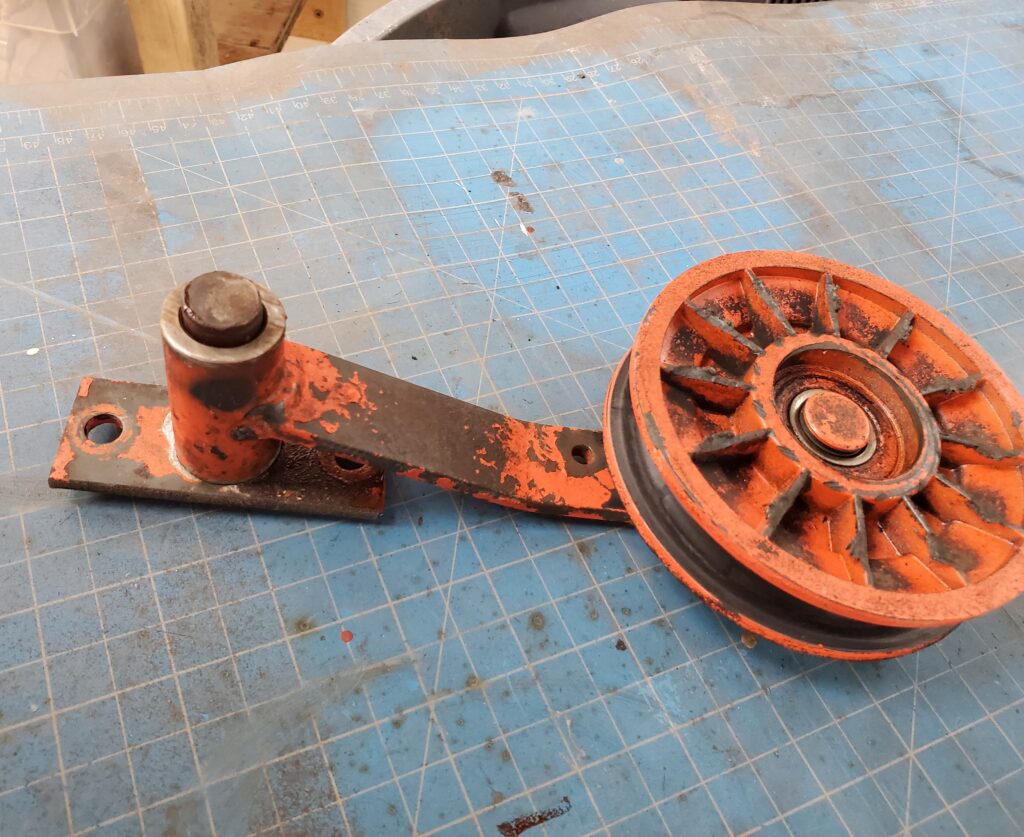
They fixed this with a piece of angle iron bolted across. Nah we will do a better fix using a bigger plate up top, and bolt that through. As for the deck.. It’s got a lot of stress cracks to weld up as well as the patch. No way I can get all the dents out. But it will be functional and repainted. Oh and while I was under the tractor I removed the drive belt tension wheel. It was seized and not doing the job.. Which I’m sure the belt was slipping .
Back to the deck…
The pulley is ok it’s the swivelling part that did not swivel any more. FIXED ! But let’s get back to the deck fix’n. I did the welding today, the patch and the new front wheel holder’s.
It’s not bodywork on a car.. This just needs to be strong, not pretty. And it’s hiding under the tractor.
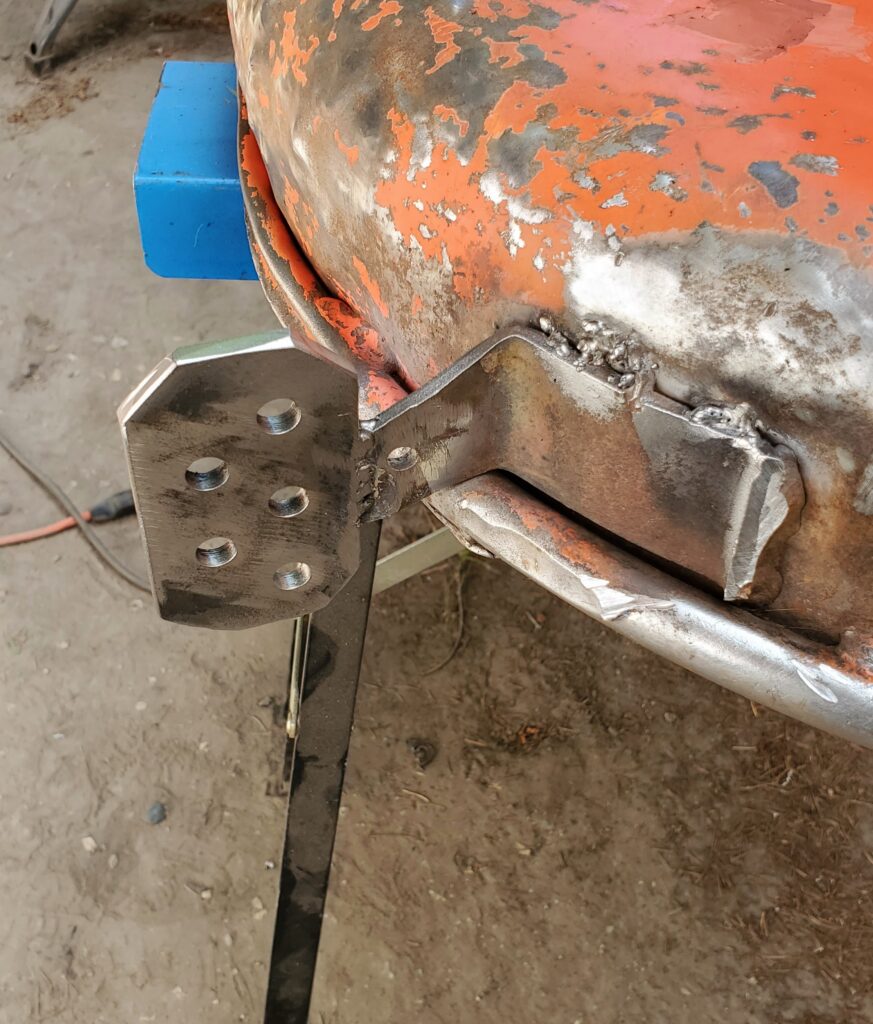
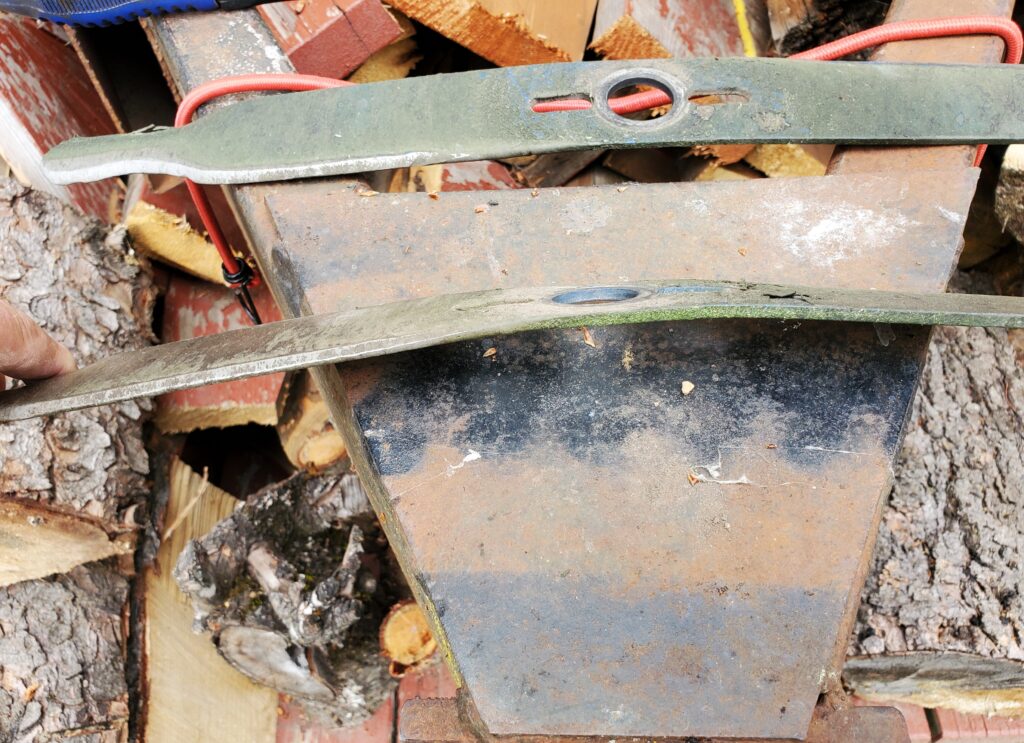
Here’s one of the gauge wheel holder’s. Hope they stand the test of time.. I only welded the new piece on ! Everything got another sanding and de-greasing. Time for the bottom paint first..
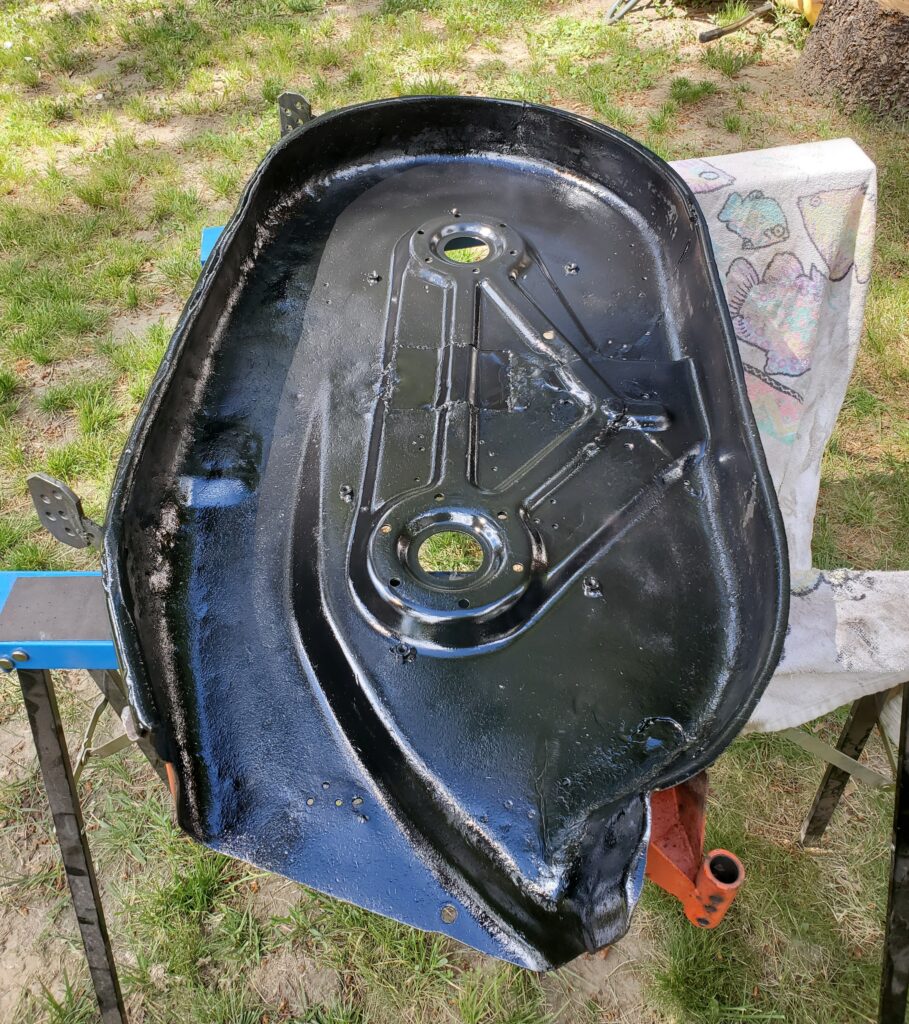
Ta Da ! Once the bottom was dry. The top got a coat of primer.. and then the Kubota orange paint.. Looks as good as can be..
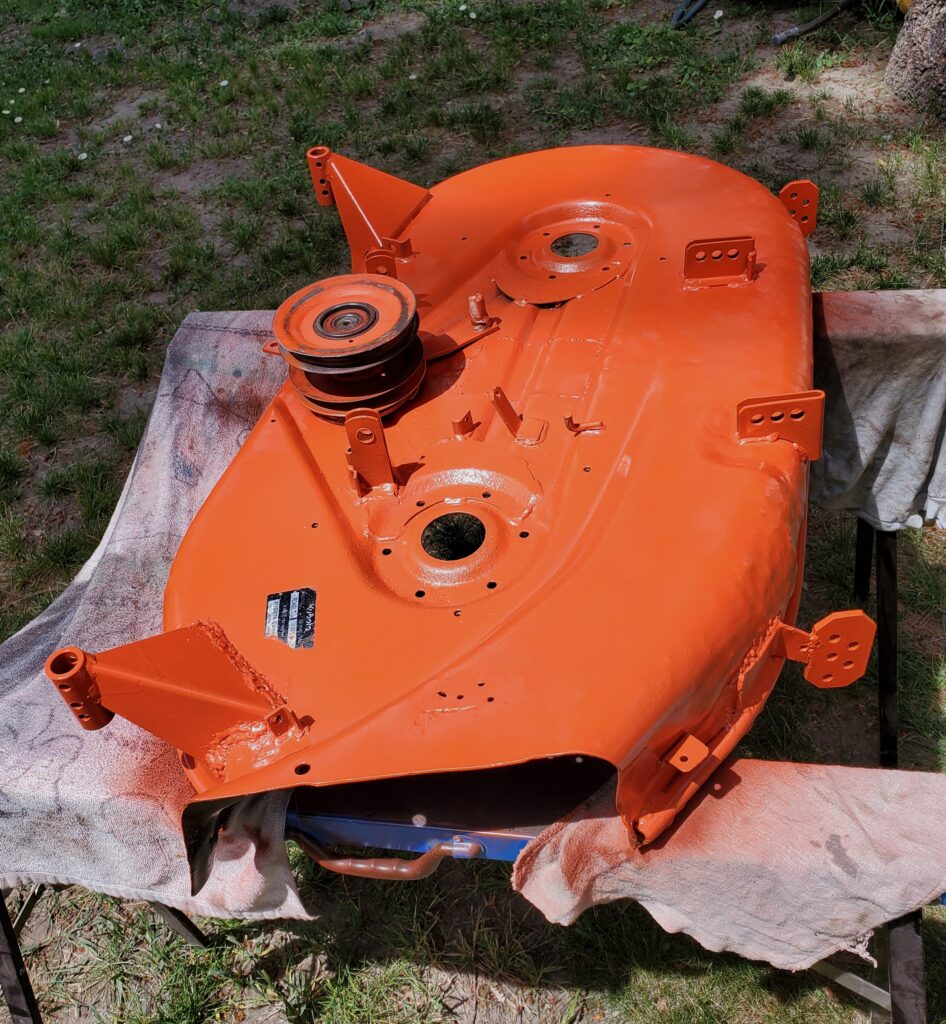
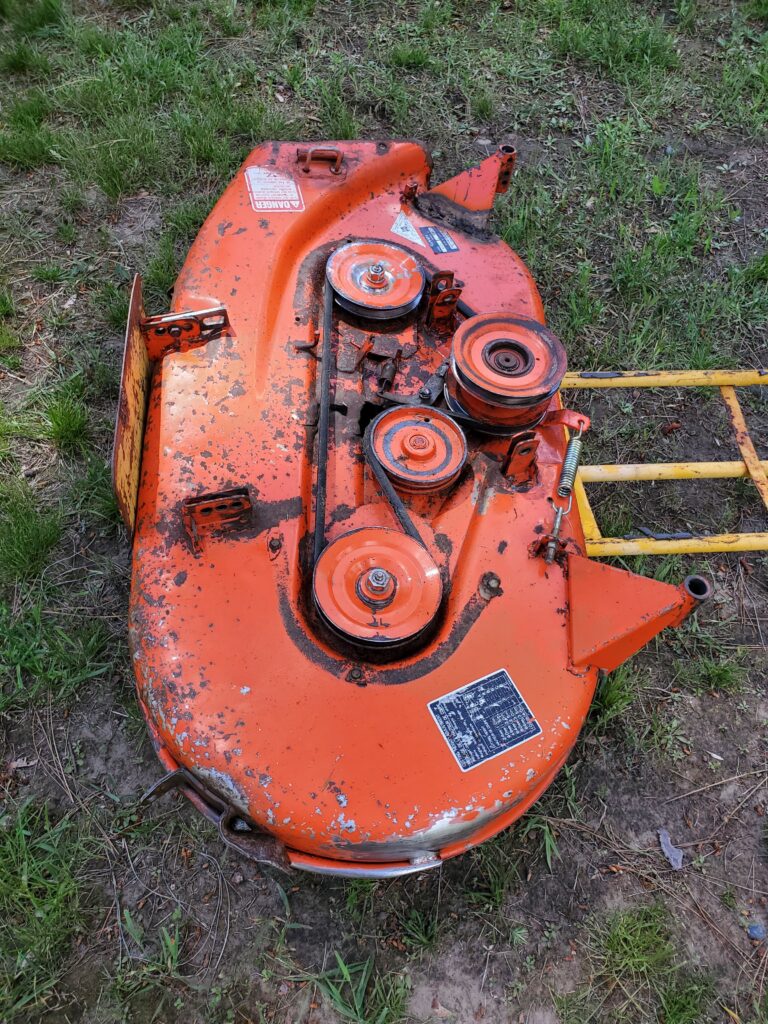
You can really see the dents in the front of the deck. Looks like they were mowing rocks not grass. Today I replaced all four bearings in the arbours… Now they are smooth… I will install them then paint them, so I can paint the bolts too. Need to make a grass deflector and two safety covers. Here’s a bit of an update video…
Today I’ll work on the grass defector and the belt covers. This is Funny! Who knew that Betty Crocker made new belt / pulley covers for my Kubota. $3.75 each !
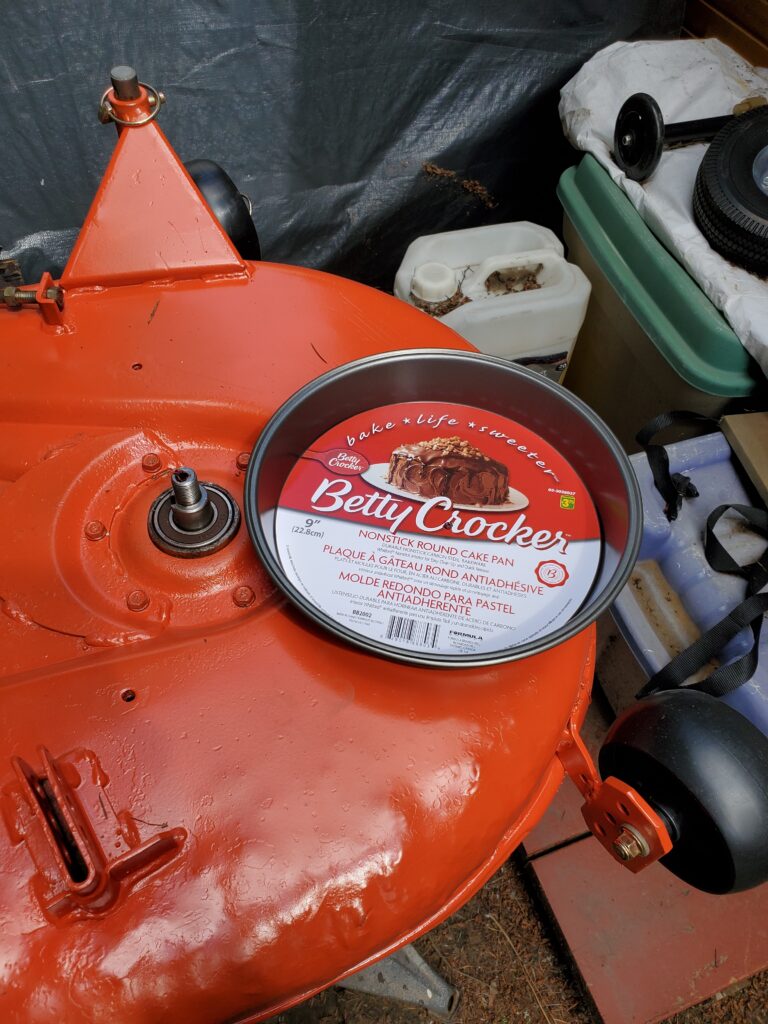
Oh sure they need a bit of a trim..and a hole for the grease zirt.. But the diameter and height is perfect.
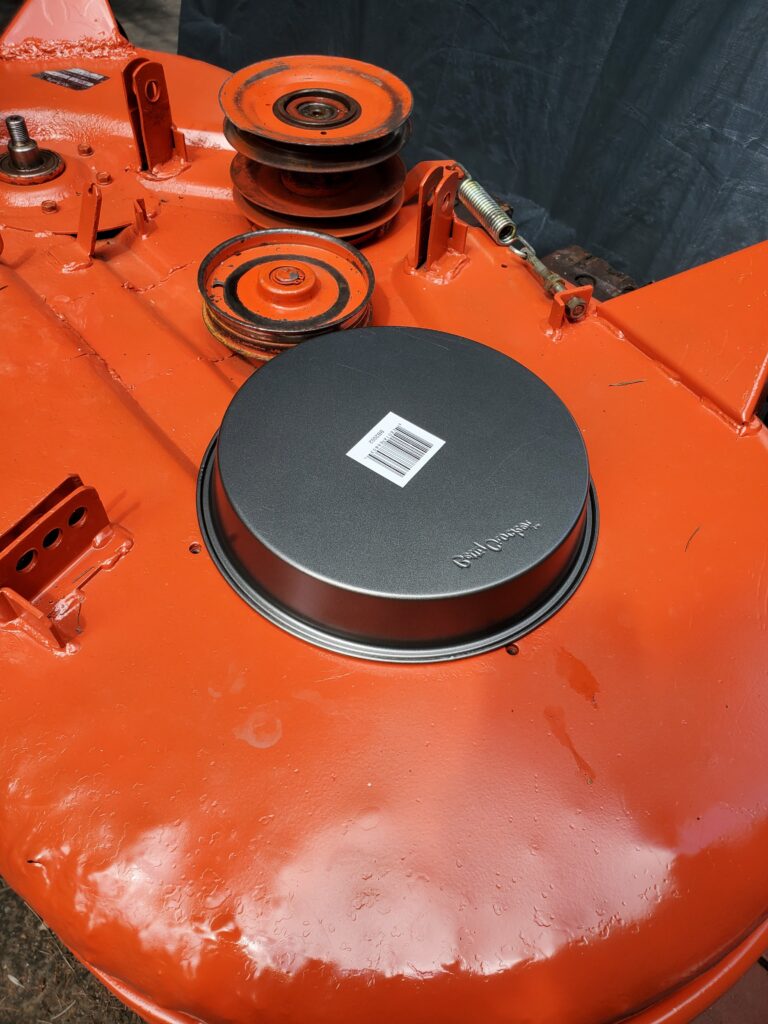
I’ll make clamps to hold them in place…