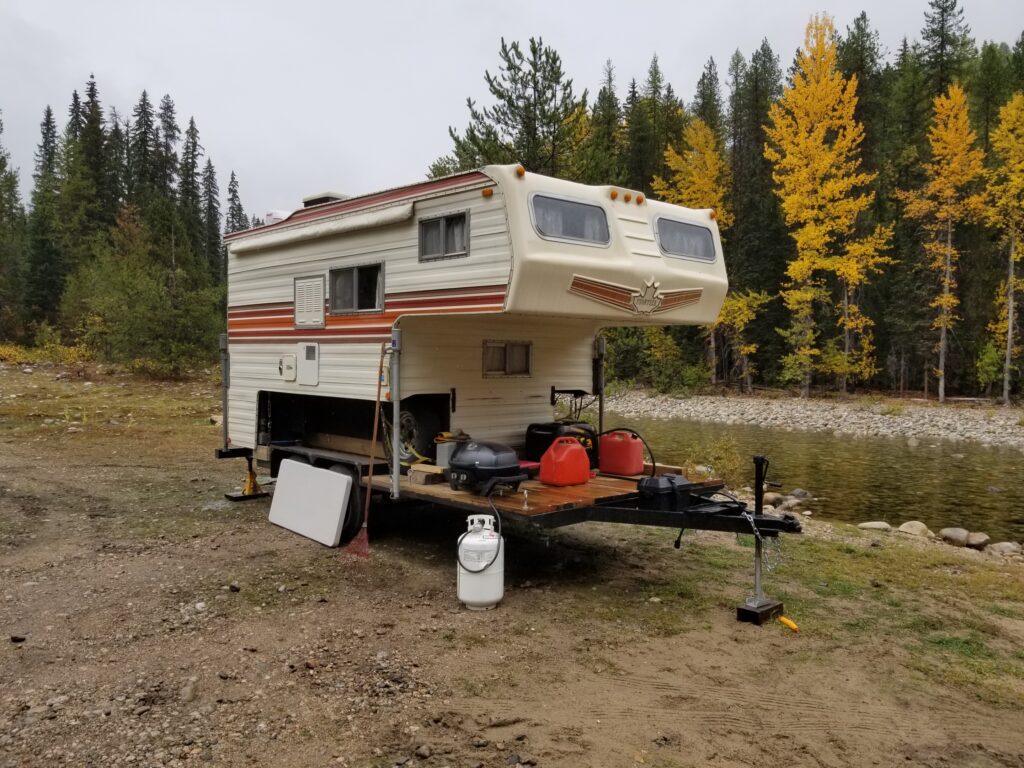
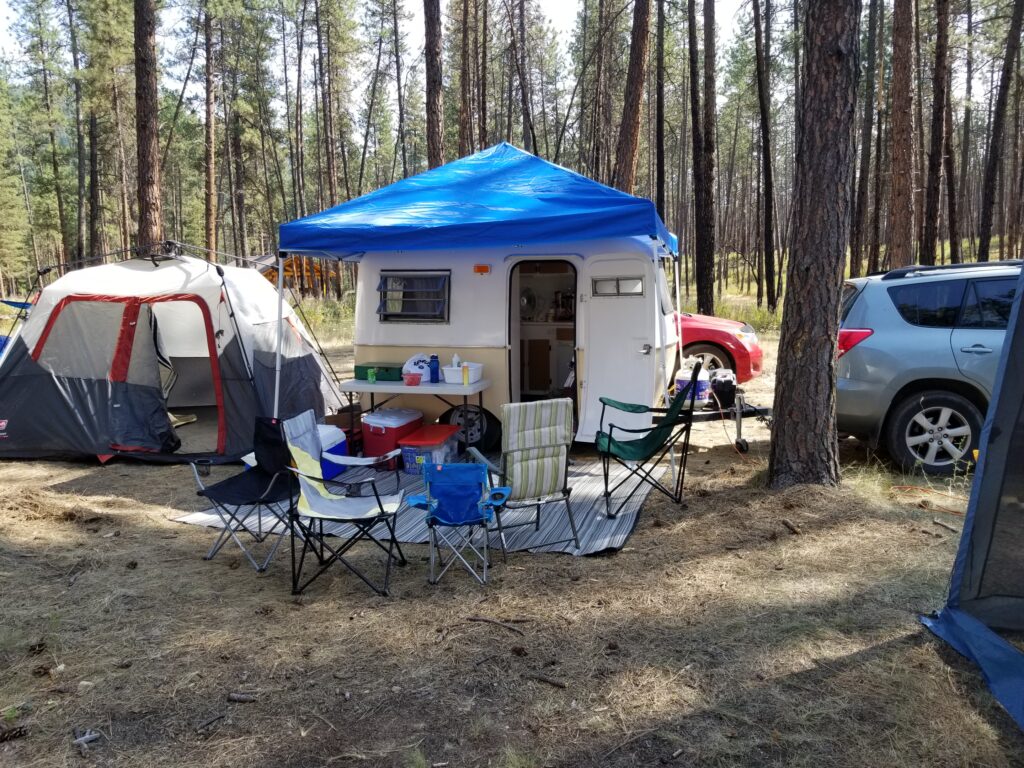
And I’m getting out lots ATV ing… It’s now a tradition to go camping 56 kms up the Granby Rd.. Hunting season ! I don’t hunt but the boys aren’t all that serious about it either. It’s a chance for camp fires … bad food.. and exploring on our ATV’s My camping rig worked out good..
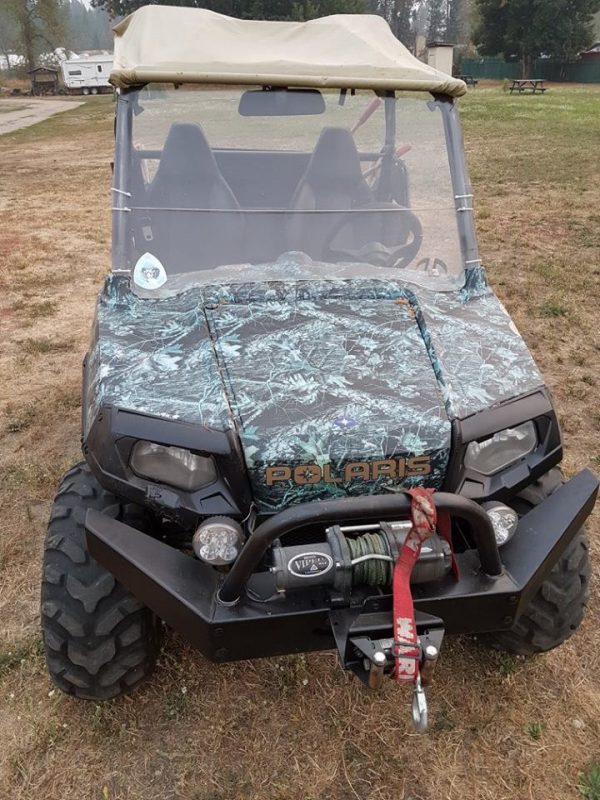
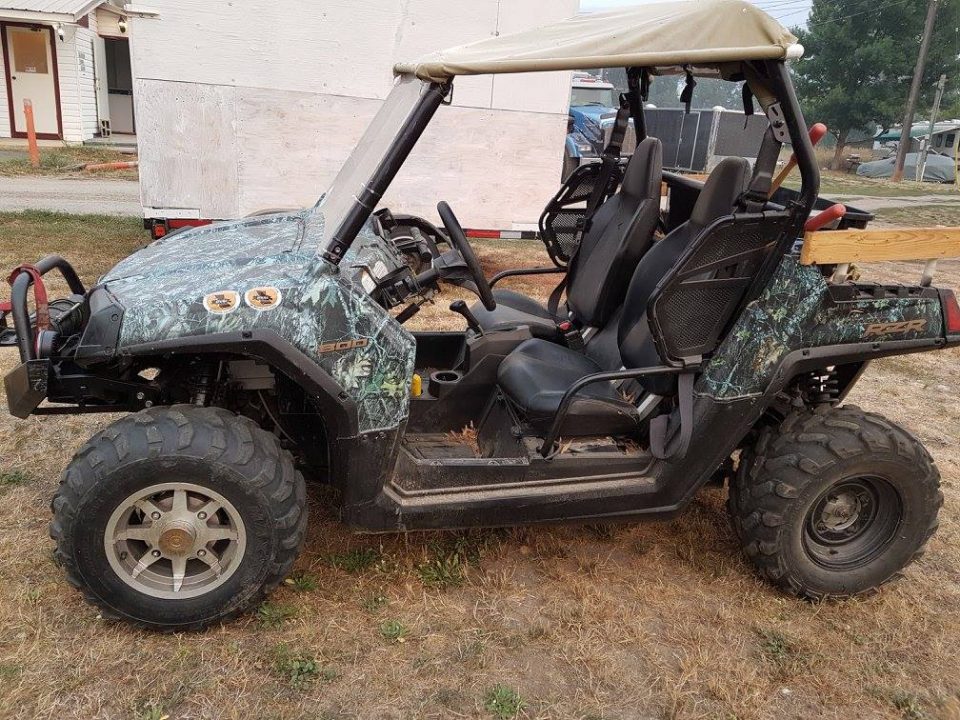
I had my own cozy place… Unfortunately it rained more that we would have liked.. which dampened the fire and I got cold & wet every time I went for a ride. Then in the second week I got the chance to try a Side by side ATV.. A Polaris RZR 800.
And yes it has a roof and a windscreen ! Wish I had that the week before.. In trade for using this I fixed the bush guard seen above..
Here you can see that it’s bent down and it’s loose too.. I removed it for the rides I went on.. put on about 120 kms of mixed riding.. and I even took a friend along one of the rides.. I really like the protection and the safe feeling …. not to mention the dry / not cold feeling. It goes everywhere the quads went.. It’s only 4 inches wider.
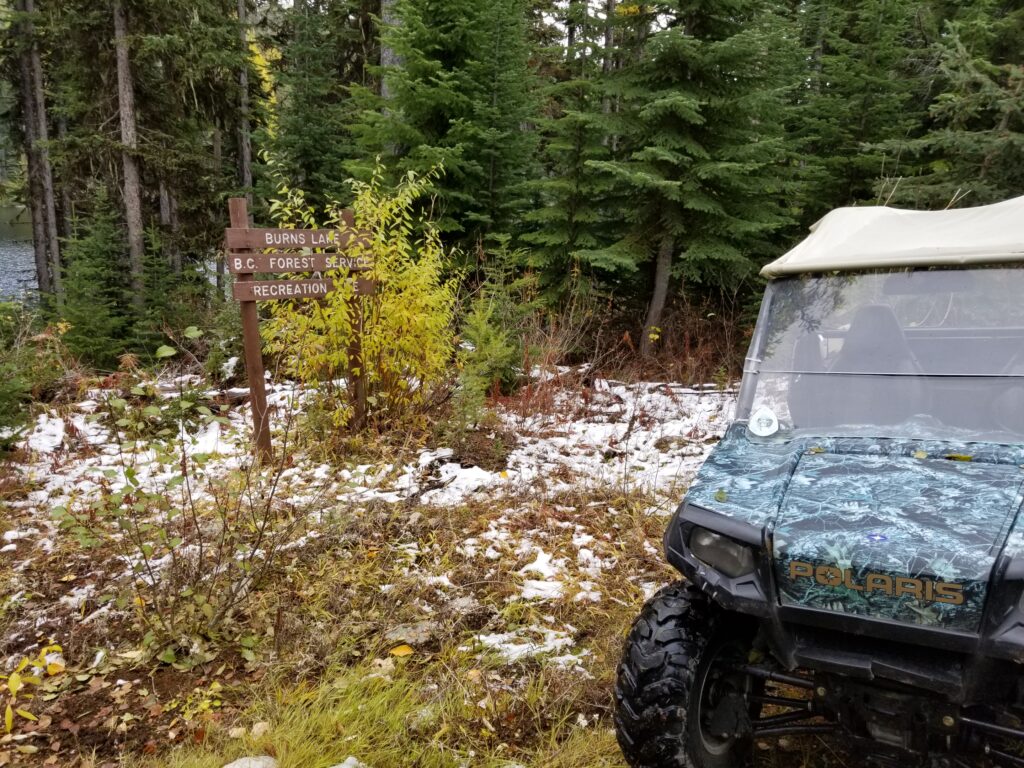
You can see a bit of snow.. yup it’s cold. But I was warm.. and it’s comfy too.. In the spring my friend will be selling this RZR.. and I may just want it.. After all it’s got a new and improved bush guard !
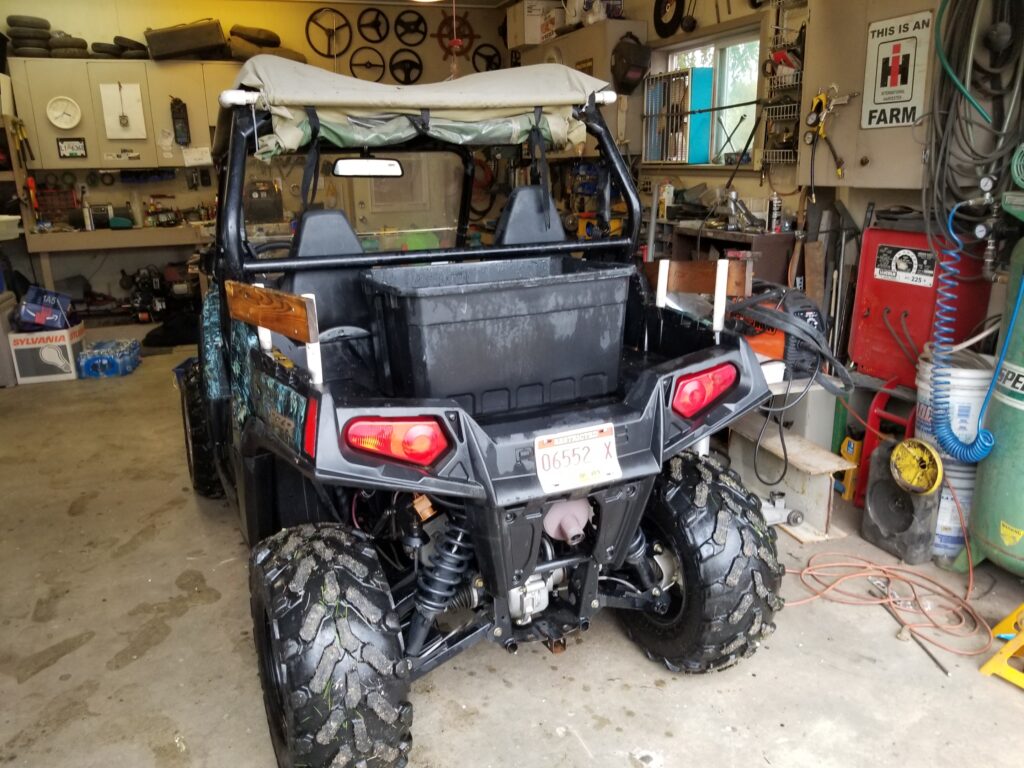
Also lot’s of storage in the rear tray too..
I like it.. So we’ll see next spring if I make a deal… and ATVing will never be the same..
Jan 2019 : NOT Spring.
I did a lot of research on RZR’s since that ride. Looking at used ones.. The prices, the features and the condition. One of them got my attention since early December.. And it was at the dealer where I bought my 400 quad. So naturally they are willing to trade. This one is a 2014 Polaris RZR 570.. with all the goodies I want.. So without further ado… I’ll make another post… Oh and The 800 got sold to someone..
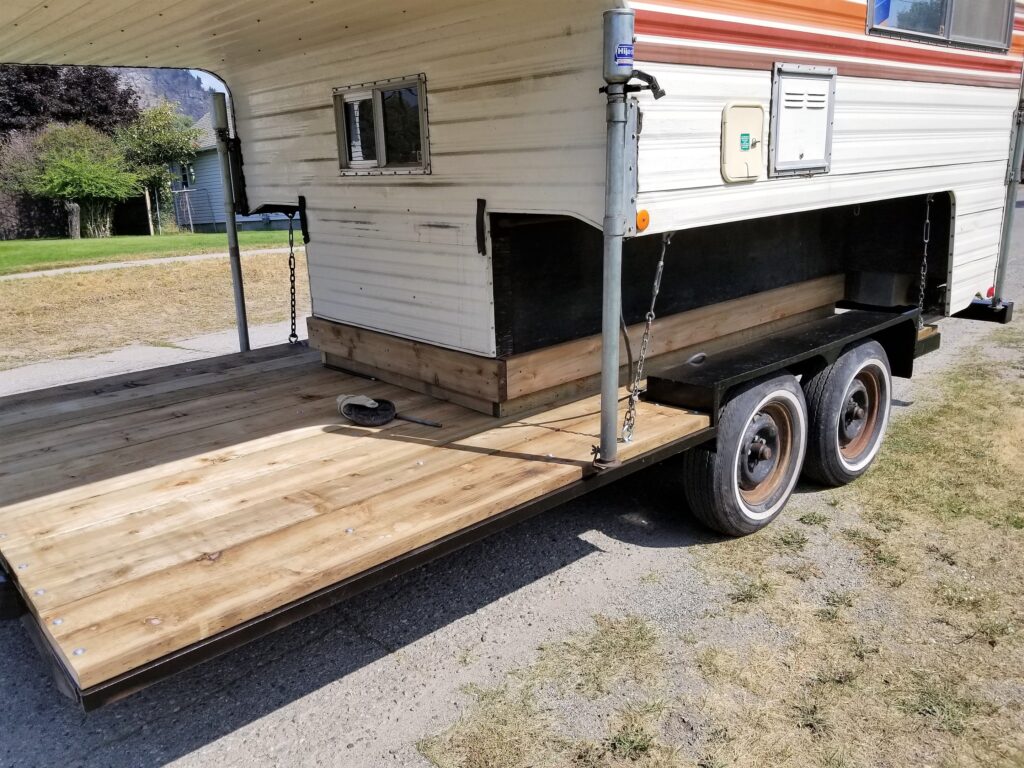
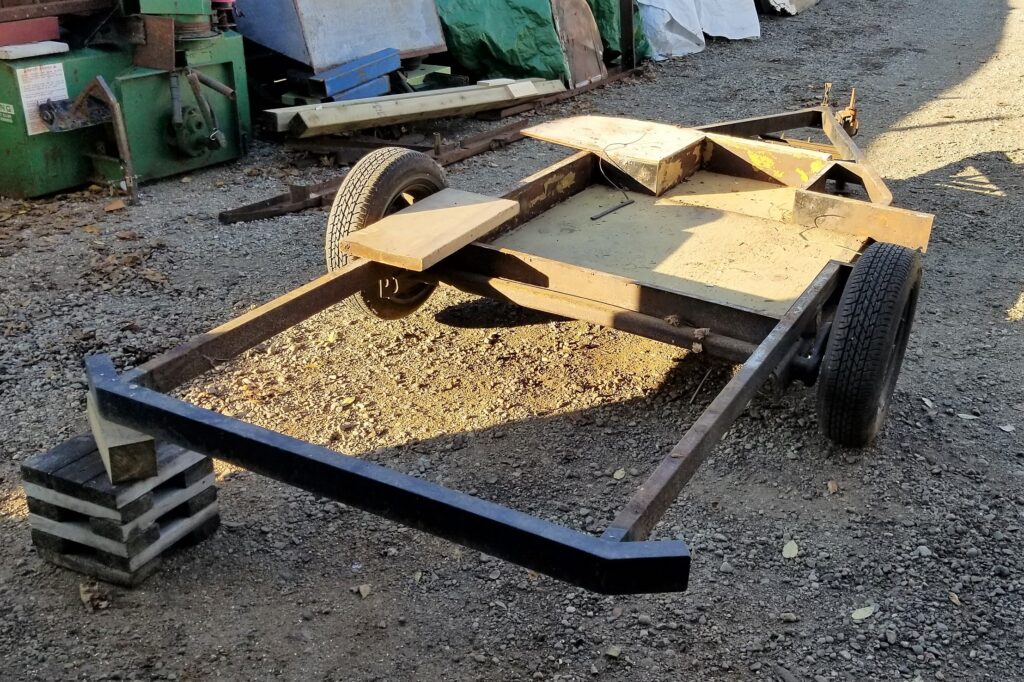
The trailer frame is almost finished.. The decking is on !
And today I was working on the cradle for the camper. The decking is 2×8 treated wood bolted to the frame with galvanized bolts. Very strong and should out last me.
The cradle for the camper to sit on.. Also 2×8 treated wood.
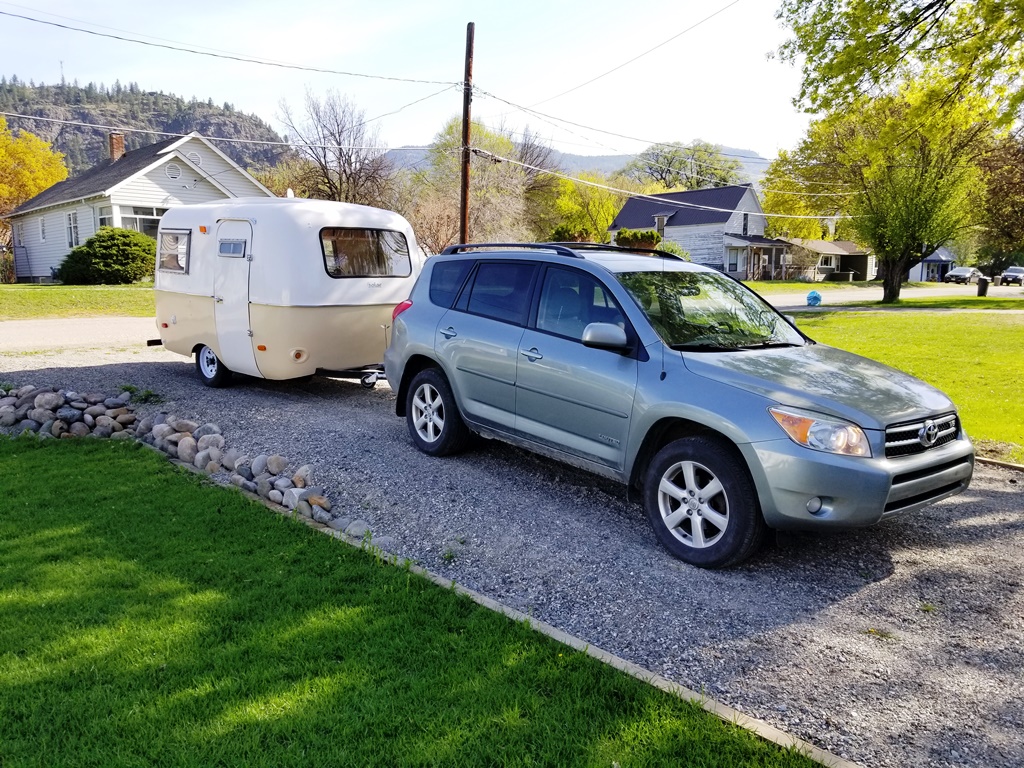
This morning I got the brakes adjusted and wired up.. and the wheels back on.. Then Dave & I rolled the trailer under the camper.. PERFECT FIT.. Wow.. I’m getting better with the tape measure. The balance is spot on too.. About 300 ibs tongue weight. So it should tow really nice… And look at the room up front for a quad.
Still a bit more work to do.. but the new Scooby will be ready for Hunting this October.
Update : Sept 11. 2018
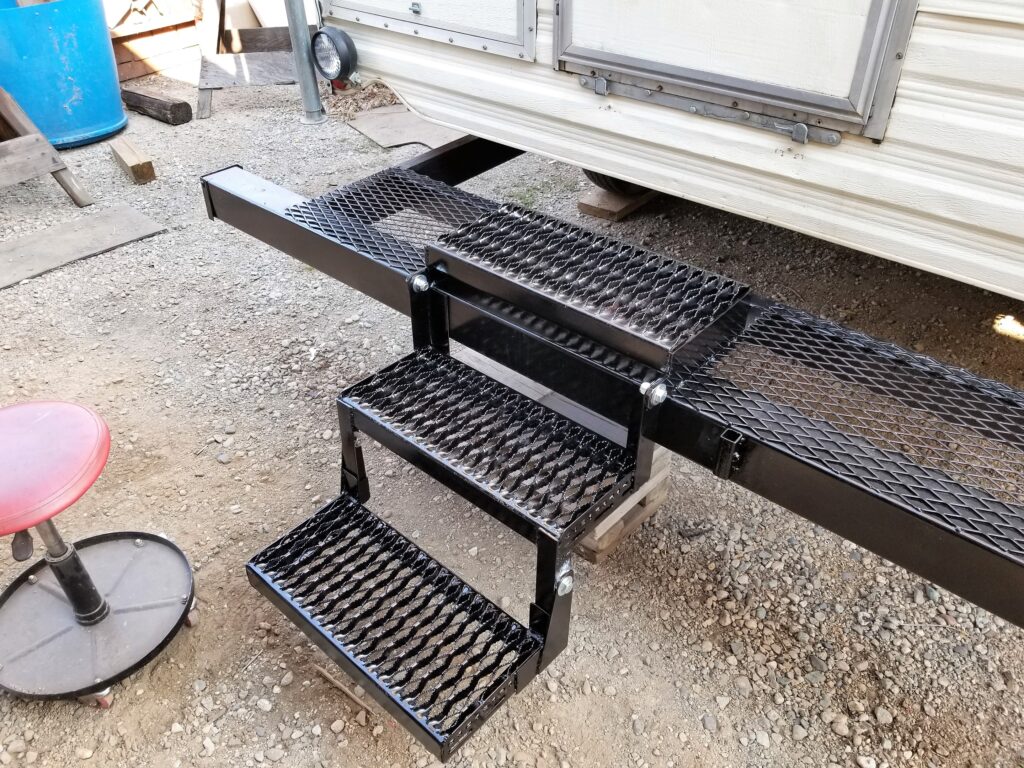
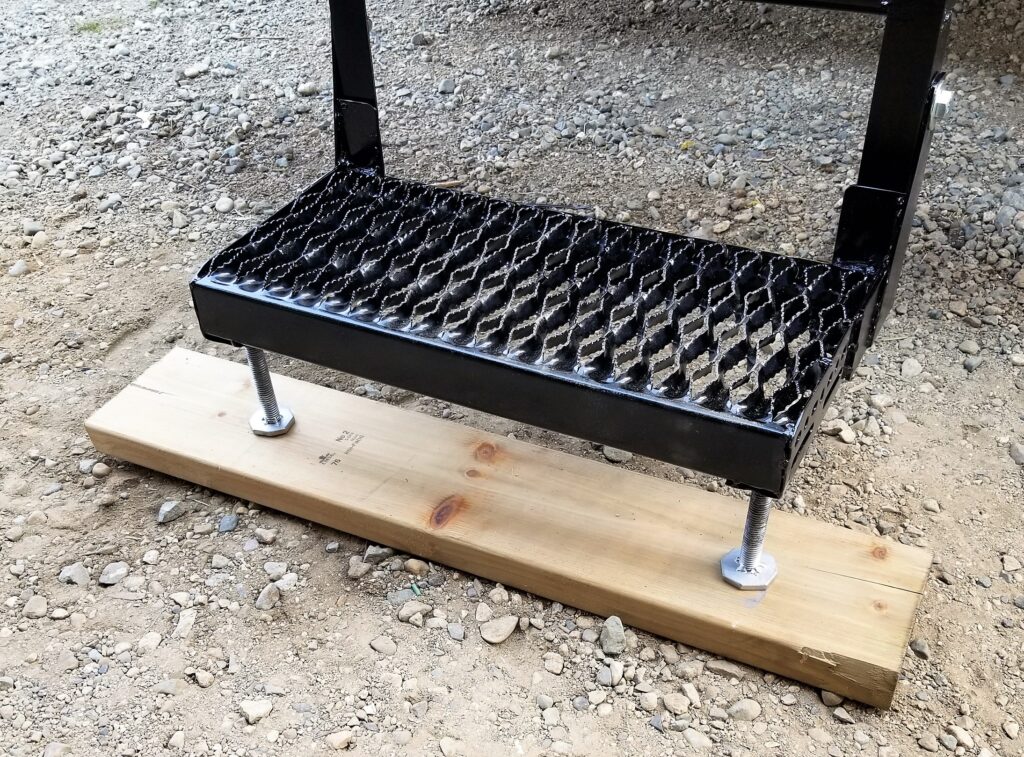
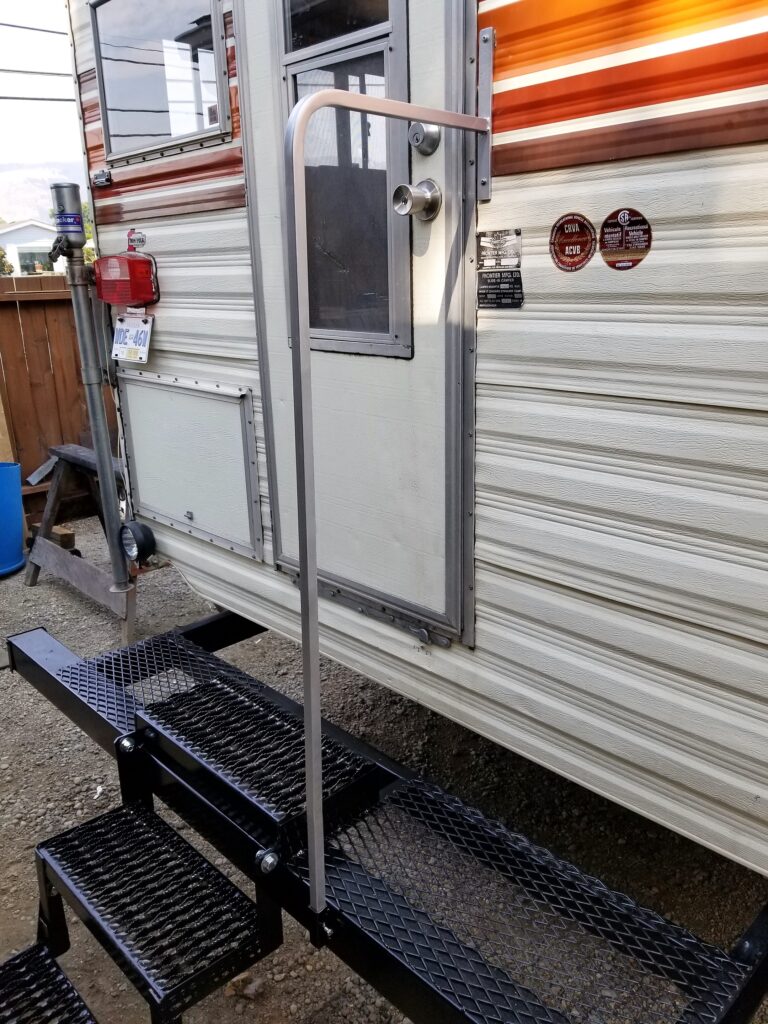
I have built the folding stairs and installed a hand rail too.
They turned out very nice.. Fold up nice too….
Perfect ! But I didn’t like the way the bottom step flexed… sooo I installed threaded feet to the under side and .. no more flex.. nice and solid.
They are very adjustable .. I will cut a couple of wood squares to place under the feet..
It’s a simple thing .. but it’s sturdy.. and can be removed if the camper was taken off the trailer. Amazing how it gives you comfort when entering and exiting the camper.
The roof is all sealed up and vent covers are installed. Ready for what ever weather comes our way.
October 2018
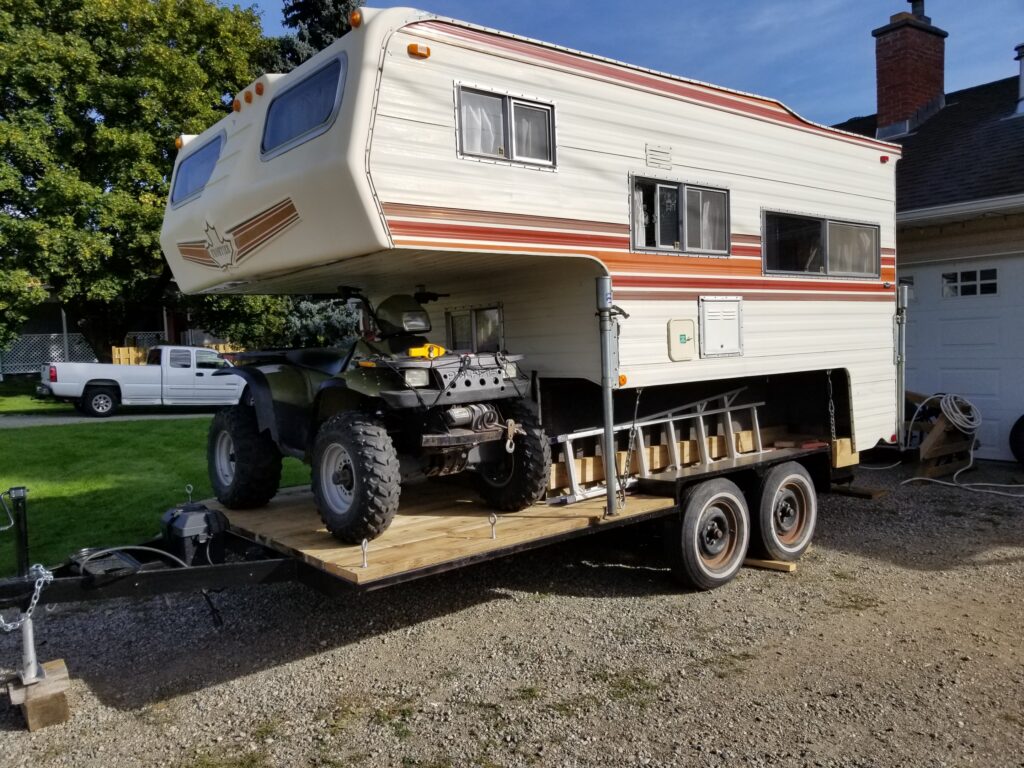
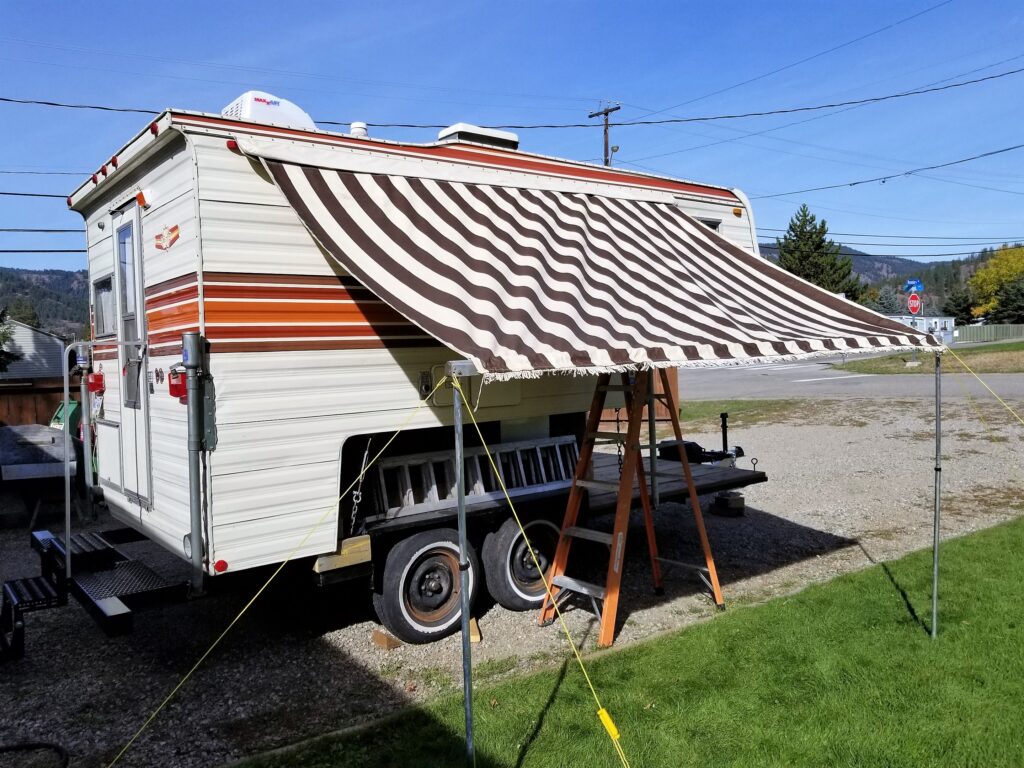
I will be taking the Frontier (scooby) up the valley on the annual hunting trip.. So I’ve outfitted it all up .. tested out the front deck..
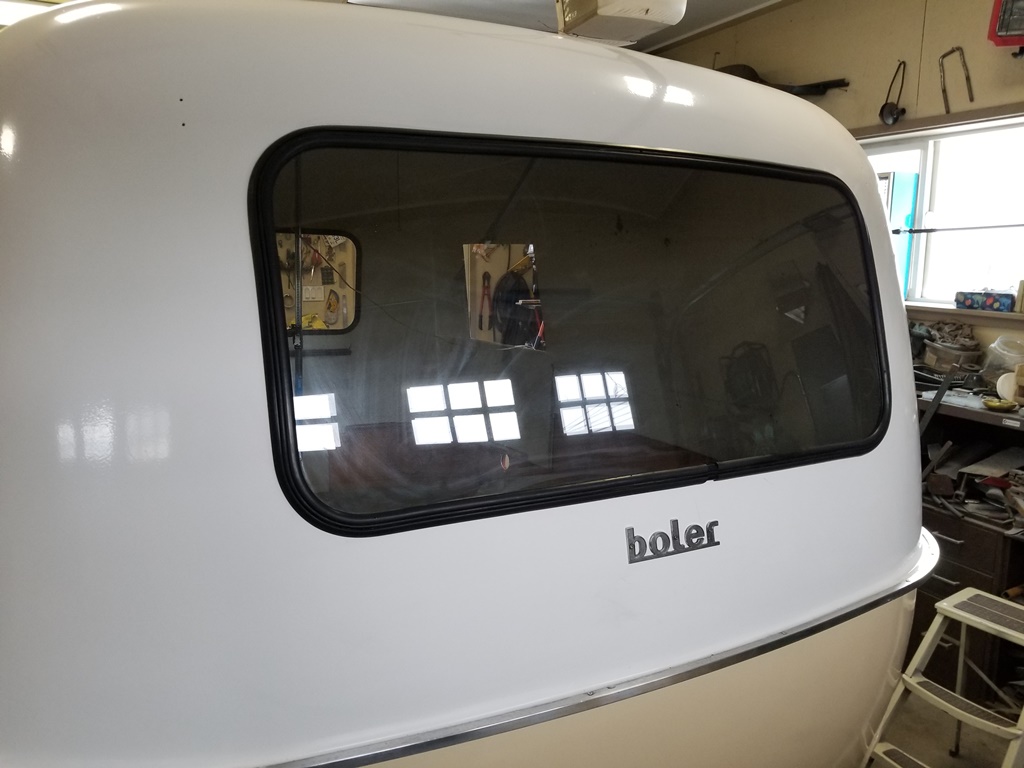
A full size ATV fits perfectly. And I remembered I’ve never looked at the canopy…
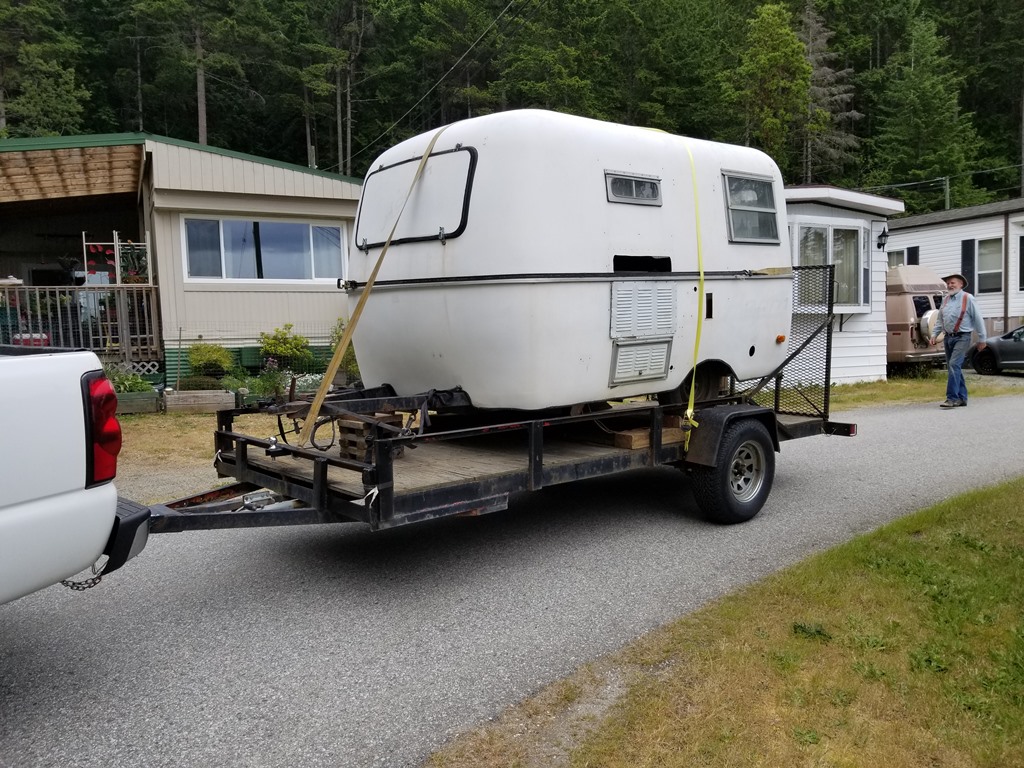
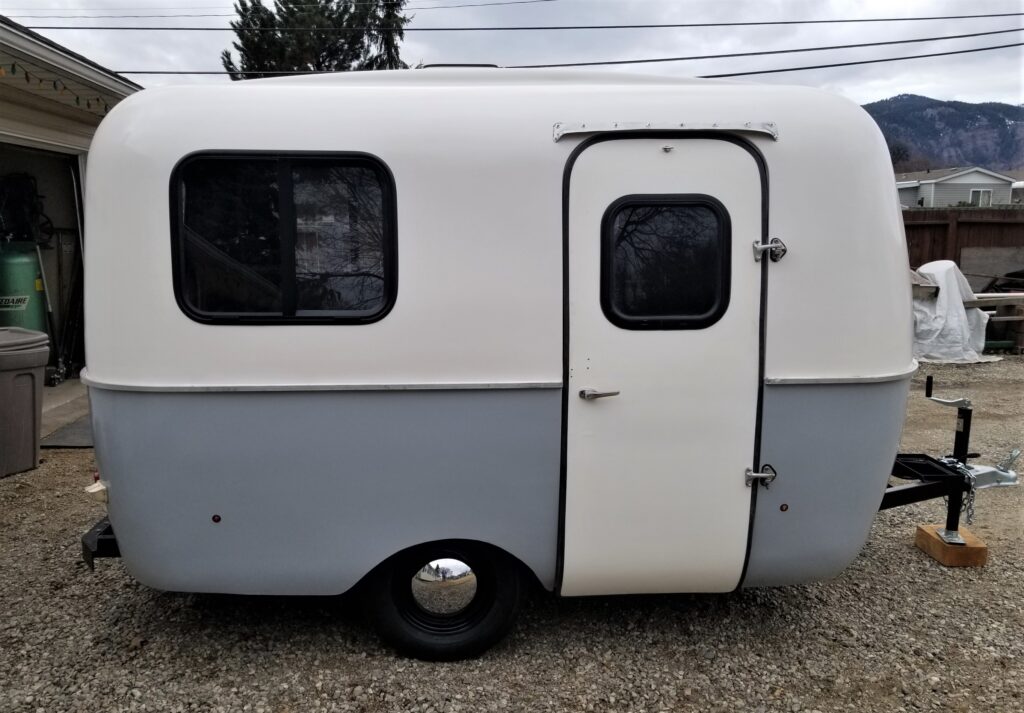
I know I’ve said this before.. at some point.. but this one fell into my lap.. not literally that would hurt.. but I was looking but not very hard for another Boler style trailer to restore. I so enjoyed the 73 Boler project that I said (loudly) that I would love to do another.. Well the little trailer god was listening. The ad for this one popped up on my phone while I was in Vancouver.. Someone had gotten in over their head trying to fix the leaks in their Acorn trailer.. and just wanted it gone BUT to someone who would love it and fix it …and that understood these little trailers. Hey THAT’S ME. and he agreed.. So I had to plan a long drive .. to get it .. the next week. 7 hrs to Vancouver then a ferry ride.. then another hour up the coast . But most fortunately the Acorn was just down the road from my Bother’s place.. So he went and had a look for me. Big job to fix this one he said.. Don’t care I said. So here it is home with me .. intact.. and with BC registration too !
Yes I did remember to take a photo just after loading it on the trailer. The fella behind the trailer is / was the owner. It’s making the trip home on a trailer because …. the body is barely attached to the frame.. and there is no lights .. AND it’s a long trip. Funny the other project Boler had to be ferried home too.. but it was the frame that was toast.. this frame looks good.
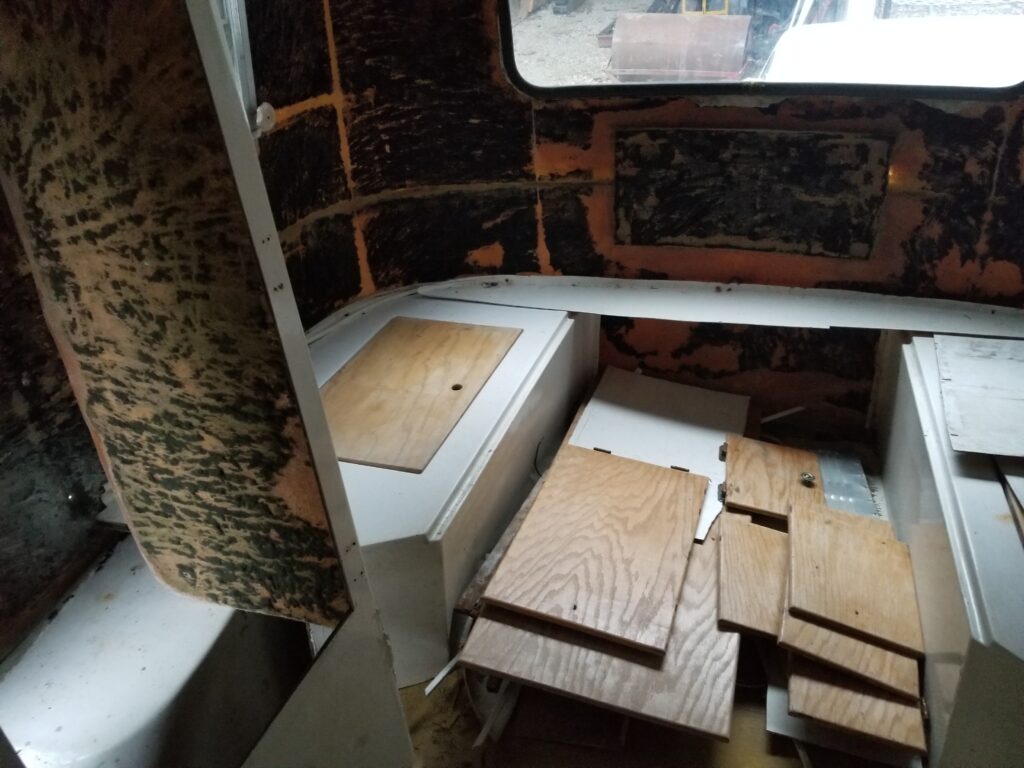
Interior ! not so much. This is where the work will happen.. So… the story as I understand it .. This trailer came from Arizona.. dry climate. When brought back to the BC coast .. wet climate. All the rivets leaked and damaged the Thinsulate wall covering.. and the plywood floor. A good argument for using bolts not rivets to attach the cabinets to the walls. Too bad about the wall finish.. now I will have to glue carpet. And build a new floor.
The first thing I did was to pull all the parts out from inside .. so I could see what I had. It’s all there ! and in good condition.. And as a bonus the cupboard doors are oak ! Perfect ! So I put things back.. sorta in the places where they go.
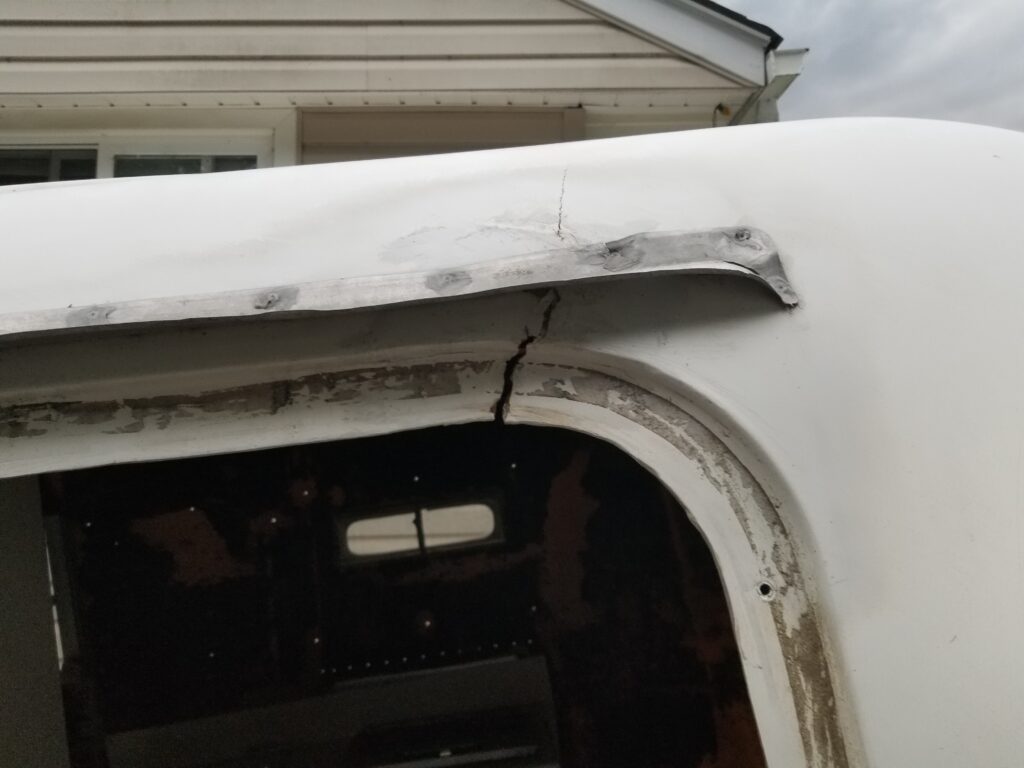
Because the body is loose from the floor.. there is nothing holding the door up. so it’s sagging .. and it cracked the fiberglass over the door.. The boler had a similar crack over the rear window because the frame had sagged. So aside from that the body is great.
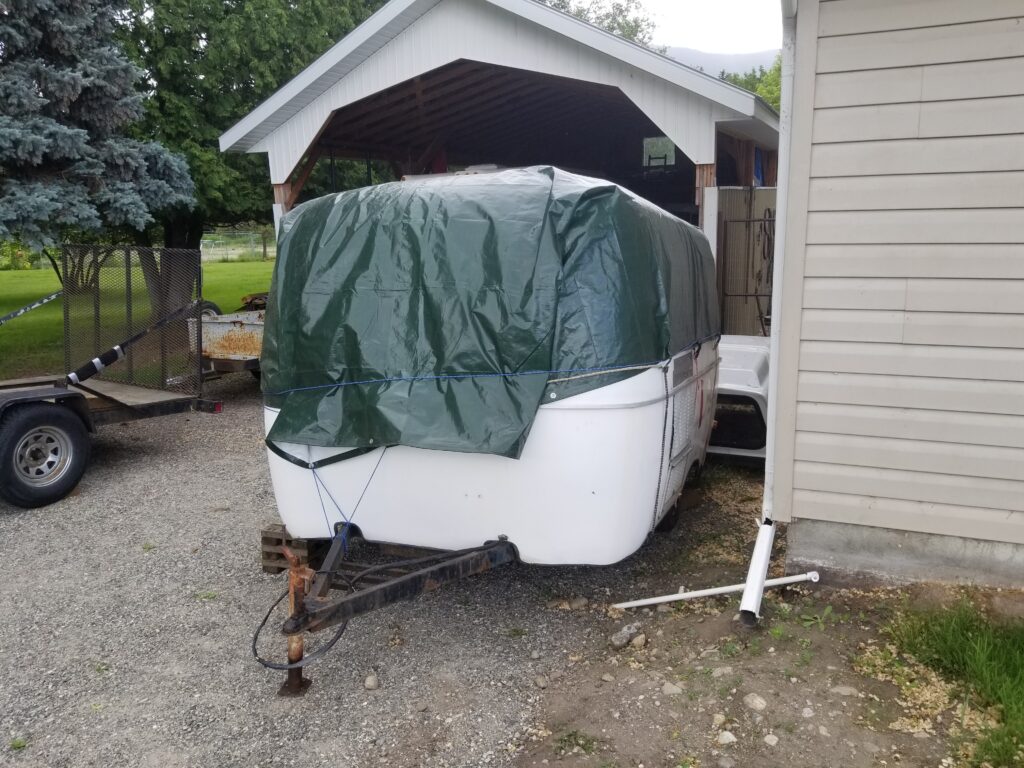
I’ve tarped the trailer now to keep the rain out.. and this will be a great project to start in the fall.
IT’S TIME !
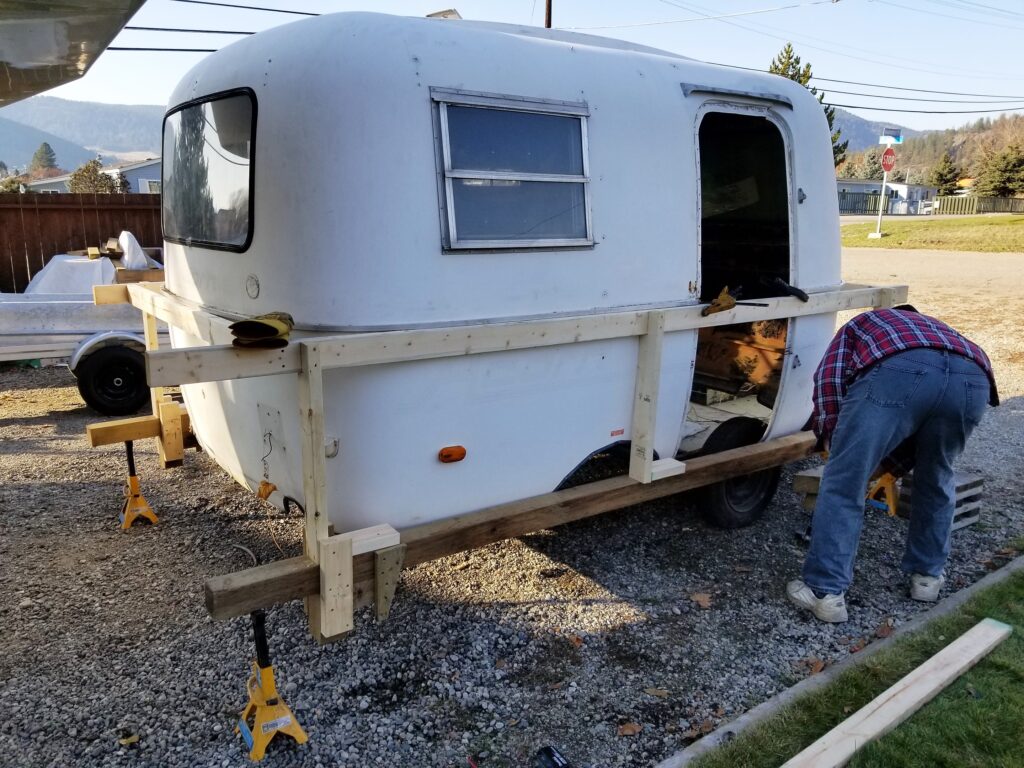
Now it’s November.. And I need to get started on the Acorn. I’ve been thinking and planning how to fix the floor. How do I support the trailer and make everything true and level. IT’s ROUND ! Then it came to me.. The one thing that’s level is the joint between the top and bottom… and the aluminum trim the covers it. So I build a cradle that supports the whole trailer on that rim. As a bonus we can lift the body off of the frame,
Here you can see we are doing just that.. and have the frame half way out the front. This was also made easy by the fact that there is NO floor.. no wheel wells.. The body was attached to the left front corner by a few feet of floor.. That was all.. Sooo looks like I’m building a whole new floor. I sorta knew that from the start.
Meet the frame ! A lot like the 73’s frame.. but without the repairs. And there’s a bump out up front for a potty.. Interesting.. There is still a very slight sag in the left rear frame tube. We are going to see if we can tweak it with chains and a porta power ram. I’m going to clean the frame good and check for rust holes and cracks.. but it looks ok. So maybe just a few extra pieces of steel and new axles.
It’s time to divide the post up into the different stages of work. This trailer will have 6 more pages..
Well it’s late March.. and I’ve done the house reno’s . The snow is gone.. So it’s time to get the Boler done..
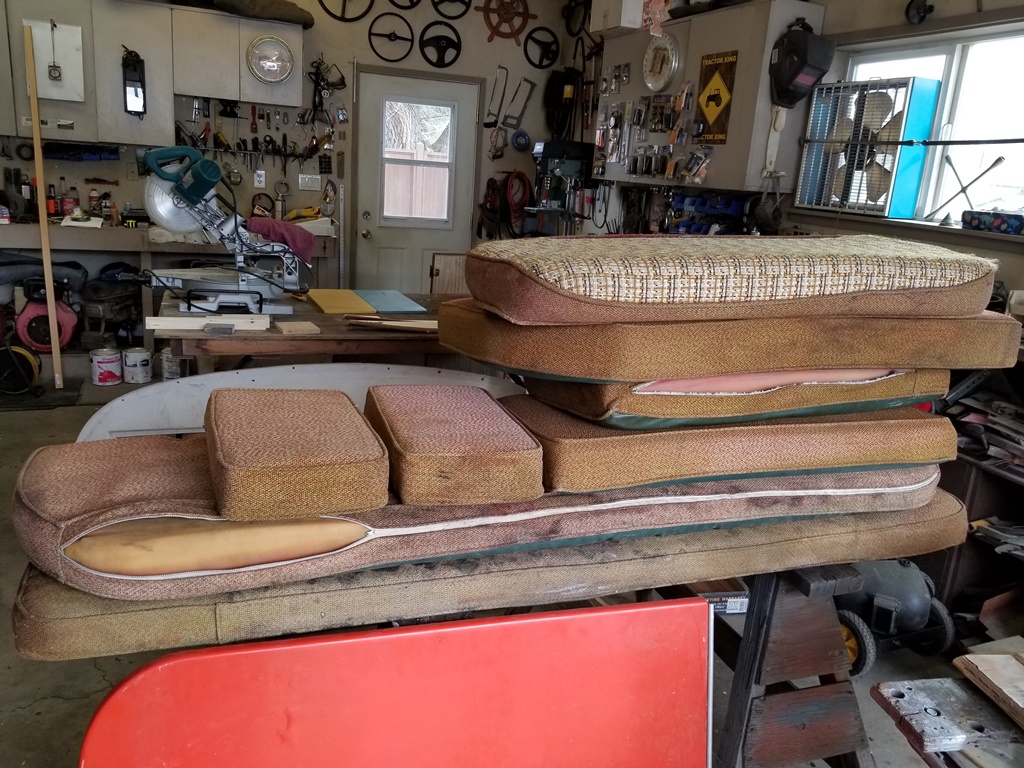
I emptied the trailer out …everything back in the shop. These are the yucky cushions.. Off to the landfill. But I have to keep the plywood base for the upper bunk.
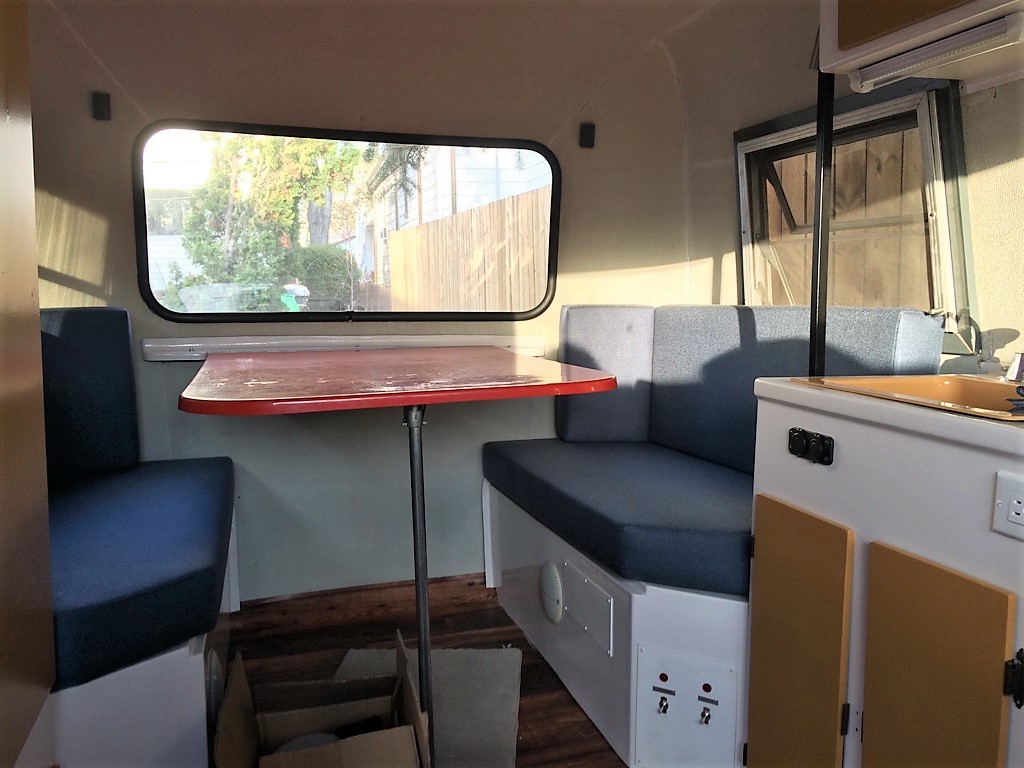
In good condition too ! New upholstery is being made as I write here.. The table … apparently it will remain red for now. So I don’t need to work on that..
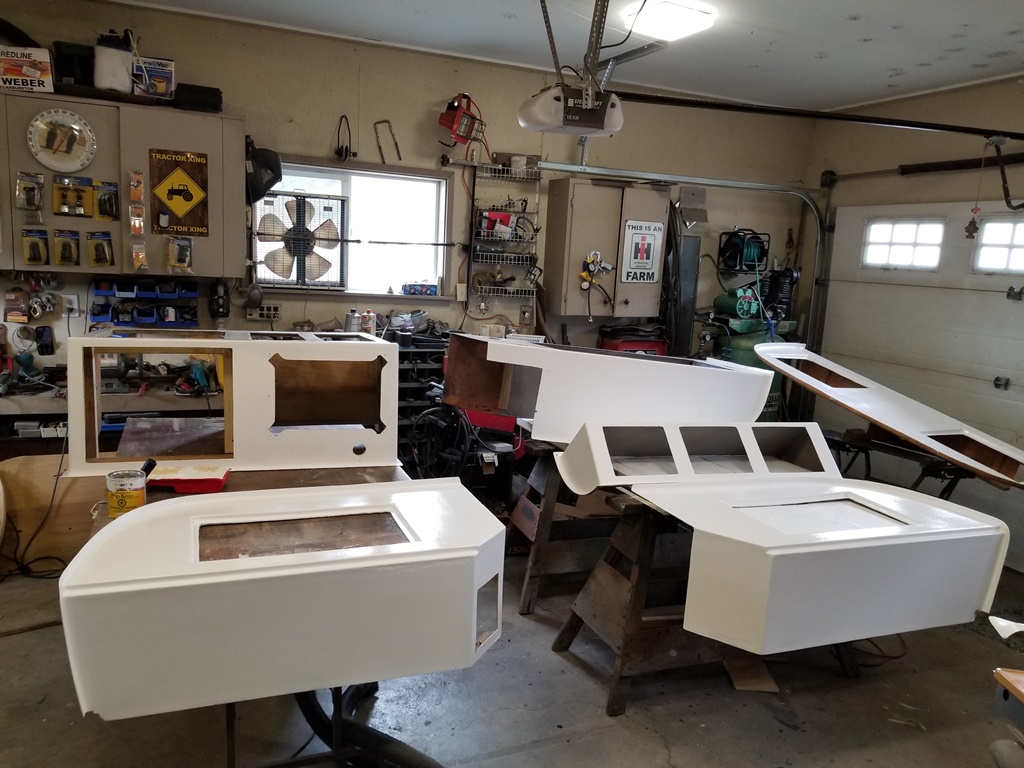
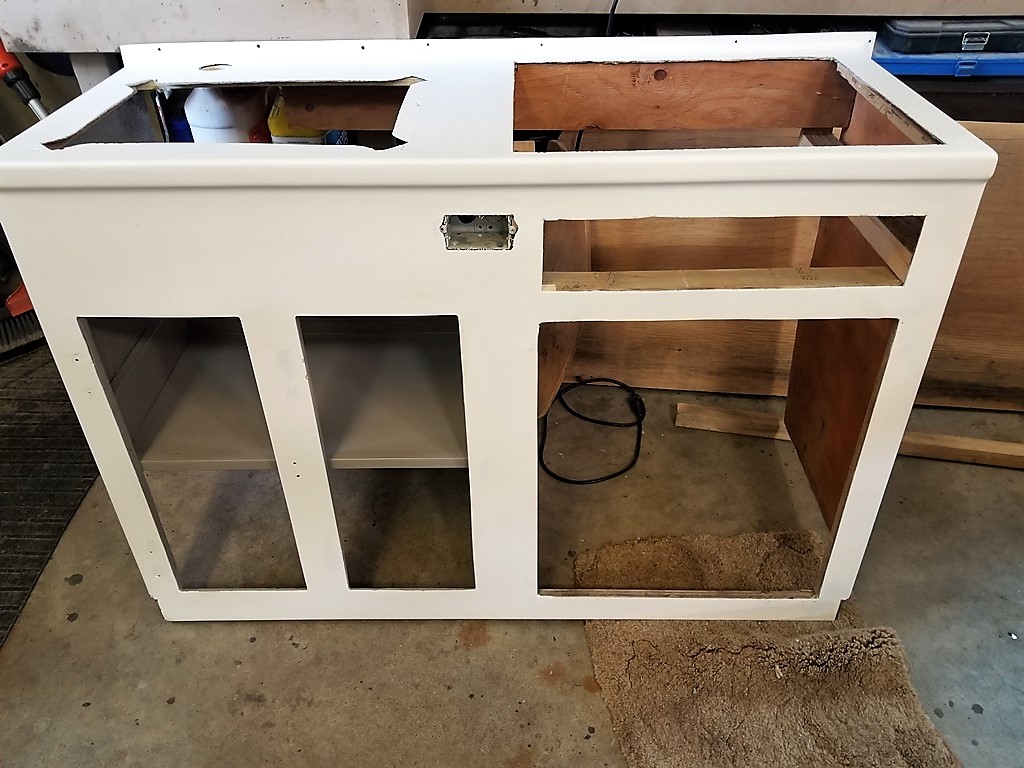
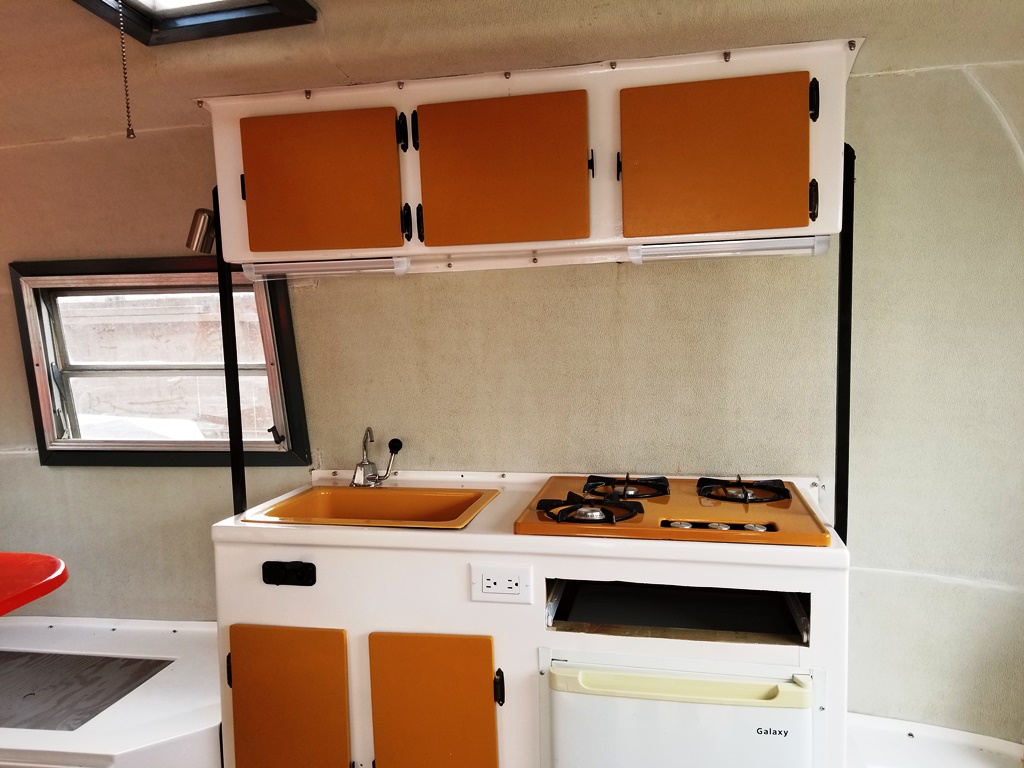
Update: It’s taken awhile to rework the cabinets.. So the stove fits.. The fridge fits.. And I managed to get a drawer to fit in there too. New wood glued inside for strength as well. They are all filled and primed now..
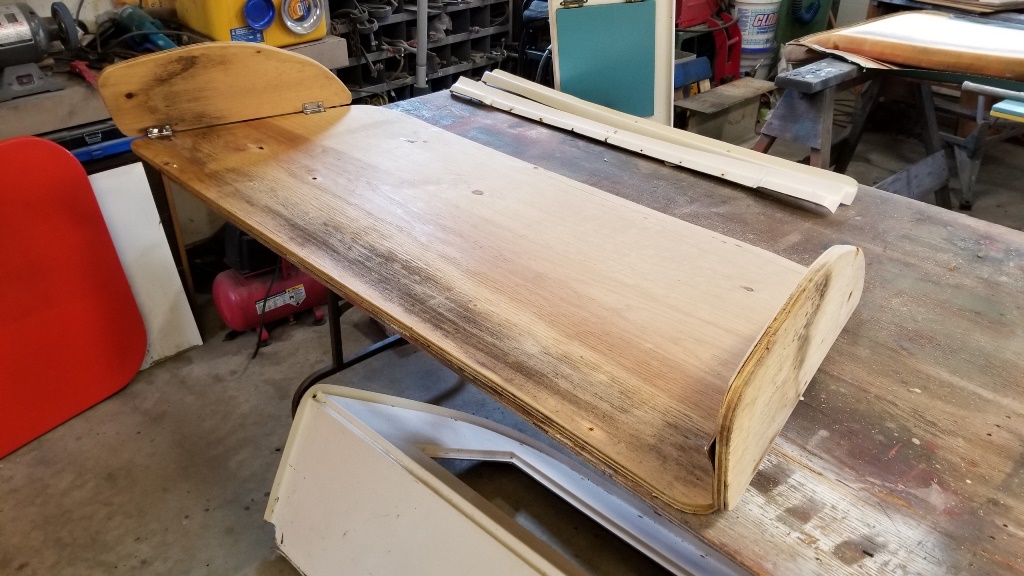
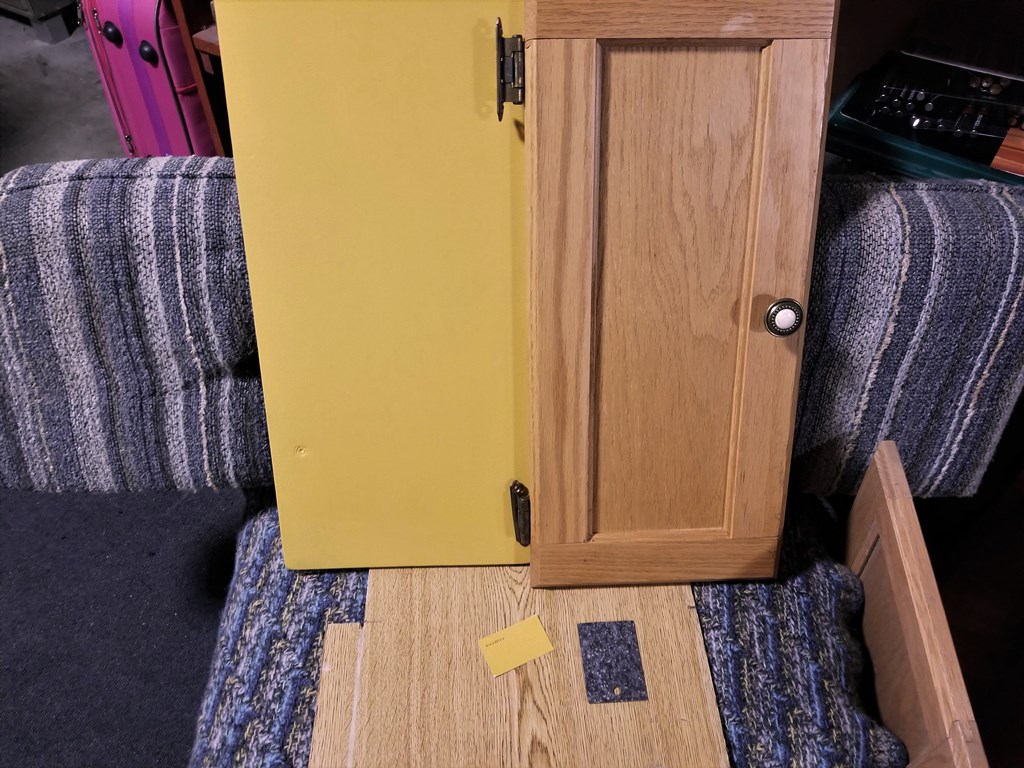
The interior ( that’s visible) is painted grey.. I had to make two new hatch covers.. and two more door fronts too..
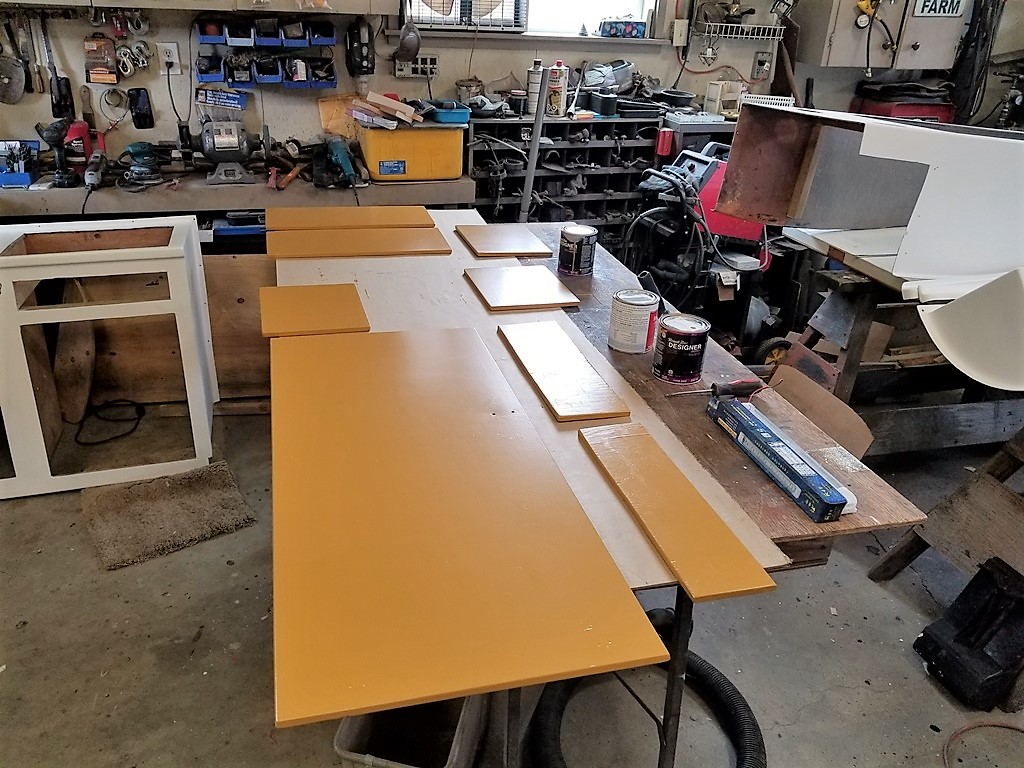
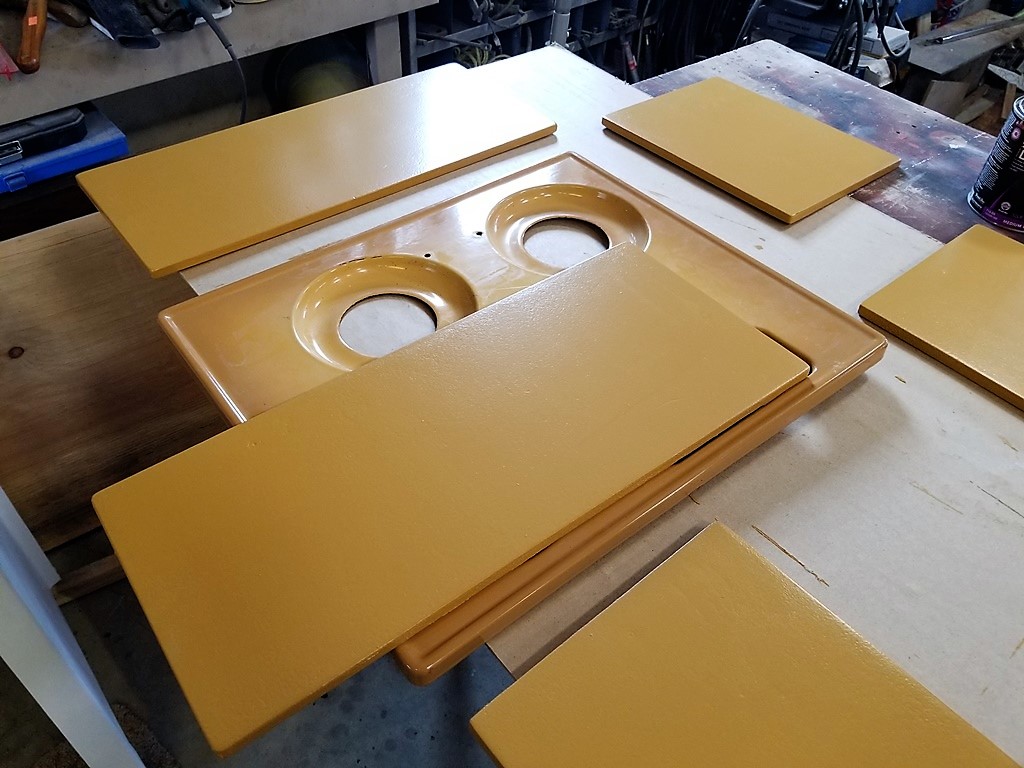
Here’s the door fronts.. We decided to go with the harvest gold to match the sink and stove. I like it. And I got the color SOOOO close.
The stove top is two tone.. so we went to the DARK SIDE.. With the wood floor and the blue cushions.. this trailer will look sweet !
Here is the primed kitchen with it’s new features. Extra shelf on the left.. and a drawer under the stove. Also extra wood added to make it more ridgit. I’m painting the high gloss off white tonight..
May 1 st week… Last push.
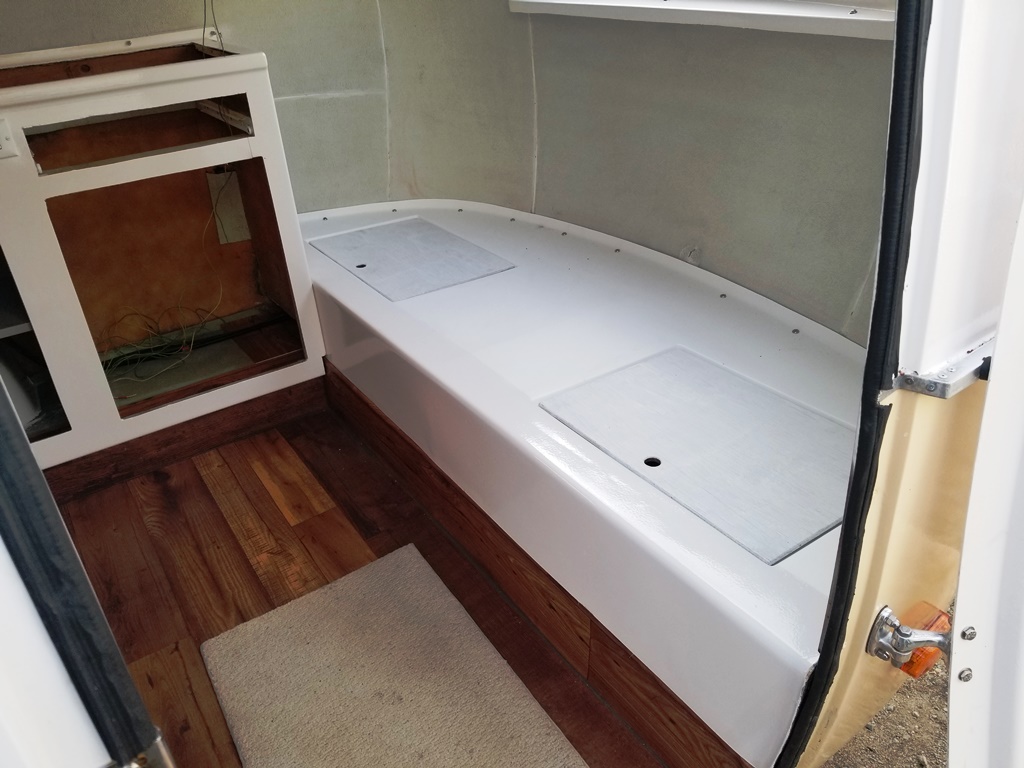
Before the Boler goes home to Edomonton. The Cabinets are all ready .. And I’ve installed them back in the trailer.. The water tank and lines and the hand pump is in and working good.
I’ve got the wiring all done too.. The Coleman Power panel is working good.. It couldn’t go where I wanted.. so it’s below where you sit.
But that’s ok.. I could not get the speakers working good for the stereo.. so I’m leaving that for Dallas to fix..
Still to do this week is the fridge, Bunk supports, a drawer for under the stove.. Today we install the hitch on the Rav4 and take the boler for a run..
Still to do this week is the fridge, Bunk supports, a drawer for under the stove.. Today we install the hitch on the Rav4 and take the boler for a run..
YES ! took it for a highway run and it’s perfect.. tows great.. Lot’s to do this week.. but I got it all done by Saturday morning..
Here’s the finished closet..
And the finished Kitchen.. And here’s a short video..
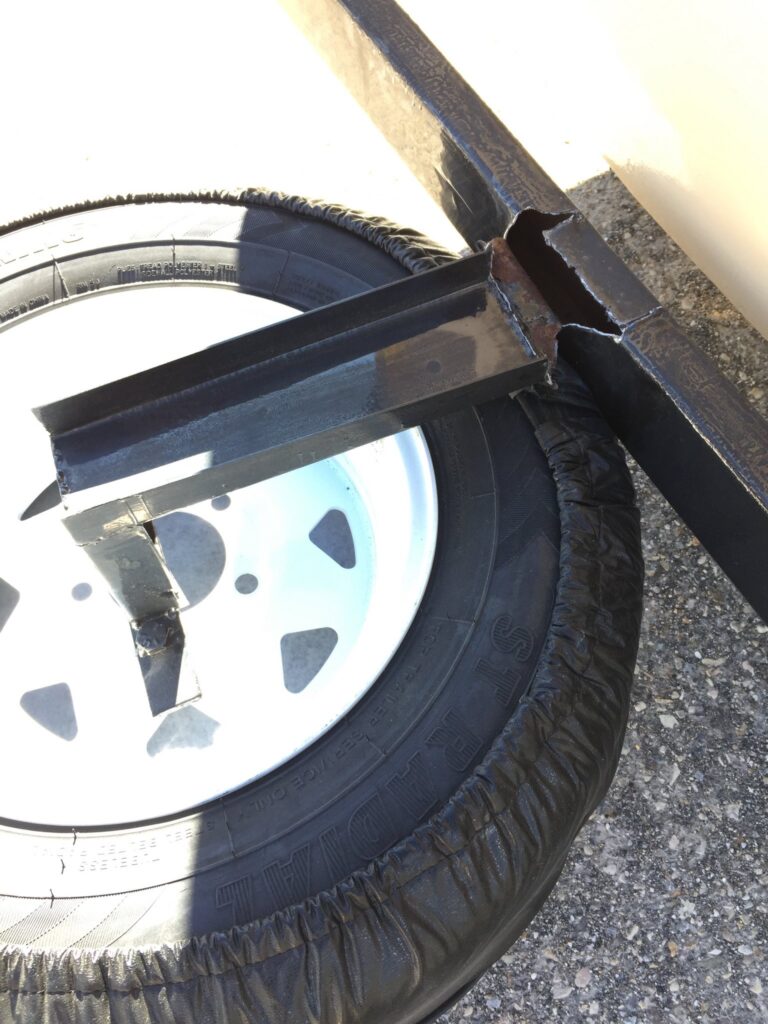
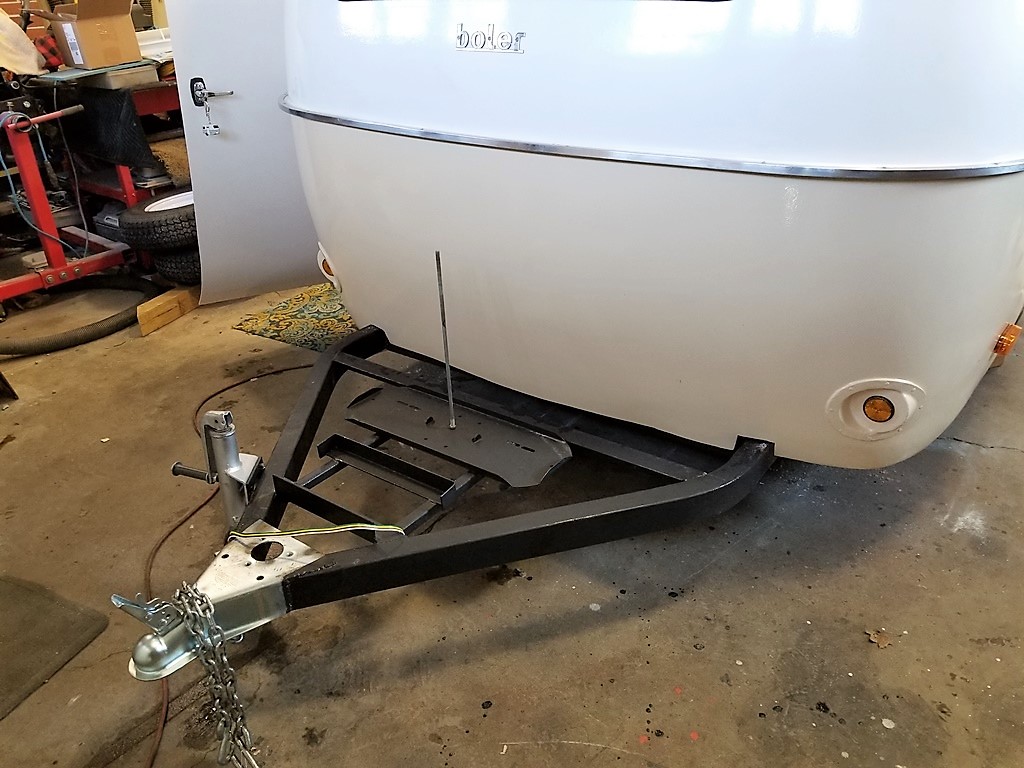
I’ve had a few reports back from the first road trip .. The spare tire mount bent down and clearly the old metal I used on the bumper was not strong enough for all the bouncing..
This will need to be fixed in the summer when the Boler comes back for camp..
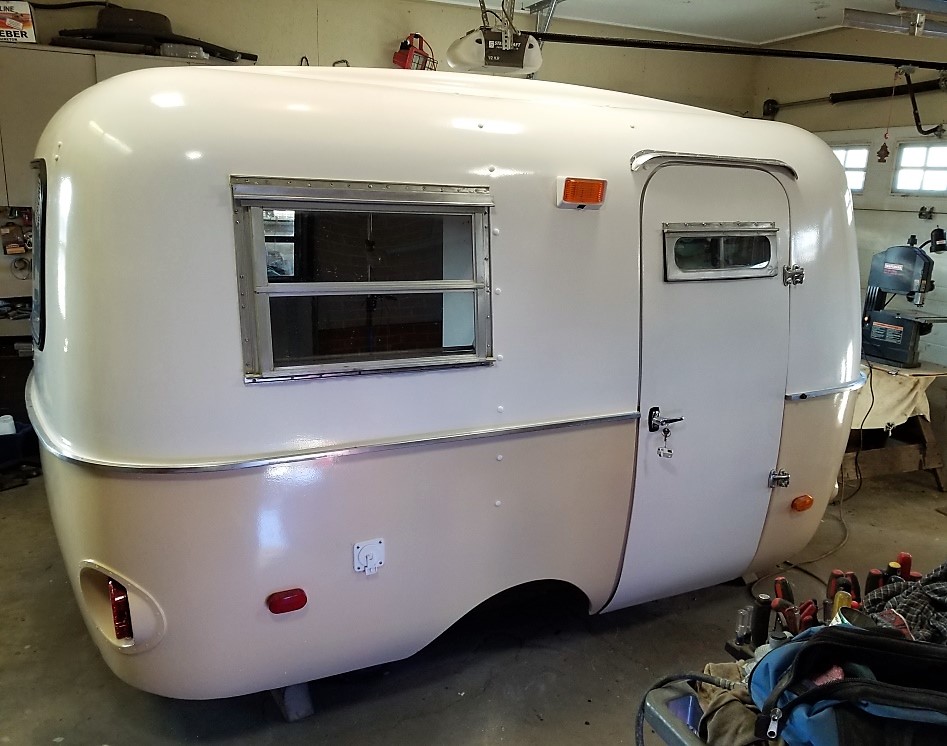
Here’s the latest photo of the boler with the new cushions…
But this brings to a close the Boler project.. It gone to it’s new home now.. But did come for a visit to our group camp this year.
Here it is after a long trip to the Yukon and then back here.. They love it..
But Wait ! there’s more !
I have found another Boler (type) trailer for sale cheap.. A US made version of the Boler called an Acorn / Scamp. So I’m starting a new post ( of coarse) 1979 Acorn Trailer
This will include the new vinyl flooring and some of the wiring:
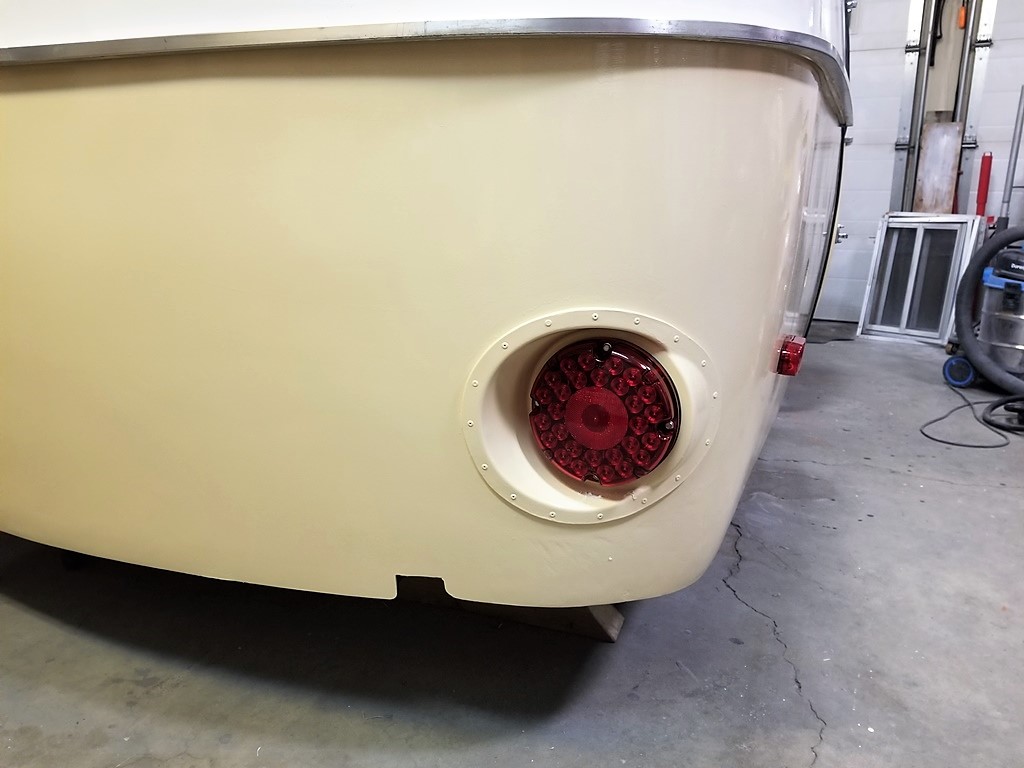
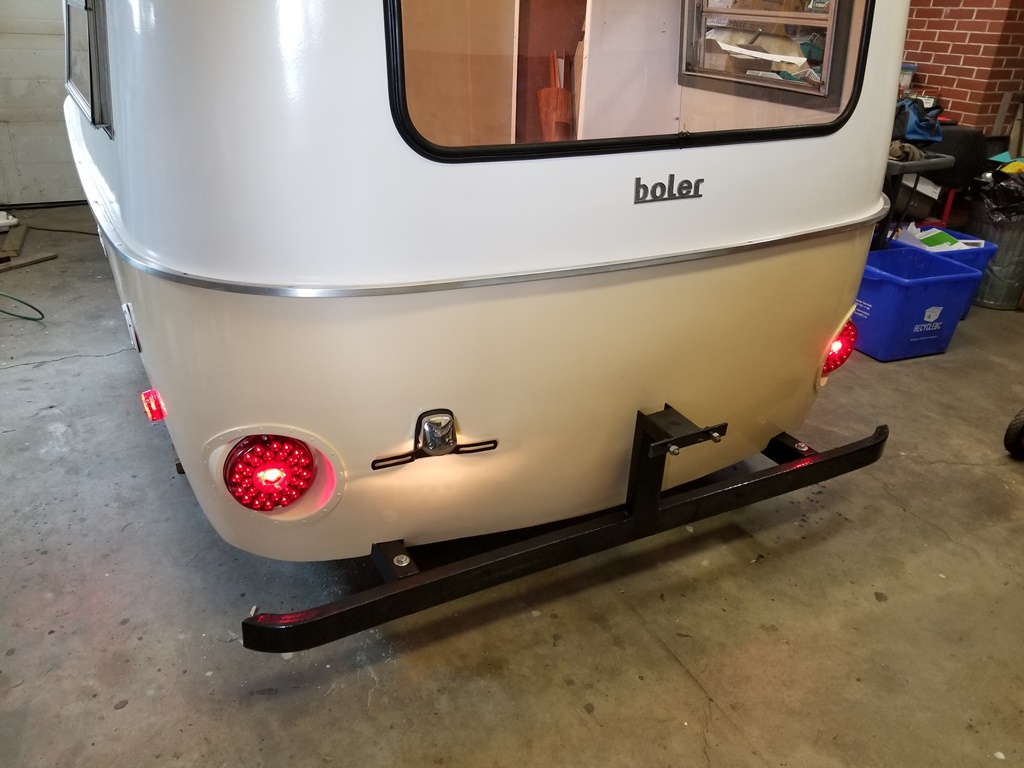
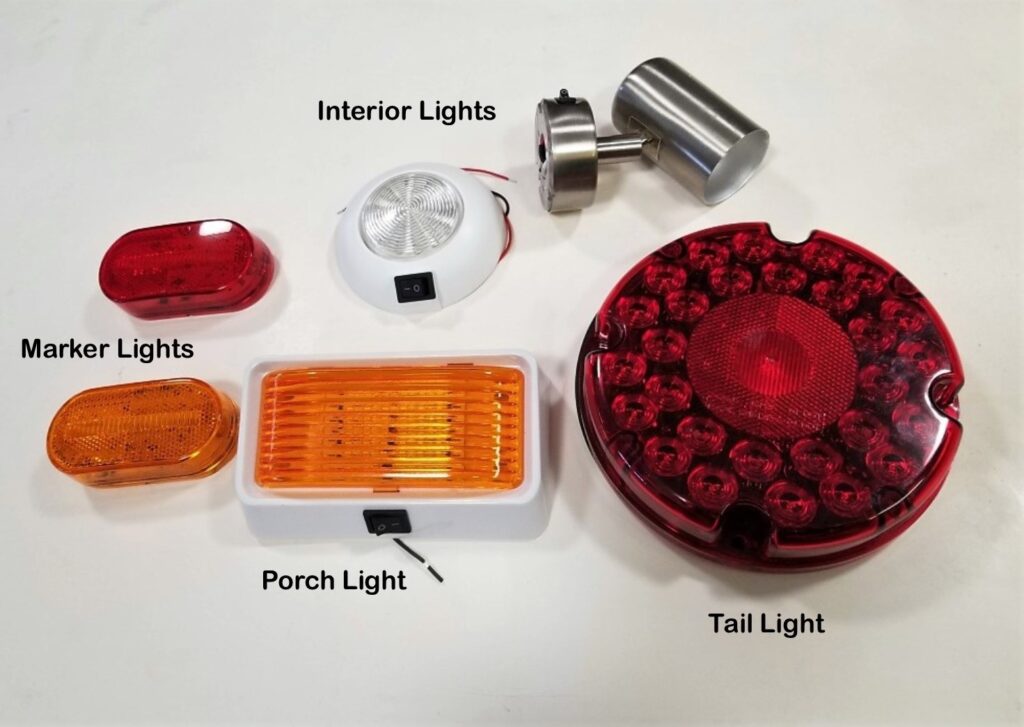
But mostly I’m doing the fun part.. Lights !
Like these LED stop / turn / tail lights. These are a boler must have. I’ve been fighting with the door.. it used to fit better.. turns out my new door gasket is to thick.. so I took a knife to it and “pared” things down.. a lot ! fits now and closes the way it should. Will need some foam gasket to fix a few gaps.
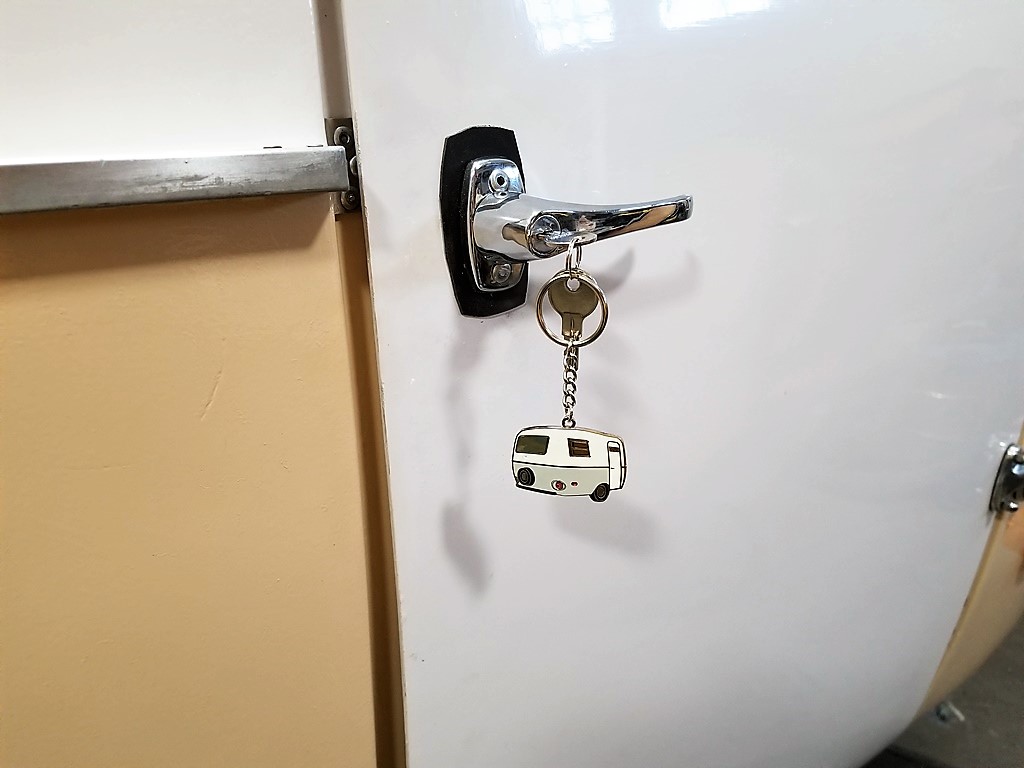
The Devil is in the Details !
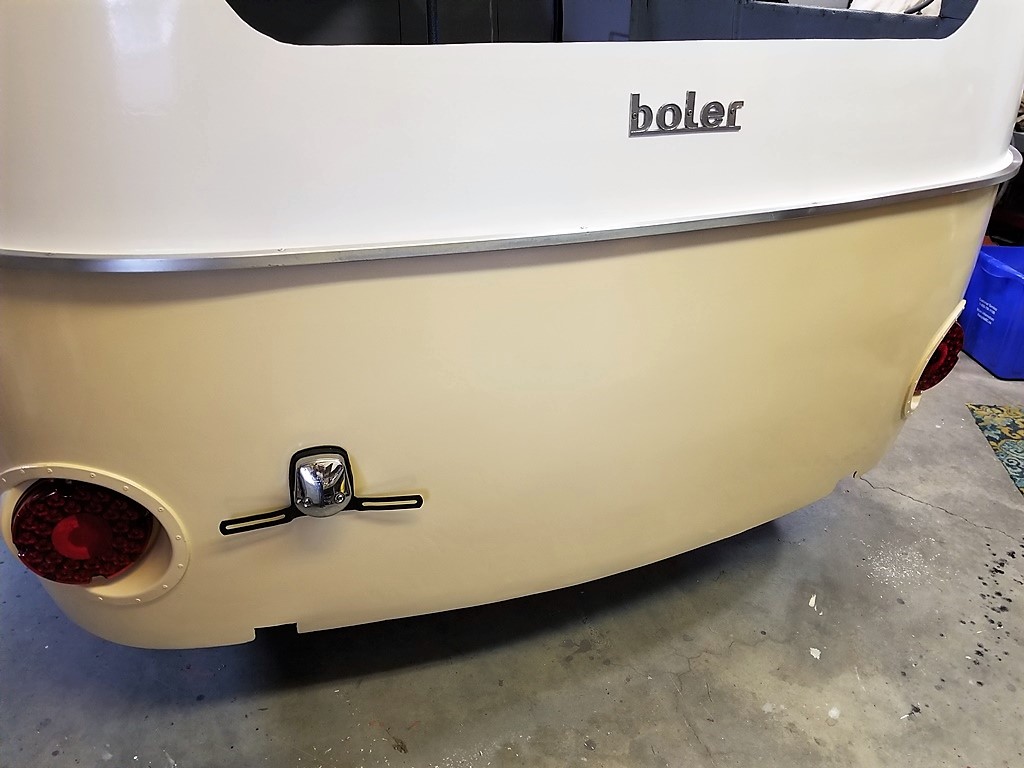
And I got this right. New handle …new keys… and a lucky key chain. I almost forgot the plate holder for the back.. So I did the restore on it and ….
Looks great! This plate holder came off the Colman tent trailer that is donating many things to the boler. I should turn my attention to the inside flooring.. There’s work to do in there.
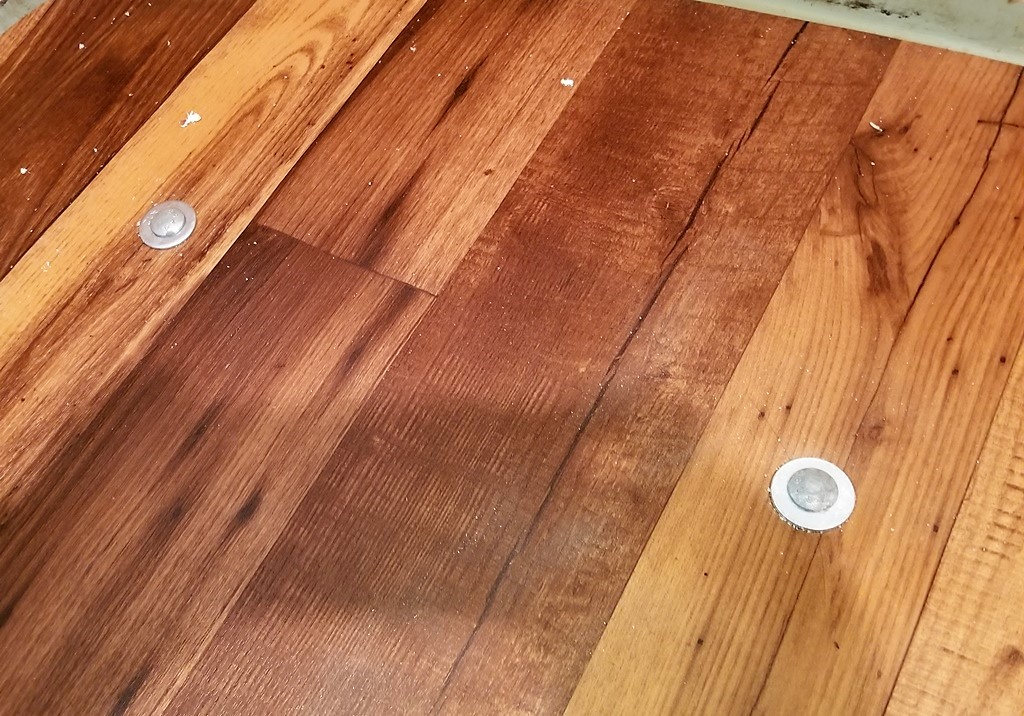
I’ve filled the holes in the floor and used the latex caulking on the seams of the interior cushy wall cover.. And with help I got the front and rear windows in.
The lock strip was the hardest part of this.. But got-R- done . Just a few more things before installing the flooring.
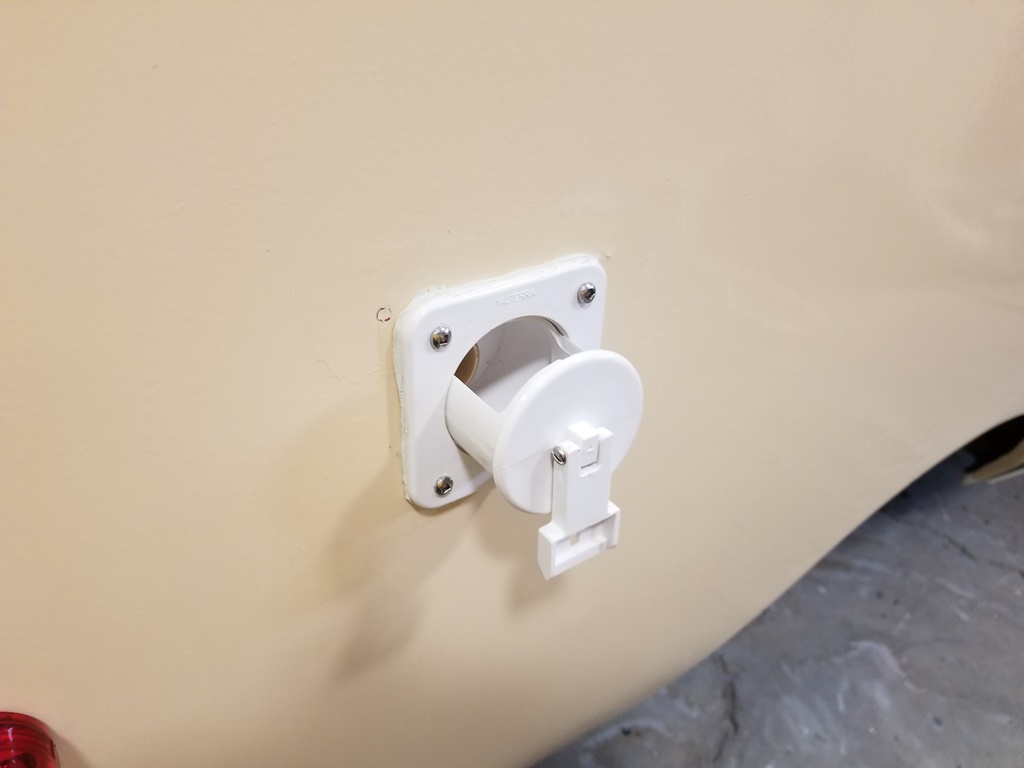
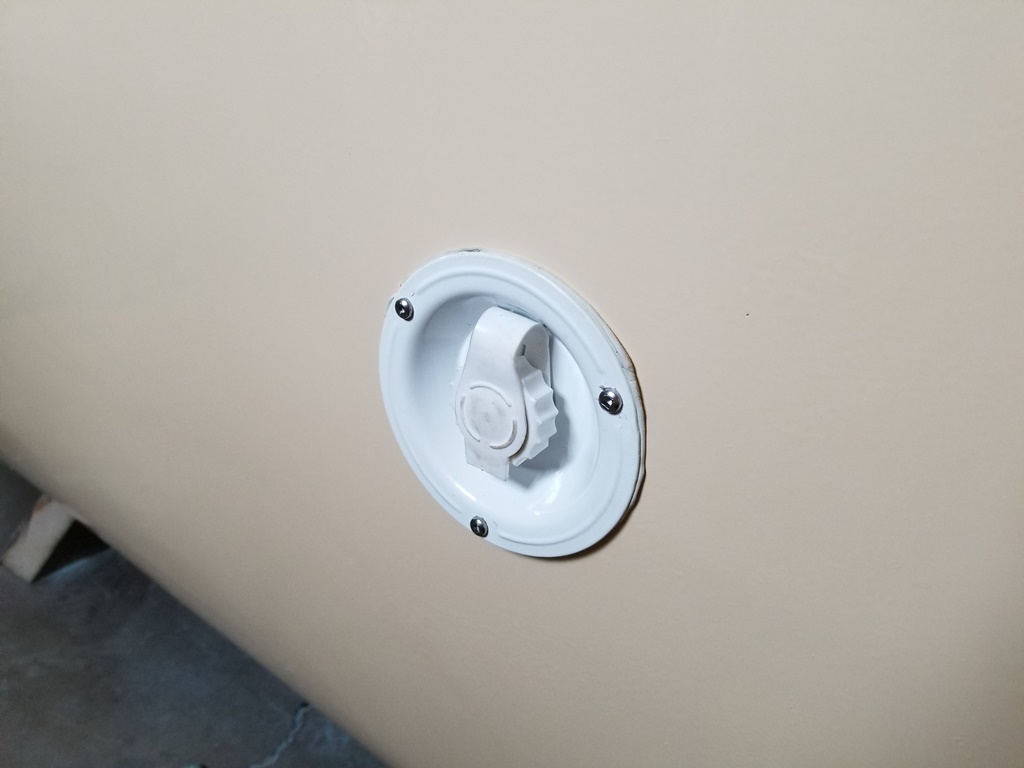
Like this fresh water fill. And the power cord hatch.. and the sink drain connection.
Of which I think I better label so no one hooks water up to it.. That would be messy. This is for hooking a hose up.. and draining into a bucket.. or your friends tent.. or use your own ideas..
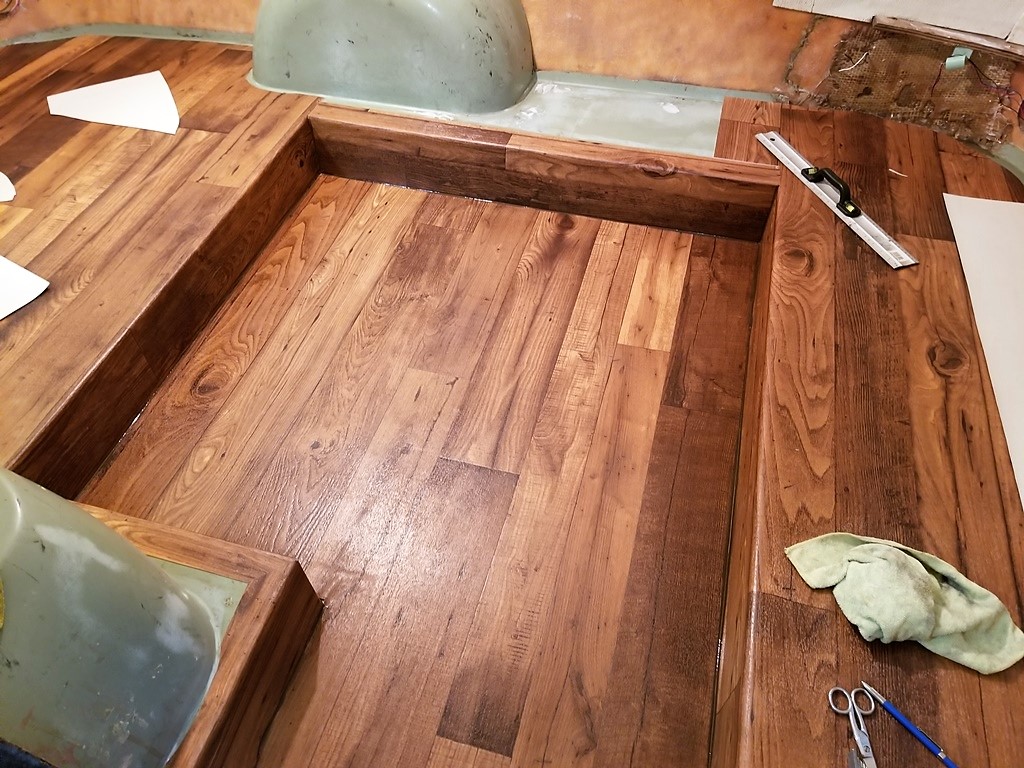
Had a bit of a fight with the glue that was recommended by the flooring store.. Ended up mostly using contact cement. ( they said do not use contact cement) but it works great.. so not sure why I wouldn’t use that .. given the fact that there is all these weird surfaces. However ! It looks great.. and should be easy to clean.
Work on the boler will have to take a bit of a break for a few months.. There is a strong possibility that we will be moving.. so I have to clean out the shop for viewing. And that was just the kick I needed to get the trailer to lock up.. and back on the frame..
Got a lot more done today.. and this is what it looks like now.. still need the frame under it.. but that’s happening tomorrow.
Body Meets Frame !
And it’s a perfect fit !
We put foam canopy tape on the frame… everywhere it touches. Bolted down with galvanized bolts.. So it could be lifted off again. And those are not through the frame.. beside the frame.
And this is all you see.. inside the cabinets. Way better..
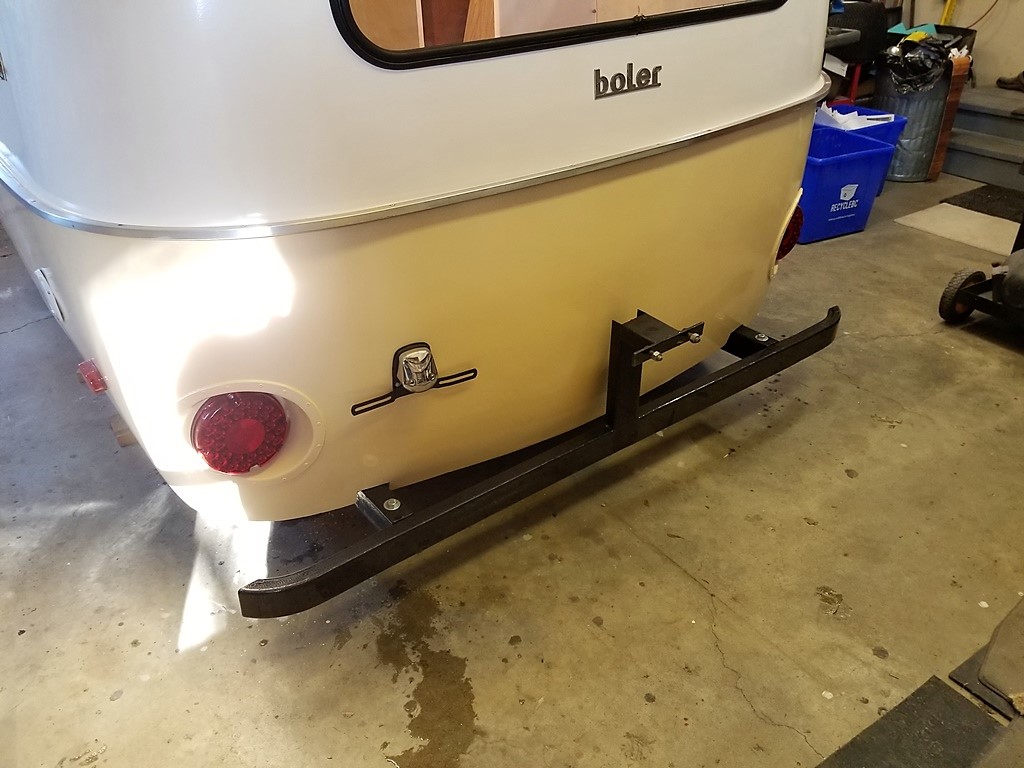
And the rear bumper is a perfect fit ..with the spare tire close .. but not touching the back of the trailer. Now I’m wiring the running lights so it can be towed around.. Oh and I have naked 12 ” rims on to keep the trailer low.. so it fits through my 7 ft high door. It will end up being 4 ” higher with the proper wheels.
Lights ! Camera ! just a bit of Action !
Pretty lights.. Yup got this part done… and then it was out the door..
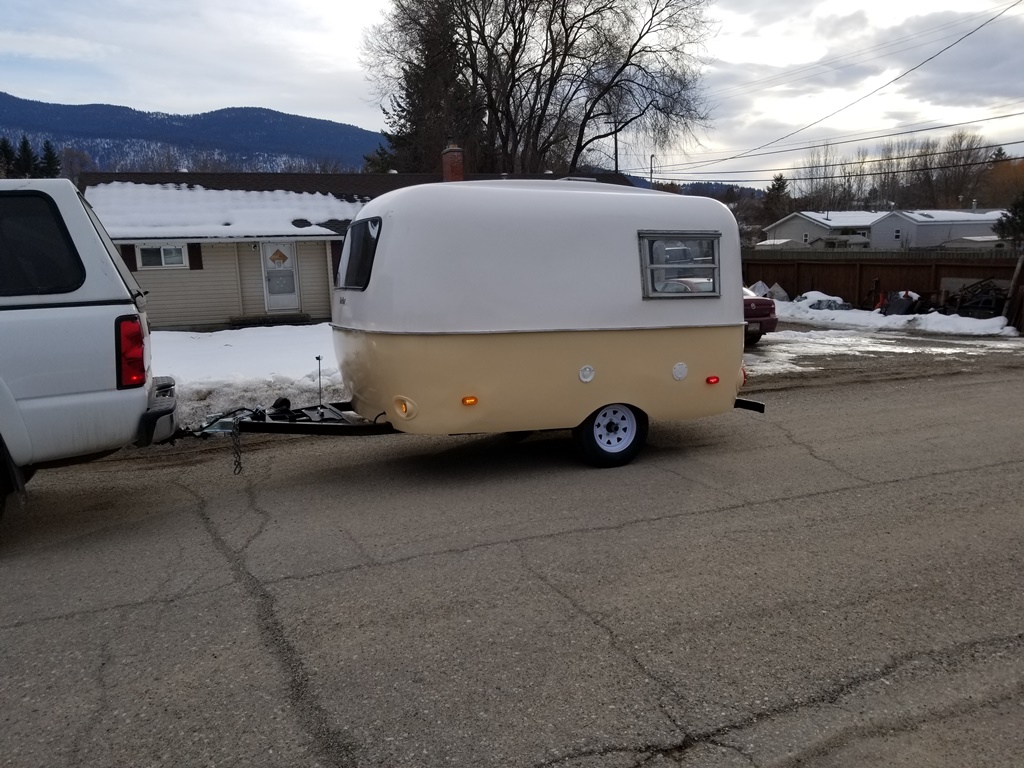
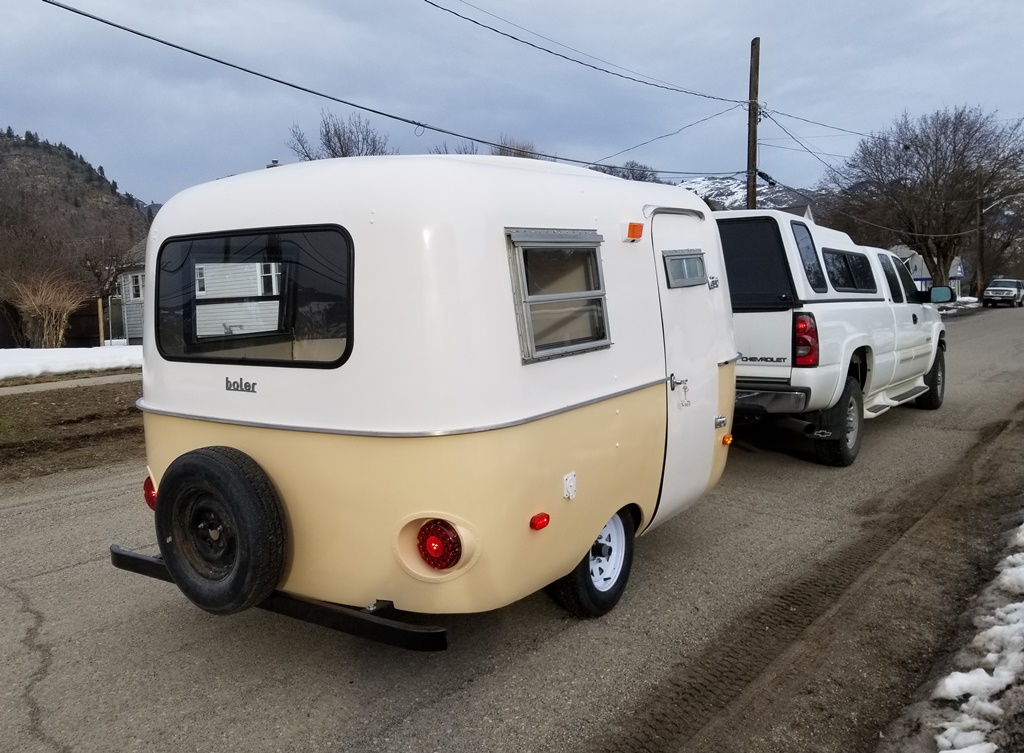
With the 12″ rims only ..the trailer fit nicely out the door.. and then the real wheels went on.. and I towed it over to the other driveway..
But not before a photo op.. I like the ride height.. So it’s tarped to keep the weather off, and all the bits and pieces are inside..
The next page will happen when I get back to doing the interior..
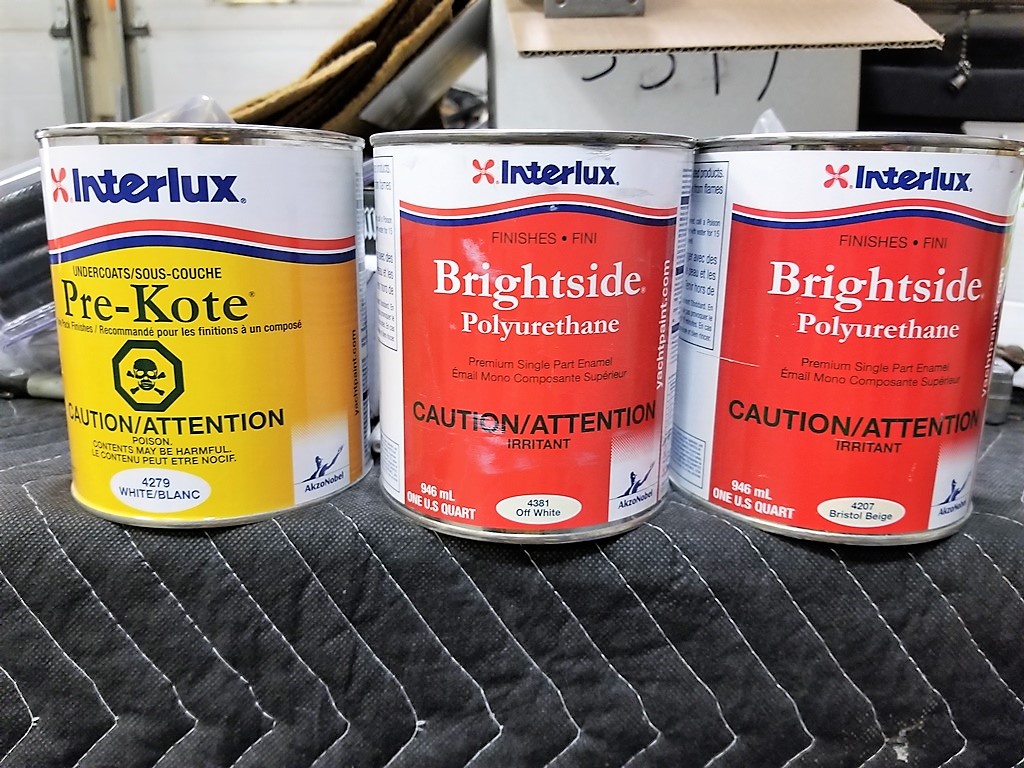
I have chosen to go with paint that I’m very familiar with. Paint that works good on fiberglass.. I can roll it or brush it and it’s very glossy.
Yes it’s boat paint! How fitting for the boler. A few years back I chose this paint for the Bazooo 6×6 . Because the body was fiberglass. This time I have the sand-able primer too..
And here’s the primer on. Took most of the quart.. so now I’ll have a good idea how much two finish coats will take. This primer is great at covering everything. I found a few holes I missed ..so I’ll fill those and touch up the primer. Needs 24 hours drying time and then a fine sanding.
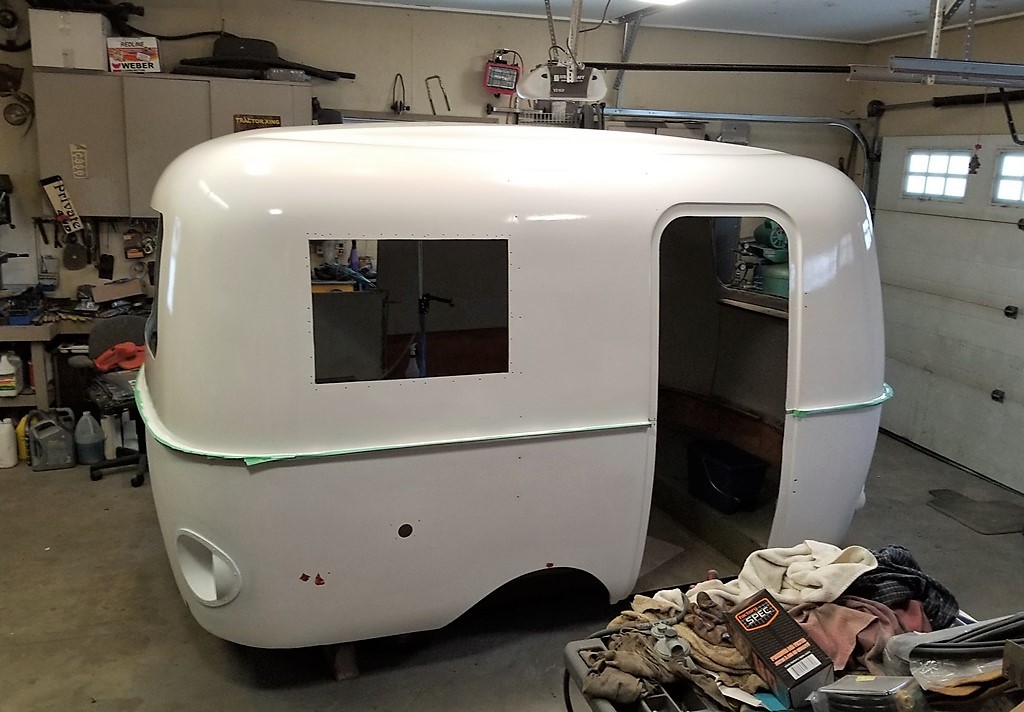
The front of the trailer looks like new ! Tomorrow I’m going to apply the first coat on the top half.. Off white.
Very little difference in the off white from the pure white. And that’s good.. cause I want it to still look white. And shiny too ! Tonight I’ll put the first coat of beige on the bottom.
But there was a debate for the bottom color.. I was favoring blue… but the person who will use the boler liked the beige. She wins and now I like it too.
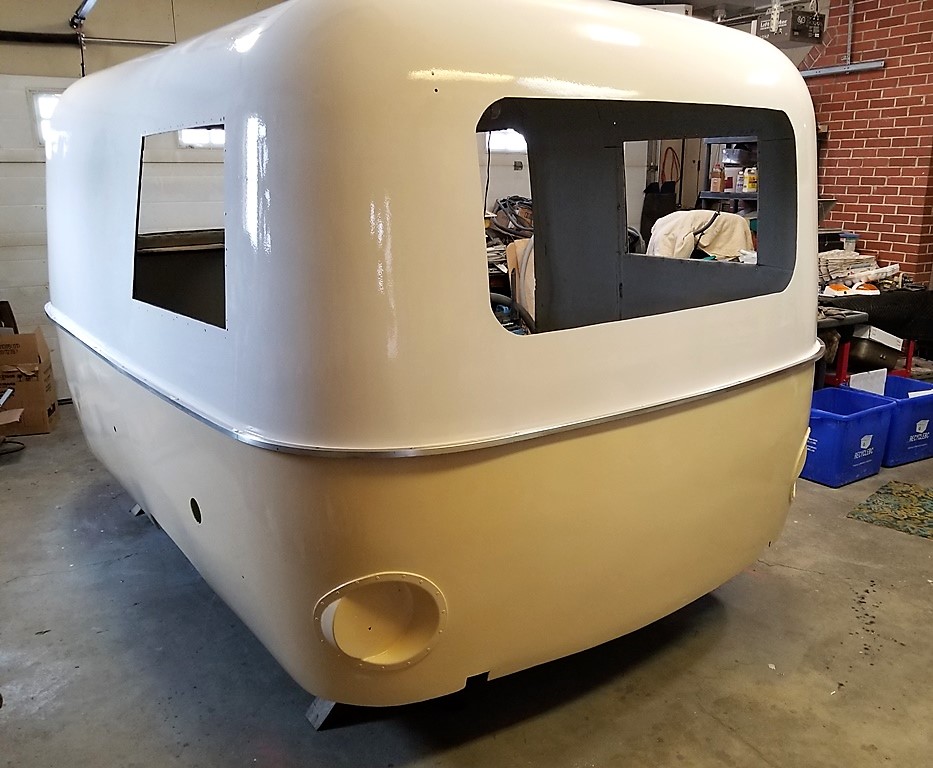
Ya. it’s kinda retro looking.. And classy too.
Soon I will have the second coat on the bottom.. then I’ll bring the door inside and paint it.
And while the paint cures…. I’m thinking of the lighting… Ya the electrical will be covered in a new posting ..further along. But I have finally collected all the lights.
Ta Da.. All are LED’s ! and things of beauty.. Those 7 ” tail lights are hard to come by. The interior lights all have the switches on them.. We all know that LED’s in your home save money… in a RV they save your battery. Back to the paint thing….
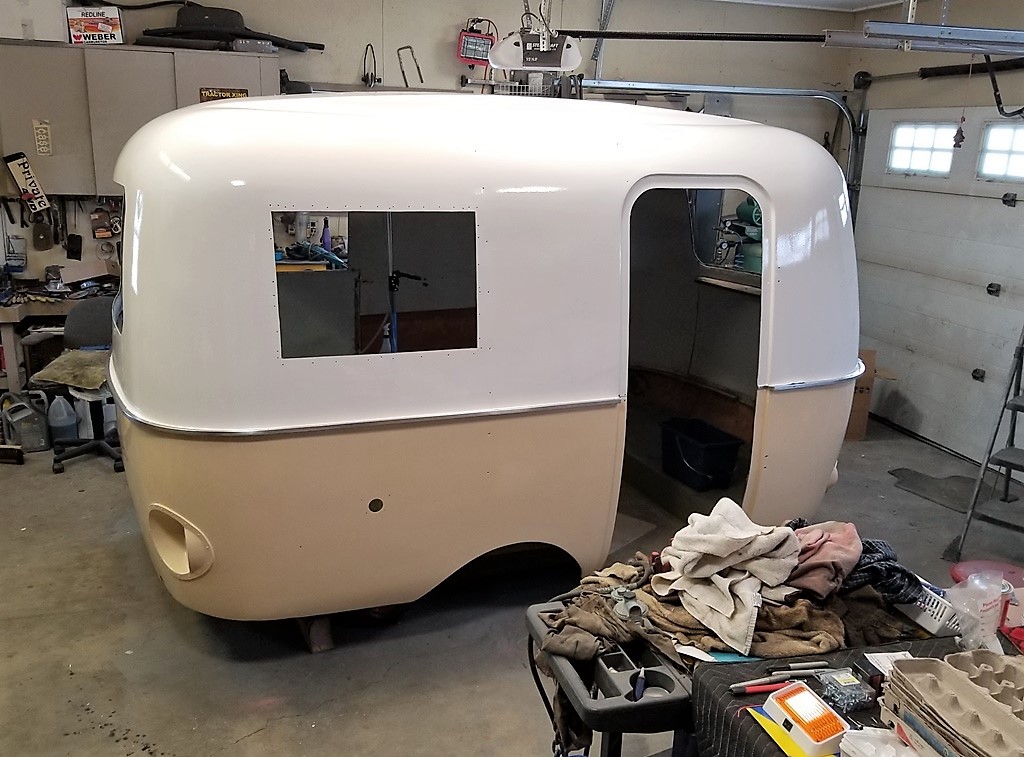
I’ve actually got the painting on the body done before new years. And I’m super pleased with how it turned out. I went back to using a foam roller for the last coat of Beige bottom paint.. And wow nice and smooth. I’ll buy more foam rollers for the cabinets. The door is primed and ready for the off white.
And here is the second coat of finish on the inside of the door. Looks like it just came from the factory. Once this is done both sides then I plan to install the roof vent and the door.. and wheel the body outside ..still on the dolly. This will make room in the shop for the interior parts to be repaired and painted.
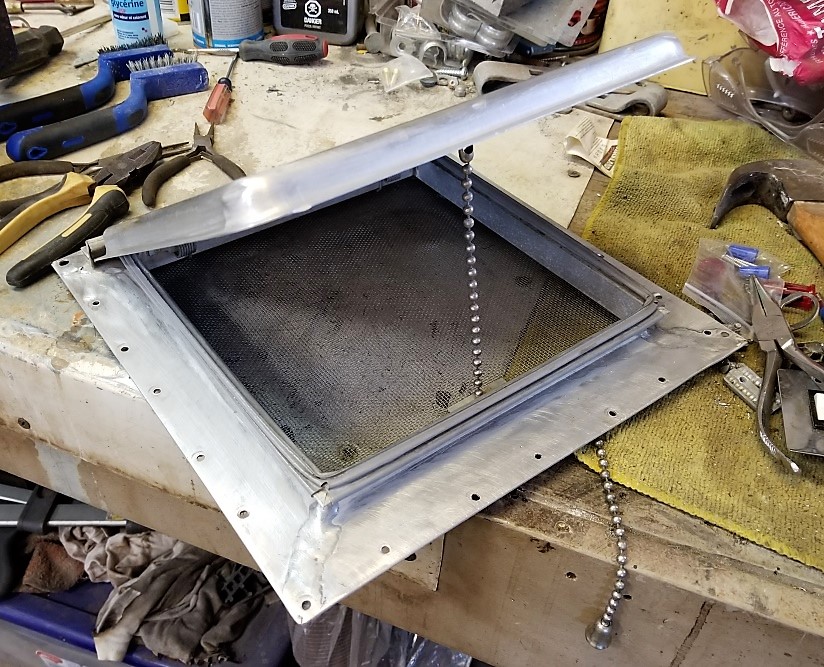
Here’s the vent all cleaned up and ready to install. PROPERLY with butyl tape.. not silicone. And no rivets.. I’ll be using Stainless Steel screws.
Change of plans.. I now have Dave here to help with attaching things. Need a person on the inside and on the outside. So I would like to finish to the point where the body is sealed ( won’t leak ) and put it back on the frame too.. Because when it goes out it’s gonna get cold.. So the boler will be complete except for the interior cabinets. And for this next step I will start a new page..
Here’s the post for that stuff.. My mind just goes crazy with what I can do.. And aside from replacing the missing cabinets, There is way more I’m thinking about.. Everything from adding lights and vents.. to redecorating the kitchen ! I could turn this camper into a very nice place to spend time..
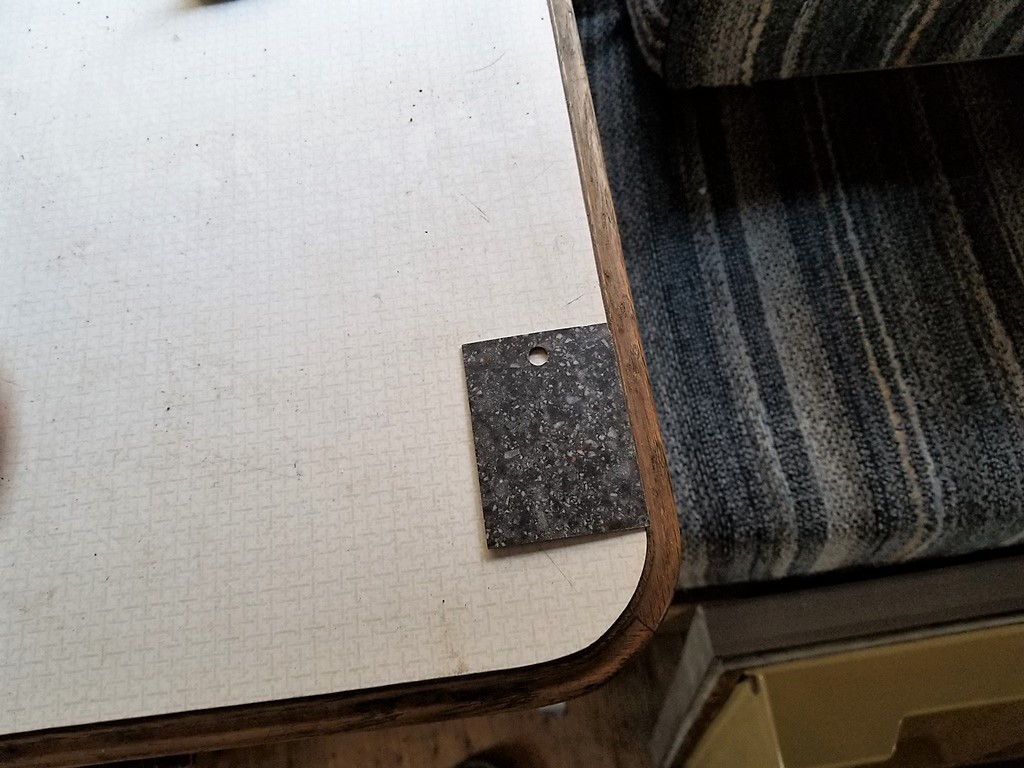
I was at the building supply store getting a tarp.. While there I had a look at the formica laminate samples. So let’s start with some décor ideas shall we. Brought a bunch home and looked at them with a door, a cushion and piece of paneling. And these samples jumped out..
And this photo is not a good one for the true colors. So I went out to the camper to look again..
I put the laminate sample on the table .. and .. wow.. yes that works.. WAY classier than the white. And the same goes for the kitchen counter top.. And that little swatch of yellow.. It’s a close match for the Harvest gold sink and stove that will go in the boler. When I see it next to the oak cabinets and the new counter top I like it a lot.. That’s a solution to the partially painted walls in the kitchen..
Yes ! it is. I’m thinking this color is perfect for all the walls and the cupboard fronts in the kitchen.. only.. maybe. Plans change. But I got a liter of the paint to try on one of the boler cabinet doors..
This larger sample gives a better idea of the look. It’s a very nice “earthy” warm yellow. The black & stainless steel appliances will look good. I need to find some lino for the floor that is light color and ties it all in.
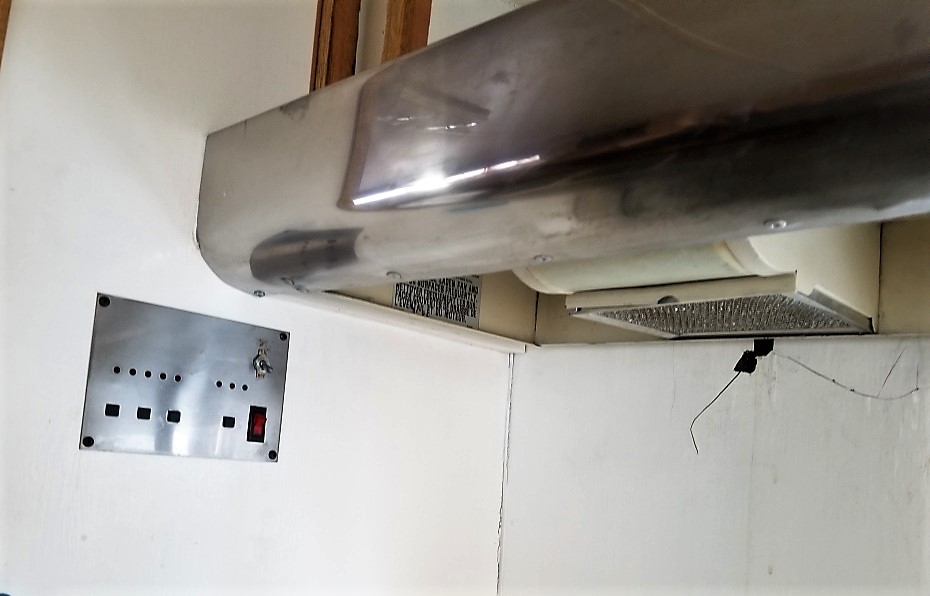
Now for some changes… Functional changes. The Hood over the stove.. looks like this..
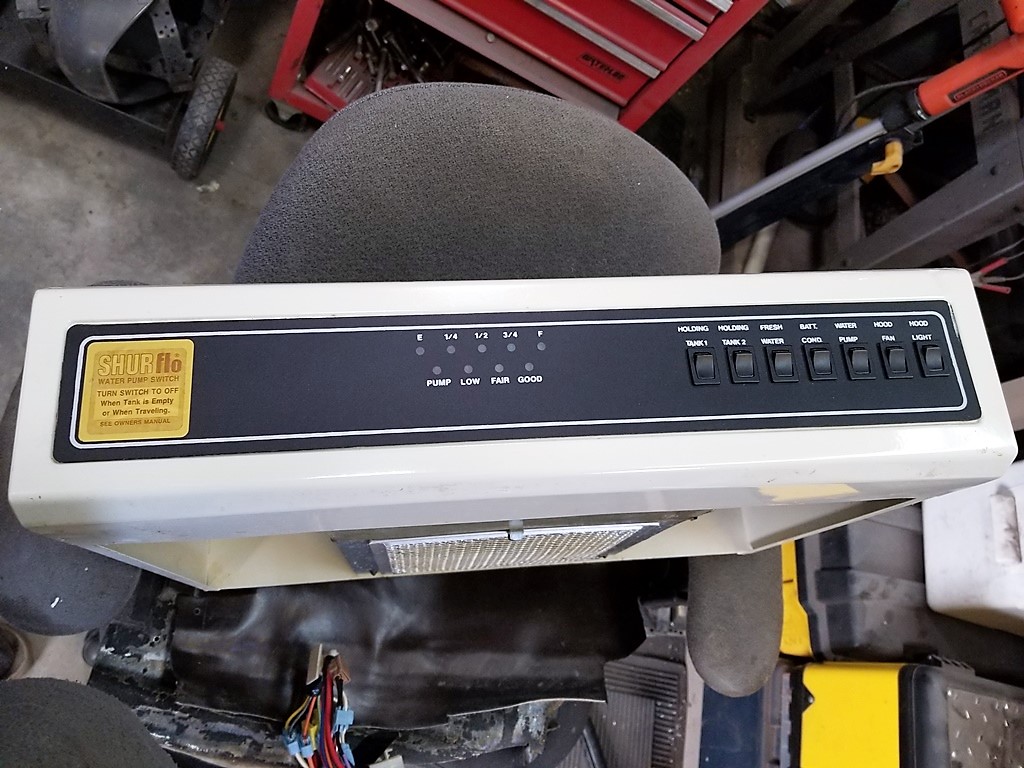
Someone wrapped the front in polished aluminum.. ok.. I get it .. but moving the switches over to the monitor panel..? And using the water pump switch as one of them.. naw. not for me. And! do you notice something missing from the monitor panel ? YA all the labels telling you what is what.. Soooo I’m changing the whole shaboo.. for the hood from Dave’s old wrecked Award trailer.. It’s got the monitor panel and clearly marked switches right up front..
Nice eh ! There is however too many lights and switches.. I’m not sure yet if the camper has two holding tanks or one.. and the fresh water tank I’m getting from Dave has no level sensors on it.. That could be fixed if I can find a source for them. And the battery level ? With only three lights ! Well you all should know by now that I prefer the digital one. I’ll do a bit of modifying to suit my needs . And paint it black too.. All appliances will be black. I’m thinking of swapping out the range for the one from Dave’s Award parts trailer.. It’s a newer stove with a piezo lighter and it’s a nice black finish too. With a stainless cover for the burners. Nice! I had a look in the dump valve box .. found a few things I thought were missing.. and could plainly see that this camper has a grey tank and a black tank.. So the monitor panel makes sense now. I will just need to figure out which wires read which level. The Bigfoot was moved to storage at a friends place for the summer.. His place flooded this year .. and the river was about 6 inches up the belly of the camper… So some water got in the door.. It seems ok though.. other than some silt nothing bad happened.
Sept 2018
It was time to bring the Bigfoot home for the winter.. The nice stands were available now that the Frontier was on the trailer.
I gave it a bath …and it’s looking great. This is a good place for it to spend the winter.. and in the spring this is a good place to work on it too.
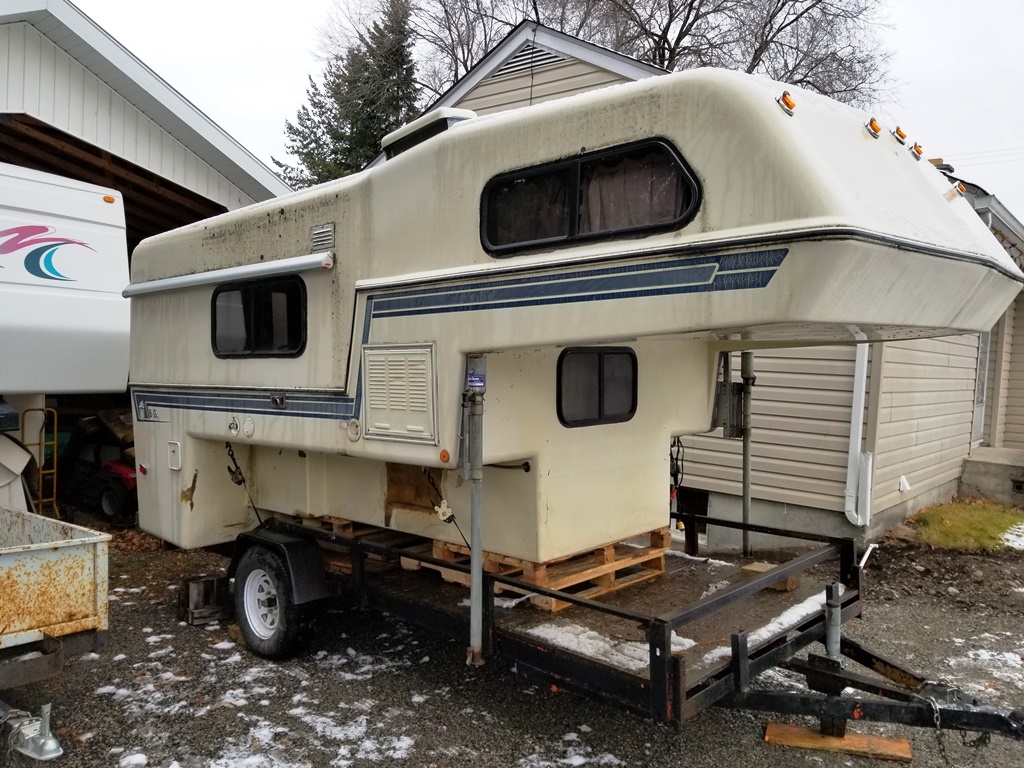
Yup.. I couldn’t resist.. it’s just the way I am.. But I’m a bit fussy as to what I take home. These are some of the most desirable truck camper out there.. And still being made.. Here in the Okanagan. Two piece fiberglass construction. They are not prone to leaks.. or rot like the wood frame ones. Plus they are better in the cold weather. Because if this they hold their value. So when I was offered one (that needs some love) at a low price that allows for money to be spent ..I jumped on it..
The truck it was sitting on got sold early this fall.. so there it sat on the jacks. This is the same place the bolercame from.. But doesn’t need the same amount of work.. It’s just the interior that needs help.. Exterior just needs a bath.
Yes I now have 2 Campers !
The Frontier camper is almost ready to go use.. very little work needed. This however is a bit more of a project.. And it’s not just a good cleaning. So next spring we will use the Frontier and enjoy it. When I get this camper all done we may want to use it instead and sell the Frontier. We’ll see.
For now I brought it home and we will keep it on the trailer for the winter. This is a big camper.. 11 1/2 ft ! and heavy. Still no problem for my truck. Bigger means it’s roomier inside.. a full bath with shower.. large dinette. and a good size kitchen. The bed is a full queen too. There’s an awning on the side.. Frontier has one too.. Basically this camper has all the stuff you would expect to have in any RV. All nestled on the back of my truck. Turns the truck into a small motor home.
The good …the bad.. and the work.
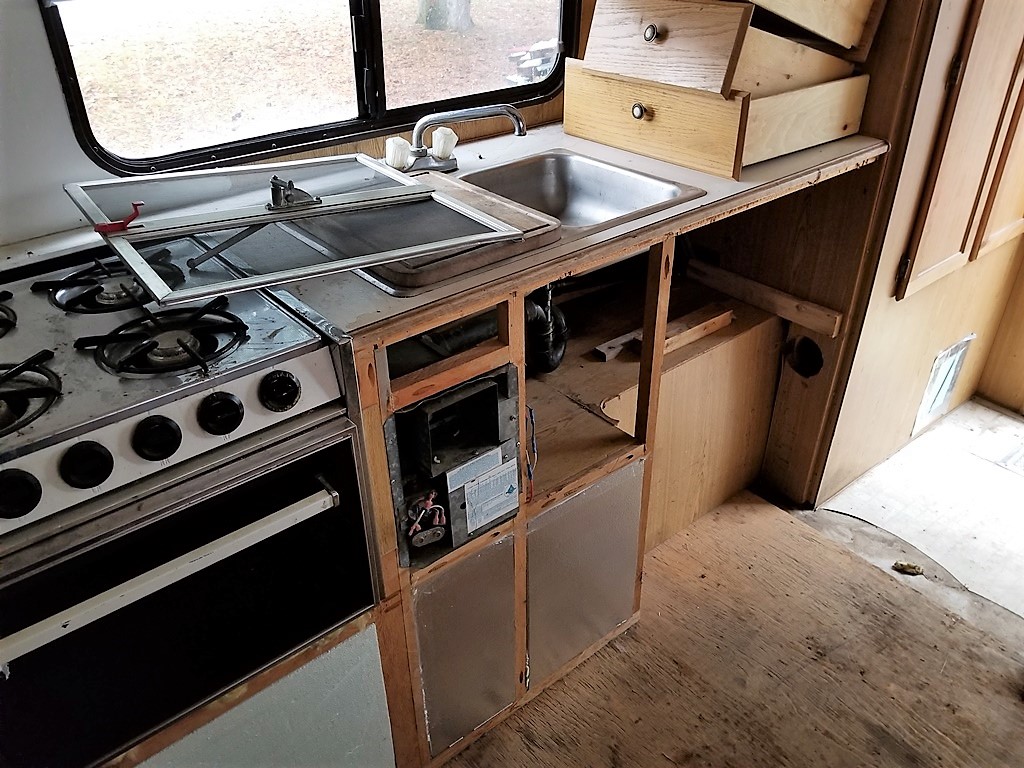
I made this comparison photo.. to show how messed up the interior is
Yup.. it looks bad for me .. but I’m not afraid of a bit of wood work. The table and the cushions are there.. and in very good condition.. I’m actually able to tweak things a bit.. But I like the way it’s laid out and will copy it closely. Same with the kitchen cupboards..
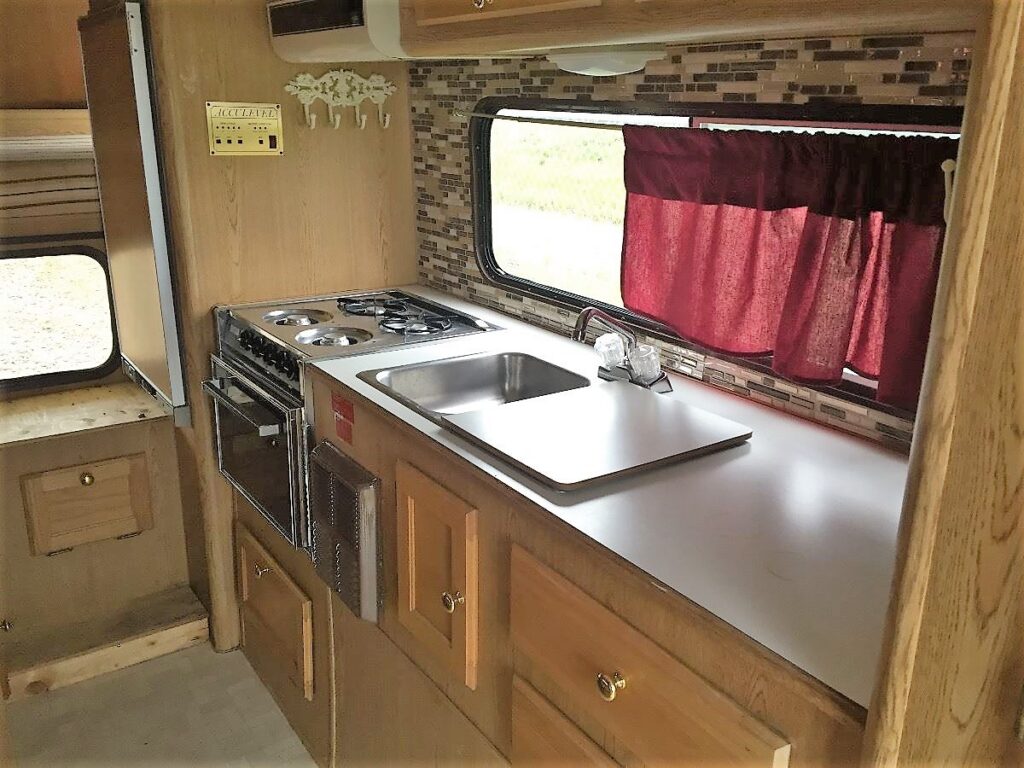
There’s a bit missing here too.. Again I do see this as an opportunity to change the counter top.. and add a cupboard to the bottom. Because some of the paneling is missing.. I’m tempted to do a bit of painting .. Also the floor has been added to for more stiffness.. so new flooring is in order too. I could make this camper real classy.. Here’s a photo from the web of what the kitchen looked like from the factory with just a few personal touches.
They did a nice back splash ! Let’s see how I do.. So many possibilities.. It’s going to be nice to do this kind of work.. no wheels , no motors..
And what about the LOU ?
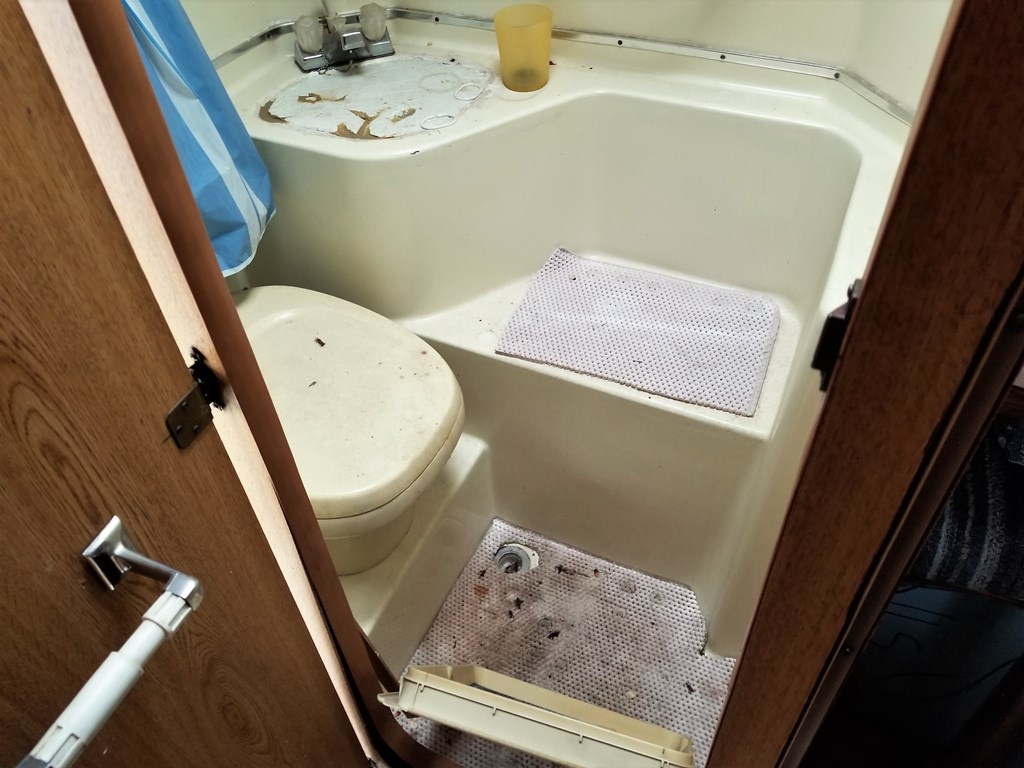
It’s called a wet bath. And needs a good cleaning.. but not much else. so long as everything works. However look at the sink.. it’s hiding under a piece of foam? Not for long. I’m sure there are some repairs needed here and there.. I’m making a list of parts needed. It’s just things like drawer slides.. better ones. New LED lights, I’m going to replace both faucets as well..
It’s called a wet bath. And needs a good cleaning.. but not much else. so long as everything works. However look at the sink.. it’s hiding under a piece of foam? Not for long. I’m sure there are some repairs needed here and there.. I’m making a list of parts needed. It’s just things like drawer slides.. better ones. New LED lights, I’m going to replace both faucets as well..
Venting.. It’s a problem with the older Bigfoot’s. Of coarse the windows open.. but you can’t leave them open cause rain can get in. The only roof vents are the bathroom one and the escape one over the bed. Again you can’t leave them open. The bath one is inside that tiny room anyway. So I will need to install a roof vent in the middle that will have a vent cover. I’m thinking of building a winter cover for use on the escape hatch.. so it too could be left open without worry.
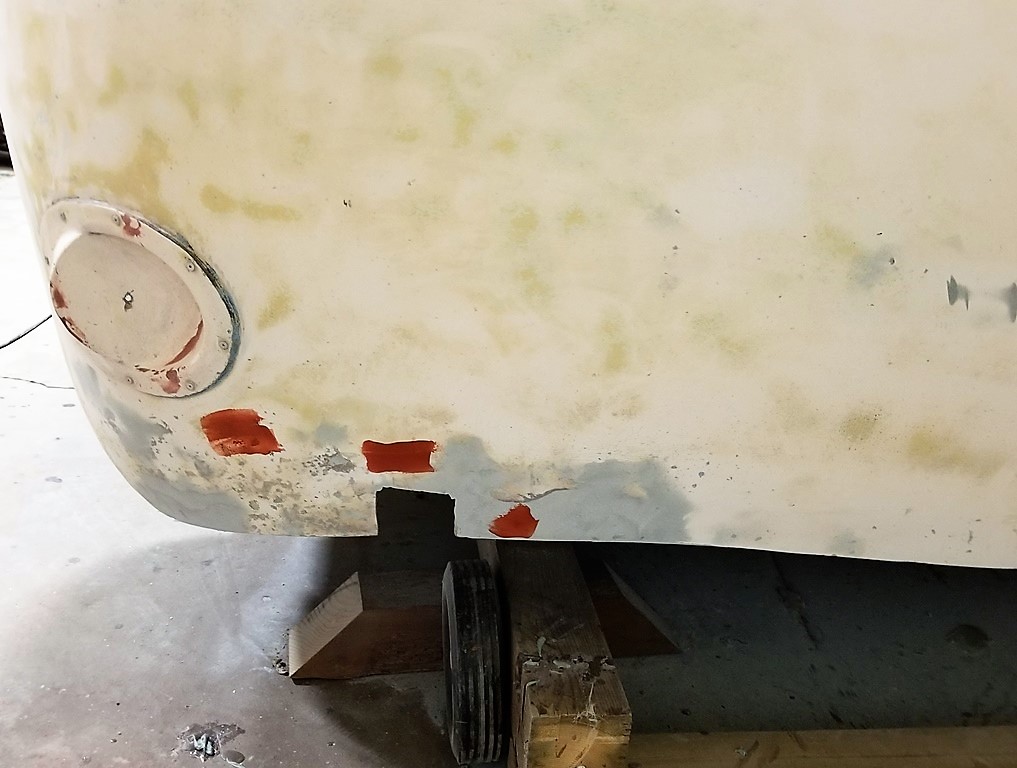
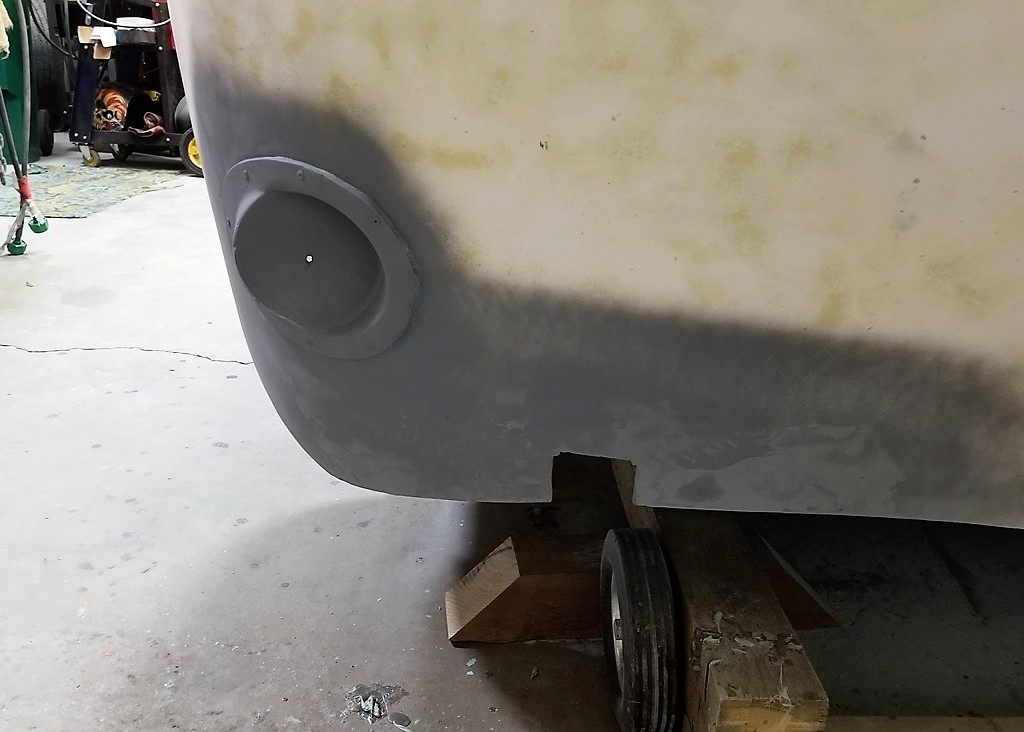
Leaks ! I found two leaks.. One is where the awning is bolted to the side of the camper.. A little bit of water from the snow melting on the roof is running down the side and finding it’s way inside. The other was dampness on the top of the propane cabinet.. I could see that the caulking outside on the top of the door was pulled away from the wall.. I fixed that. Now let’s not be too worried about these leaks.. because there is no framing in the walls.. just foam and the fiberglass shell.. but it does effect the wall finish.. So.. I’m going to have to tarp the camper for the winter.. And we are going to put an electric heater inside to help dry things out..
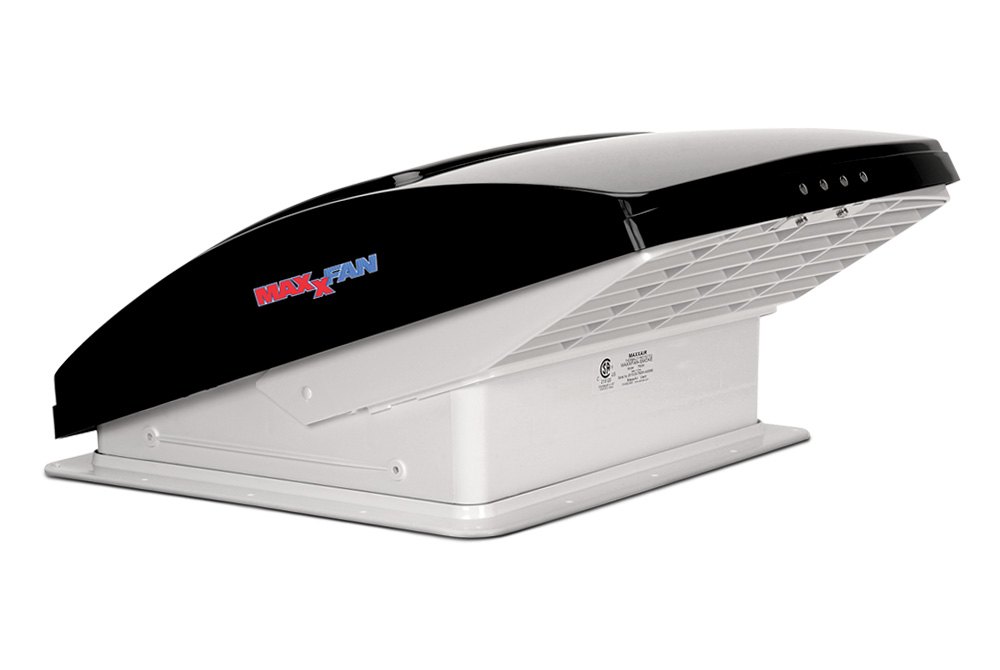
I have chosen a power vent to install on the Bigfoot. and included it in a rather large RV parts order..
This is a new product and it has great reviews. It has it’s own rain cover ! so you don’t need to buy a separate cover. A 4 speed fan that only vents.. but that’s ok.. it’s all that is needed.. and the price is great too. I also was thinking of how to keep the water off the windows.. These campers don’t have gutters.. the water or melting snow .. just runs off where ever.. cause the roof is curved. They make drip guards for doors.. and you can buy them in any length. So why not install them over the windows ? Yes!
And I thought perhaps it’s time to make a video….
Today I also when to my friend Dave’s RV graveyard.. to see what could be used for the Bigfoot.. Lots of great stuff.. Some of the cupboard doors, paneling.. and the hood vent ..
I’m now going to tarp the Bigfoot for the winter.. and not venture out there much.. I said that about the Frontier camper too… but could not help myself.. I was in there lots thinking about what I’m going to do. So I’m sure the same will apply to the Bigfoot.. Yup I’m very sure. And on that note it’s time to start a new page / post for all my ideas.. fixing , changing, and even the décor..
These are (interesting to me) rare things that I have found :
Some I have fixed up and passed on .. and a few I still have stored. Now someone may argue that some of these things are not really that rare . But if it’s uncommon for the average Joe to own them.. So here I is list them. I’m going to start with the tractors / mowers .. these were my hobby for a long time. Many of these were documented in my old blog. But now I’ve lost that because I wasn’t using it enough when I got my own domain with a new blog.. The one you are reading now.
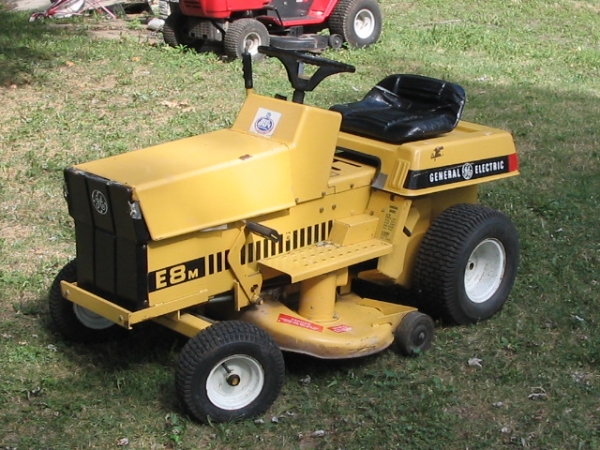
This is a GE electric lawn tractor.. I went almost to Edmonton to get this from a farmer.. I never got it running and flipped it for more dollars.. to a collector of these rare tractors.. yes they are hard to find.
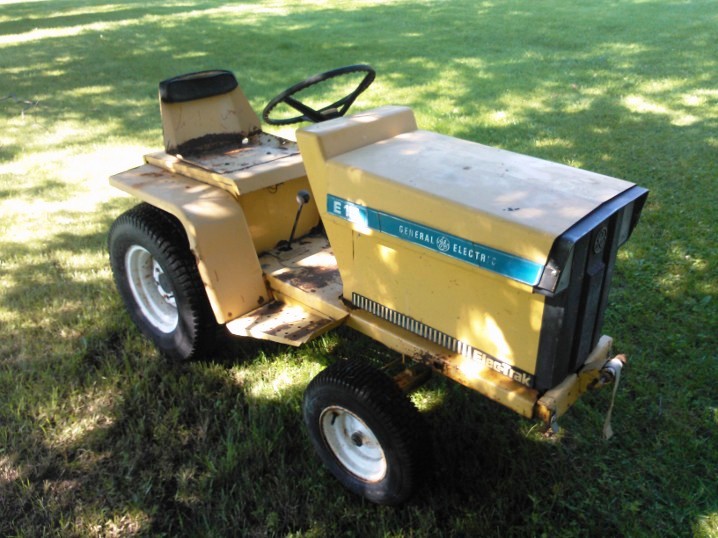
Here’s it’s big brother ( bigger motor) no mower deck, that was lost.. I found this one locally.. And I still have it .. Very rare.
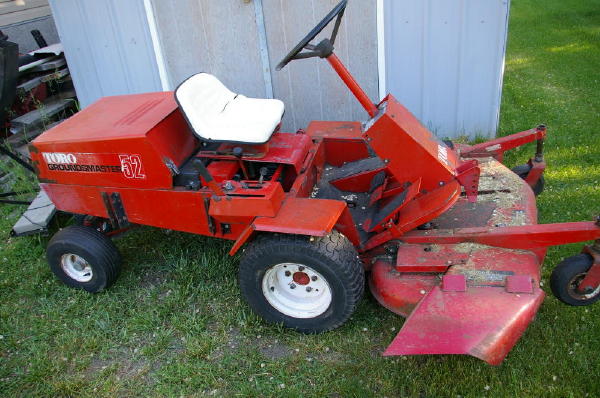
This is a Toro Groundsmaster.. A very serious mower.. with a large deck.. I had two ! and I still have the parts one waiting for me under a tarp.. needs a lot of work.. maybe not very rare but still hard to find..
Oh yes.. a very rare Struck mini dozer.. So cool.. got it running great. works just like a big one.. but the size of a lawn mower. 8 hp. I found this way up Kootenay Lake.. sold it.. I have a video
Rv’s that are unique.. and a bit on the rare side..
My 1977 classic GMC motorhome. Hard to find a good one in Canada.. I used it two seasons and sold it for a profit.. they gain in value if you keep them nice. I went back to pulling a trailer.
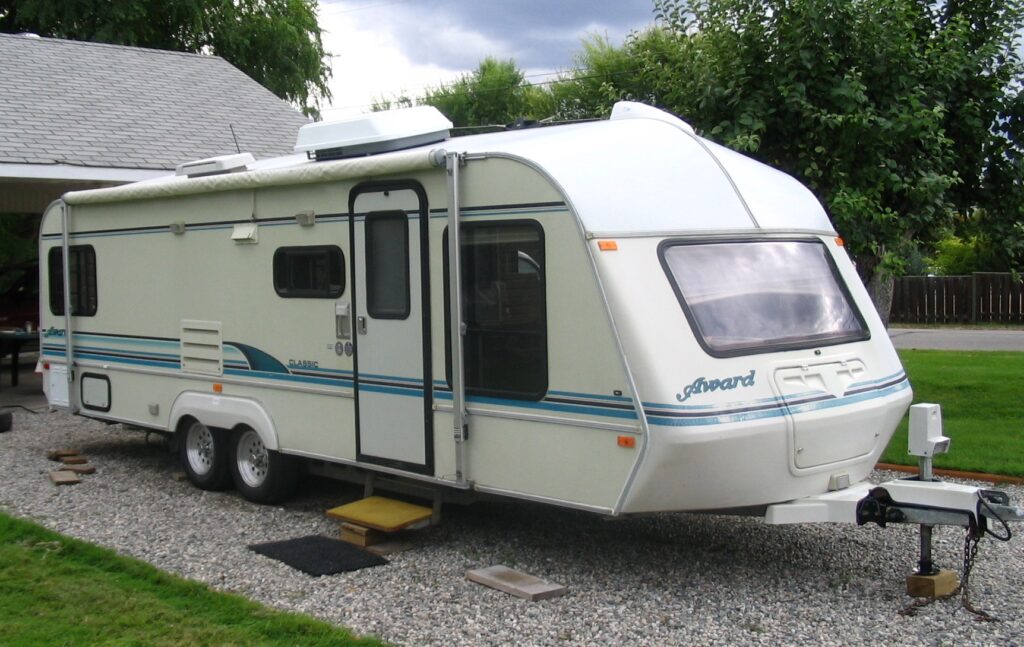
Our 94 Award 27 ft trailer.. Loved this trailer.. used it for many years.. but it started to have structure problems.. so we sold it cheap.
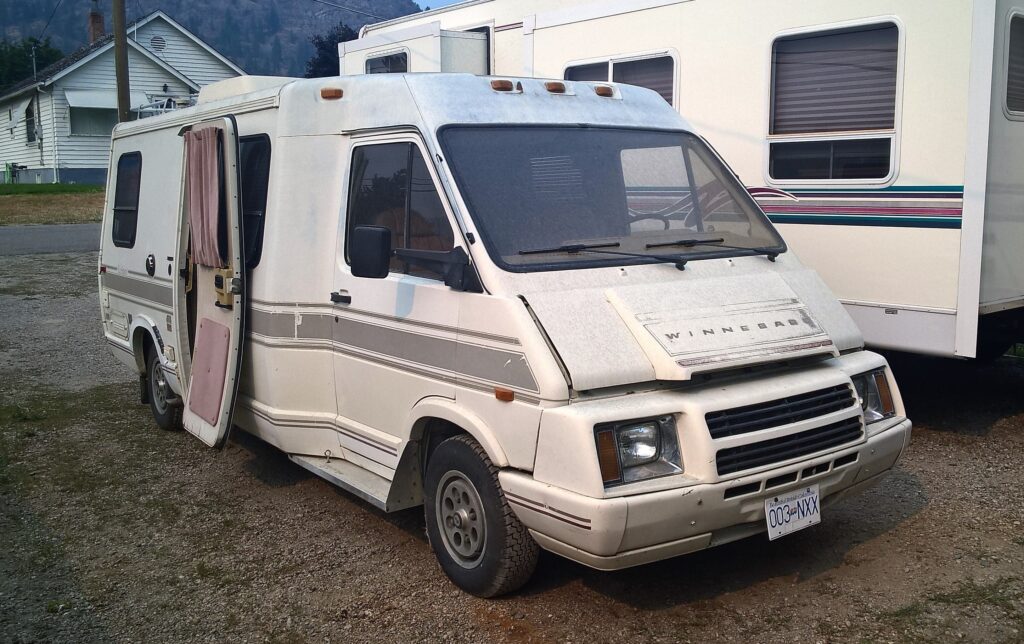
1986 Winnebago LeSharo motor home. Not very common.. cause they always broke down.. French motor ! I have replaced the motor in this one .. But it runs like crap. Sold it cheap as is… It’s story HERE
Let’s included the Boler Trailers !
# 1.. 1973 Boler.. Fully restored by me in the winter of 2017-18. Now lives in Edmonton. See the Blog post HERE
#2 1979 Acorn/Scamp, currently in the shop and having a new floor installed. I’ll update the photo when it’s done.. /you can see the blog post HERE
ATV’s.. These are fun projects..
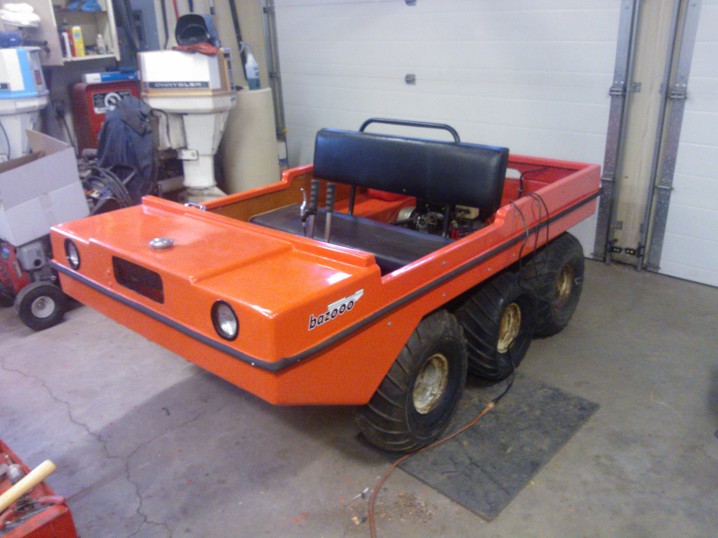
Early 1970’s 6×6 BAZOOO ! yes that’s correct spelling. I fully restored this one winter.. and It ran good.. But I just couldn’t see myself keeping it. I sold it to a collector of rare 6×6’s .. it now lives in a museum in Indiana. full story HERE
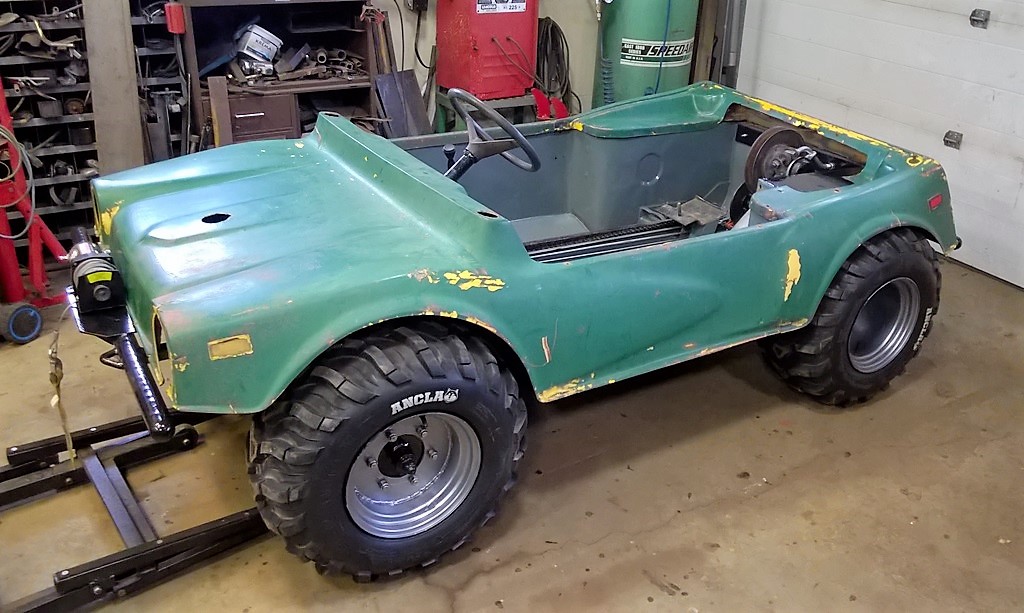
A rare 1974 Terra Jet. 4×4 amphibious ATV.. yup it floats ! It’s unfinished and stored for now.. I need to install a motor. and do the body work.. Full story HERE
Then there was a boat..
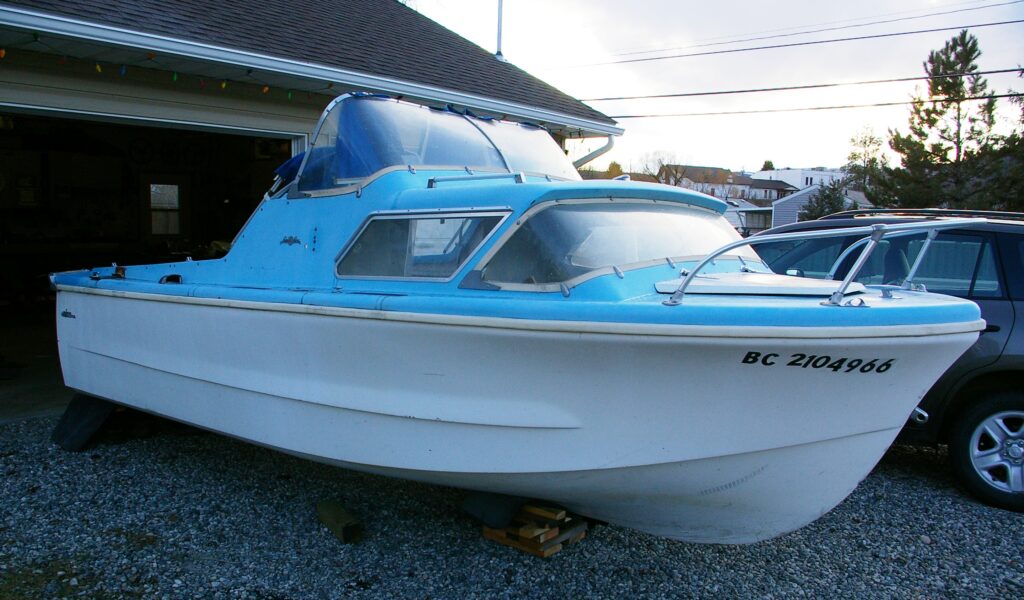
Very rare indeed.. 1959 Perfomer Seven Seas .. I got about half way done and decided I would never get to finishing it .. so I sold it to a fella who will.. I’m keeping in touch with hi, and hope to see how he does.. Full story HERE
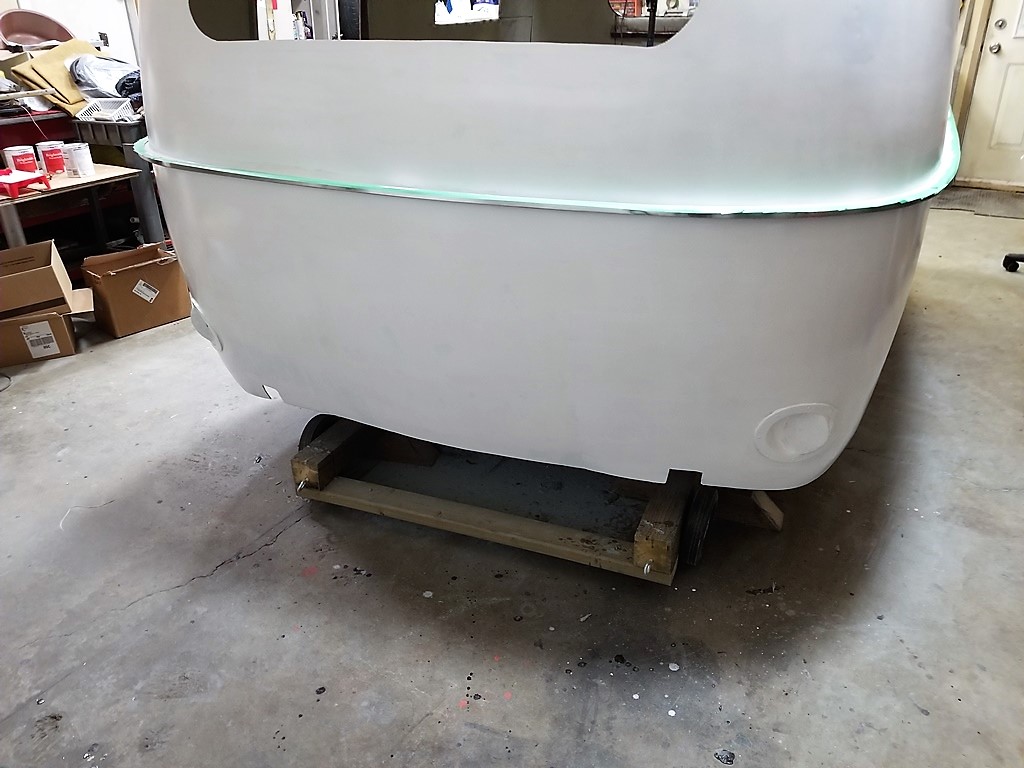
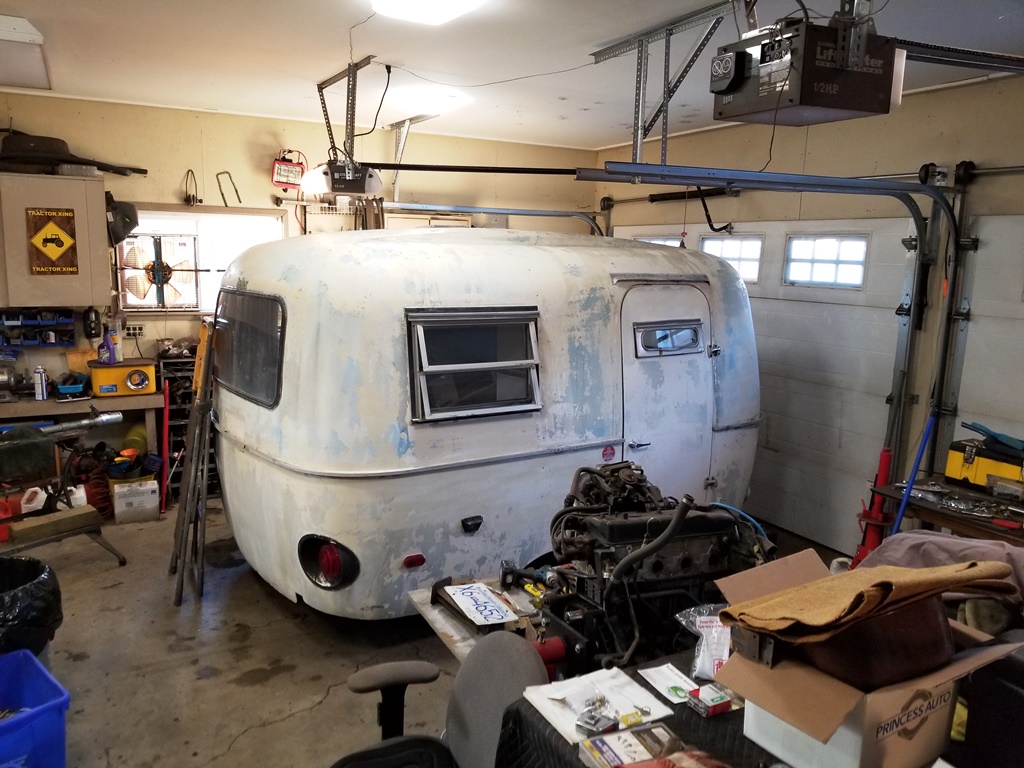
Here it is.. in the shop. The dolly I made worked great. Rolled right in.. Now we’ll let it thaw out a day or so.. It snowed and it’s cold out.
Naked Boler !
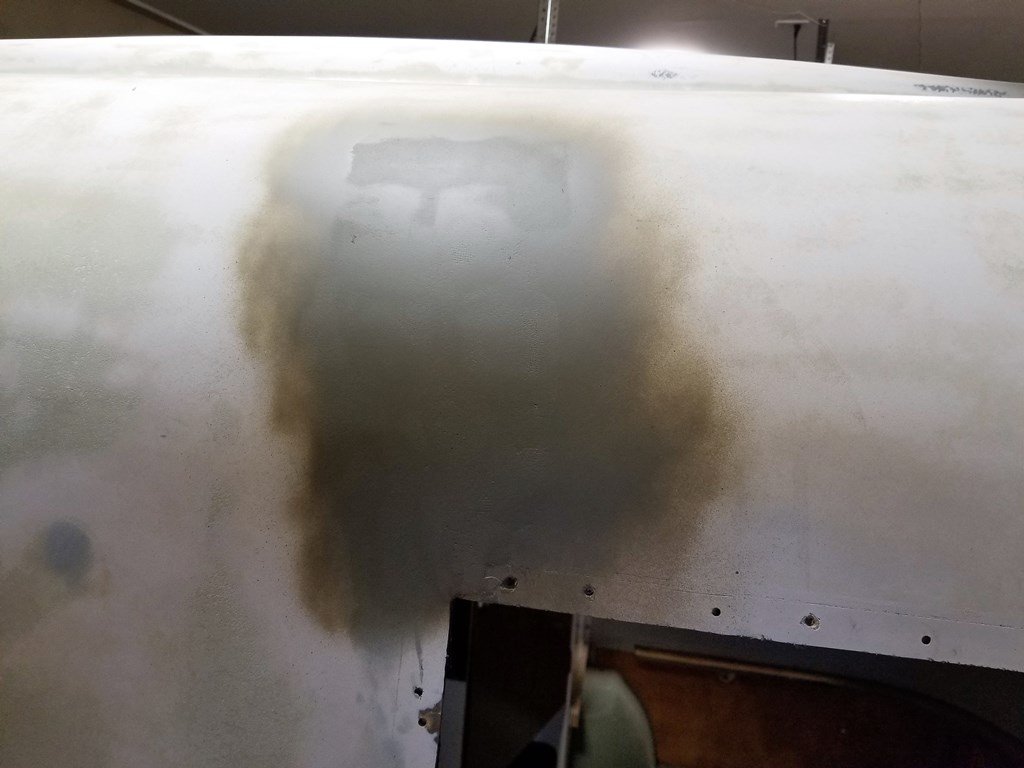
All the windows and lights.. and everything has been stripped off the body and now I’m sanding and repairing. I tried using paint stripper on the pool paint.. Nope not working.. the sander is the only way that crap is coming off. This is going to take a week or so.. I hooked the shop vac up to the sander ..so I’ll have less dust.
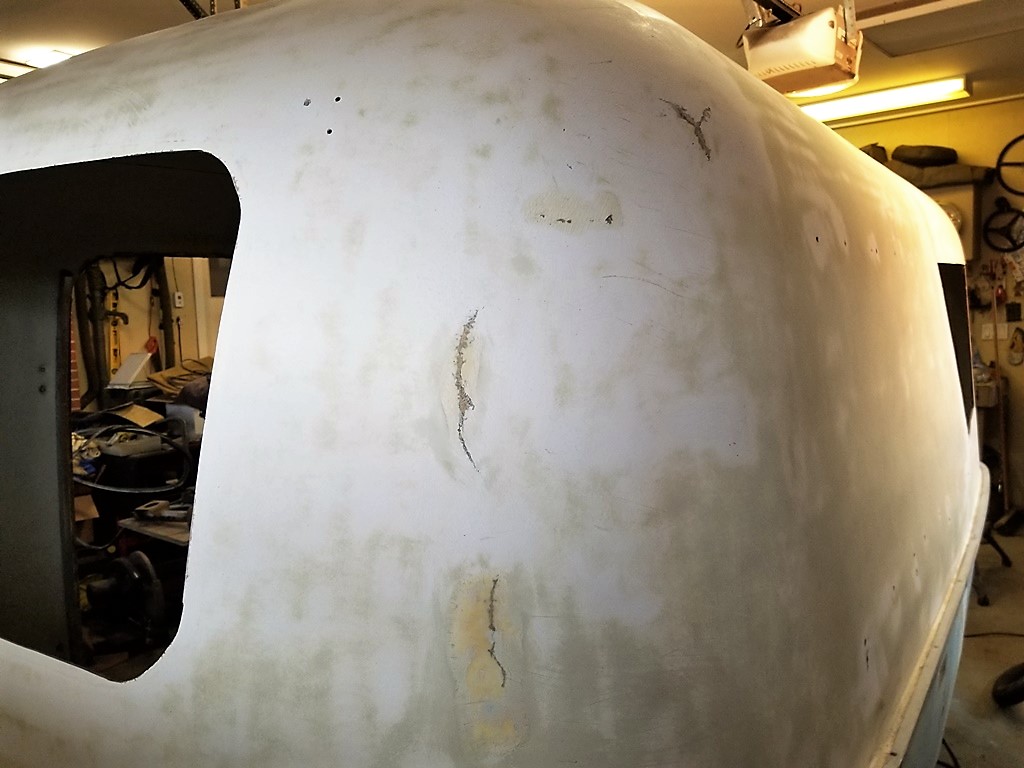
About half done now.. and found some more ouchies.. But there were fixed properly.
?
God only knows how you can do this to a nice little trailer.. but there you have it. There’s repaired damage to the left front lower corner too. Most likely a jack knife situation..
?
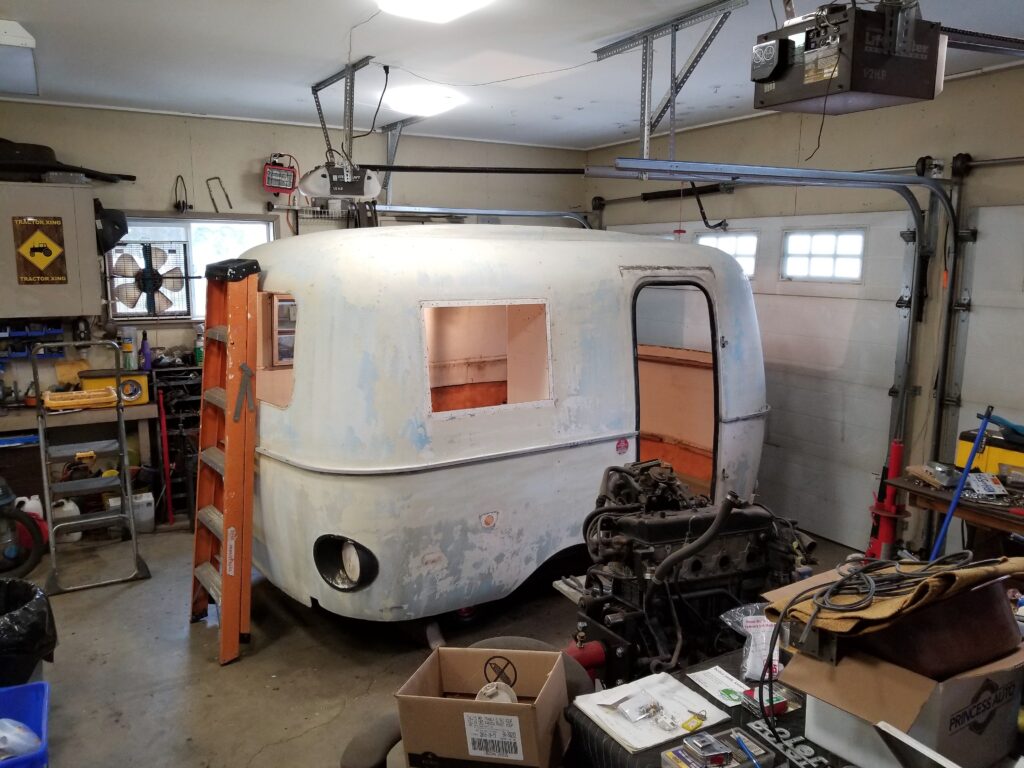
Here you can see the difference the sanding is making. I have finished sanding the top half of the body. I’m in the process of filling the unwanted holes and the repairs. Here’s a new video…
The crack repair turned out good.
?
I put a coat of primer on to make sure . It should never crack again. Because I will have the supports for the upper cabinet. Now to start the bottom half.. less fun cause it’s down low..
I started at the back.. and by fixing the bottom edge. It was jagged and uneven.. so I trimmed a bit off.. Looks good now.. This process needs to be done all around the bottom.. Plus! the paint was harder to remove on the bottom half. I’m using a big sander with 80 grit to get the pool paint off.. then finishing up with the small sander.. which I need to fix now.. I need a part so I’ll clean up and work on the door..
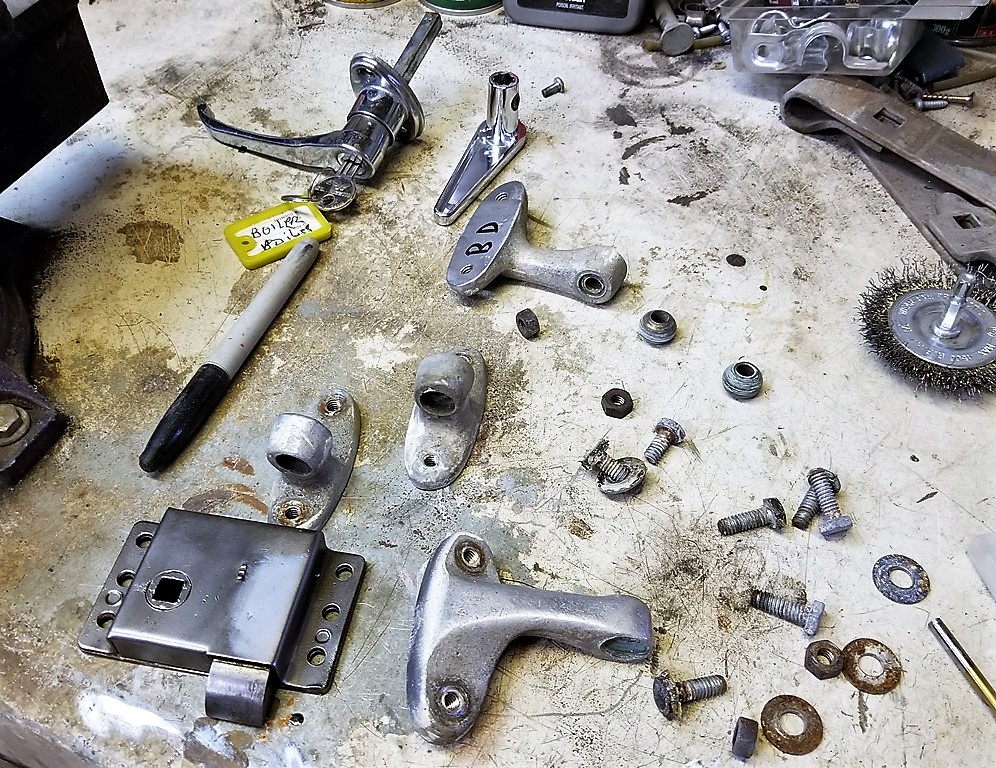
Here’s all the bits and pieces.. nothing to fix here. The door worked ok.. even locked. So just the hinge pins and the inside and outside handles are replaced. And as for the door !
There you go.. it’s in great condition.
Nov 19 2017
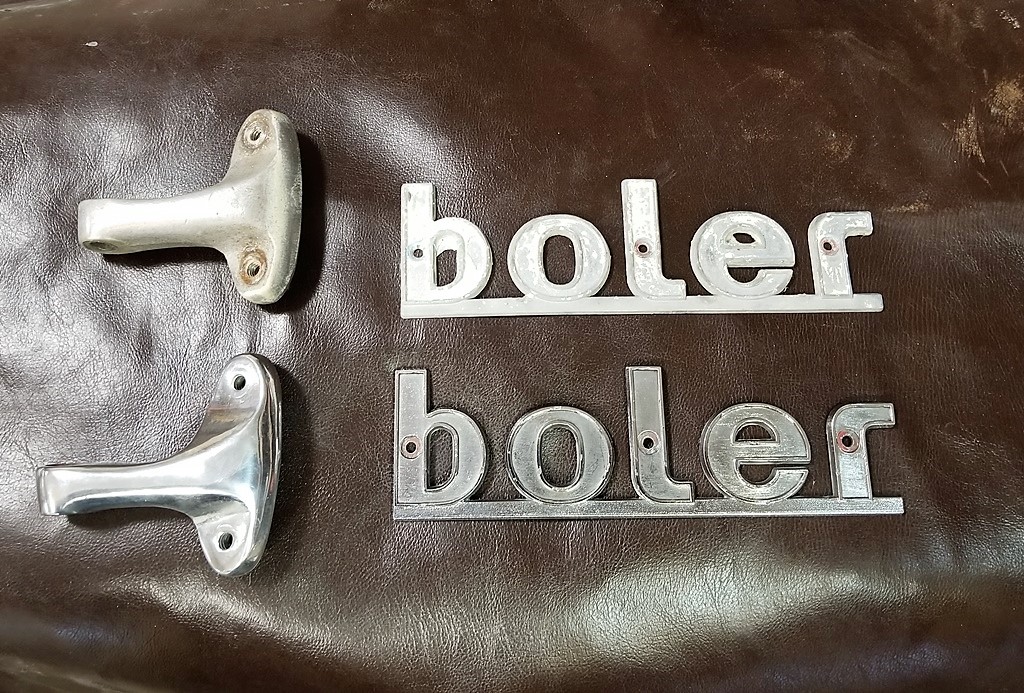
I had to go to Kelowna ..so I paid a visit to the fastener store and picked up the stainless steel bolts and screws I would need. I also picked up a metal polishing kit.. and couldn’t wait to try it out.
Wow.. with a bit of work I now have very shiny hinges. I did them all.. cause I can ! Here’s the latest video I made ..
Dec 10 th 2017:
Progress has been a bit slow as of late.. lots of distractions. Also sanding the hard pool paint off is an exercise in patience. I’m getting there but it’s going slow.. and some days I just don’t want to do it at all.. Today I’ll make a good effort. Determined to get the last of it off the bottom of the boler. Then there are a few holes to fill.. a final sanding and I can start with the painting.
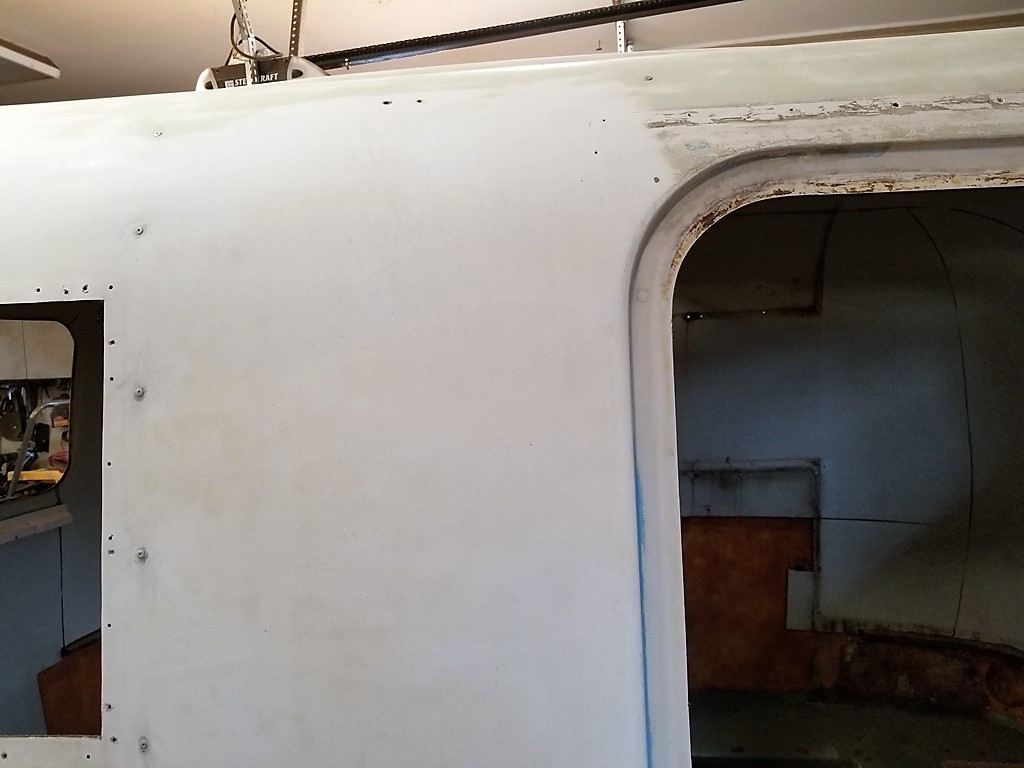
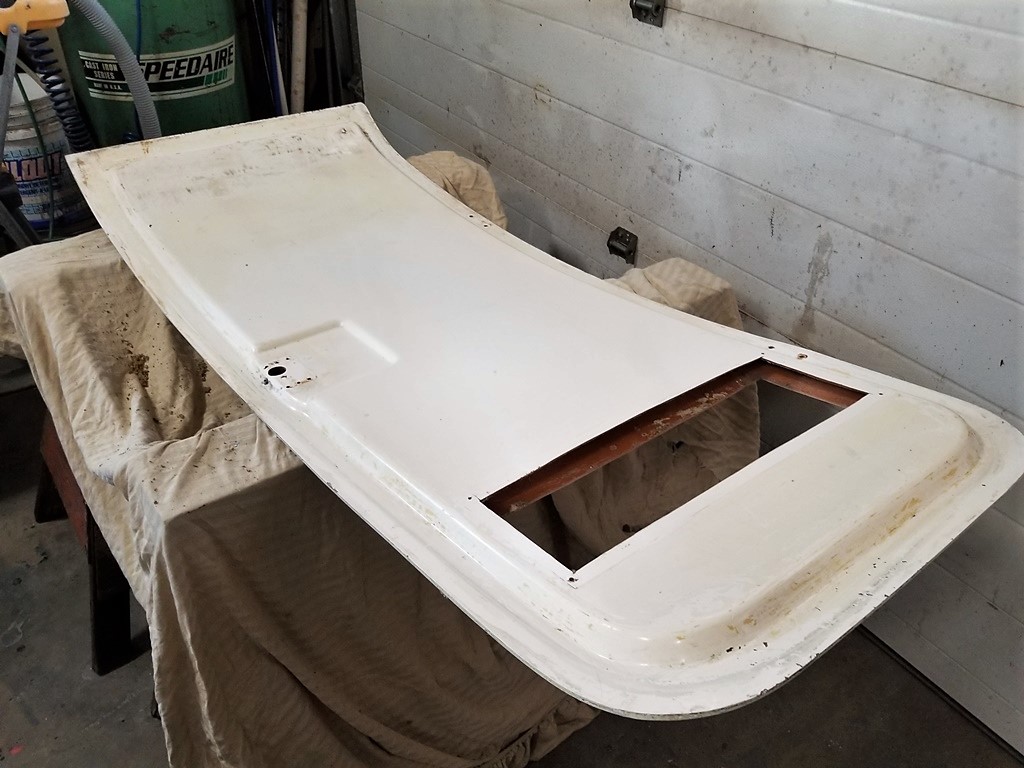
This is some of the work I’m doing on the front of the trailer. I had to reconstruct the opening for the frame. It was in the wrong place.. and I want the front to look proper.. no holes all over. There was also chunks missing out of the bottom.. So I’ve got that all rebuilt with layers of fiberglass.. and a bit of filler. Now the bottom edge of the trailer is uniform and smooth.
Here’s the same area with primer on it. I’m cleaning up the shop and the trailer to get ready for the painting.. I’ll start another post for the painting…


