Nov 4 2017
Made in Canada.. EH
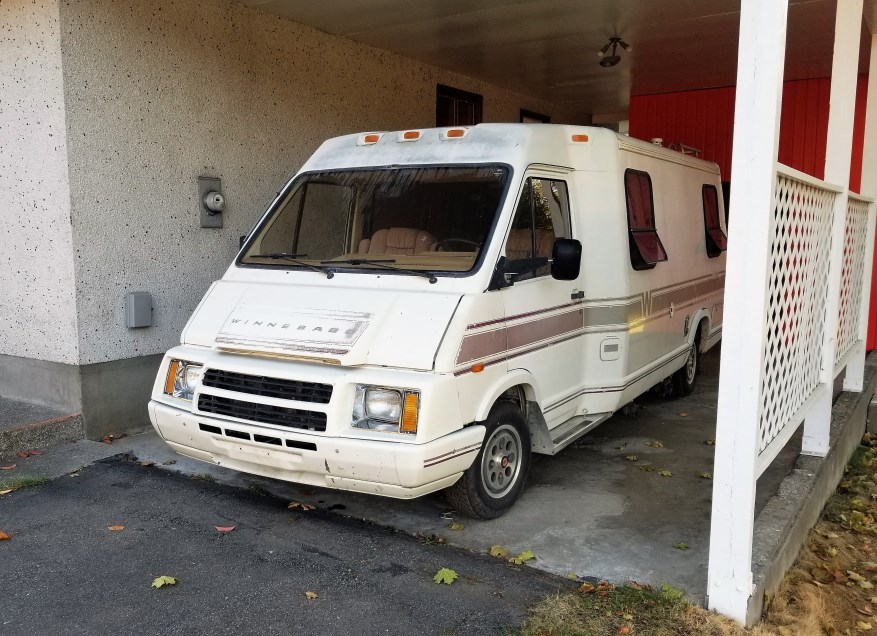
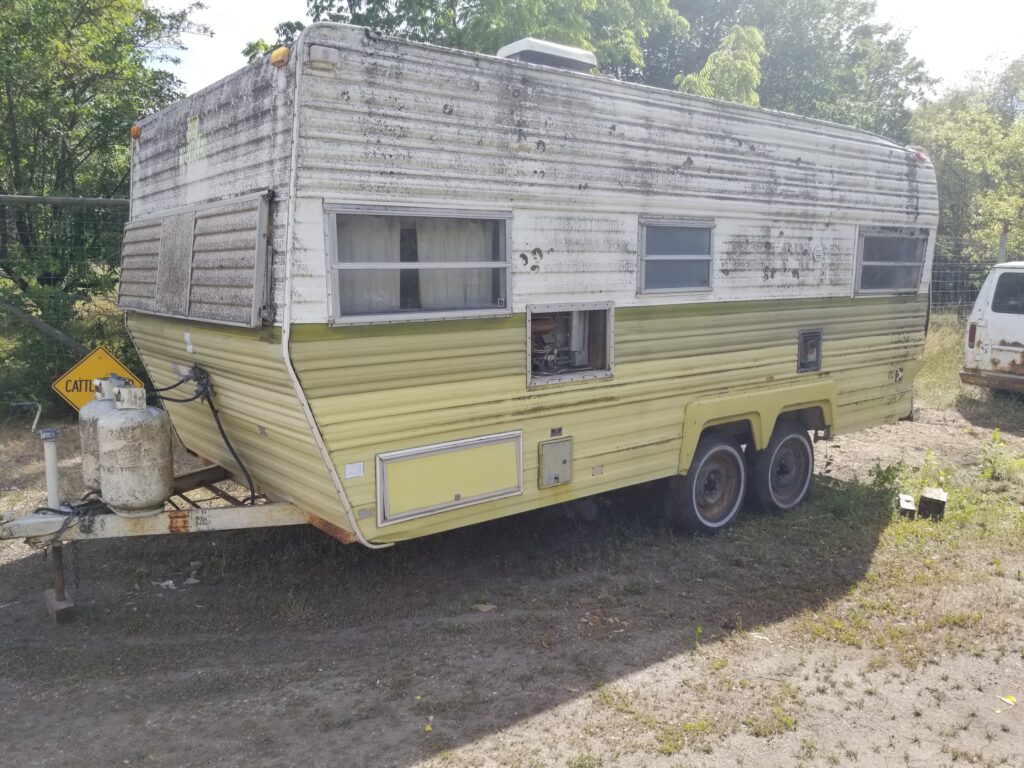
I was atending an estate sale at a rural property and just looking at stuff.. The camper in the shed caught my eye, and the wheels in my head were turning. I had thought about a camper when I was hunting with my friend Dave and his Brother this fall. Truck campers are better on the rough roads.. These are places I would never take our fifth wheel. And these are the roads that take you to some very beautiful camping spots. Free ones ! So the thought of having one just for those weekend getaways, camping / atving trips would be great.
Meanwhile back at the farm…..
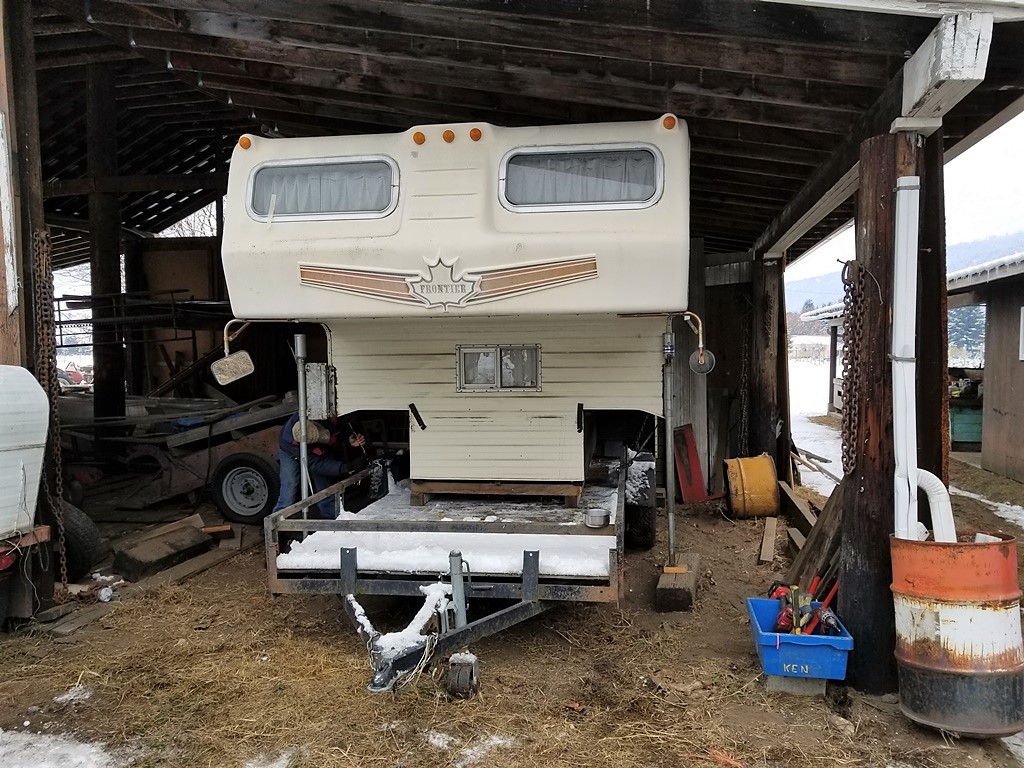
Hiding in the shed.. this camper has been kept dry and safe for many years. So I had a closer look.. And it was in great condition for it’s age. So I made a low offer and they said sure.. need it gone the property was sold and everything needed to go.. So now I own a camper ! While I was there a friend from the ATV club came and said ” that’s good deal” and I’ll help you get it out of there and home.. Little did he know how long that was going to take. Well it took five hours to load it up..
?
Because of the low roof.. and me not really wanting to take the canopy off the truck.. I went and got the “landscape” trailer. The deck was low so not much jacking / lifting needed. .. However we had to extend one jack out because the trailer is wider than a truck. Soooo like I said ..long time but I got it home before dark.
Look a new Scooby !
?
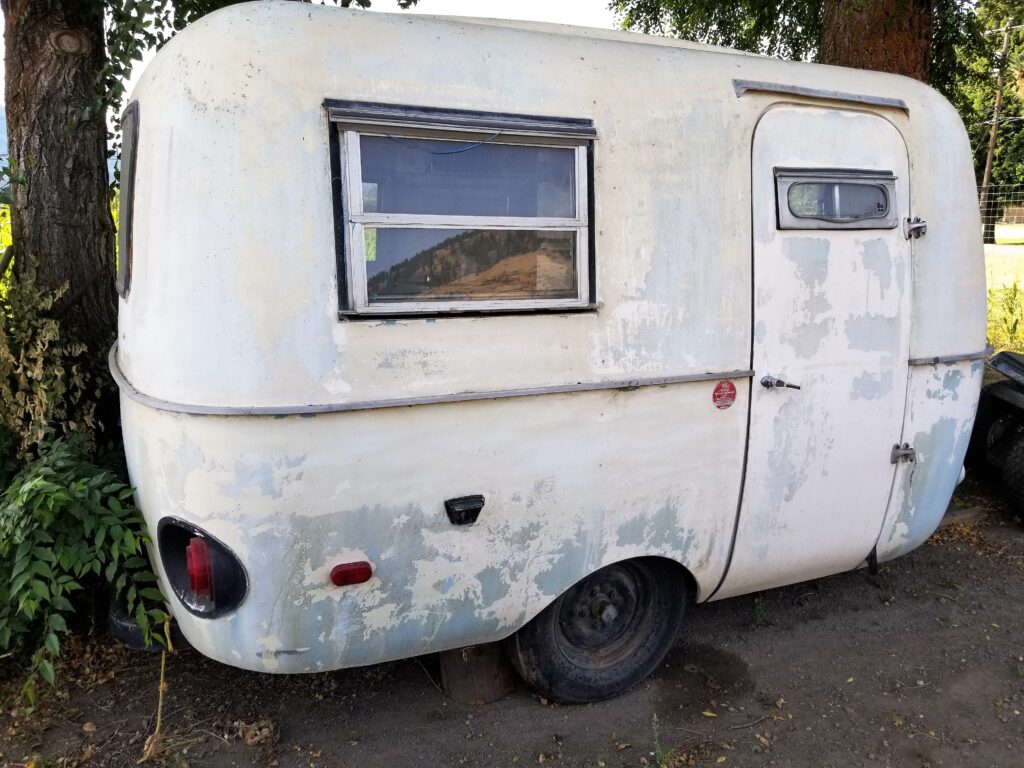
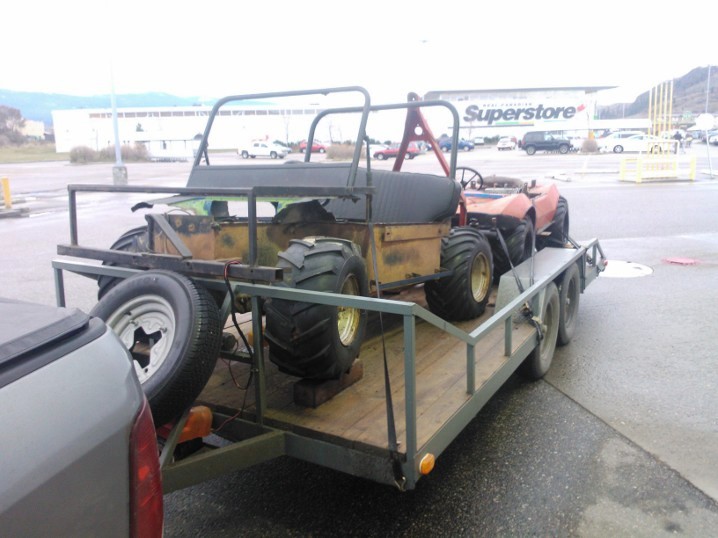
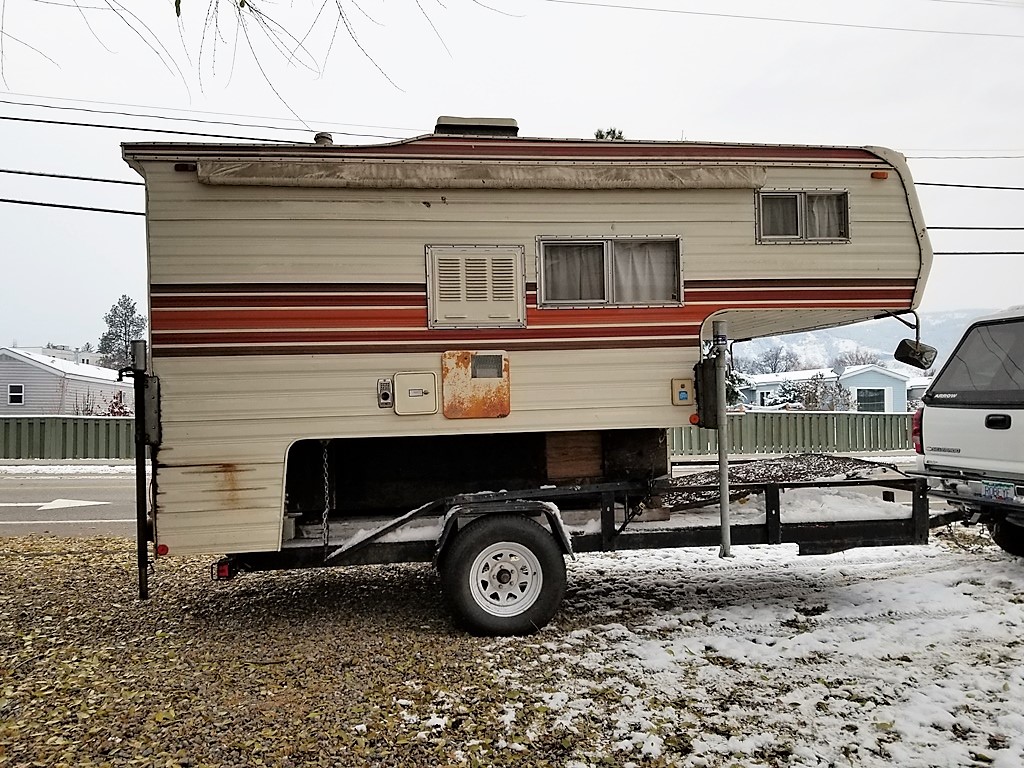
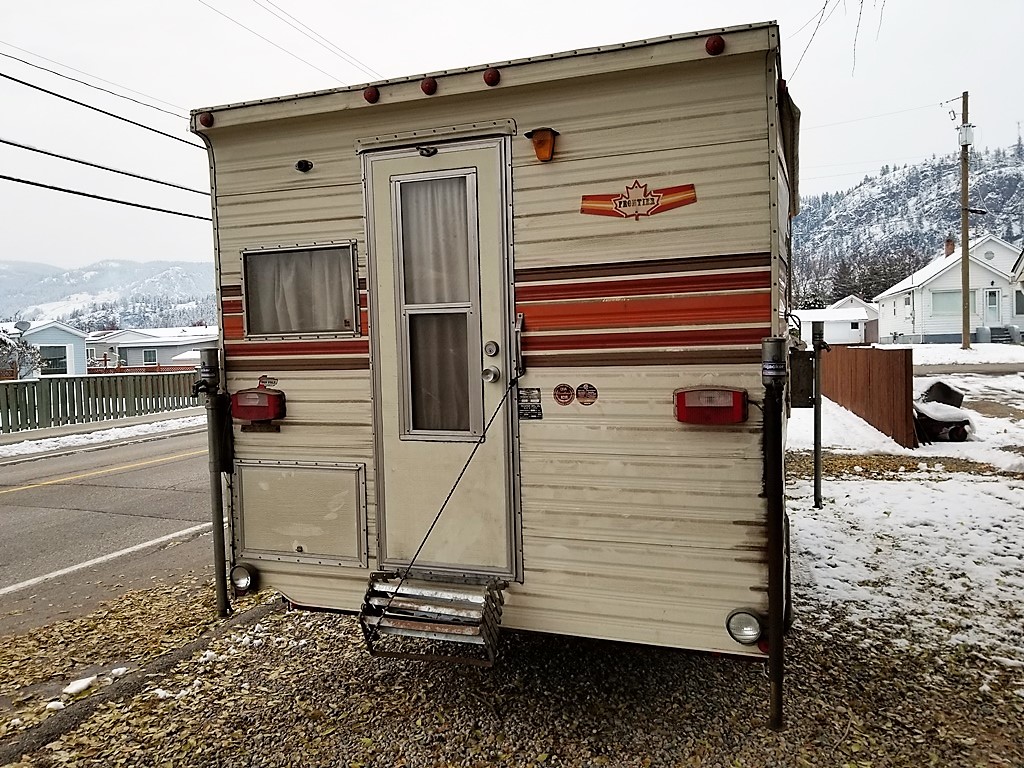
Dave’s old hunting rig was a camper on an old trailer frame so it could be towed.. They called it “Scooby” . A lot of dust blew off on the way home from the years in the shed, but not enough. Other than a good bath.. there is only a few things to fix. And if I’m gonna have a camper this one ticks a lot of boxes for me. A bathroom YES, hot water tank, upper bed with headroom, no leaks, bonus canopy on the side… and it appears to have been looked after not trashed like some campers I’ve seen… Plus it was stored properly so I can assume that everything works. 9 1/2 ft is the perfect size too. I would just need a short hitch extension to tow my quad on the utility trailer.
?
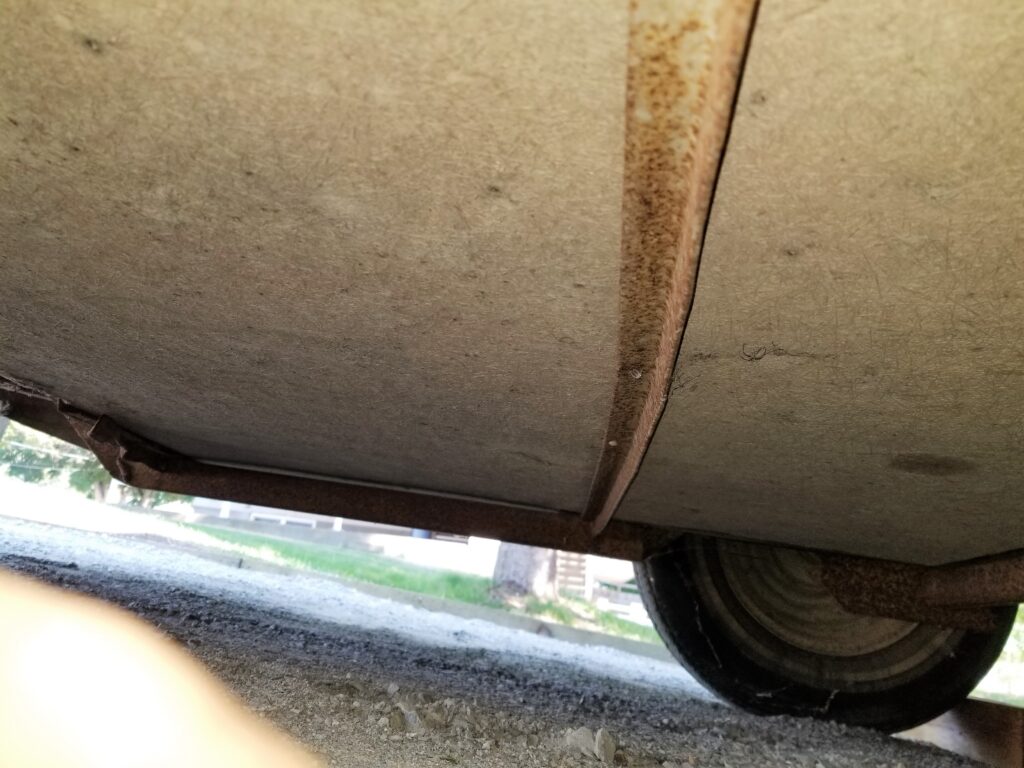
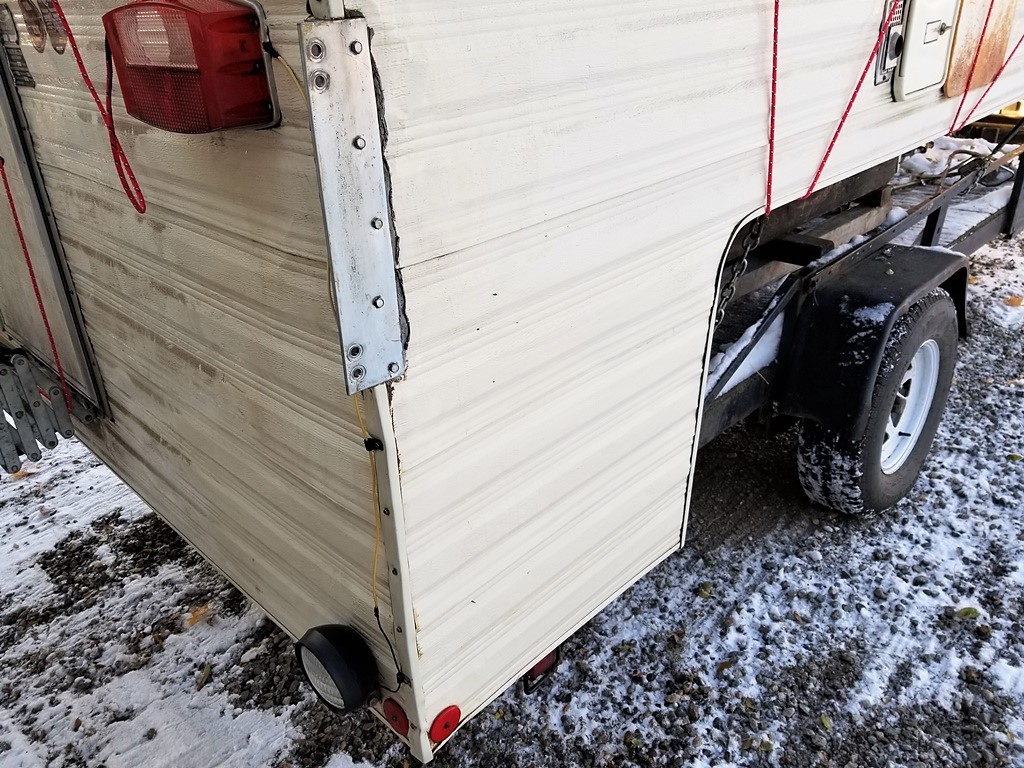
None of the lights are broken.. one jack leaks, but works.. My friend that helped me gave me two spares. The two 20 lb propane tanks are old .. and there’s a crack in the right front window .. All easy fixes. They could not find the keys.. so I’ll have to change the dead bolt.. The staining you can see on the right rear corner is from the leaky jack. Degreaser will take care of that. The decals and stripes are like new ! It says the weight is 909 kgs. That’s 2000 lbs, no problem for my truck.
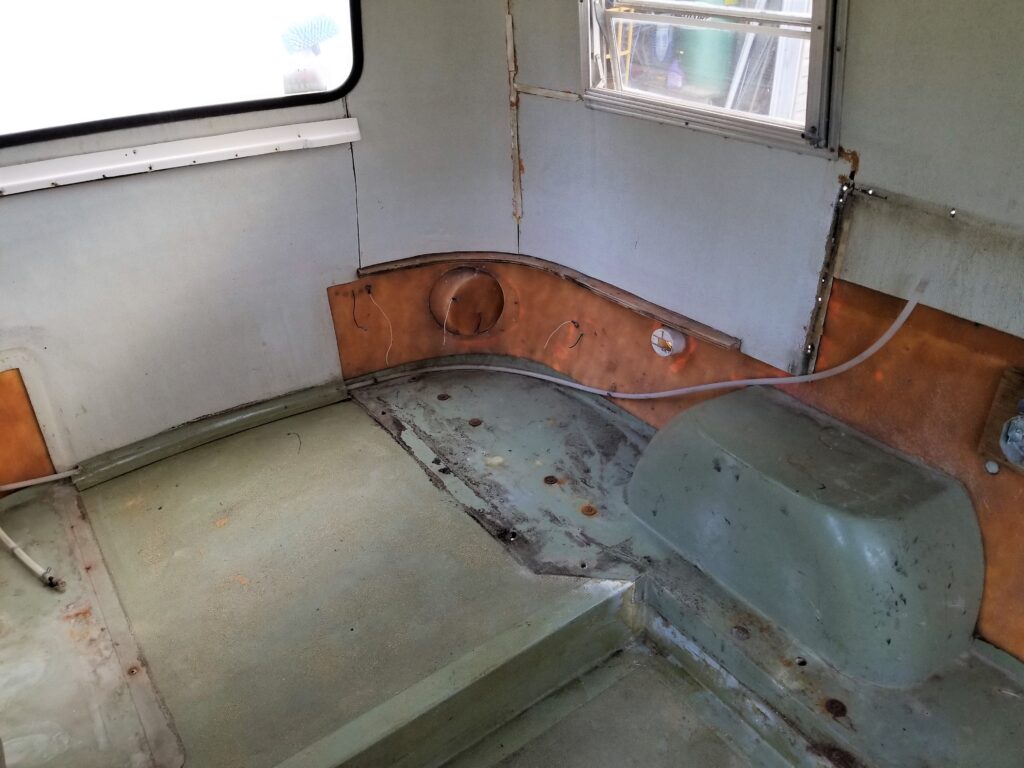
Nov 5 th 2017: Interior Tour…
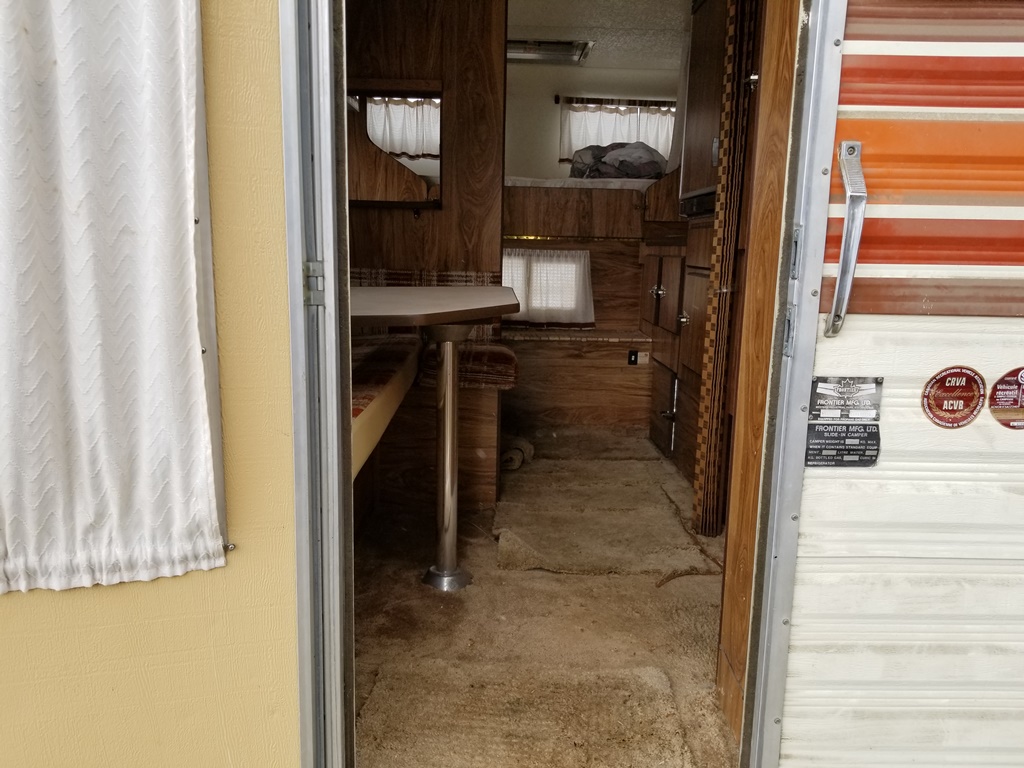
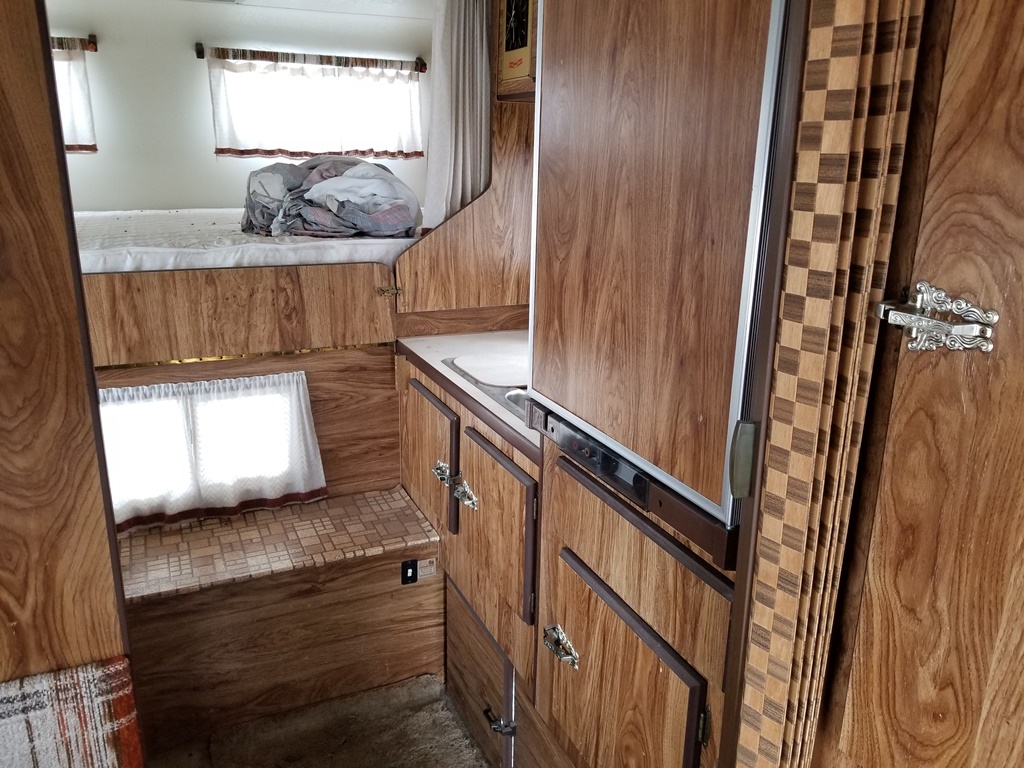
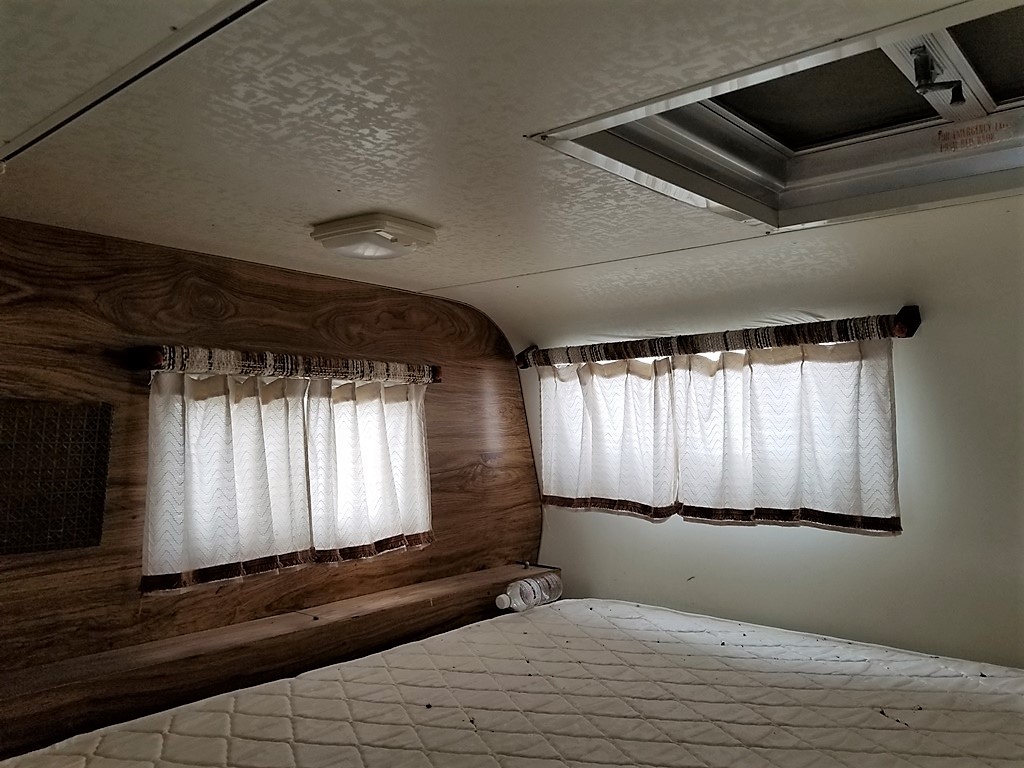
Well what does it look like in a early eighties camper.. BROWN ! Lots of it.. and wood too.
?
If your into wood and brown carpet.. then this is your place. I kinda like the retro feel .. just not the carpet.. I think it’s a bad idea in any RV.. But there is lino under the carpet.. and yes it’s brown too. Still better than carpet.
?
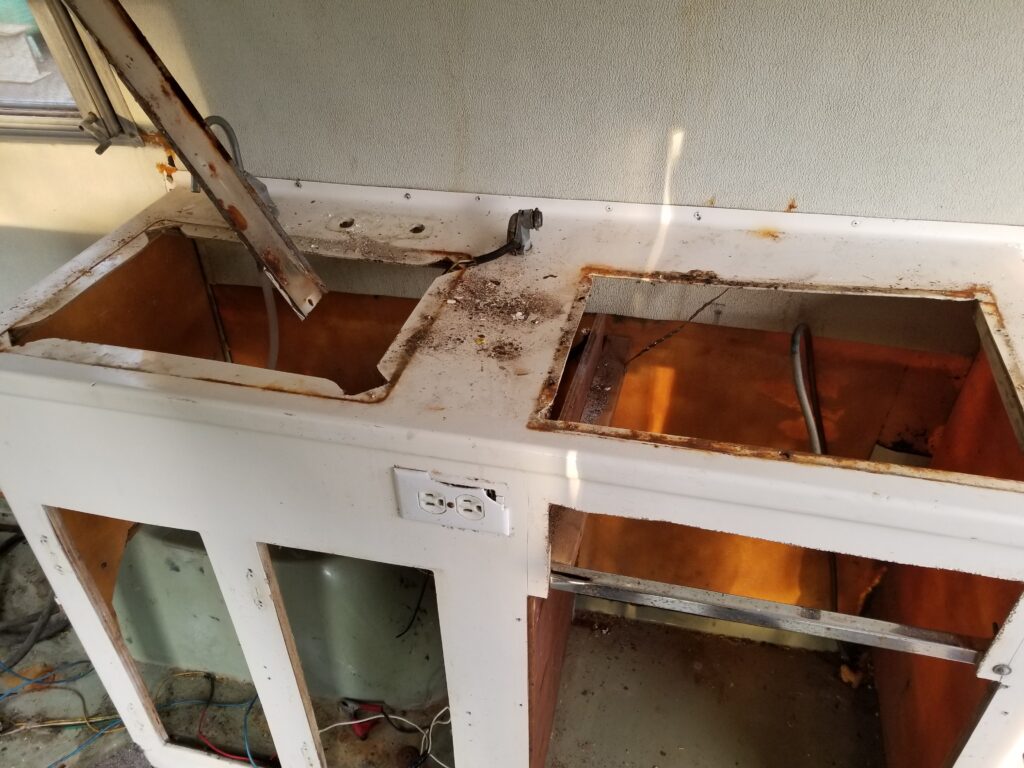
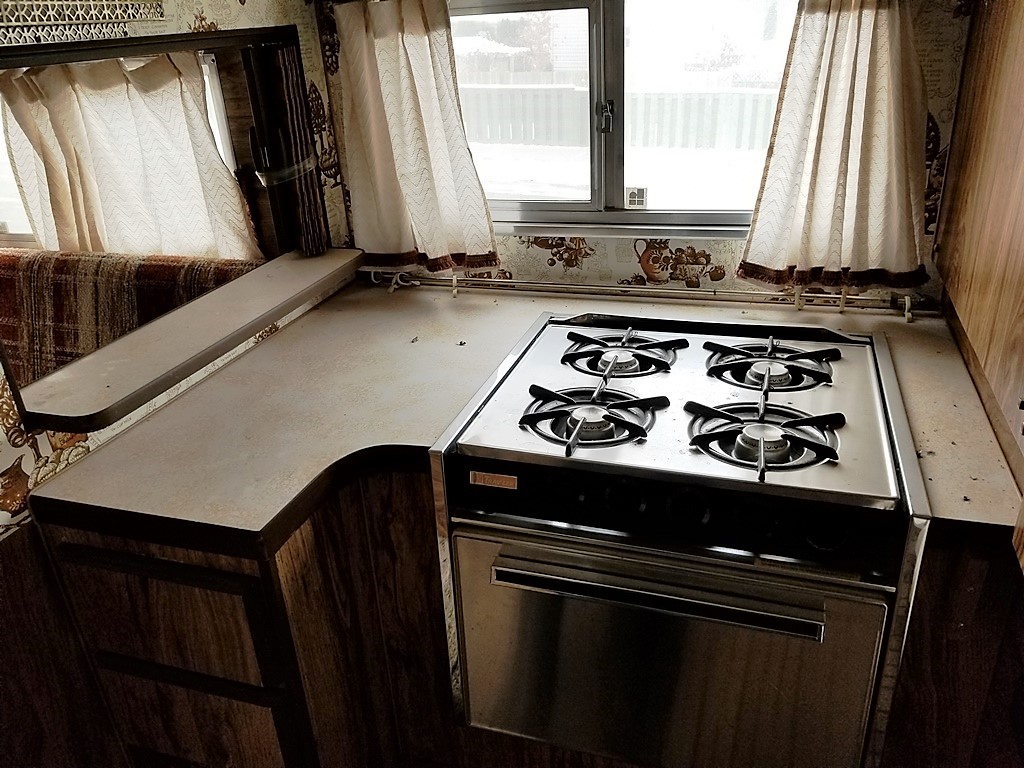
At least the counters and curtains are white. That fridge is in perfect condition.
?
Nice stove with an oven.. They don’t make a four burner anymore. please excuse the dead flies. I’m not cleaning it till spring.
?
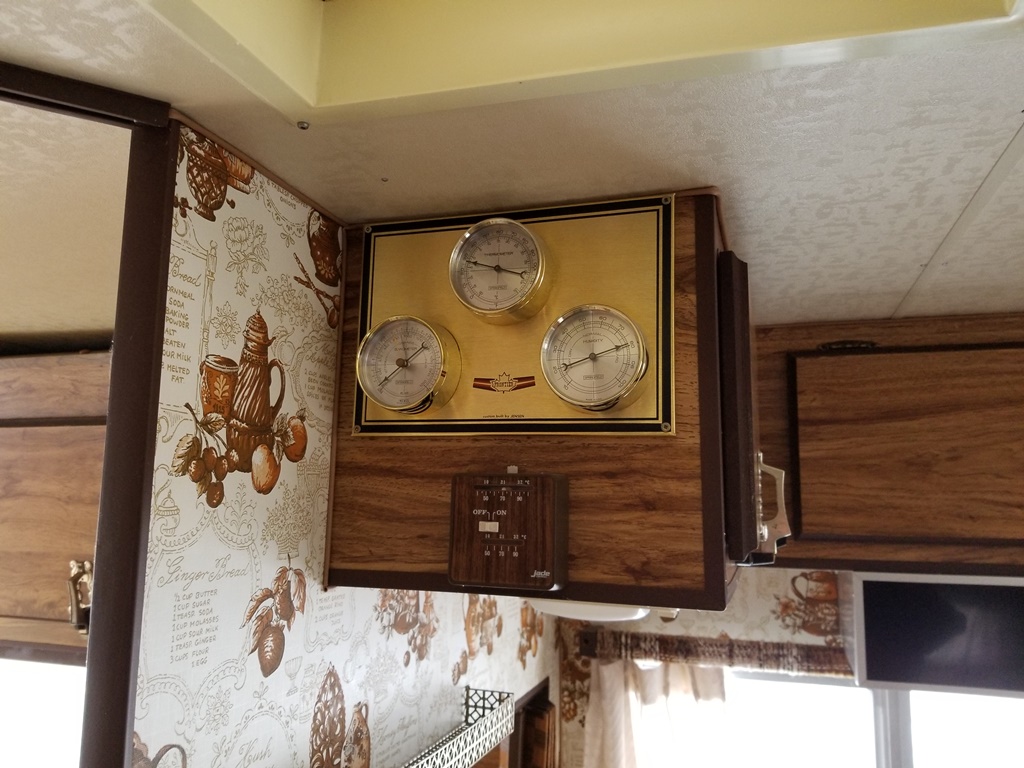
And gadgets ! Who doesn’t like gadgets ? I’ll be moving the thermostat over a bit to make room for more gadgets. And that wallpaper is very familiar.. Fugly but familiar. I can live with it.
?
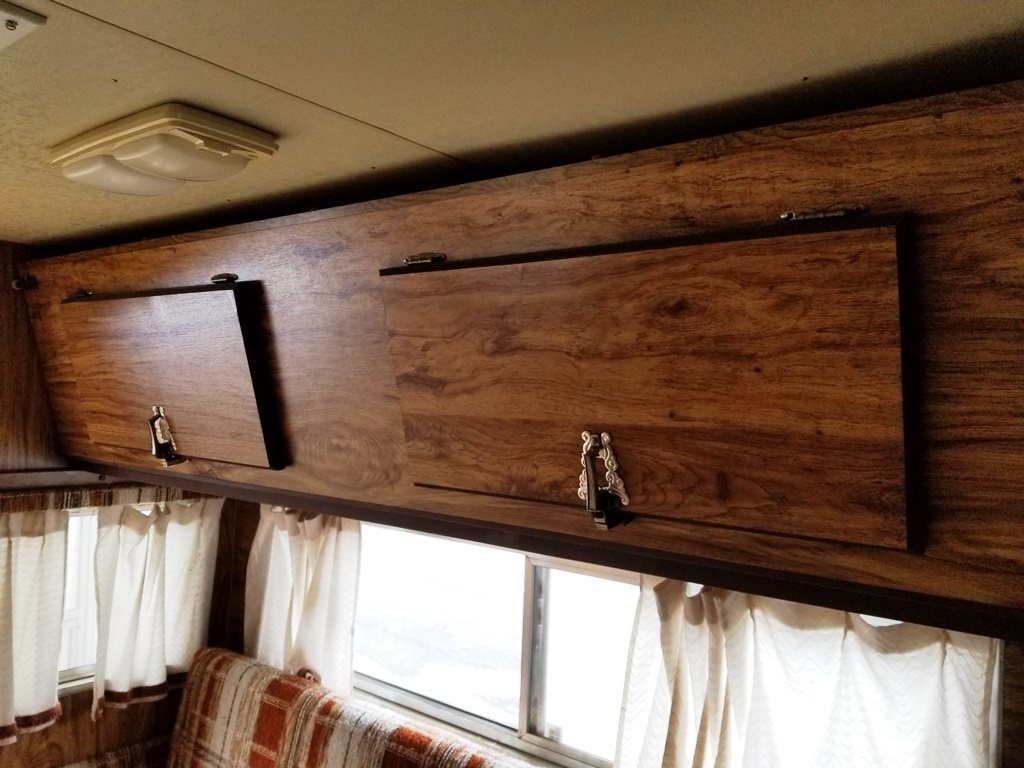
That’s a bunk above the dinette.. that’s also a good cupboard when the bunk is closed .. cool idea. There is lots of storage in the camper..
?
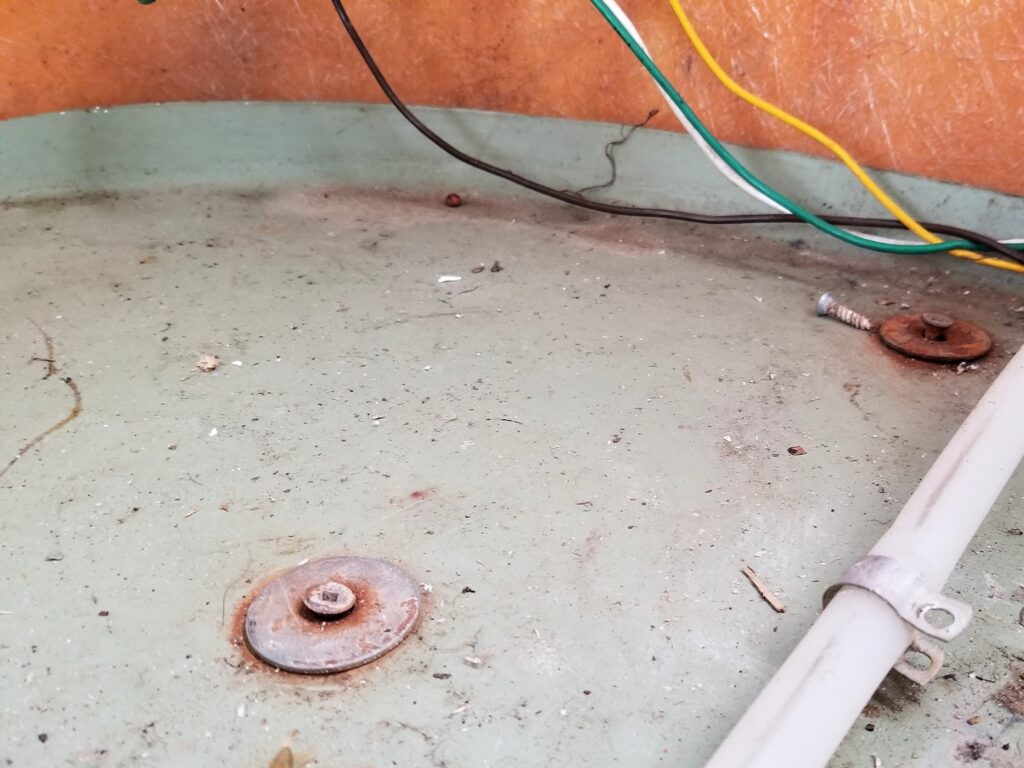
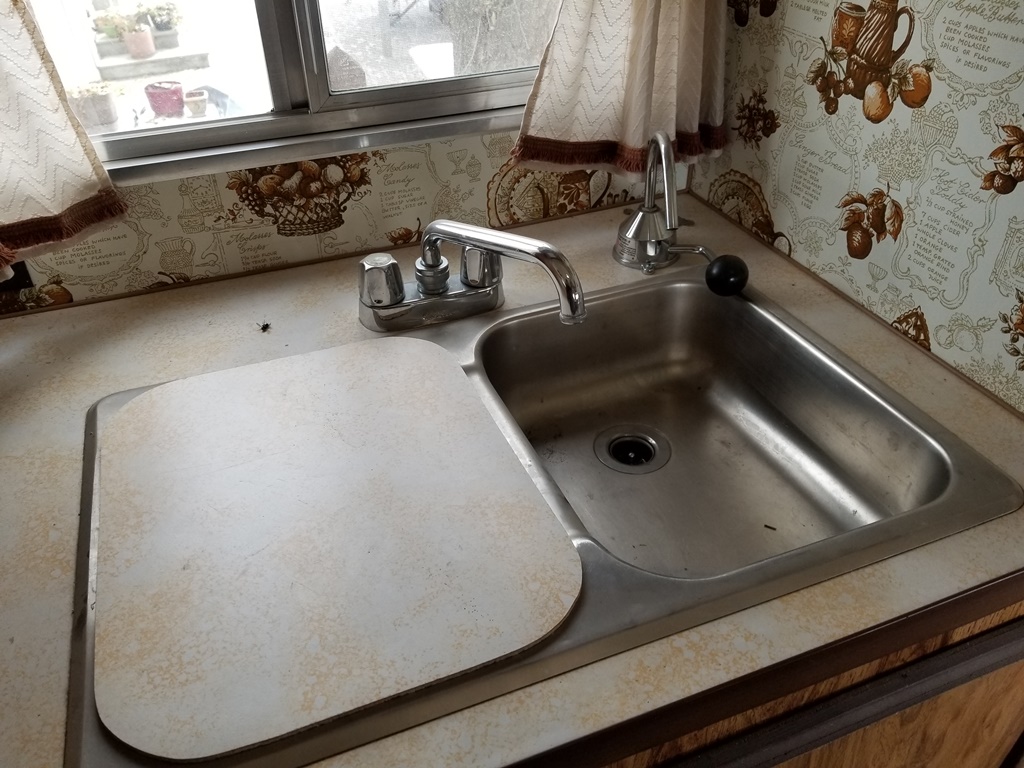
And how about a nice sink.. with a hand pump ? What for.. there’s power and a pump.. AND I found a battery! I was thinking this old of camper would use a second truck battery. Nope. Has it’s own. Bonus! And just like any good RV when you plug in to 110 v it charges the battery. But not the one I found.. very old and very dead.
?
Lots of room up top.. and a very good ” proper” mattress. Nice size opening windows for that important breeze in the hot months.
?
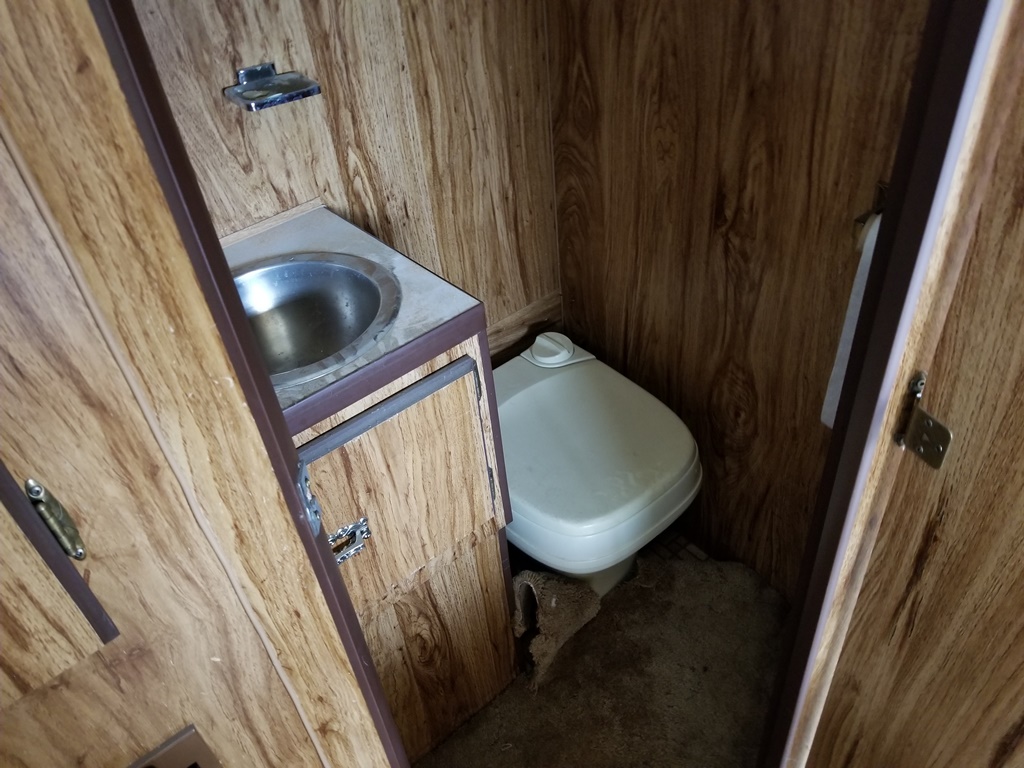
And no tour would be complete without a peek at the LOU. A bit tight but all campers are. No shower in this one.. Never use it anyway. But having a toilet in the middle of the night is a blessing.
Beddy Bye Time…
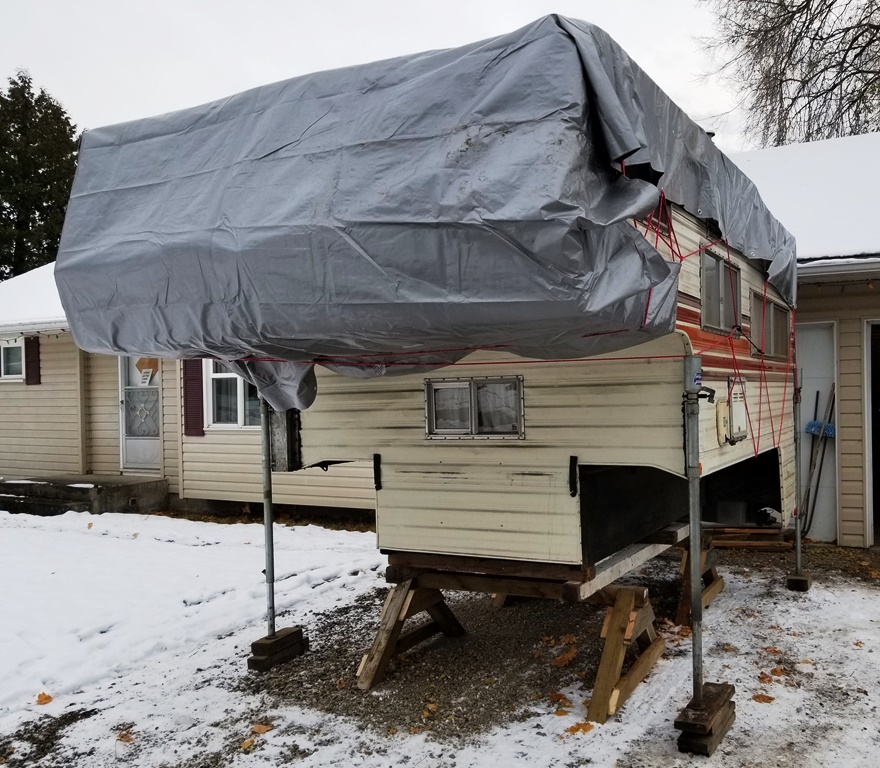
Today was cold but dry. and I got the chance to tarp the camper for the winter. But before I did that I could not resist running power to the camper and see if it has life. You bet it does ! only two burnt out lights.. I could hear the inverter working it’s magic. And I tested the pump.. But I did not try the fridge because I wasn’t sure how to turn it on ? Oh well in the spring I’ll go through all the stuff.. For now I’m making up some blocking for it’s winter resting place… so Dave can have his trailer back.. No Scooby.
Plans for the spring:
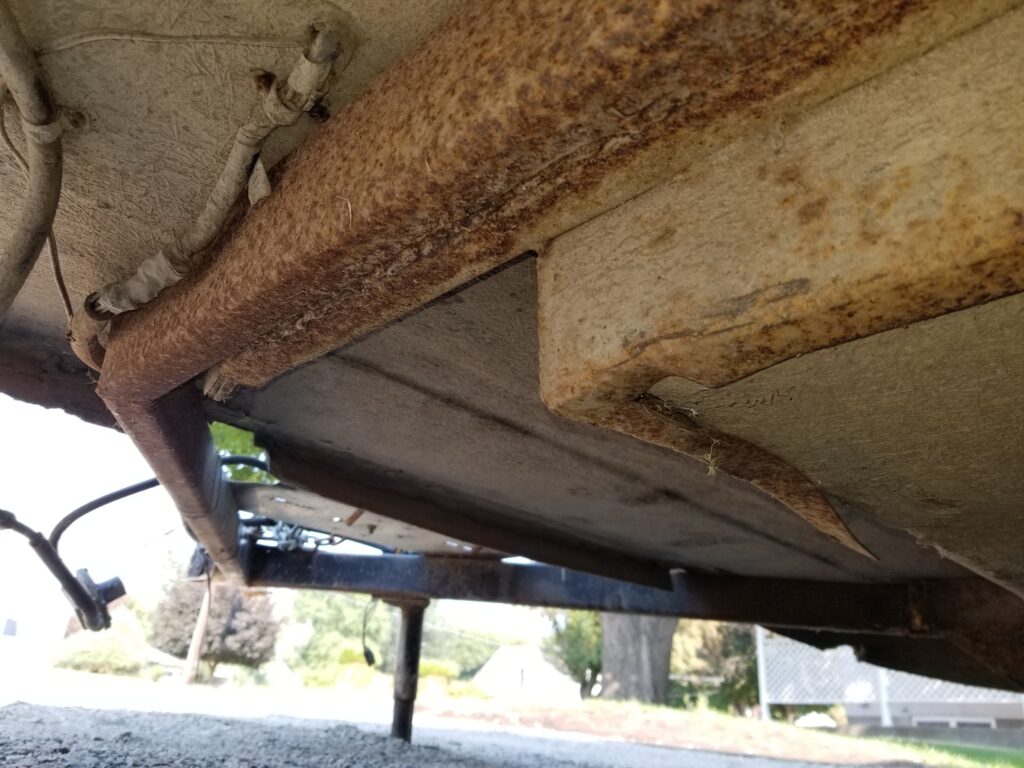
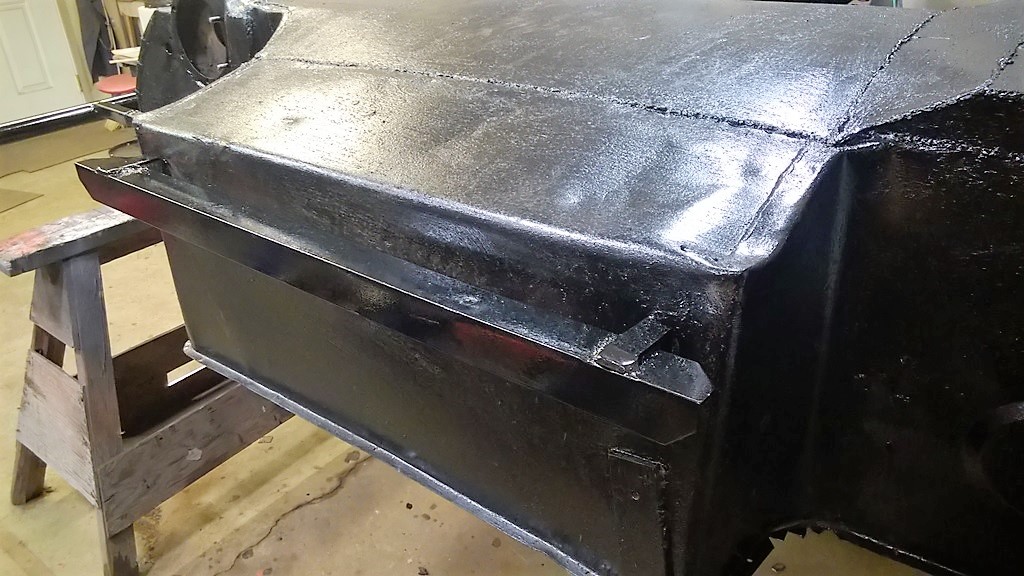
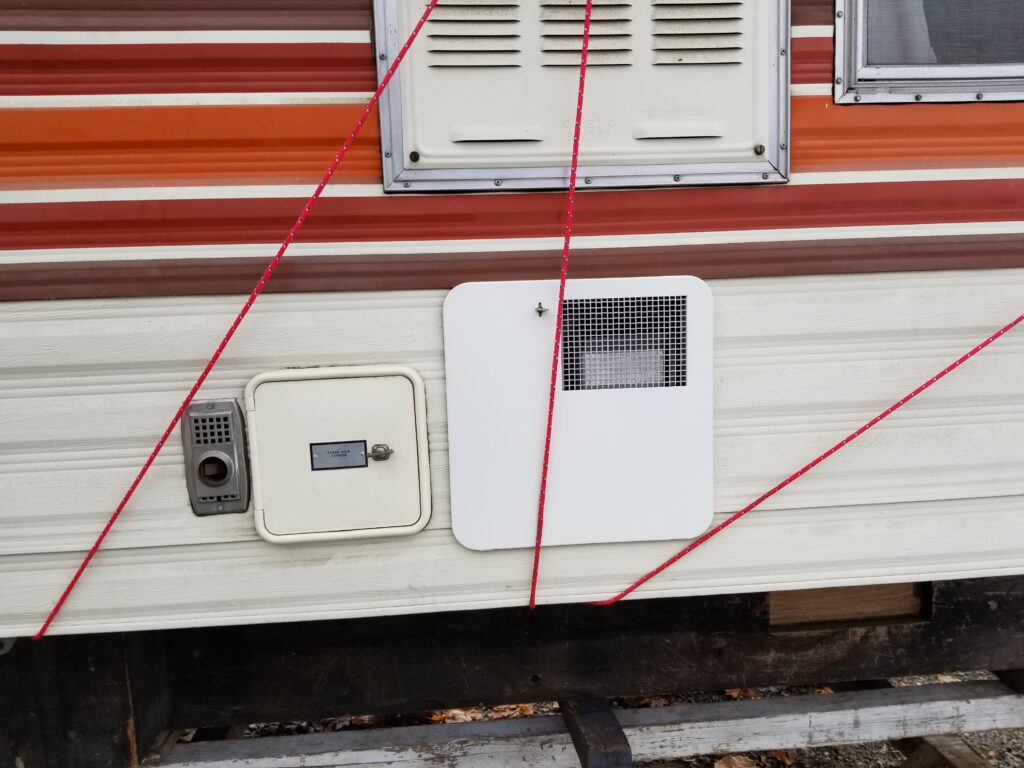
Can’t help myself.. gotta think about my mods and repairs. The roof needs to be resealed.. that’s a given. This camper shows no sign of leaks and I’m keeping it that way. Since the one piece aluminum roof has been ( for the most part) kept out of the weather. I’ll presume it’s still got all of it’s integrity. Looks like the vent lids were replaced at some point. But the two plumbing vent caps are crispy critters. And the big escape hatch lid is showing signs of it’s age too. So a parts order will include those. Plus as always I will install vent covers on the three vents. The fridge vent is metal and still good. The only other concern is the two front windows. I know one has a crack so it needs a fix.. I’m thinking I’ll remove both and have new tinted glass installed, then reseal them. That should keep mother nature at bay. Now for the “could live without.. but I want it anyway” stuff..

This is the panel I made for our fifth wheel. I won’t bother with the stereo.. but the other gadgets are very handy. A 12v power outlet, a dual USB charging port, a digital volt meter and a switch to turn them off. The kind of camping that I’ll be doing is far from power, so knowing the battery level is important. Charging my phone is too.. even though I’ll be far from service.. It’s my camera. Changing the lights to LED will save power too. so that will be done.
Nov 6 th 2017
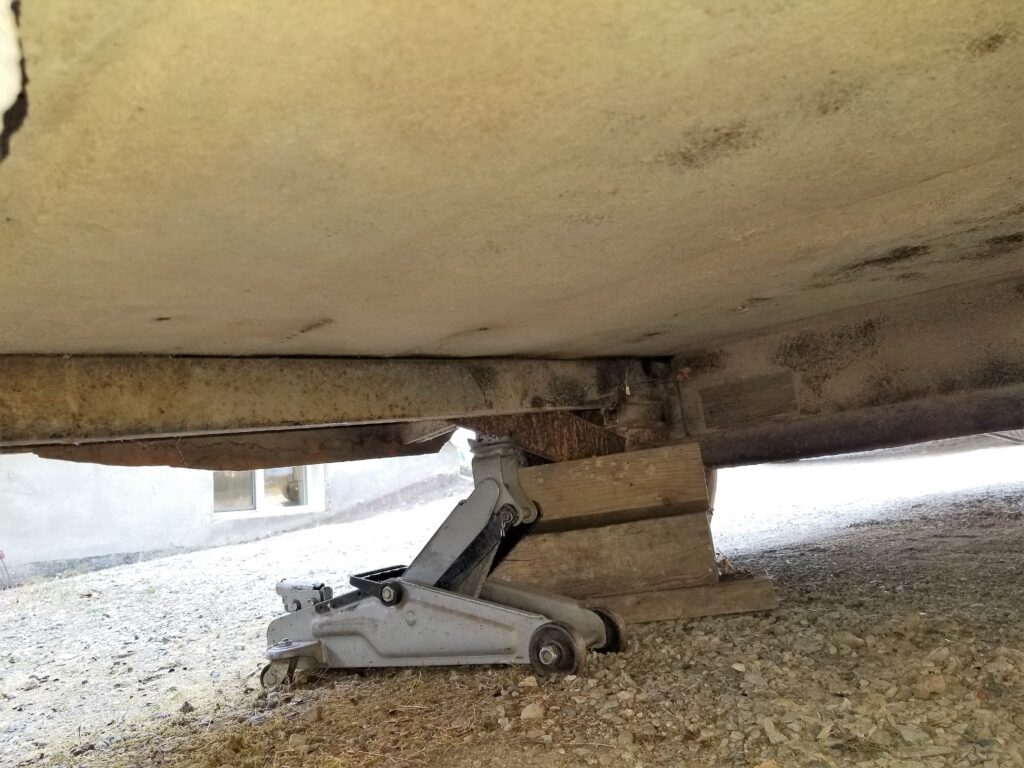
Today I moved things around ..BOLER into shop, and the camper into position where it will stay for the winter. I thought I’d replace the leaking jack.. the oily corner of the camper was bugging me.
?
Not any more.. I wasn’t going to mount the clean jack to a dirty camper.. so It now looks like this. Nice! Tomorrow I make some horses to hold the camper.
?
Hate those Camper steps !
With a passion.. so my brain went to work and I thought of this idea. I see it on new campers.. regular RV folding steps.
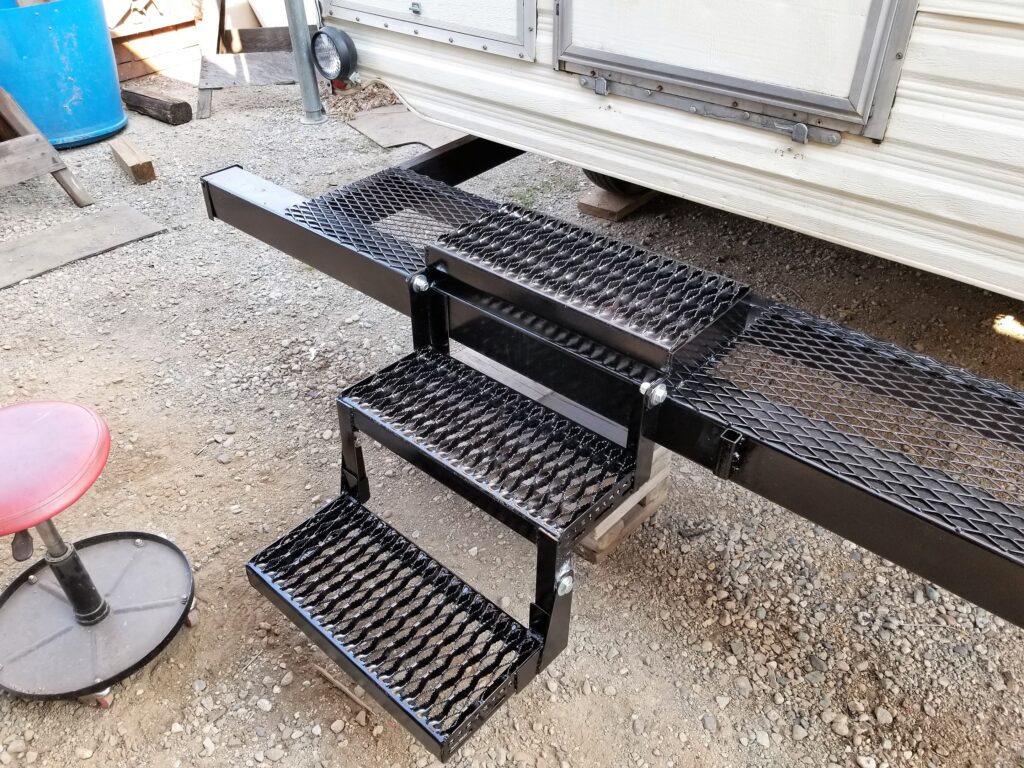
So I got on Paint and put my thoughts to paper.. well screen. A light weight platform and folding steps. Why not ! Gives a place for a tool box … and a railing / handle. We need these things as we get older. Those accordion style steps are killers.
And That’s That:
All put away for the winter. Will start a new post in the spring..
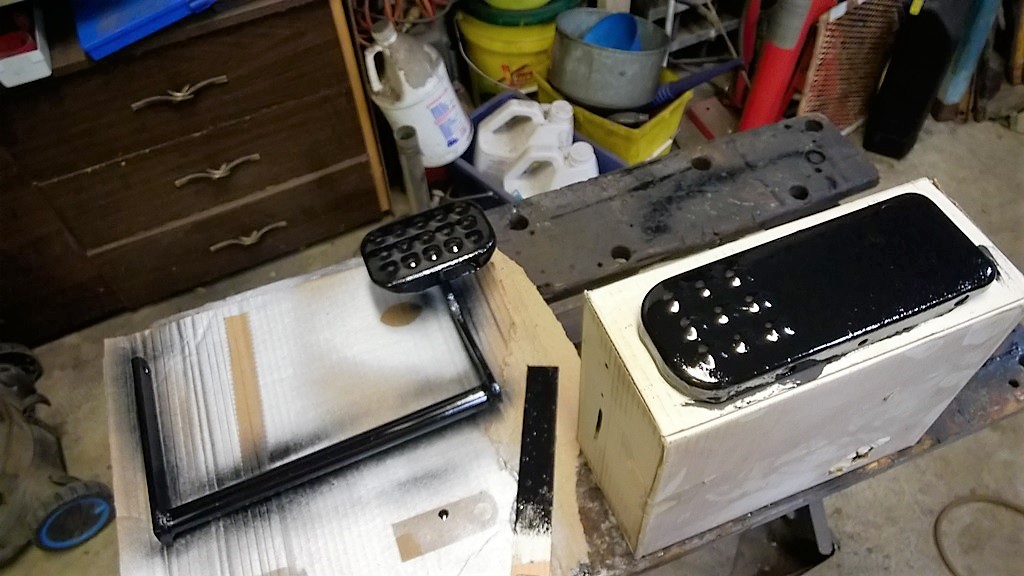
But I can’t resist doing a few small jobs. Like the hot water tank cover was very rusty ..and that bugged me like the jack.
I made it all pretty again.. close match color too ! I have an order coming for RV stuff.. The vent covers, new interior switches, LED lights and little bits needed to make the camper perfect..
Nov 22 2017:
All my parts came. And I stashed them in the camper. Who knows I may feel like doing some of that work before spring. Just not the roof stuff. Yesterday I was showing the camper to my friend Dave.. so we plugged the power in and tried a few things.. Also turned on the propane and lit the stove.. and fired up the furnace and fridge. All is in good working order.. I switched the fridge over to electric and left it overnight to see just how good.. The freezer was ice cold this morning. The furnace started to warm the camper up nicely too. Wow.. we have a winner.
Just couldn’t leave it alone…
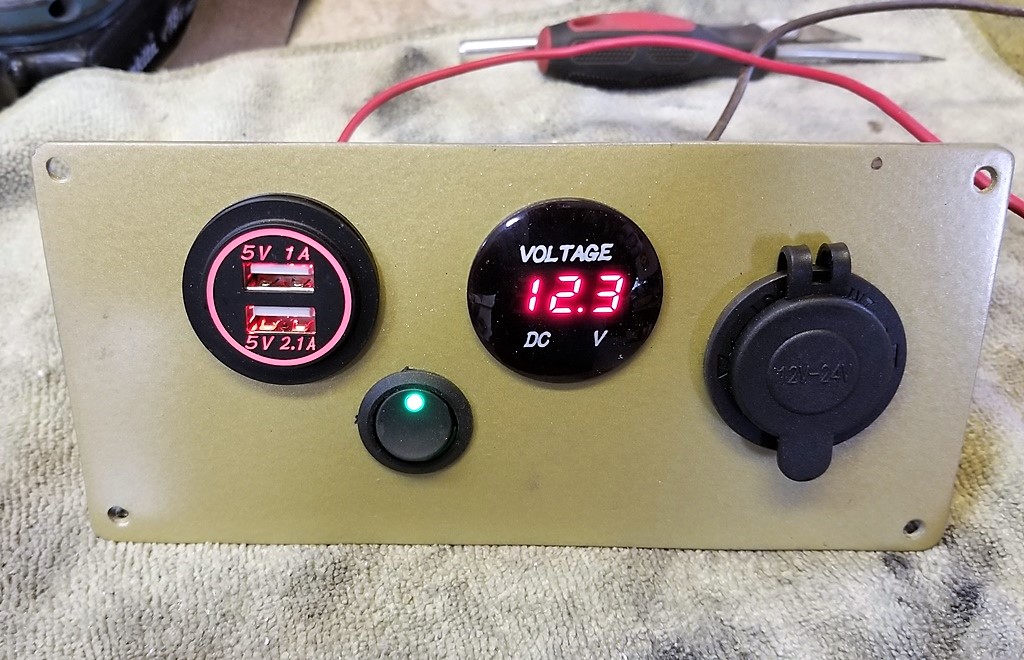
So I made up the “panel” .. yes the one …or version of.. what I like to have in all my campers.. 12 volt power.. USB ports.. and a nice easy to read volt meter.. All on a beautiful gold panel.. ..
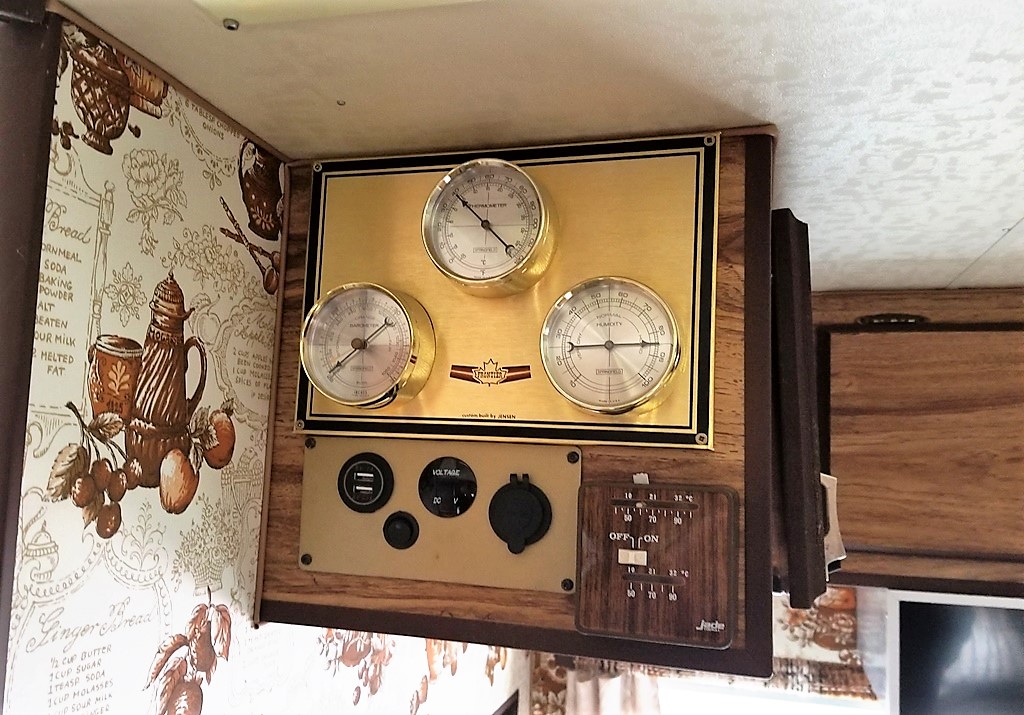
And here’s the gadget center… installed but not hooked up to power yet. I’ll do that when I change the light.
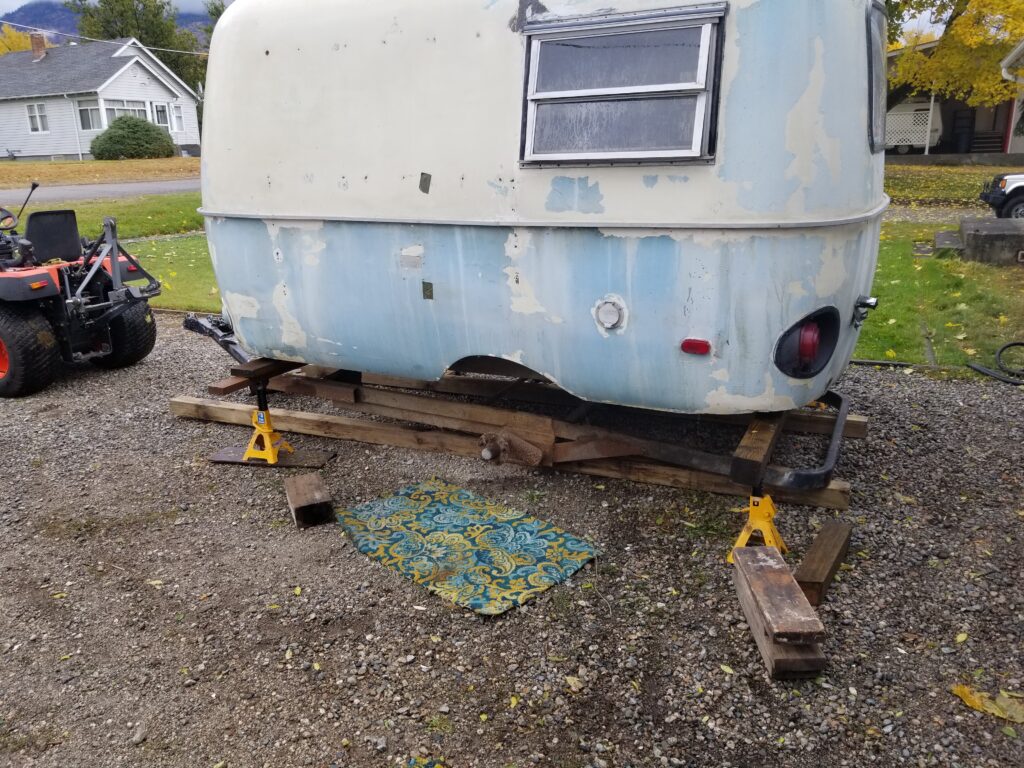
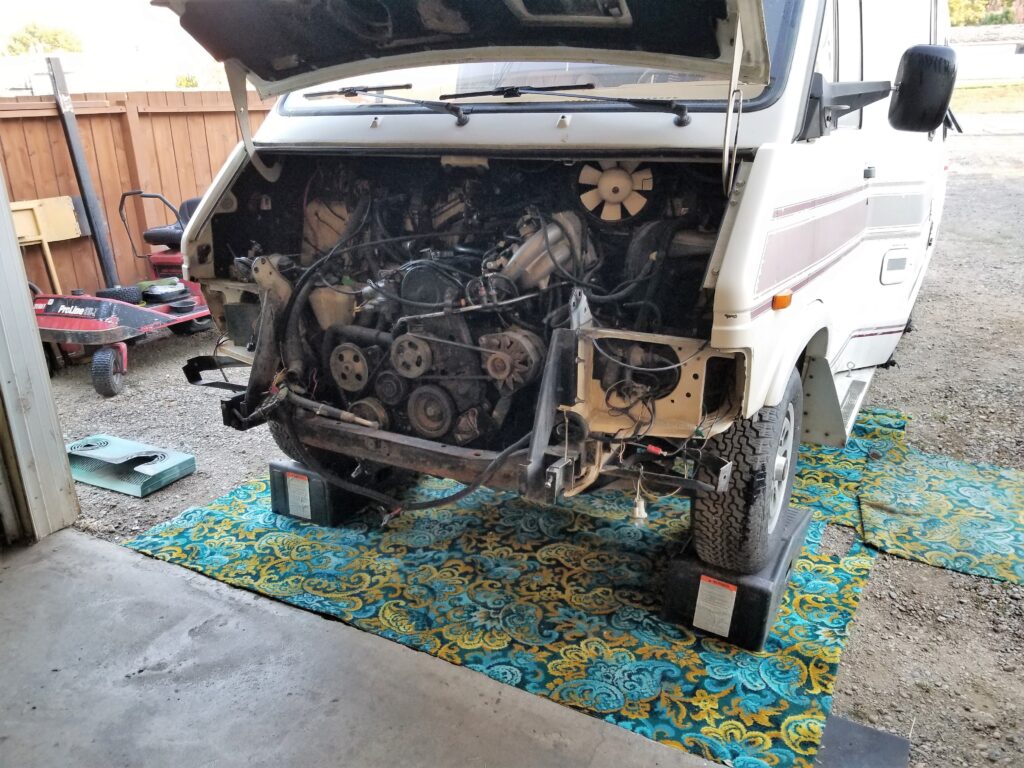
Update: Summer 2018
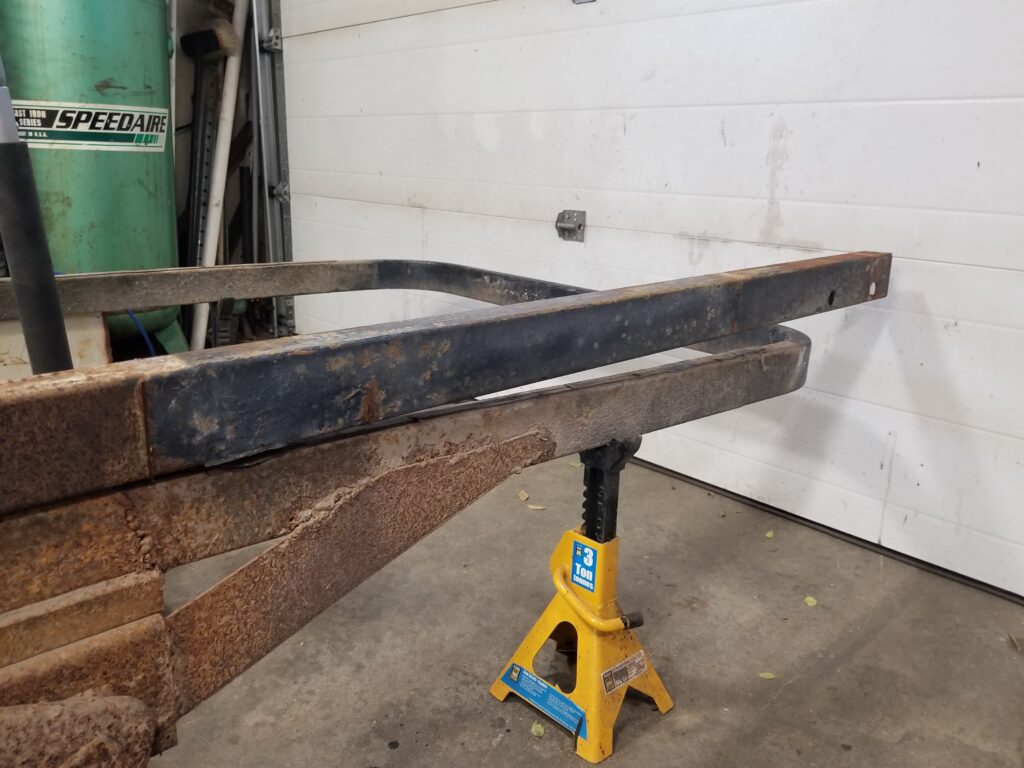
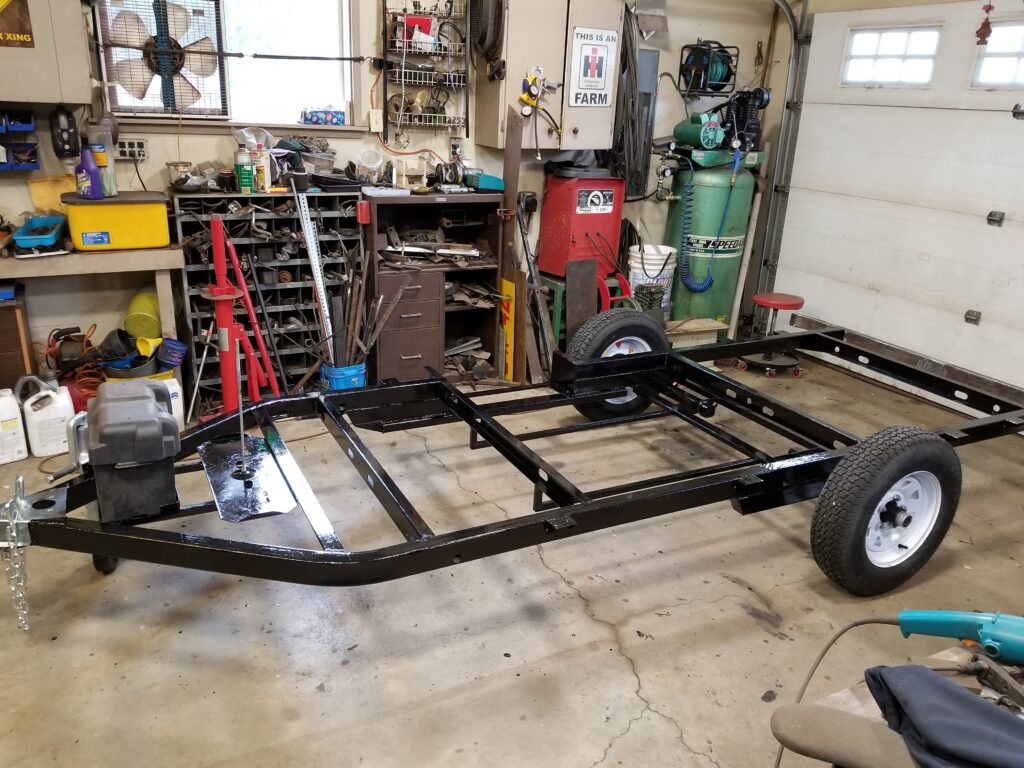
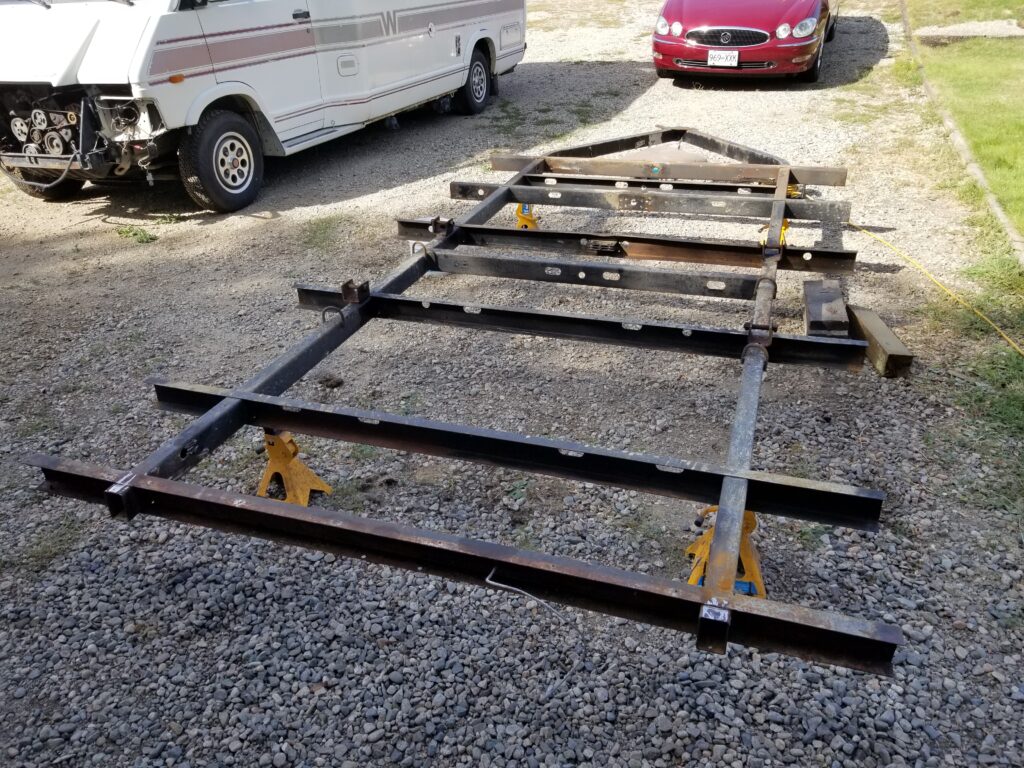
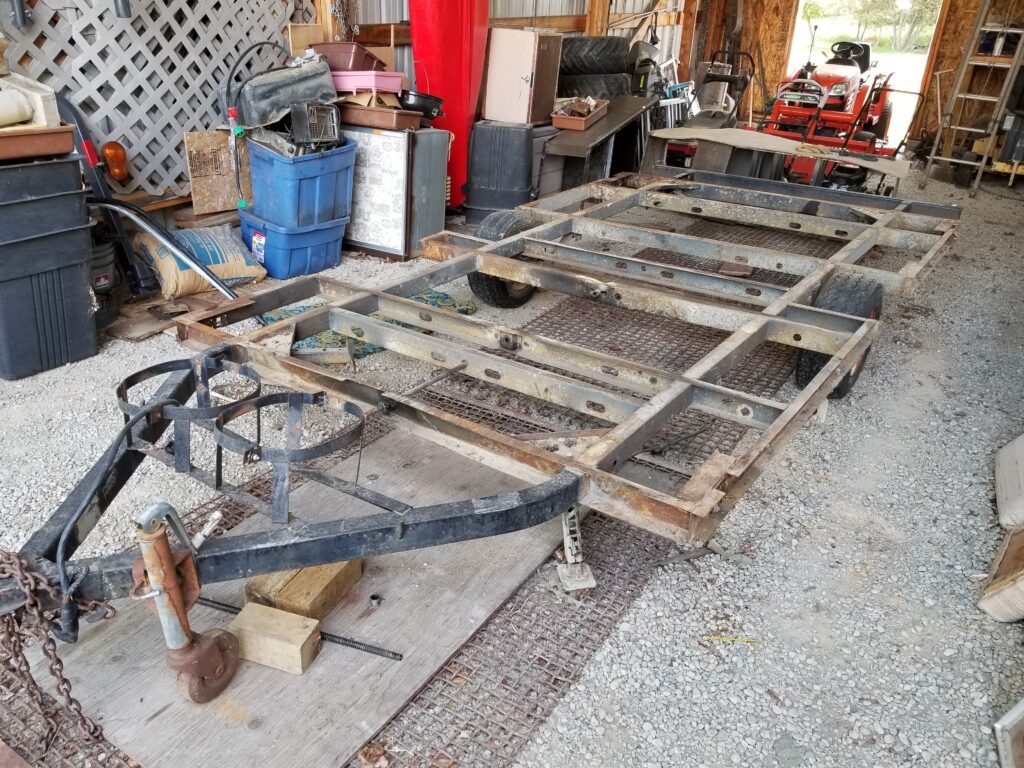
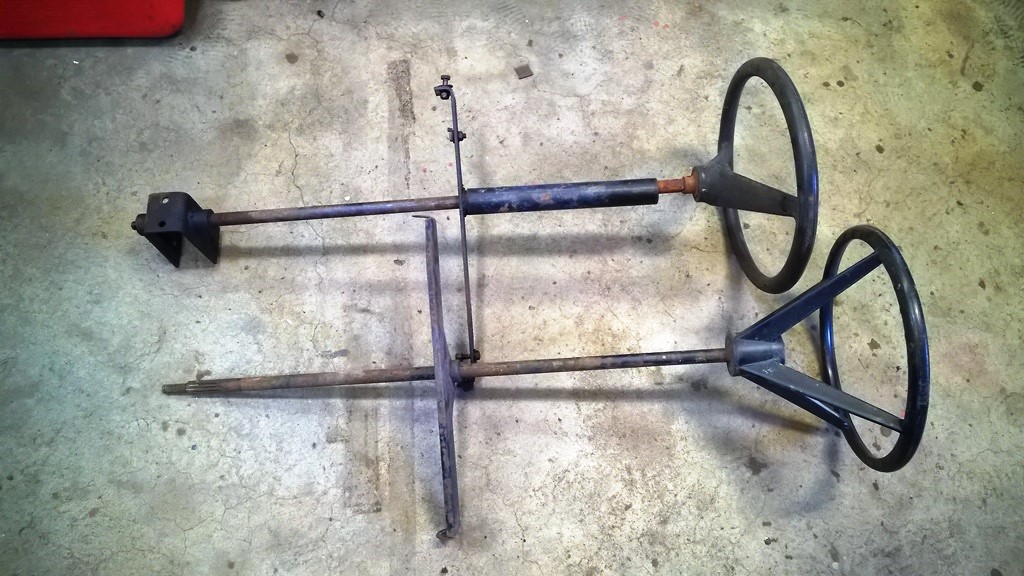
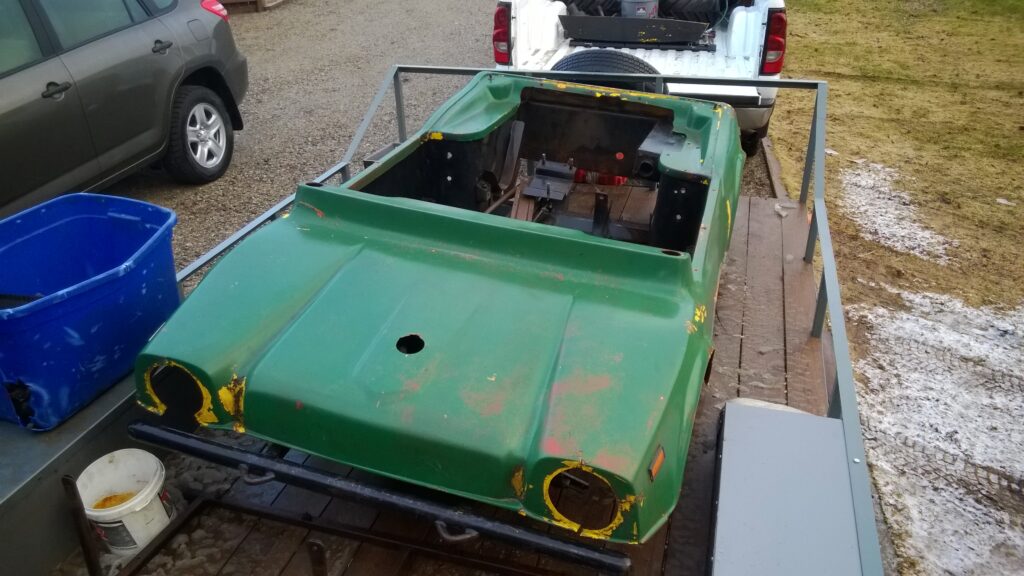
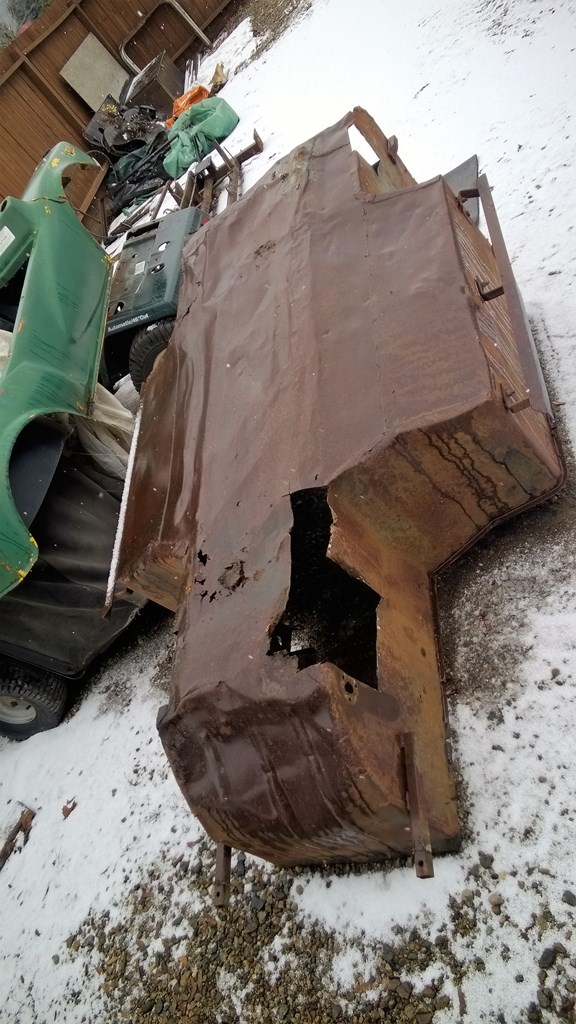
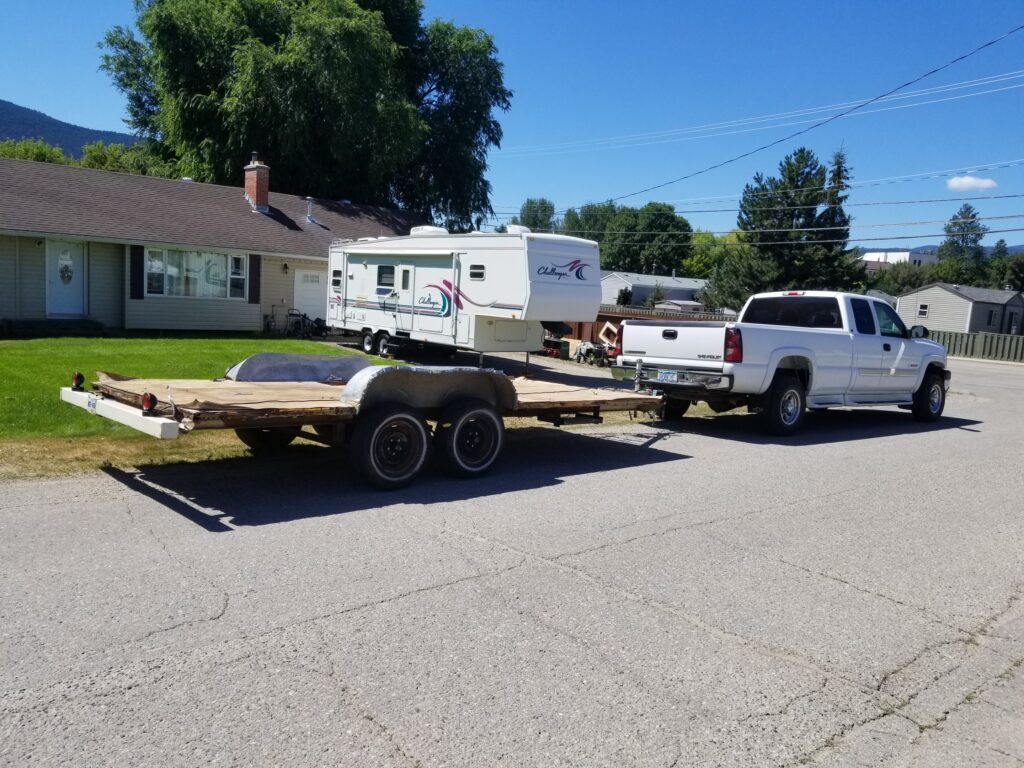
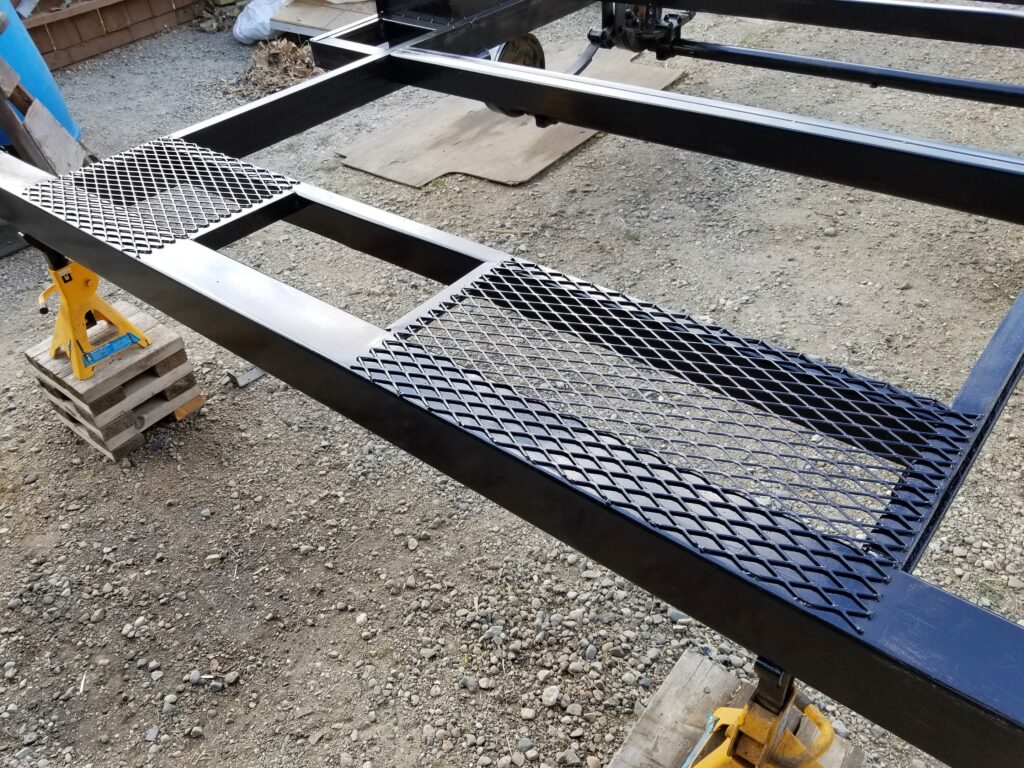
When our fifth wheel came out of the RV port.. the Frontier camper went in.. and that was 4 months ago. Other than installing some LED lights and doing some cleaning ..it’s been left alone . When we moved it I use my truck. It was realized that this camper is just a little bit too wide for the tailgate opening of the truck. So I’ve come up with the idea of making a new “Scooby” ( that’s a camper set on an old travel trailer frame) Like I mentioned earlier in this post. Now you can tow the camper ! I was given a free 18 ft trailer that was damaged and had leaked.
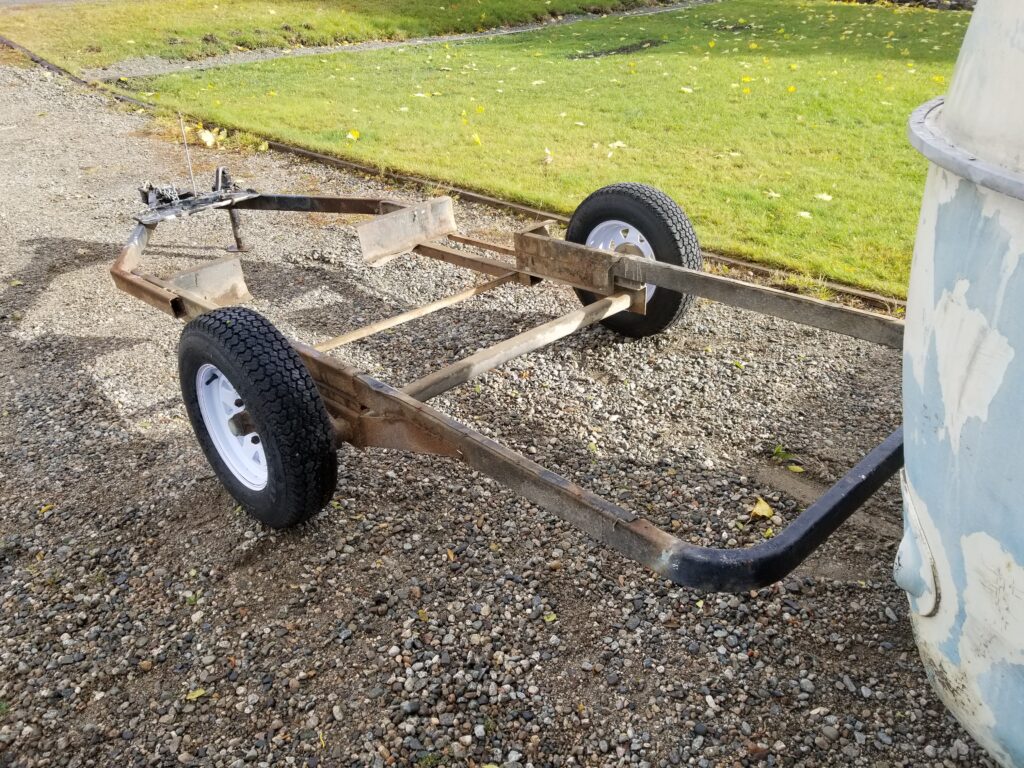
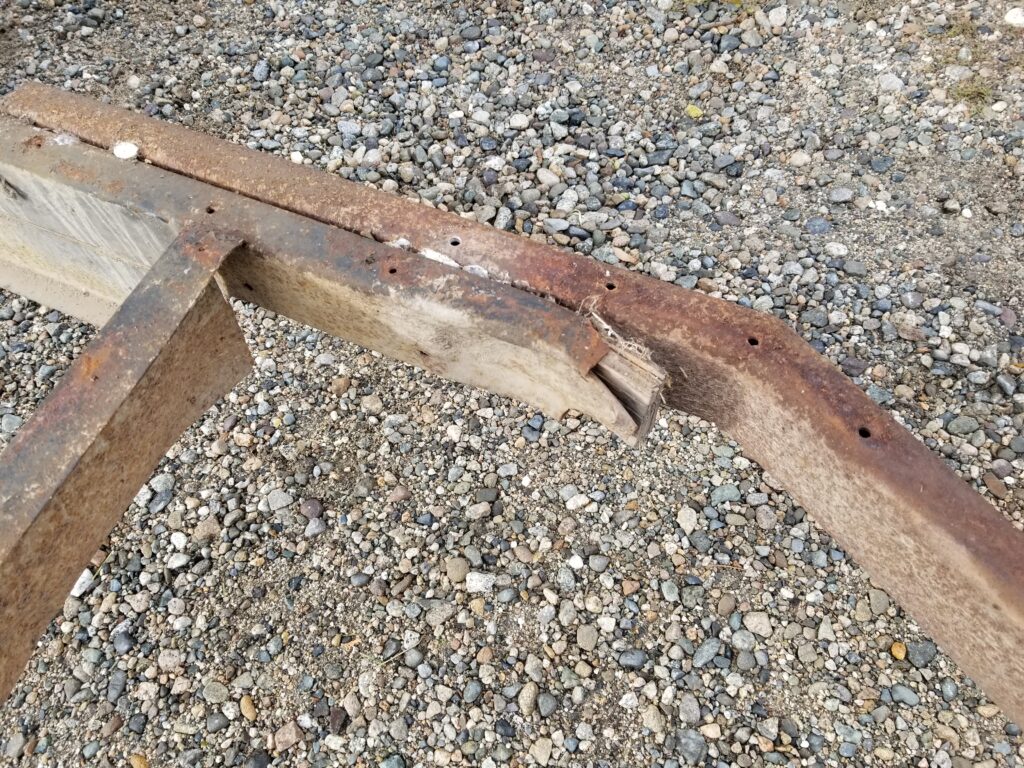
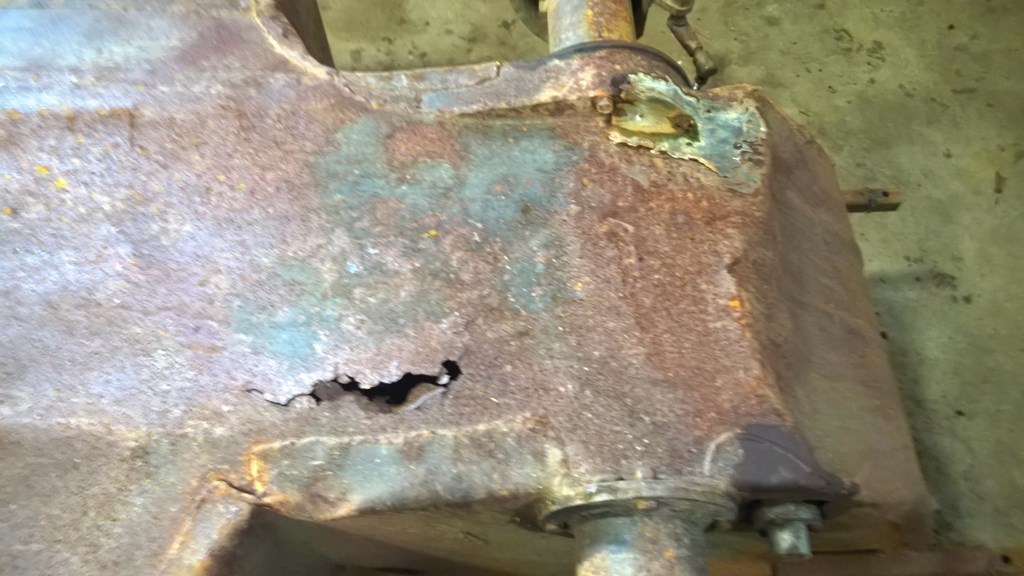
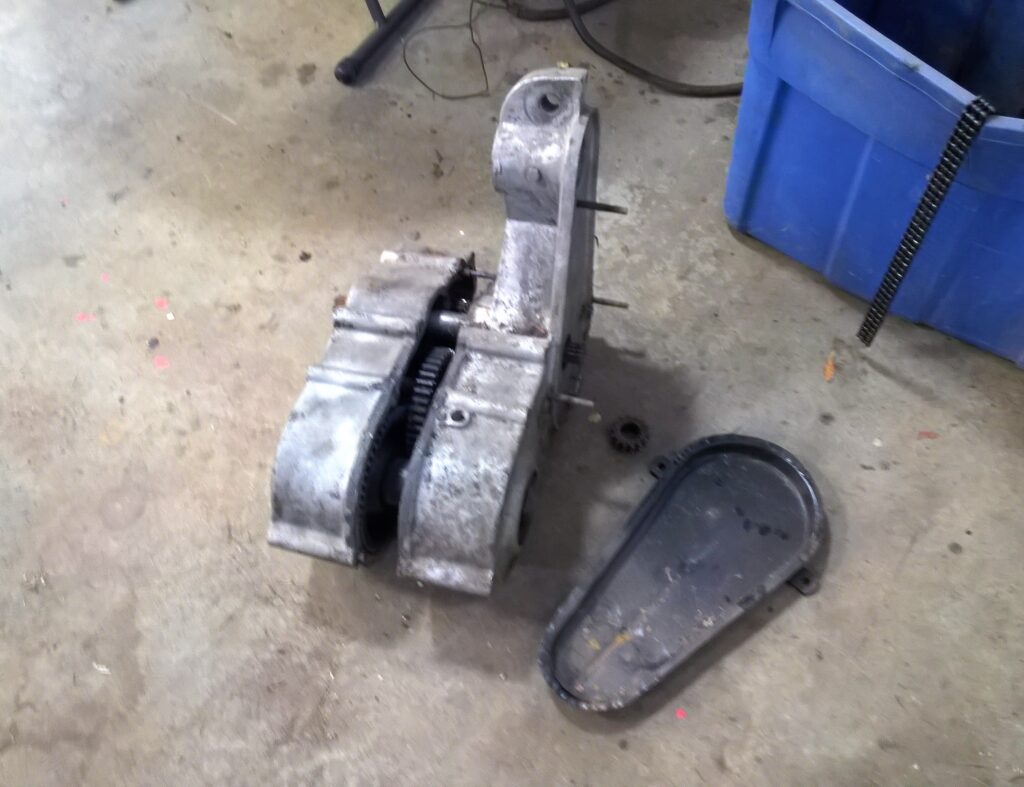
It’s been sitting for many years… So we stripped all the useful parts and wrecked it to the frame.
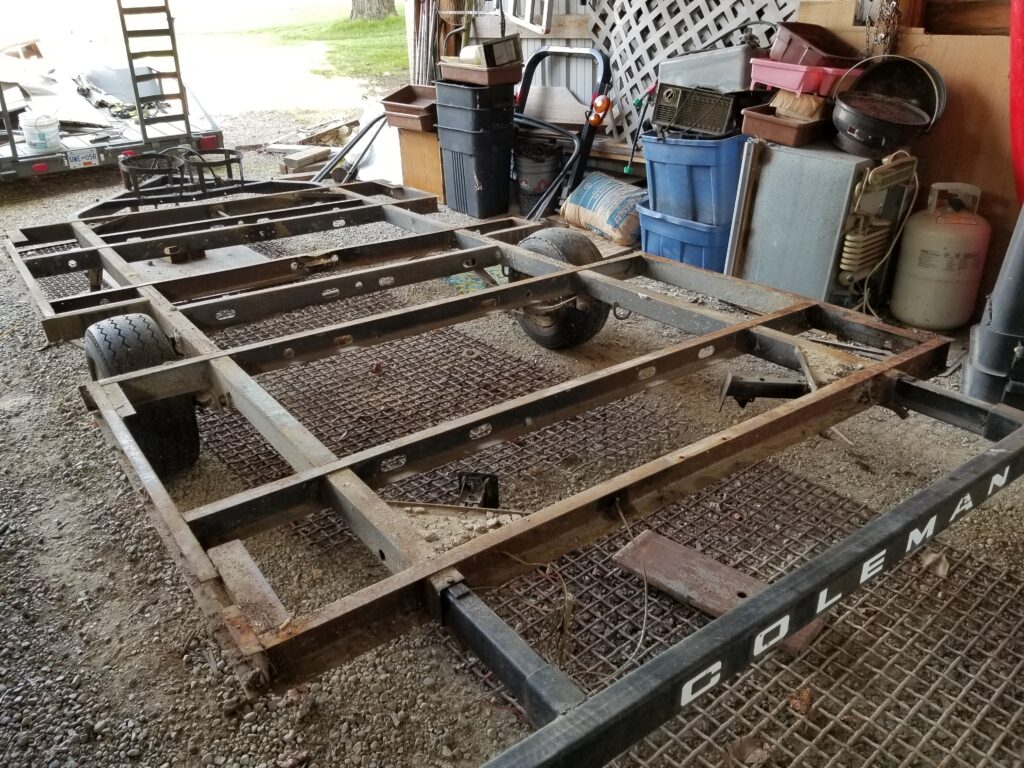
And that I brought home … with the floor still attached .. But we removed that too. It’s the perfect size for making a scooby. I have flat deck registration and a plate for it so we are set.
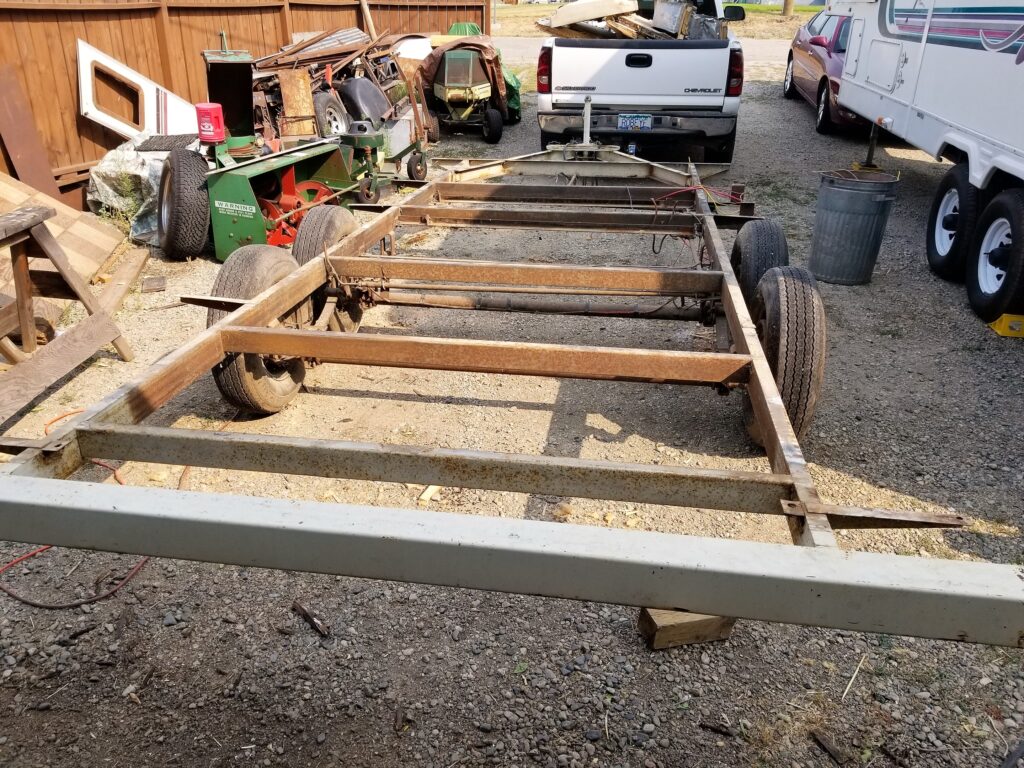
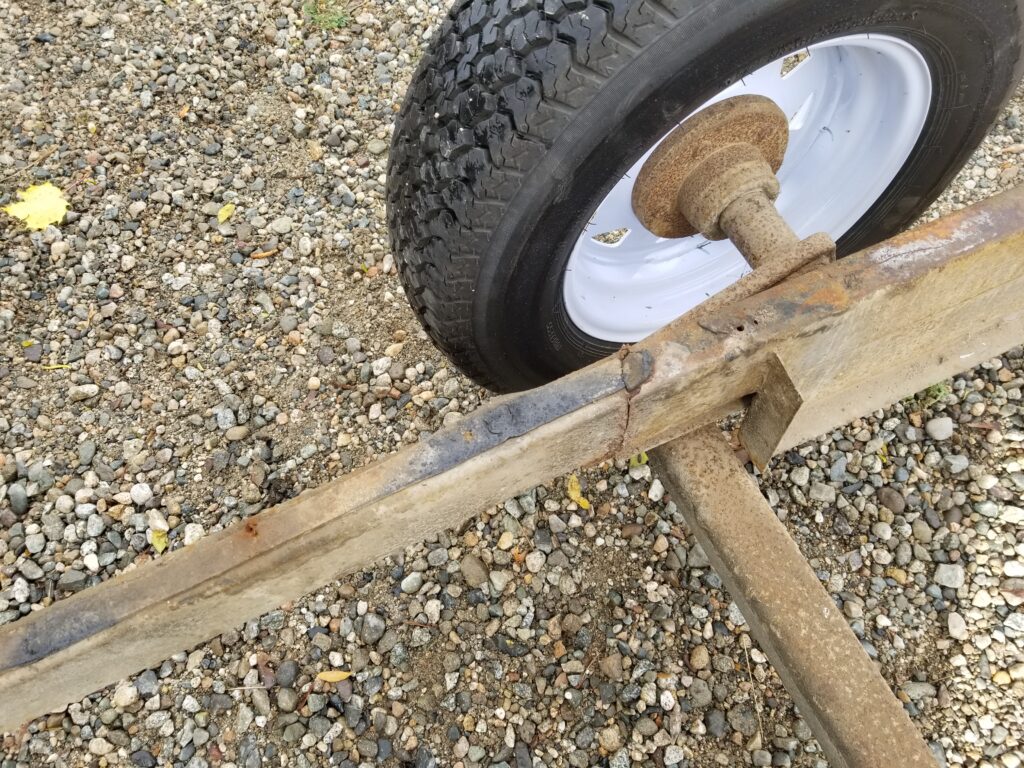
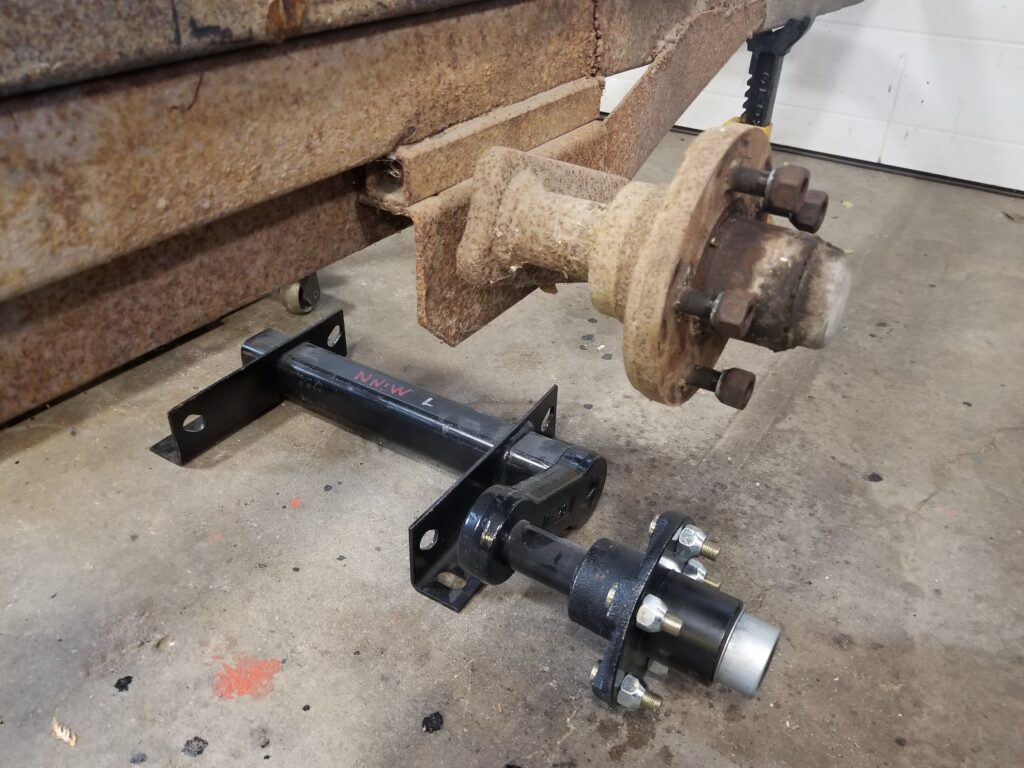
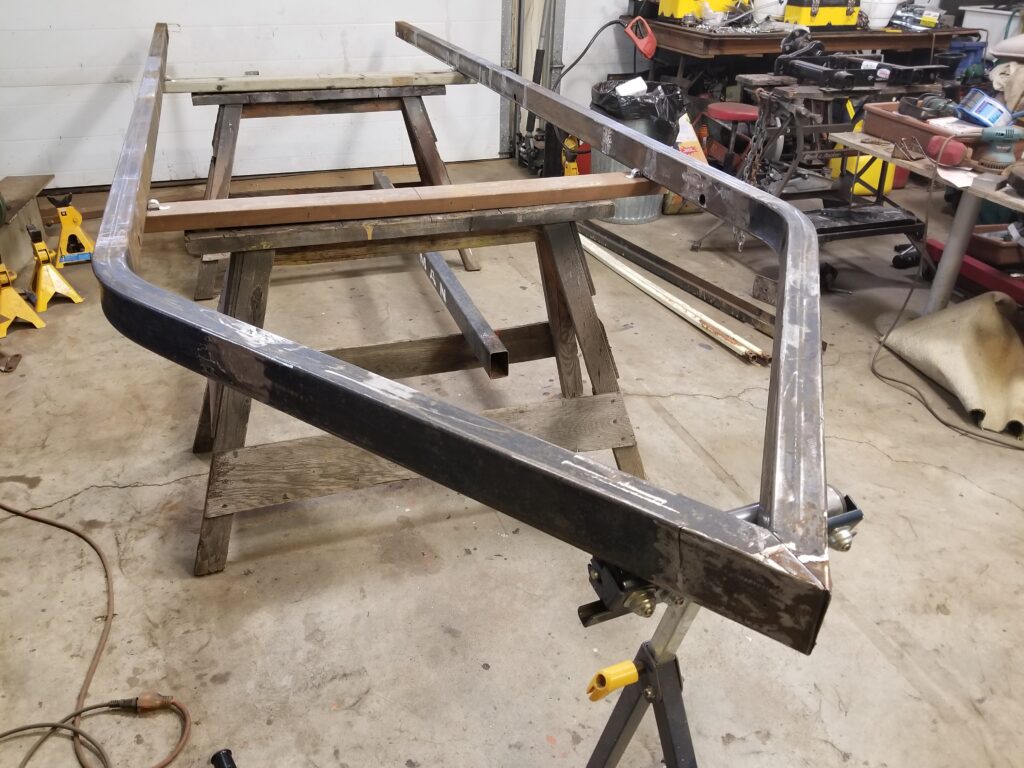
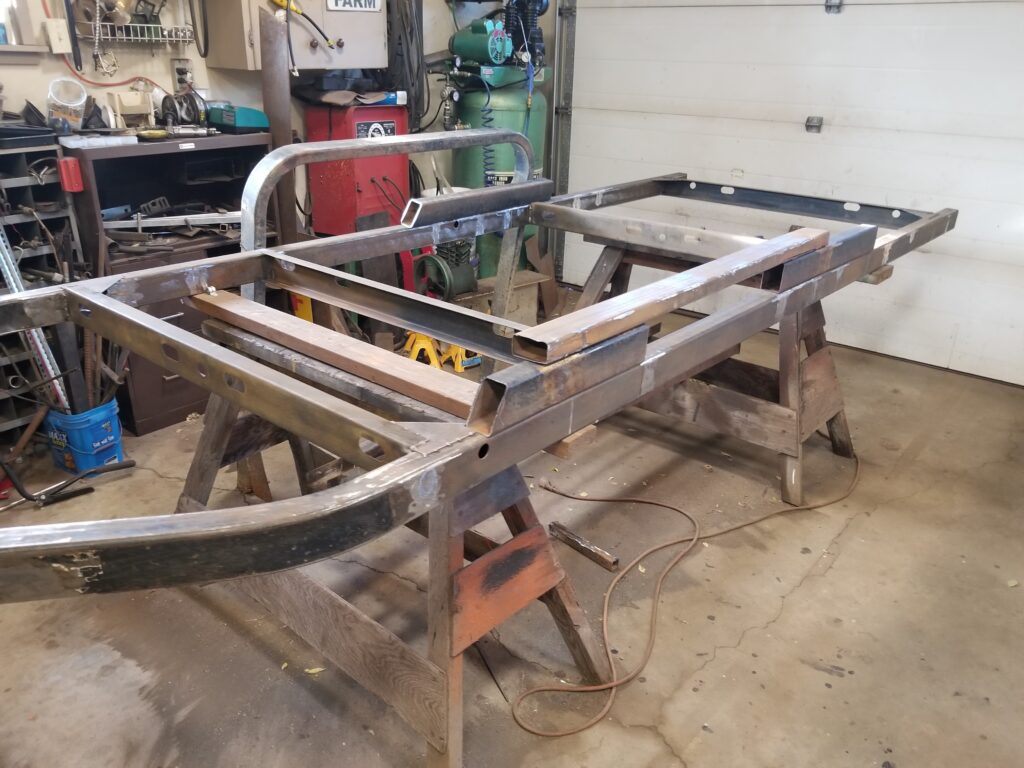
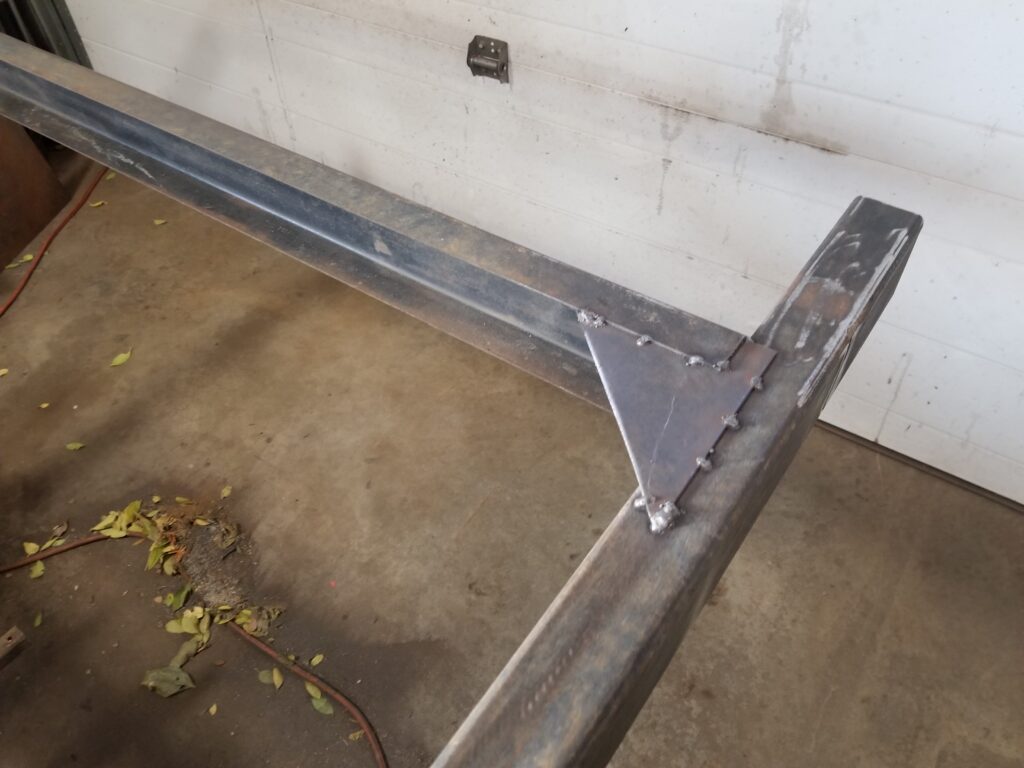
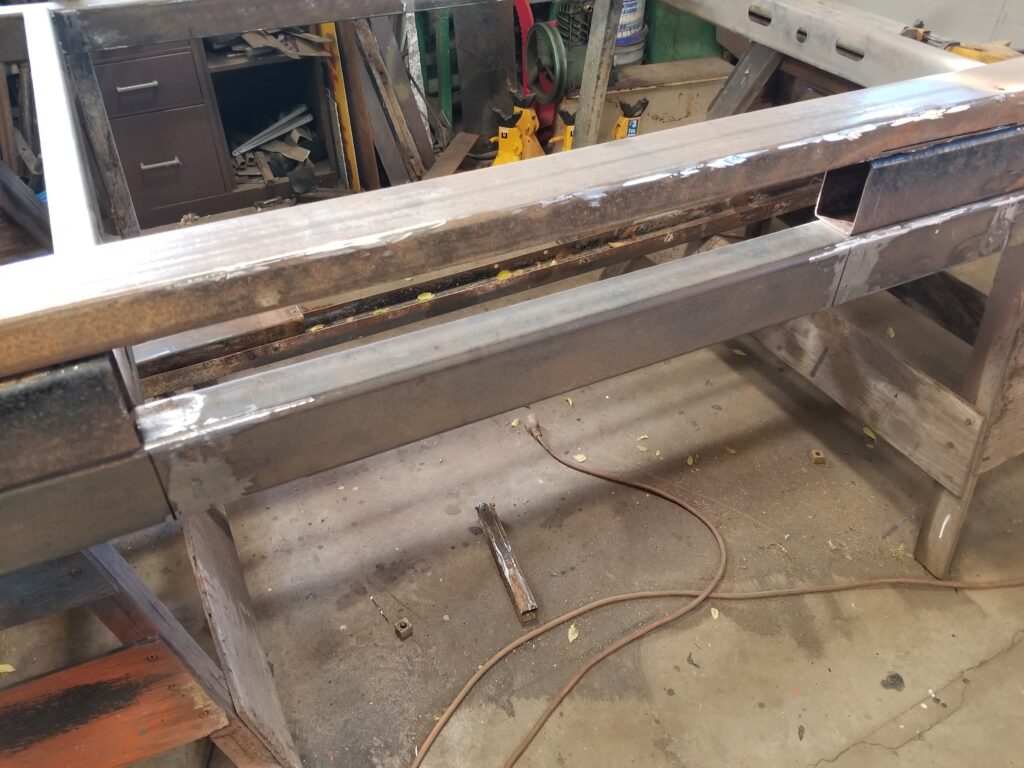
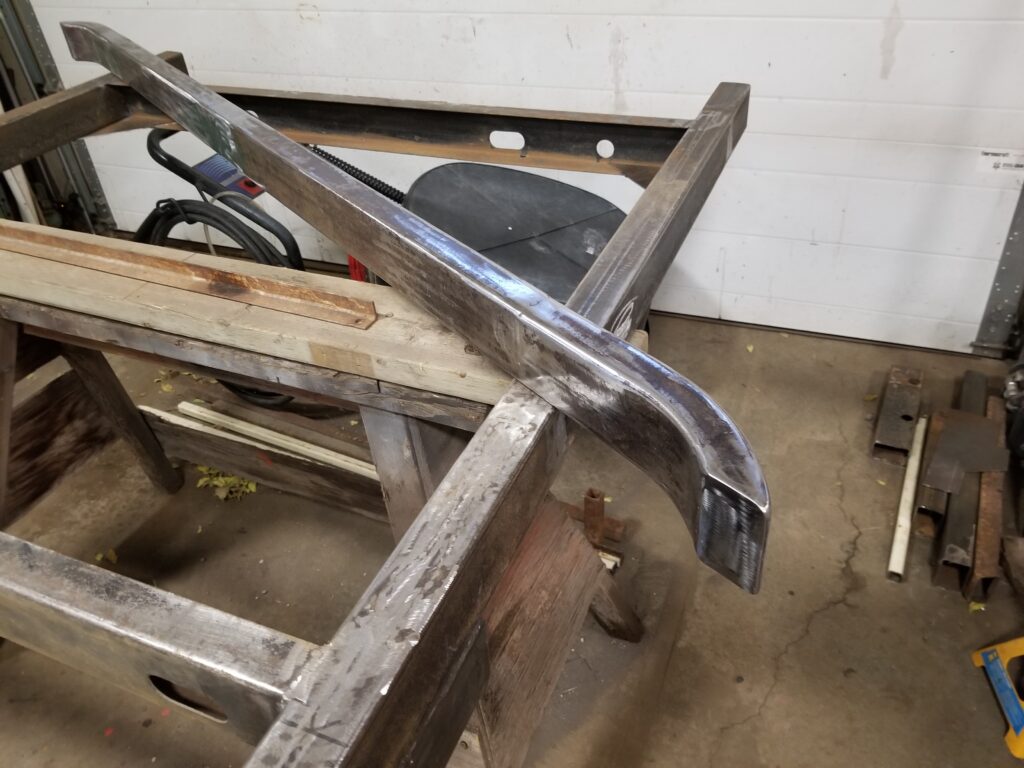
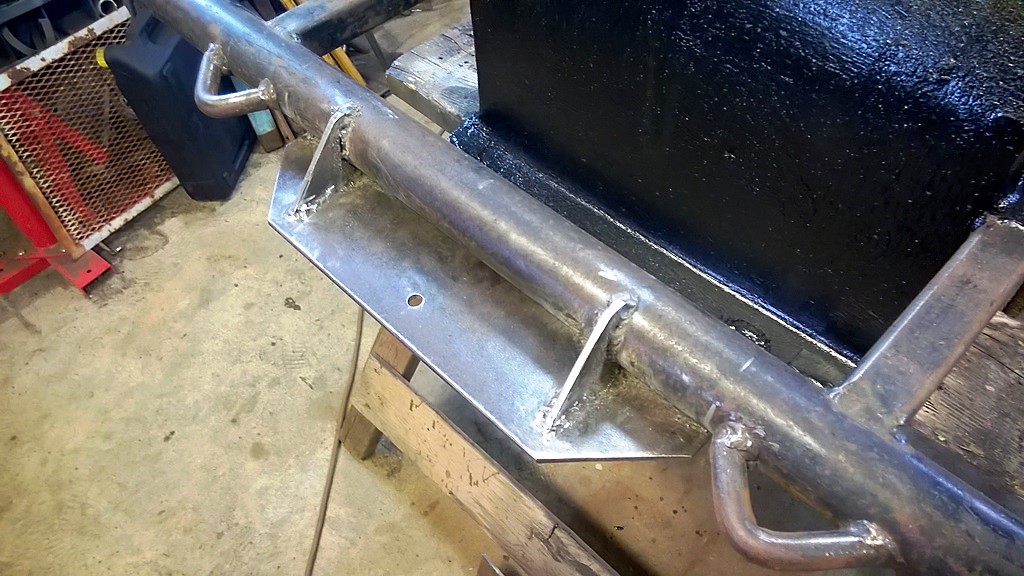
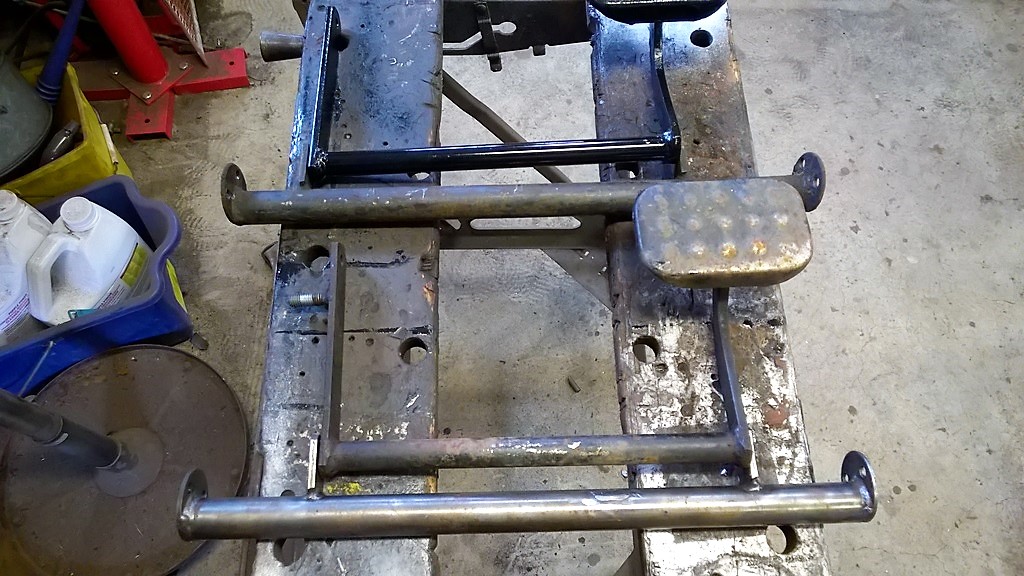
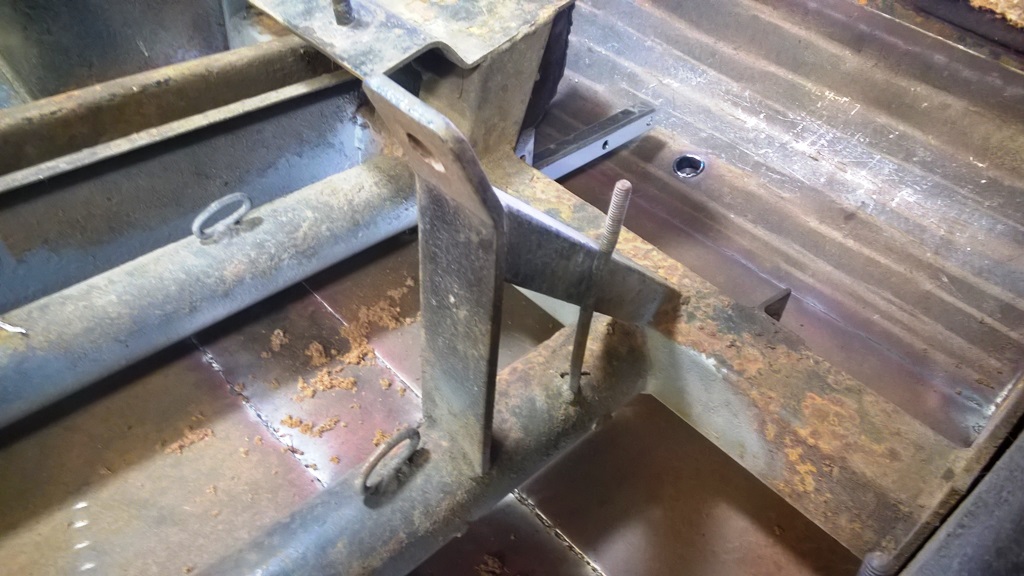
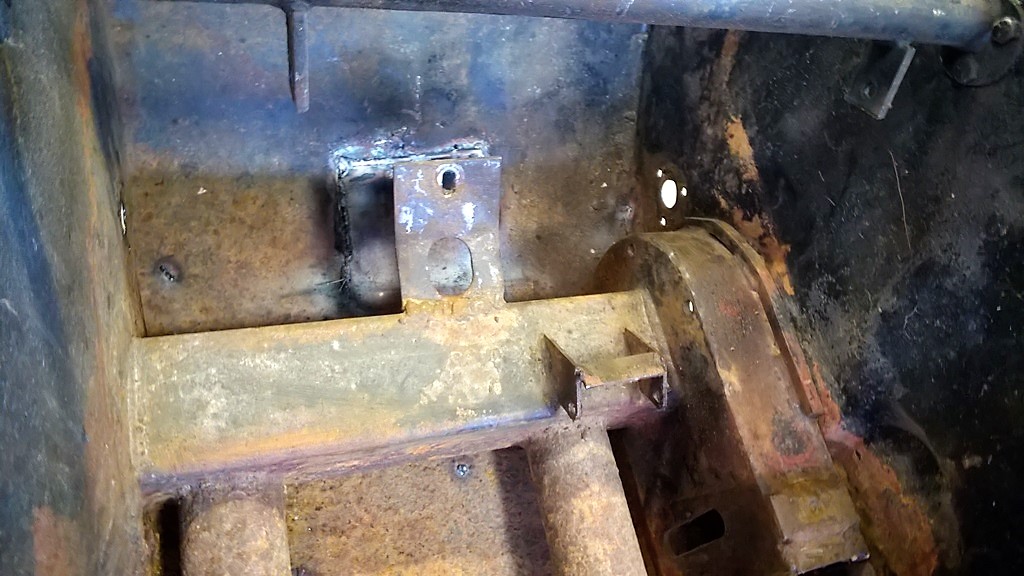
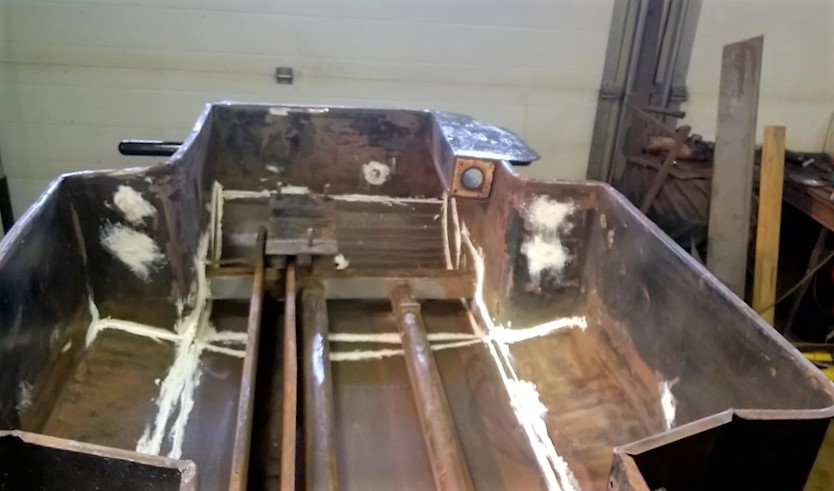
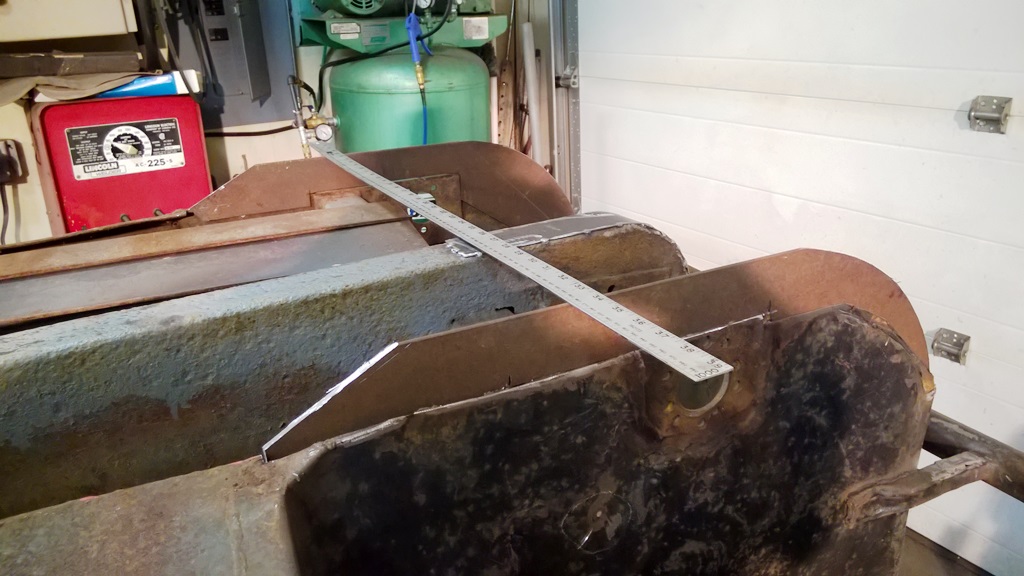
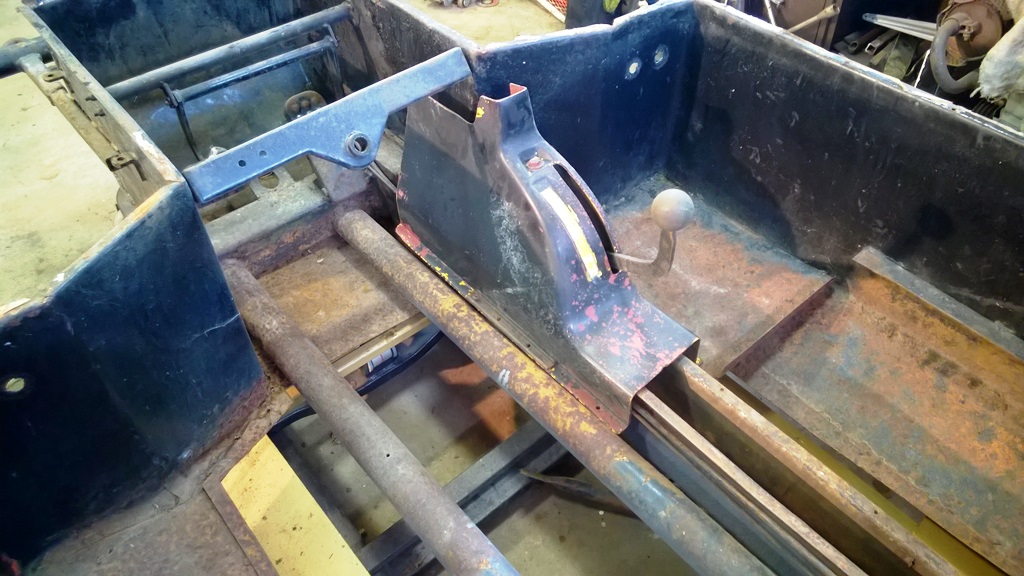
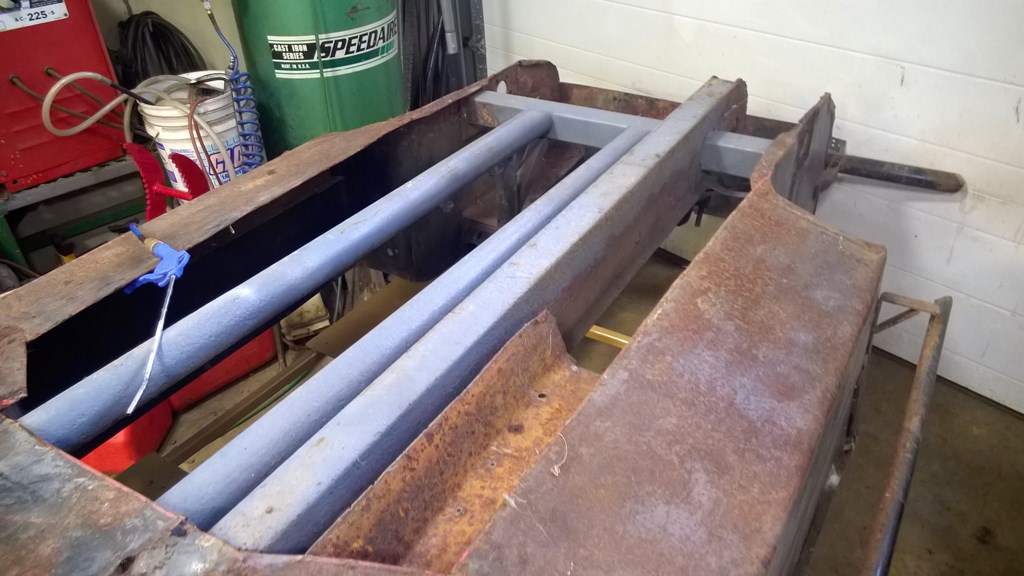
Here I’m working on the mods to the frame to make it camper friendly. The camper will sit 12 inches forward of the rear bumper.. so I’ve meshed in on either side of where the rear step will go. And I’ve added 13 inches out from the frame for fenders and to better fit the width of the camper. Plus a few more cross pieces to better hold the deck.
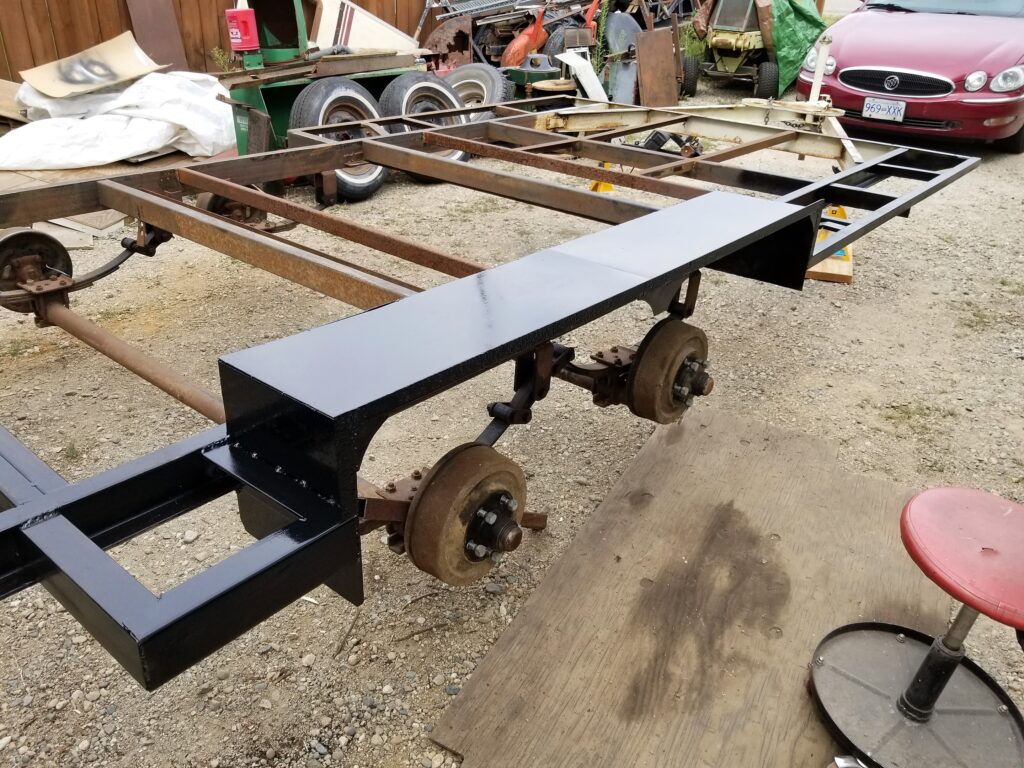
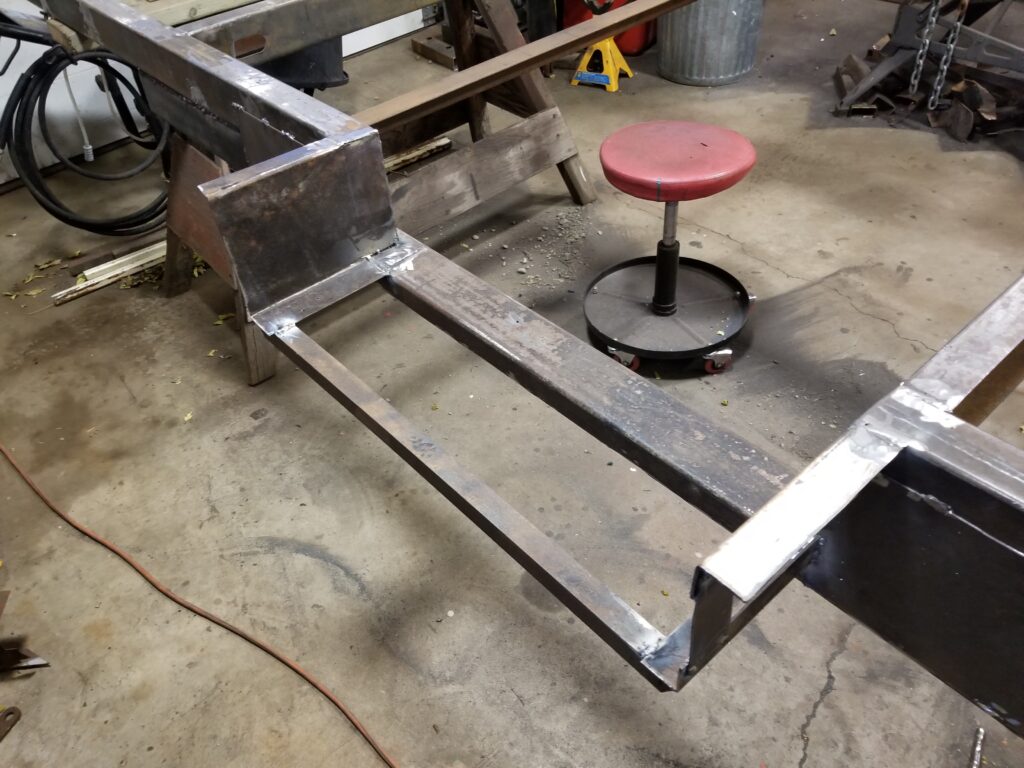
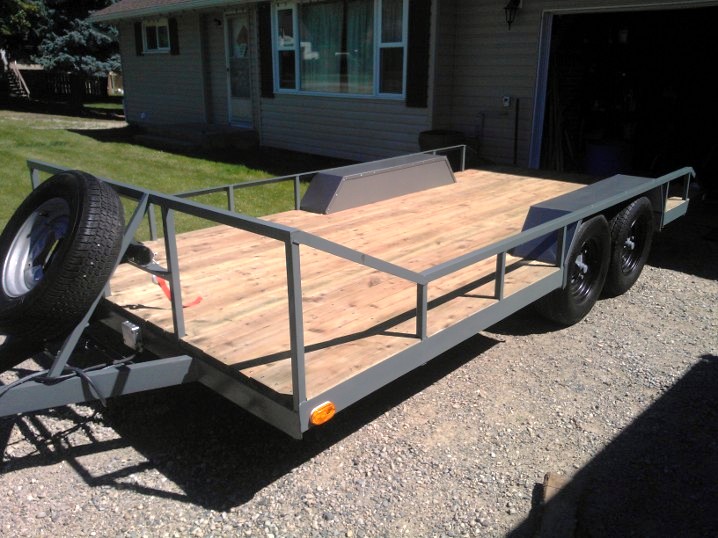
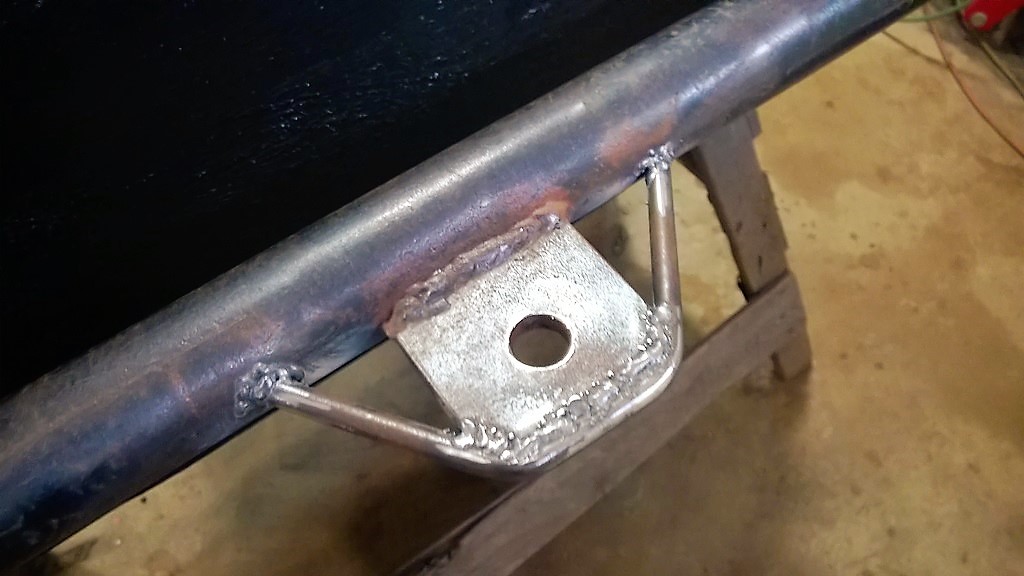
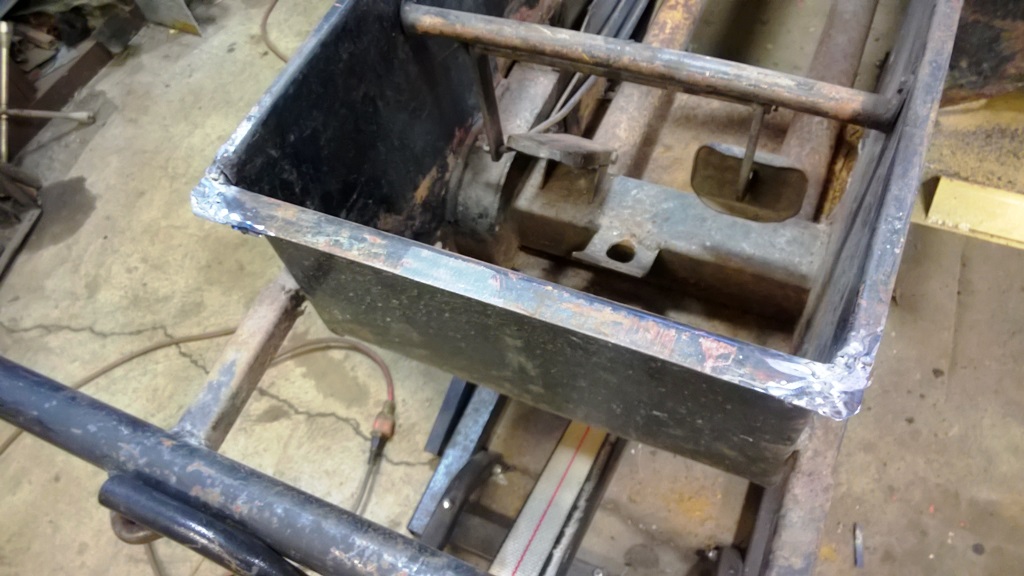
Here’s my right side fender.. all done even painted.. in fact I’ve painted most of the frame now..
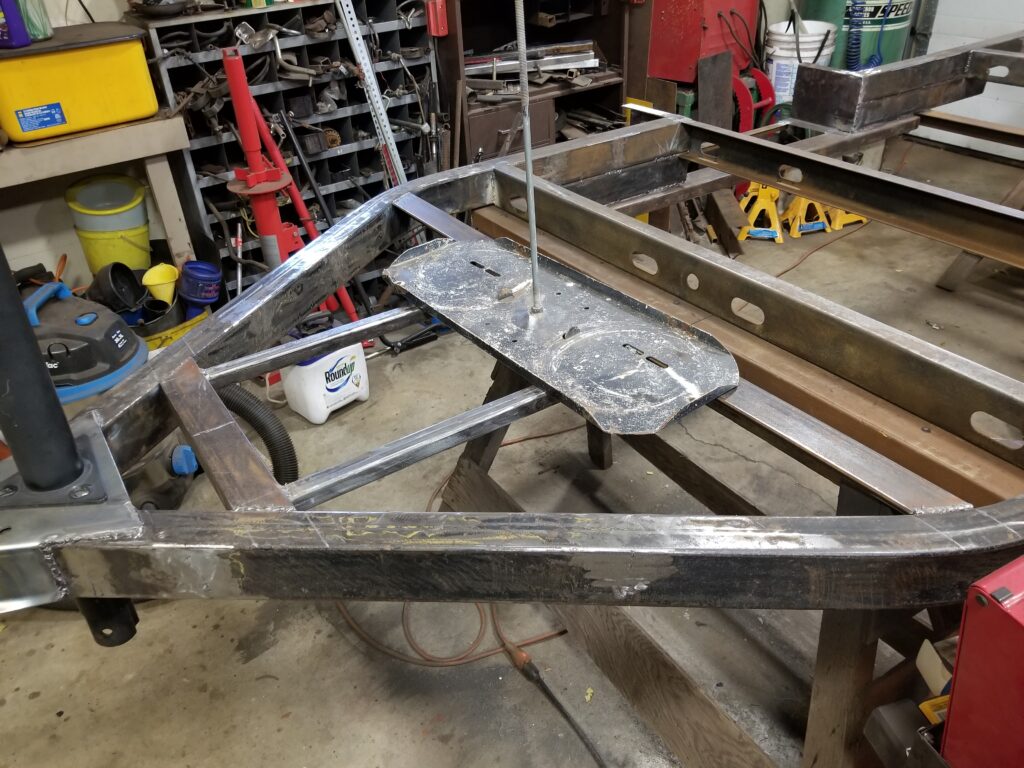
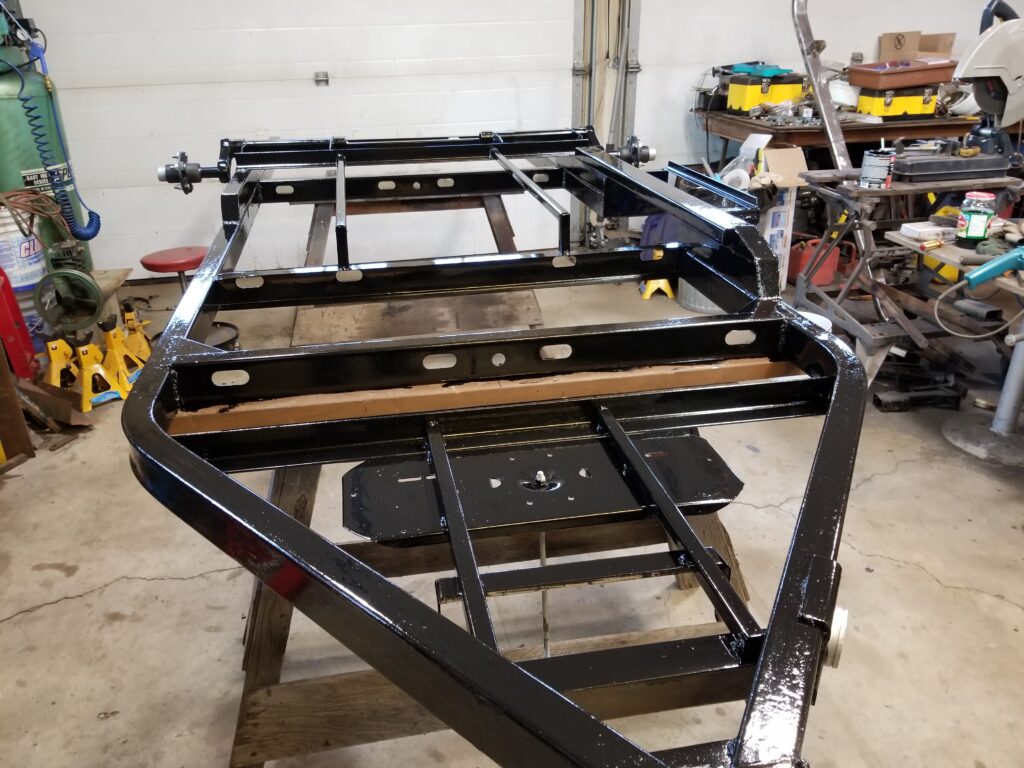
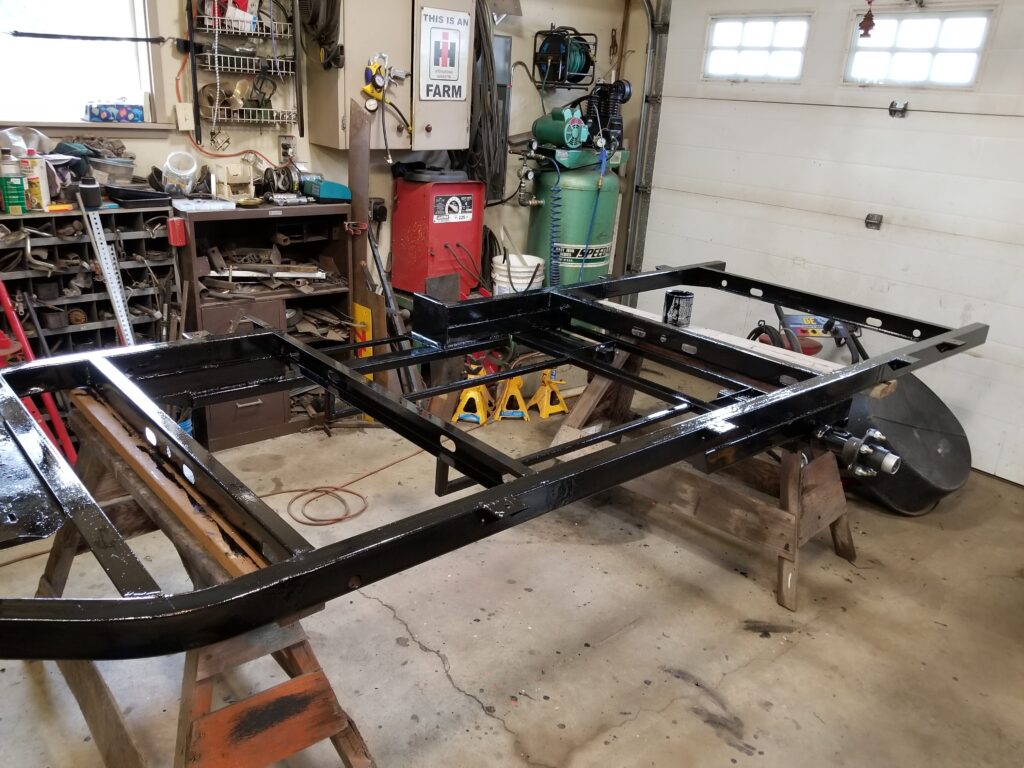
A complete change of color.. Gloss black is the new choice. The wiring is done too..
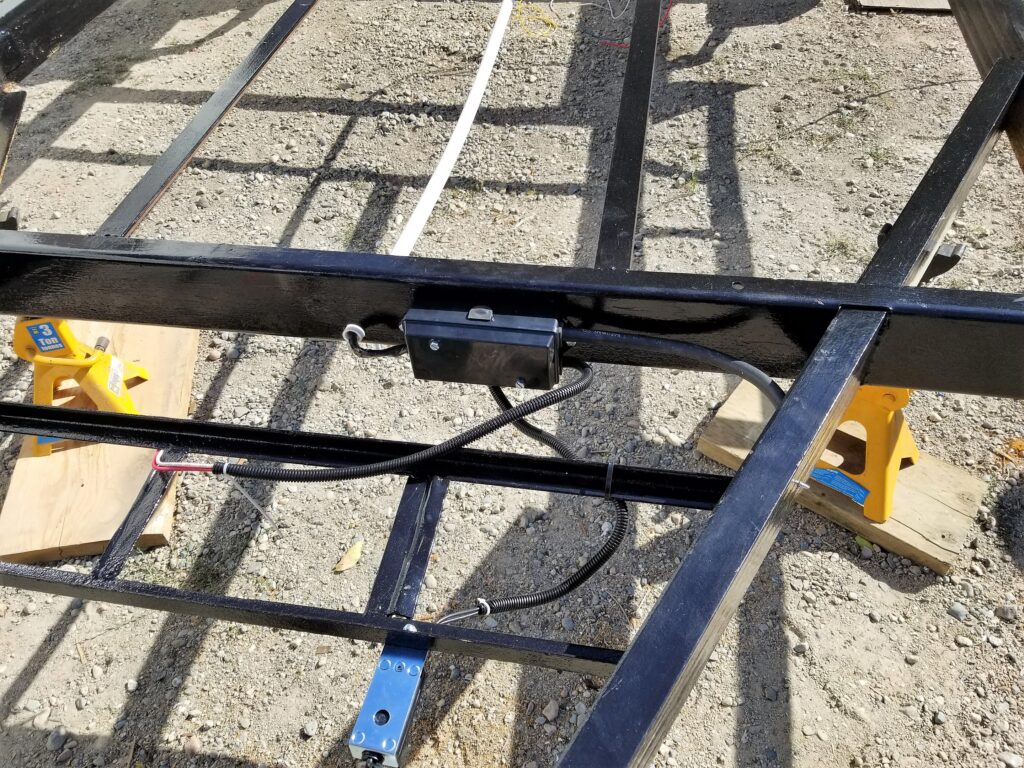
With a new box , brake a way switch, but used good salvaged wire from the wrecked out trailer. I’m thinking I would like to start a new post for the continued work on this project..