Category Archives: Travel Trailers

1973 Boler Trailer…

Sept  14  2017

This Post will have 7 pages:

Introduction:

This summer a few of us were “talking projects”..  and what was worth the time and money.  The boler trailer always topped the list.  I said I should just do RV’s .. because I have lots of parts and a resource for new parts.  Well I bought one..  cheap enough to spend some bucks on it.  First I need to get the LeSharo RV running before starting on the boler.  And then I park it till spring.  but let’s get the blog going anyway.

And this is mine..  a bit of a mess.  been stored for many many years.  But it’s mostly there.  It will likely need work on the frame first..  and then the body has way too many holes..   I plan to strip it down to the shell and start over.. The list of things to do is long..  however this trailer is still in good condition for it’s year.  And so we begin..  with a video..

There’s a few things I forgot in the video..  like new suspension as well as wheels..  So it’s going to be like pulling a new trailer.  Plus this is like a blank slate for colors and décor.  We are already talking about those things..  And I’m thinking of ways to incorporate some of the parts I have.  Also how to bring it up to date with things like LED lighting,  power monitoring and better fabrics.  All while trying to keep a bit of “nostalgic” ness to it.  But the frame on these is always been the weak part.  So if it’s never been replaced then you have to start there.

Frame: (problems under there)

How fortunate that there are lots of folks who have built new frames ..and shared their designs on the net.  So I’m taking their ideas… and my ideas, and making a whole new frame.  I’ll be using the main part of the Colman tent trailer frame that I was about to use for a new utility trailer.

This ( above photo) is a beefier frame  2″ x 3″ box steel compared to the factory boler frame 1-1/2″ x 2-1/2″ box steel.   As well the bigger frame is bent not cut and welded to the angle for the hitch.  I plan to add a third piece in the middle and have the hitch mounted to that.

I like this frame,  mostly the body mounts.  But I will add a few more pieces..  Adding a little weight here will not matter.. just means no problems down the road.  The original boler design was to have a light frame and use the combination of a fiberglass / plywood sandwich floor to ADD strength to the frame.  So they both need to be in good condition to work.  Over time things would sag..  and weaken.  And that’s the case with the frame under there now.

Yes I crawled under to see what’s up and shoot some photos.  Above is the rear floor.  And sure enough the left side has sagged.  Someone welded a angle brace … but that’s not a fix.  I’m surprised to see no other framing … just the two little beams.

And here’s the middle floor .  ( where you stand and walk ) again it seams like no support..  That plywood / fiberglass is very strong !  It does not flex when I walk on it.  And I really doubt that rusty bent piece of angle is doing much.

So looking toward the hitch it’s obvious that the frame was repaired.  Long time ago judging by the rust.  All these problems and the torsion suspension is very much wore out..  That’s why it came home on a trailer.   I know I said I would not be starting this project for a while…  but I’ve got a little spare time and just can’t leave it alone.  I lifted the whole trailer off the ground.

Supporting it with my jack stands.  Interestingly this took the sag out of the frame and show me that the whole back of the body was not tight to the frame anymore.  Wow..

This is the floor under where the dinette cabinet was.  The body is attached to the frame with these screws and washers.  They were pulling out of the frame !  So when I lifted the rear they popped up..  This is NOT how I do things..  Those skinny little screws are most likely rusted and at some point would fail.  That is why my frame will have mounting flanges and carriage bolts to mount the body.

Yes I had some fun removing stuff from the interior.

All the cabinets have to come out anyway..  They need repairs and will be repainted.   May leave the closet alone.. it’s mounted very nicely with cap bolts.   The rust that you see ..  I believe was caused by moisture inside the trailer.. not leaks.  If you close these fiberglass trailers up, then they condensate inside..  best to leave vents and windows open a bit.

Well everything is out..  Real easy to get at the mounting screws now.  It can sit like this till I’m ready to tackle the frame.  I got new suspension on sale..  so that’s another big part of the frame.

These will be joined with heavy angle iron before becoming part of the frame.   For this blog I’m going to divide the work up into three more parts / pages.   Most of my projects have more than one page ..cause I don’t like long posts.   Next page will be the Frame.  Then the Body..  and finally the Interior.

#2 The Frame:

31 ft Challenger Fifth wheel

Aug 21 2015

Love at First Sight …

Was dropping a driver off while fetching cars in Kelowna.. and I couldn’t resist checking out the trailers on the small lot.  And there was a really nice fifth wheel that caught my eye..   As soon as I stepped inside I was in love..  And in love with the price too.   So I took some photos , ( one above included)   And when I got home showed them to Mo.   She too was impressed..   Not new.. nope.. 1997 in fact..  but one owner.. and they took good care of this unit and it showed.

When you see it you would think it was much newer..   So we decided to go for it.. We had the cash.. and the price was low..  So Dave & I headed for Kelowna and had a closer look..  everything worked as it should..   This RV ticks all the boxes for me , Aluminum framing.. truss roof..  large storage..  bigger fridge.  good quality throughout..  Built by Damon Corp..  who builds coaches..

With a flat floor, and hide a bed,  Real nice Table too !

With lots of cupboards.. even a pantry

Not a RV queen..  bigger..  with an opening window at the head.  This room has a BIG closet too.

We used this trailer a few years. I had the truck to pull it and we enjoyed the space.

1992 Trave-L-Mate Fifth Wheel Trailer

Sept 16 2014:

I know.. can’t tow two RV’s ..and where do I store a second one anyway..  However when it’s FREE.. .and my Nephew was going to need a place to sleep while reno’s are happening … then you say YES !

A friend and long time customer of Mo’s .. husband got ill and has been in the hospital for a few years now .. she sold the house and is moving to a condo… also getting too old for towing a trailer around.  all those things and then the roof got a leak…She just wanted it gone.   The whole trailer is in great shape except the roof.. In fact it’s a very deluxe trailer..  all the goodies you need for “Glamping”

I also got the hitch.. and I’ll mount that in my truck..   Free stuff does not come without work.. and so the roof needs to be peeled back and repairs done.. That will be next spring.  For now  we will tarp it for the winter and deal with it next year.

A new Chevy 2500..

We decided that a more reliable truck would work better.  I bought this one before I quit the car lot..  This truck came equipped to pull trailers. Even has the fifth wheel hitch installed..   Also has the heavy duty Allison Transmission and a 8.1 L 399 hp V8.   It’s a big truck ..  the quad goes in the back with room to spare.

Well it’s June 2015 and I’ve got the Fifth wheel in the Franknport  to get the roof fixed.  It’s taken a few weeks just to remove all the vents ,  A/C  and the trim from the roof.   I’ve now rolled up the aluminum roof..

The roll of tin.  not going back on.

Well you find out quickly how bad things are once the aluminum is off.  It’s still wet under the metal..  even after months of no rain getting on the roof.  Quite a bit of the plywood is de-  laminating .

I’ve got about half the roof off.. the rotten half.  Once I’m done with the demolition I will clean up …then it’s construction time !

July 5 2015:

The Roof is completely cleaned off.  The mess is gone… and we are ready  to build a new roof.

I have all my supplies :  new rubber roof/ glue,  New fridge vent & cover, new plumbing vent.  Maxair covers for the roof vents.    I also have enough 2×6 treated lumber for the rafters.. And because I don’t want the roof to sag ever again..   I’m custom cutting all the rafters to be arched on top.. Thicker in the middle where it’s needed.   I’m building in 4 ft x 8ft panels so they can be lifted into place easy.

I have now got four of the five sections in place..  Only the rear one is screwed down..  Once they are all up I’ll attach them with ceramic coated screws.. they won’t rust or react with the treated wood.

A thing of beauty..  There is finish strips for the seams, lights and vents..   The big whole is for the A/C unit .  I laid the tin roof out and copied the location of all the vents and A/C..  fudged just a bit on some to get the right spacing on the rafters.  But it’s all back the same .. Minus the skylight..  and the TV antenna.

The whole roof is on now..  Interior I mean.  and most of the finishing inside is done as well. Like this new light I added to the living room..  It’s close to the kitchen so it benefits from some extra light.  The wires went across the roof anyway so why not add a light.  The new ceiling is a brighter white as well, making it far less dark.

Onward…

I now have all the insulation done and today I got the 1/4 ”  ply on the roof.

Getting there.

And here’s the 1/4″ Ulay ply installed..  lots of screws..  5 sheets did the whole roof.   You can really see the slight curve in the roof..   Now to glue the rubber on.

July 19 2015:

Well … Git R Done..  and with only a week to spare..   So close to a finish..   The wrinkles are ok..  you should never stretch the roof..   and I was working with a fast drying glue..   As you can see all the vent’s, covers and the A/C is back where they belong..  All the trim is back too..  Just some fiberglass repair and a bead of RV sealant left and we are ready for whatever mother nature can throw at the roof.

Well the Fiver can come out to play now..  Install the fridge and give the plumbing the once over.

Update … Well after a few years the roof leaked again at the rear this time.. And no matter what we tried we could not stop the leaking.  The damage was done so it’s not being used and destined for scrap.  SAD.


Kettle River Group Camping

Group Camping @ Kettle River Park

This is a new post that will be for info on our Summer Group Camping..

We scored big this coming summer.. getting the site for the August long weekend

This year … 2014 we have the Groupsite booked from:  Wednesday. July 30 th .. to .. Sunday August 10th.   The gate is open for us 1:00 pm on the 30th.. And we leave the Monday morning by 11:00 am.  That’s 12 whole days of fun , relaxation & visiting.. Come for as many days as you like..

Also this year we will be helping Jens & Diane celebrate their 50 th Anniversary  ….  Stay tuned for the plans..

Waiting for the gate 2013

Hopefully we all avoid this line up for this year.. We were all so anxious to get there for our short time that we kinda piled up at the gate.. They won’t let us in till 1:00 so no point in being early. 

July 16 th..  :

Well it’s getting close..  and it looks like there may still be a campfire ban in effect by the time we arrive at camp..  I will wait till the last minute to load any wood..  

Update: July 22..

We are looking at just over a week now..  Campfires are allowed AT THIS TIME…  so we will bring some wood.. The compessor is dead..so we will have to do with our own inflators..

I made an adapter to use on one of the 30 amp plugs.  It splits the 30 amp into two.  So we would have three 30 amps..  Dave repaired the cage compressor that we use to inflate stuff.. it was getting tired ..  we don’t use it here at home anymore.. But it should be good for the summer..

Last year in 2013.. we had to find other ways to camp because of only getting the four days.. A few of us went to the Arosa Ranch up on Anarchist Mountain  You can see the Facebook page.. Give them a call very nice place with full hook ups.

Spring is here !

And camping will come before you know it..   I was kindly donated three more River float tubes..  the good kind that we like.. so they will be added to the bin of floaties..  Just like the one in the photo below except yellow & black..  so no worries if anyone needs extras.

Jayco Trailer First Trip

June 9 th 2013:

It wasn’t far.. just 55 kms from home. But the purpose was to test out the trailer in the real world and see what we liked and needed to change.

Midway Community Campground :

That is where we went .. with our friends along with their trailer too.. We’ve been thinking of trying out the small riverfront campground for a while.. and this was the perfect time.. $20 a night with 15 amp power !  good deal. AND you are backed up to the river.. NICE.  It’s quiet.. like the rest of Midway.  Anyway it was all about testing the trailer out..  And we love it.. Everything worked as it should.. we have more cupboards then we need.. and we had to keep turning the temp down on the fridge so stuff wouldn’t freeze.  The trailer towed sooo nice on the highway.  It’s a keeper.. We love the bed.. love the kitchen..

In fact it’s so good that we want to use it more.. we want to come back to this campground just for the weekends a few times.  It’s very relaxing.. and only a 40 minuet drive.  We also want to check out some other places that are within a hours drive..  More camping…

24 ft Jayco Trailer

May 2013:

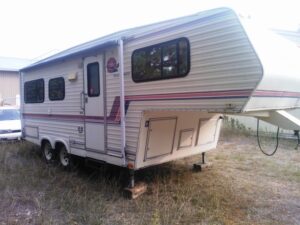
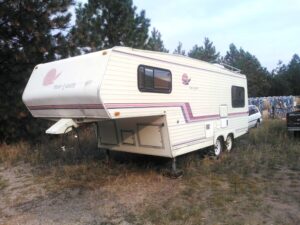
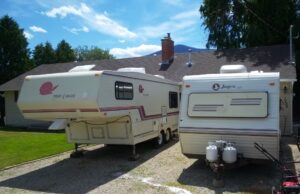
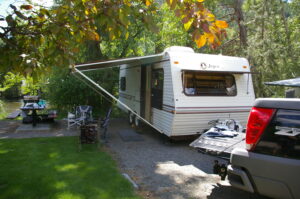
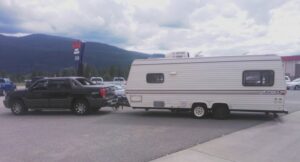
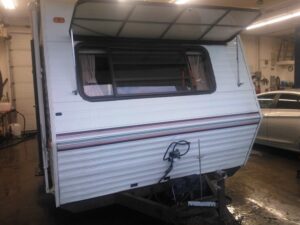
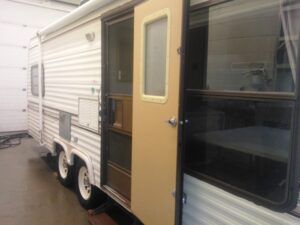
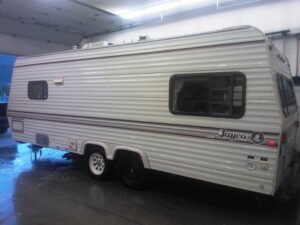
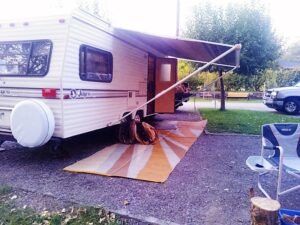
Here I go .. but not so crazy this time.. at least I think so..  As you may know.. I had a very good offer on the GMC motor home and we realized the lack of use it would get so ..take the offer.. and off the GMC went.  No RV but a whack of money in the bank…Good  Suited me fine, if the guys at work bought one I could borrow it.. But nether of them were really keen on that.. Oh well..  But I was always scanning the ads for ..well everything.. even RV’s and I saw this trailer for sale ..Christina Lake… hmm close enough to have a look.. Dave & I did just that.. And to my surprise it was the best trailer I could have ever hoped for.. So I threw out a low offer and they accepted !   Wow.. What a deal..  This is a 1990 Jayco J-Series 2450.  With the best floor plan I’ve seen.. better than what I saw at the RV show last fall…and those were new ones.. For 23 years old it’s as sturdy as the day it left the factory.. No signs of ever leaking.. and we know were to look..  Completely original inside & out.. No damage at all.. So home it came..

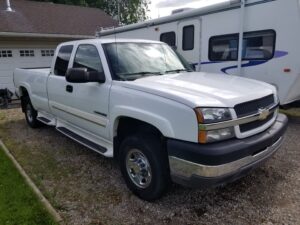
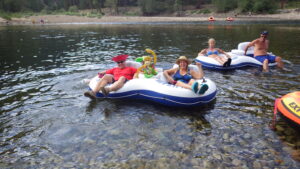
We used Dave’s Avy because I don’t have a brake controller yet.  We did have to stop at the bottom of Fife Road hill just to make sure the bearings were ok and give the tail light bulbs a twist to get the connection better.. This trailer has not been towed for a few years.. but used as a extra home.. I was worried about the tires making the short trip..  They are rough.. and the spare is used on one side.  But it all went ok .. in fact even without a proper equalizer hitch it towed great.. Wow very positive.. I believe this to be a good size trailer for our Avalanche’s to handle without worries.

Now it’s home have a good look test some things out .. make a list….

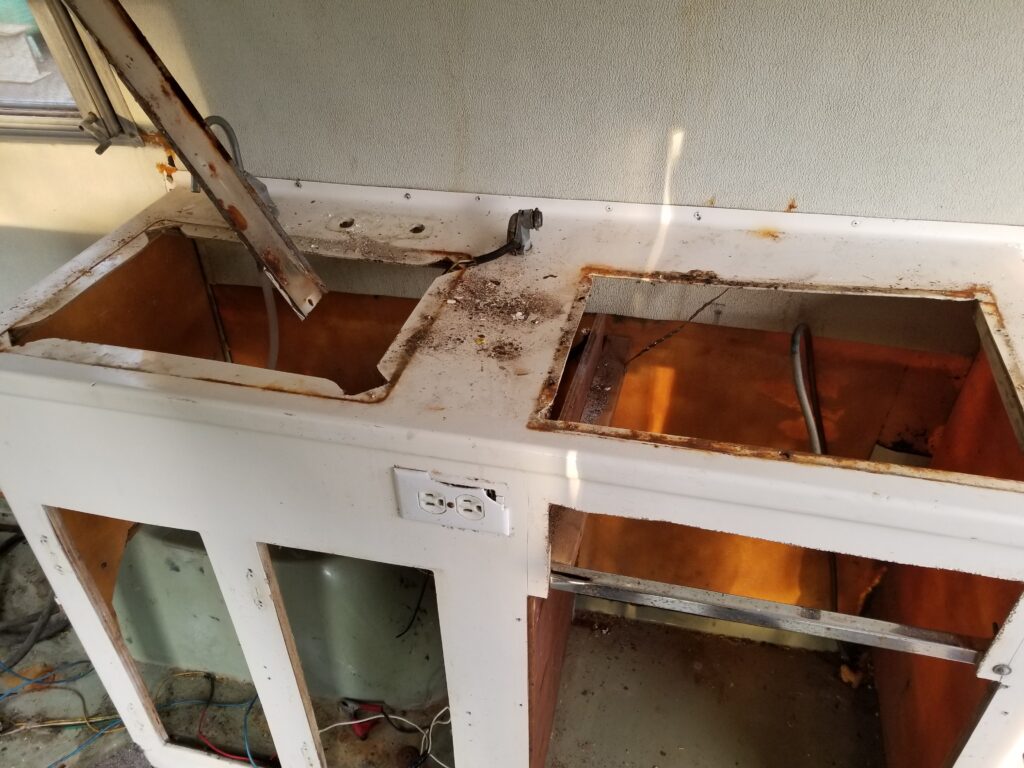
It’s not without issues… mostly outside.. that is where the weather has worked it’s magic over the years.  The obvious things are:

The Tires: Bad enough that four new ones have been bought and the spare will return to it’s holder on the back..with a new cover. This gives piece of mind when traveling.. most likely the last tires I’ll buy..

The Awning:  We could see cracks in the fabric.. and sure-nuf it’s dirty, wet and there is wasp nests up there..and they damaged one part.. you can see in the photo.  too bad because it’s a nice one..or was.  it’s a 14ft one..the plan is too install the 18 ft one from Dave’s old Award trailer.. it’s still good and that will give us one that covers the whole lenth of the trailer..

The Fridge Vent Cover:  It was toast !  Cracked and on the verge of being a leak..  We’ve replaced it with the one from the Award.

Note Here.. that we are wrecking out Dave’s old Award trailer.. it has already donated parts and pieces to other’s including the fridge that went into the GMC..  Going to be handy for a few more goodies..

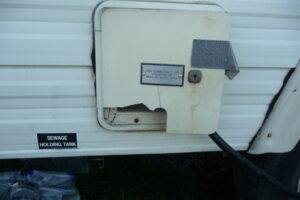
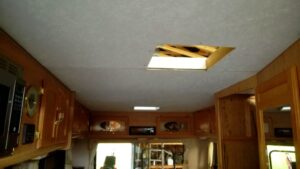
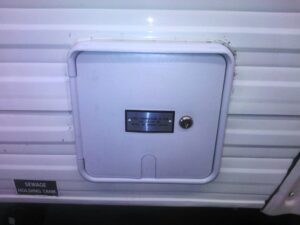
The 30 amp connection box door:  It’s cracked and won’t close anymore.. See above photo..  I’ll have to buy a new one.

The Range Hood Vent:  It was / is missing the flap that keeps the critters out.. The Award had a good one..

The Bathroom Door Latch:  The only thing (for now)  in need of replacing inside..  The Award has a good one..

The Not Bad Stuff !

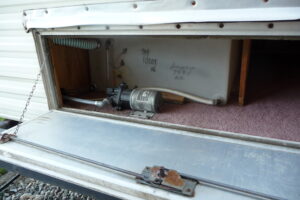
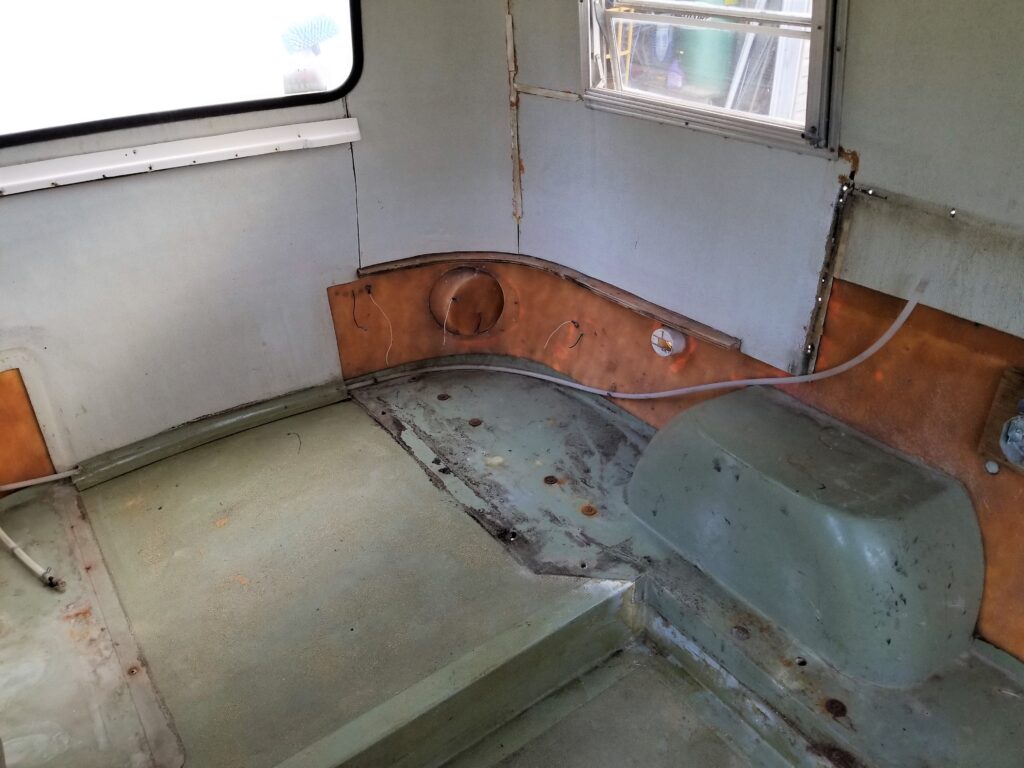
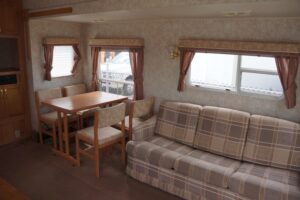
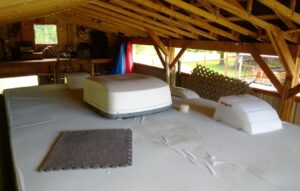
The pump and the water tank are under the bed and accessed by this door on the rear of the trailer.. Handy for repairs and winterizing !  Just remember to turn it off at night !  Check out the carpet color.. yup same as our Award trailer.. Dusty Rose.

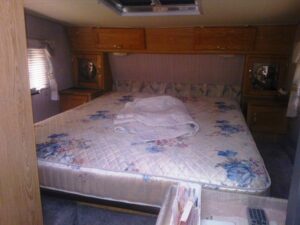
This is the most desirable feature of the trailer.. a walk-around bed.. no more crawling over each other..  There’s a 60″ wide mattress there now but a bigger one will fit..  Opening windows on three sides ..Sooo good cause we like fresh air.. And I’d like to point out that those windows are my favorite louvered ones.. when they are open the rain can’t come in.. Why don’t they still use them ??

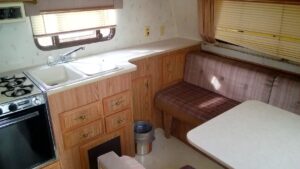
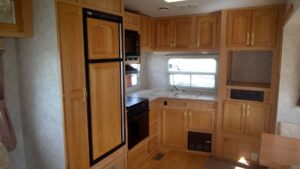
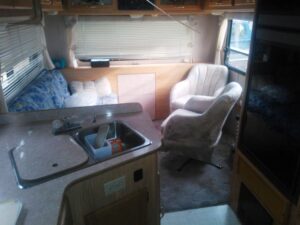
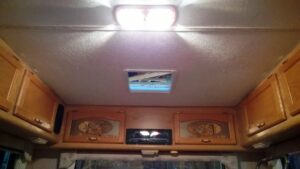
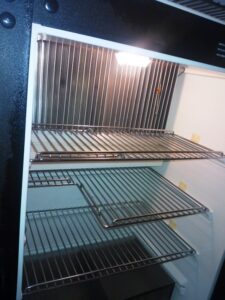
A kitchen with everything you’d expect. Double sink, 4 burner stove with oven, two door fridge.. lots of storage, and the all important counter space for the coffee maker.  all the upholstery and window dressings is in perfect condition. Every light works ! And yes the clock too.. One of the first things we did was to plug the power in.. The A/C works great.. The fridge got cold ! The info panel works ! A quick clean and we are moving in..

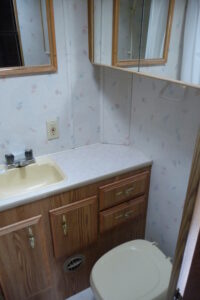
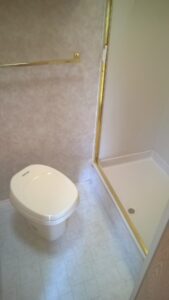
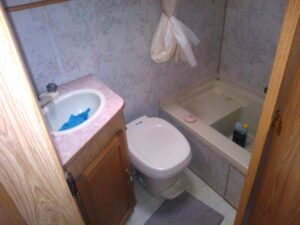
Ahh the Bathroom.. There’s a tub /shower that I could actually use !  And you can brush your teeth and crap with the door closed ! It’s a bit bigger than what we had in the Award.  It will work just fine.

Now We need to test the plumbing:

NO leaks ! I put some water in the tank and the pump fired up and flushed the left over anti-freeze out of the lines… But the pump would not shut down after the pressure was up.. We put our pressure gauge tester on the pump and it would go to the 32 psi like it should.. so Dave lubed the sensor up and adjusted it and boom worked as it should.. So then I hooked up the city water and that was good too.. NO Leaks !  Not even the faucets..  WE HAVE WATER..

Let’s Check the Propane !

The trailer came with two 20 lb tanks.. they don’t look old but one is out dated .As well one was empty the other feels like it was half full.  It’s a simple and typical trailer system.. The stove lit up perfectly and the furnace fired up and the heat was coming out..  no problems .. The hot water tank was a little more work though.. The main burner worked but the pilot would not light.. Due to some critter making a home in there .. the air hose evicted the little guy.. Now the heater works perfectly.. So all is good with the propane.. will need at least one new tank though.

The Shopping trip !

During our trip to Calgary and Edmonton I stopped at several RV parts stores and bought all the necessary bits & pieces. Including: two Max Air vent covers.(we like to leave the roof vents open).  Spare Tire cover. ( cause I’m a neat freak). New sewer hose & fittings. New Electrical cord door.  New Water tank fill door. (old one looks gross). New Tail Lights.. ( just like old ones but not broken) . Some RV caulking / sealant..  And a few other bits.

Time To get Started :

The first thing I got done was to change out the tail lights. Easy when you use the same but newer..I then sealed them with the new stuff.   Next I need to get up on the roof and clean up the old sealant.. But it started to rain. So… I’ll talk about some of the things I plan to do..

Cleaning the Exterior :

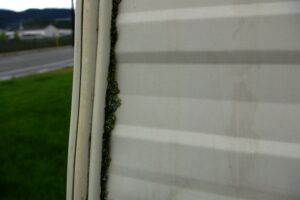
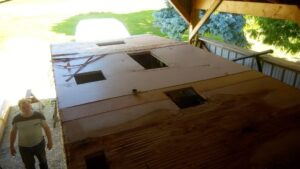
So in these two photos you can see what Mother Nature has done to the caulking.. Yup things are growing.. in the top photo I went to town on a part.. a little too much.. started to remove the paint Yikes !  I’ll have to be more careful.  But it’s how this trailer will be after a good bath..Then I’ll use the new clear sealant and cleaning will be easier. But first I’ll need to fix up the roof..

The Batteries :

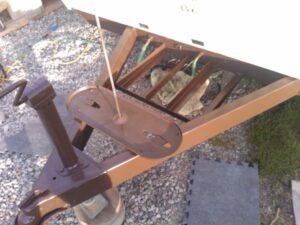
The way they had it was with the extra battery in under the dinette seat.. I’m not fond of having batteries inside.. The battery tray you see in the photo will only hold one battery.. So the plan here is to remove the rear cross piece and weld four of them back to the trailer frame so the two can sit side by side.. That works better.  These are large batteries which makes camping without plug-in power for a week possible. Of the two batteries that came with the trailer .. only one was good..

The Bath :

The weather kinda turned for the worst here.. So I decided to use the shop at work to do the roof and the cleaning.. so tonight I towed the Jayco over there and gave it a bath.. I used degreaser on the harsh spots.. Rust jelly on the rust.. and the whole trailer got a wash with “Super Clean” my favorite RV cleaner.. It is of coarse diluted half & half.. Brings the shine back to the siding..
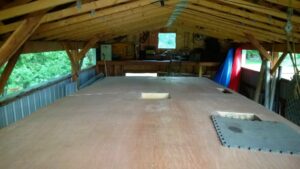
 

 Fixin.. the Roof:

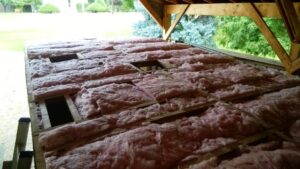
Well I got the whole roof all re-caulked.. The sun had curled some of the roof coating.. See photo below..

Although it had not leaked yet it would if left this way.. I also got to reattach the fridge vent cover.. in a better way.. While I was working on the roof Maureen was inside giving the Jayco a wipe down and vacuum.

Some New Parts :

While in the shop I replaced the power cord door and the stove hood vent.

Now doesn’t that look better.. works better too..

Also while in the shop I did a very thorough cleaning of the windows.. The louvered windows are great but they are tricky to clean and the opening mechanism needs some lube now and then..  Then I brought it back home..

In this photo that brown spare is still on the rear of the trailer..  The proper white spoke is back now and I’ve since painted the spare RV white…

 Cleaning The Awning:

The Norseman Awning has some good features.. So maybe thinking of keeping it.. I’ll see if it can be repaired. So I gave the awning a MUCH needed bath..  Looks way better but those tears bug me..  Mostly (We Hope) the awning is needed for shade not rain.. So I’m thinking just use it this year.

 Wheels & Brakes:

Finally got the trailer over to Peter’s to change over the tires and do the service on the bearings and brakes.  Everything looked in good order.. except the wiring connection to the brakes on the rear wheels was corroded, and needed to be repaired. No wonder it seemed like there were no brakes…only half were working.   We installed new grease seals and repacked the bearings. And of coarse mounted the four new tires. The spare was still good and two of the old tires are worth keeping.

Fixing The small Things:

There were a few things that needed fixing inside.. The fridge light (fixed) , The bed room door was of it’s track  (fixed) I installed a new (closable) heat vent in the kitchen.. they had taped a piece of cardboard over it !

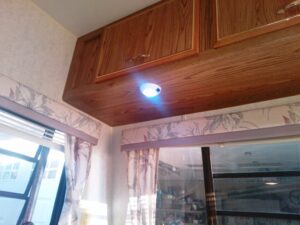
I have also changed out three of the lights for LED ones that I had.  Just the ones we think would get left on to see in the dark.. The hall light, and the two over the head of the bed. I have more should we decide they are better. They certainly use less power when your running on battery alone.

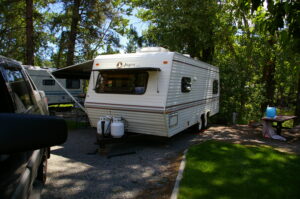
The messes are done.. including cleaning the two roof vents.. and they now have the covers installed on them so they can be left open.  Time to move in..  Now that all these things are in good order.. the Jayco looks much newer that it is. It truly does not seem like a 23 year old trailer. It’s clean and everything works as it should.

I’m just putting the finishing touches on some of the exterior now.. Painted the hot water & furnace covers, they were grey and looked out of place.. they are now RV white and look like they belong..

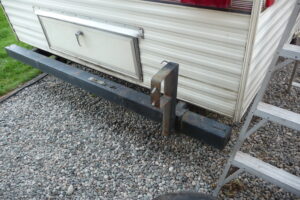
I’ve also welded the spare tire carrier to the bumper.. it was clamped and had a mechanism for folding it down ?? I could maybe see the need for that if it was in front of the access door but it’s not…so it’s much stronger now.. And the bumper got a new Brown paint job. This was the factory color for the frame. I also repainted the step and I’m in the process of painting the Hitch end too.

I’ve now finished the trays for the two batteries. And everything got a new coat of brown paint.. Just need to put things back and we are done.. Time for a “Shake Down” run..

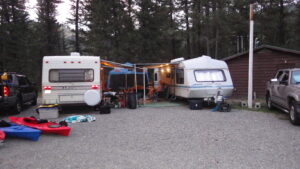
The Jayco spent some time in the Franknport but mostly it’s been in the driveway and being used as a spare room.. It’s been hot and when we used the AC it worked great.  And I’ve been running the fridge for weeks now and that’s working great too..  We are looking forward to spending the first week in August in the Jayco.. That will be it’s second trip.

 2015  Many Trips:

in the Jayco now.. three years to the family camp..  Now has new awing Fabric installed on the frame. We got a foam topper on the bed so it’s a bit more comfy… This spring while testing things after winter storage.. the fridge decided to give up it’s duties.  A newer one was found and we are good, everything works as it should..

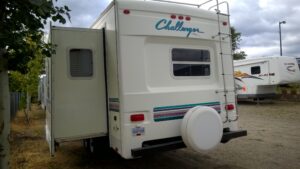
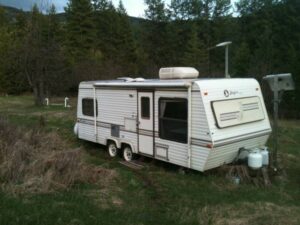
Sadly though a Fifth wheel 31 ft Challenger has come to live with us.. and it’s time to move up.  bigger newer and Deluxe!  So the fate of the Jayco is unknown for now.

Update :  We did sell the trailer and I delivered it to a new home not far away.