I’m going to spend another few days before I kick the TJ outside so I can use the shop for servicing tractors.. So let’s se what I can do.
The Chain :
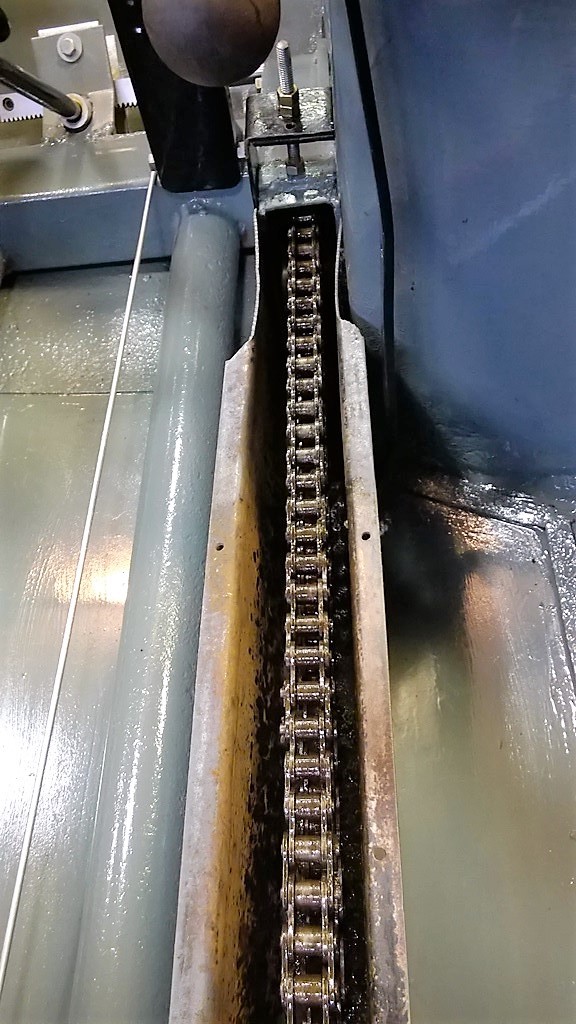
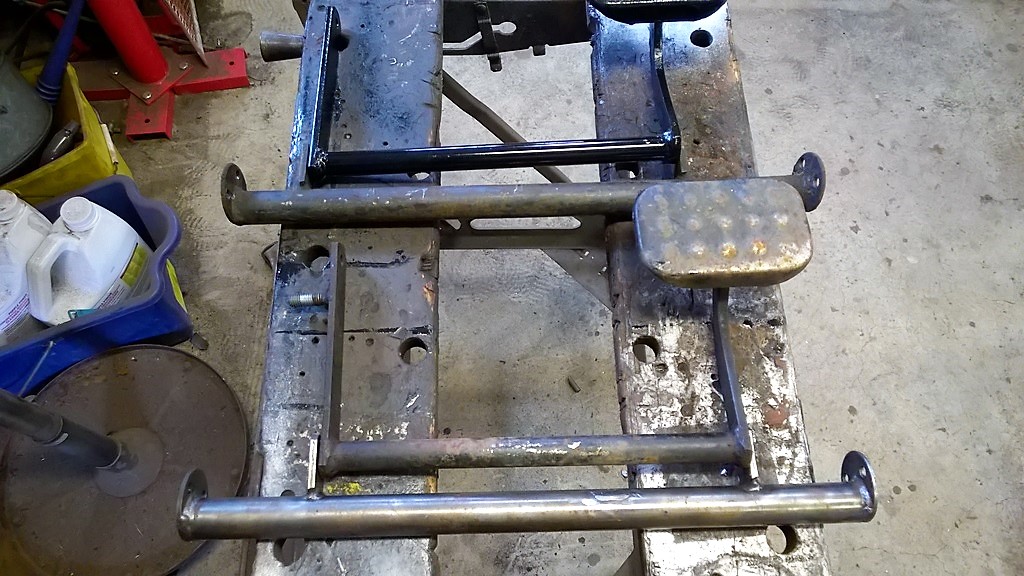
There it is.. The greasy mess. Well this took most of a day.. got the tension sprocket in the wrong place. so had to do it all over.. Got it right now.. and everything is smooth. Also got the brake caliper mounted .. it fits it’s new home great..
Wheels & Rims:
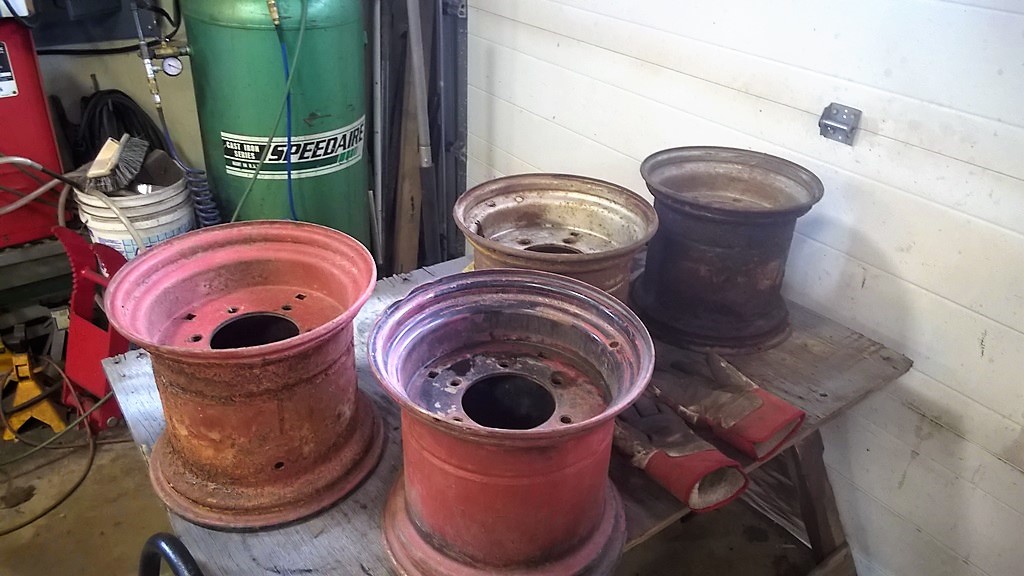
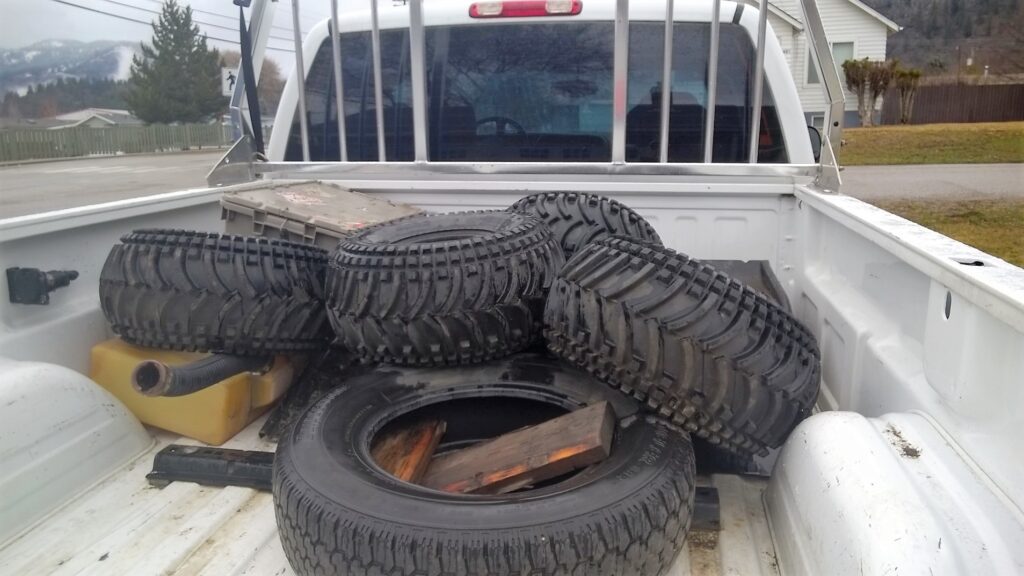
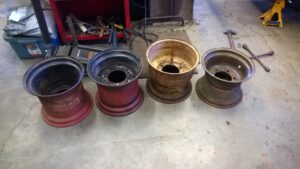
today I was going to put the wheels back on the TJ.. But as I was looking them over and there was too much I didn’t like.. Two of the tires were very old.. like 40 years ! cracked.. They all had tubes in them.. .so there were other issues. I decided to pull them all off the rims. What a job.. rusted on there.. tubes stuck.. yuck. So what better time to pick the best rims.. clean them up … paint them and mount the new tires I bought two years ago.
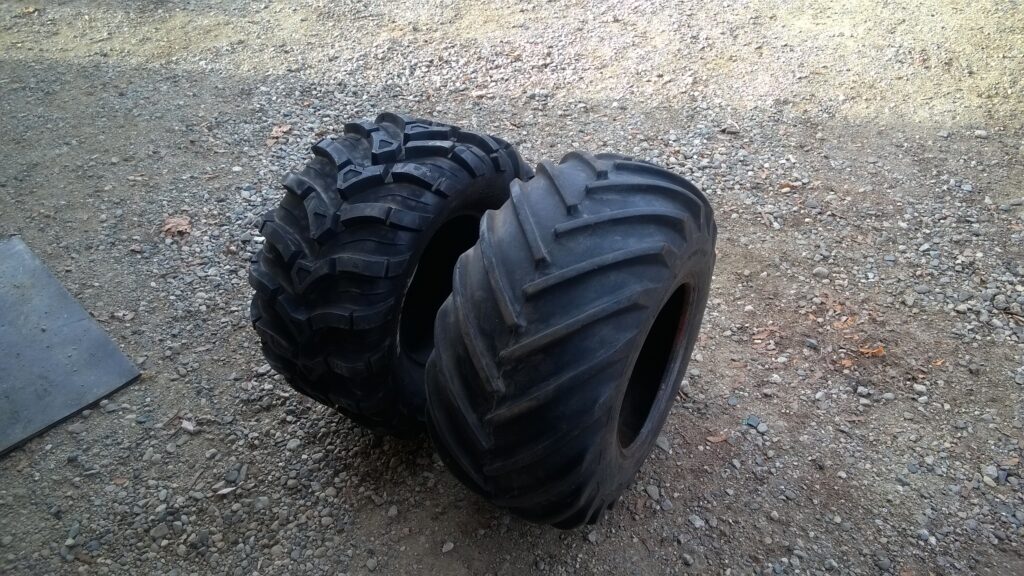
This is the tires I got.. as close to the chevron tread as I could get with out breaking the bank.. Just need to go get them from storage. And I’ve painted the rims… black, BUT dark steel gray on the outside.. where you see.. classy.
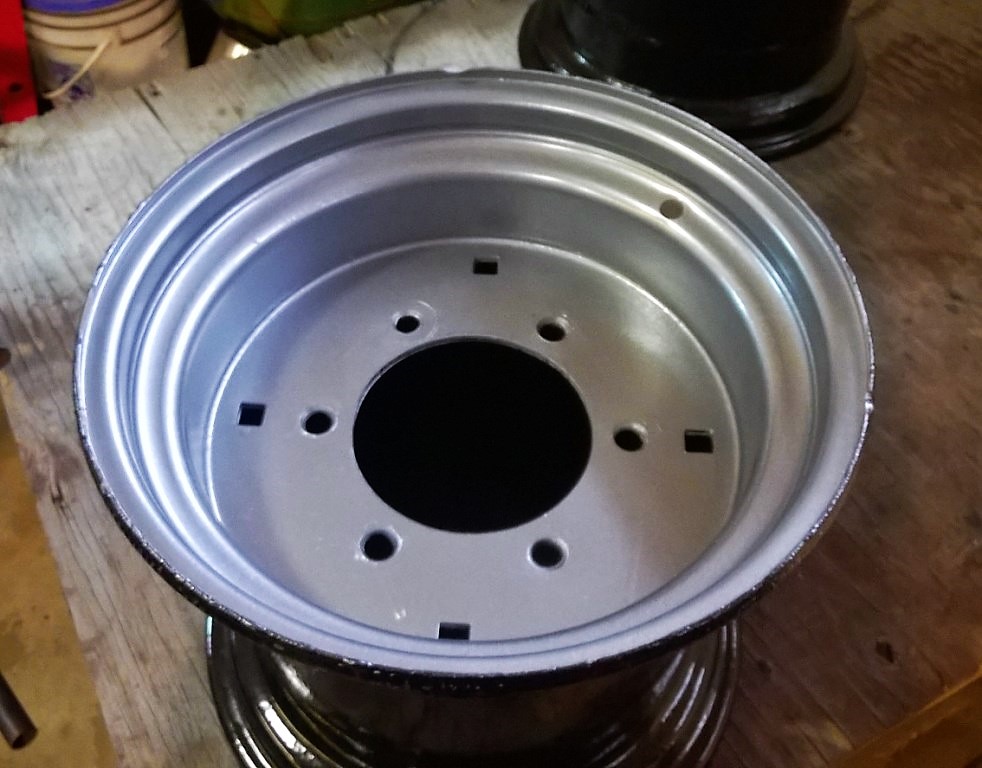
When the paint is good and cured I’ll mount the new tires. Hopping the bead seals and holds air ..
Rollin Rollin Rollin…
Those are some bad tires .. but they hold air the way they are suppose too.. and they look good ..
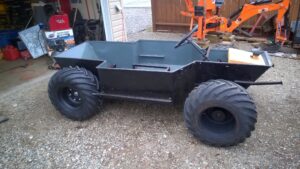
I’m putting the body back on and covering the TJ outside for a bit..
But come on… gota take a photo first. And just because the TJ goes out of the shop.. does not mean I stop working on the project. I need to get the motor ready, The seat ready, the floor panels, roll bar and windshield.. All these things can be done in the shop still. All done for now.
Update : When we were moving to Alberta a lot of things had to go …this was one of them. sold to someone who planned to finish it.
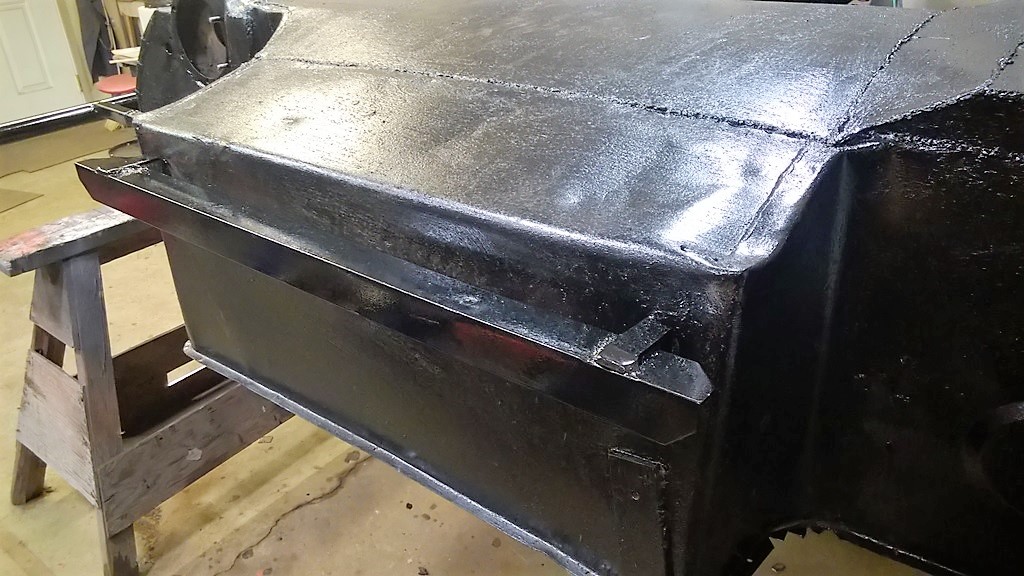
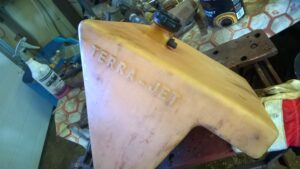
I used truck box liner finish on the first Terra Jet.. and I liked the results. It’s a rough finish.. but hey it’s a rough looking tub.
And that’s done.. Reminds me of the first Terra Jet tub. Yup.. more or less the same.. Except the frames are welded in the newer ones.. so much heavier to move. and while the Rhino liner paint is curing.. I set to work doing a few small touches to the bumpers.. plus I installed the side boards that protect the body sides.
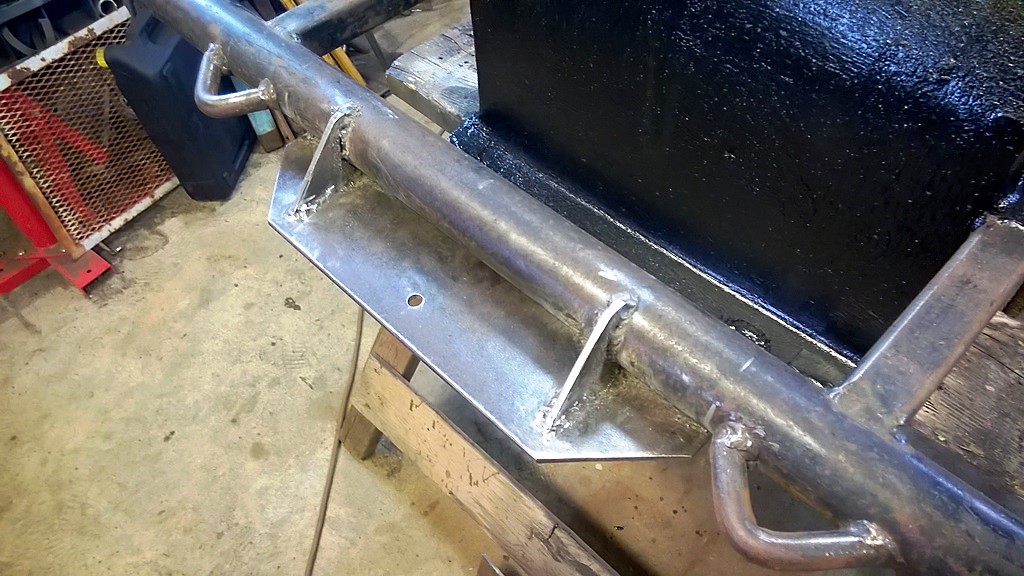
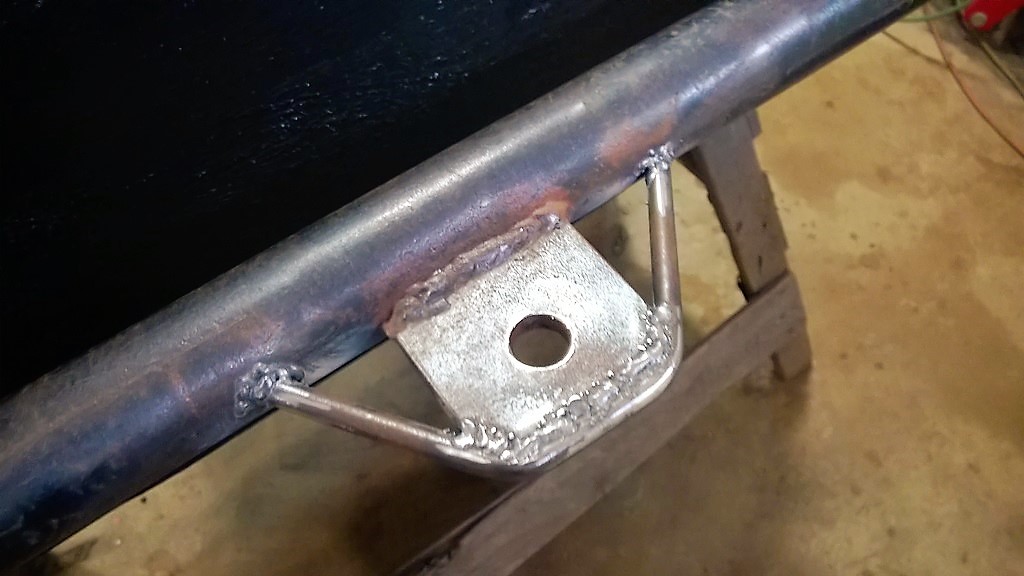
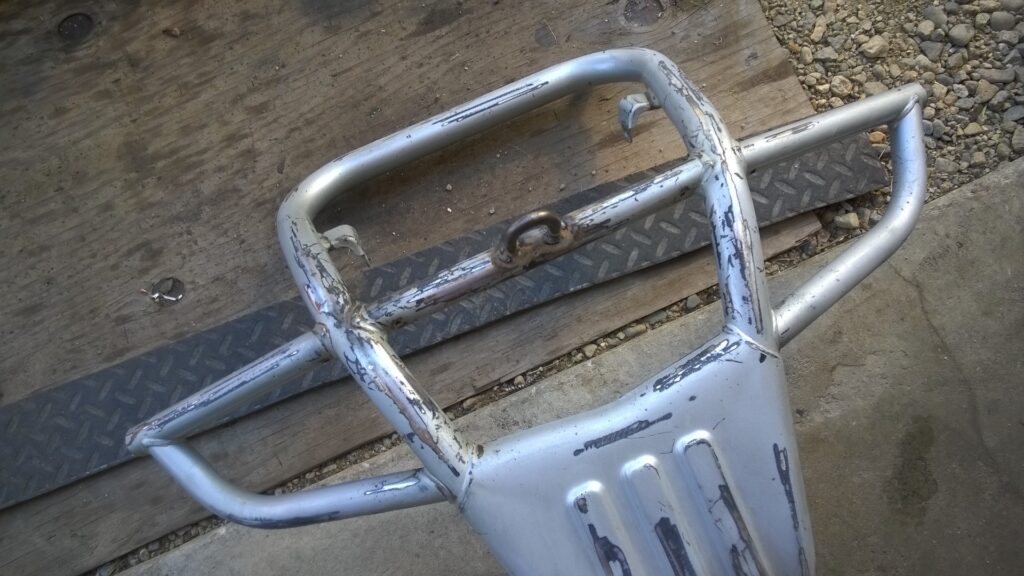
Like this winch mount on the front.. It’s upside down .. so is the tub. This holds a 2000 lb winch quite nicely.
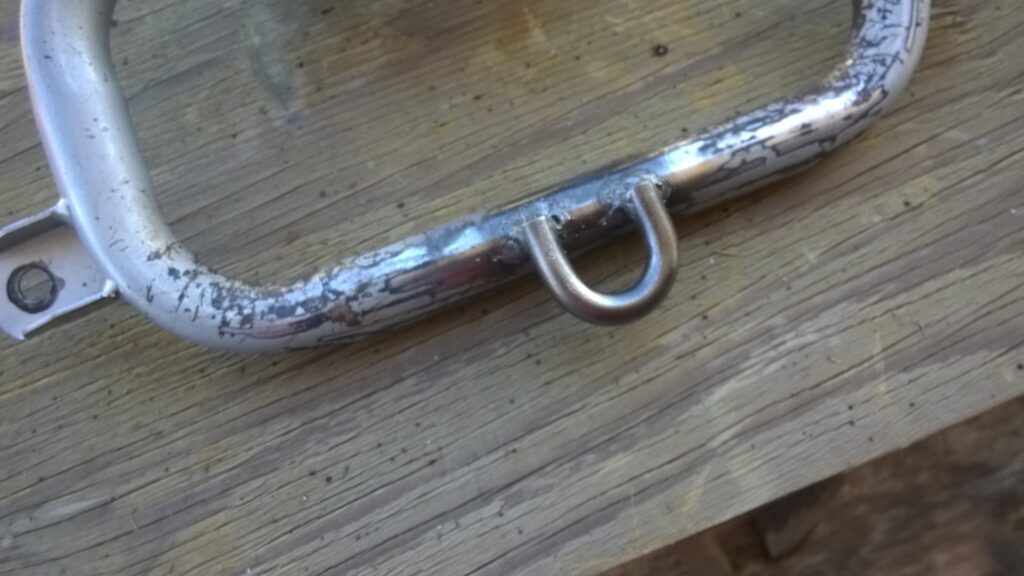
Also a small improvement to the hitch.. some places to hook to. Very nice.. It’s the little touches that I like.. Everything got some black paint.. and will be finished off when the tub gets flipped. I’m trying some new paint.. It’s much like the Por 15 that I like.. but less cost. So far so good ..
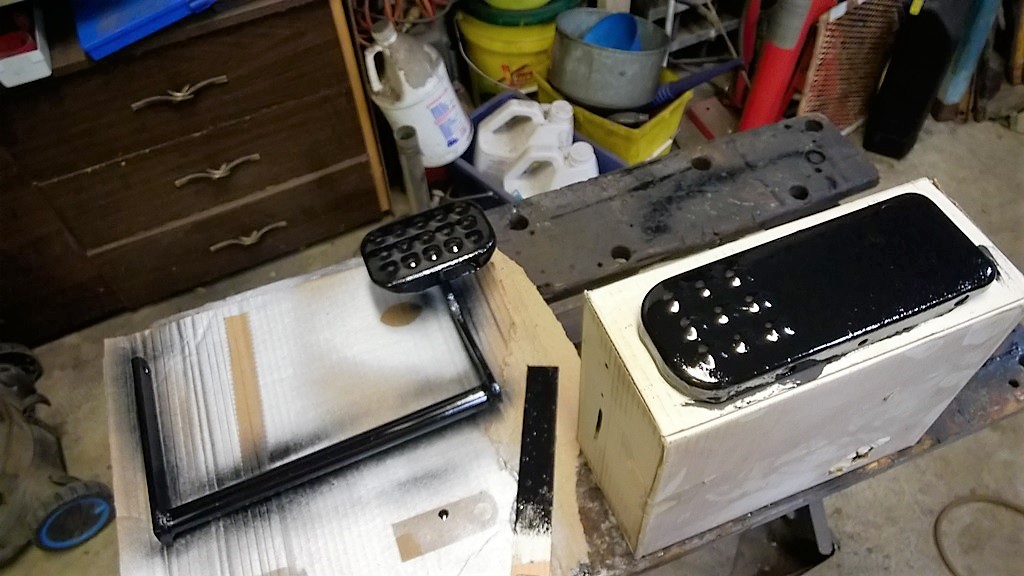
It’s a nice shiny black.. and brushes on smooth. I’m cleaning and sorting and painting some of the parts.. I’m finding out that between the two Terra Jets there are big differences.. Such as the steering. I noticed that the steering from the 76 TJ is offset to one side.. so all the bits are different from the 73 TJ where the steering wheel is in the middle. Hmm.. I have to be careful. Even these pedals are slightly different.
One thing leads to another:
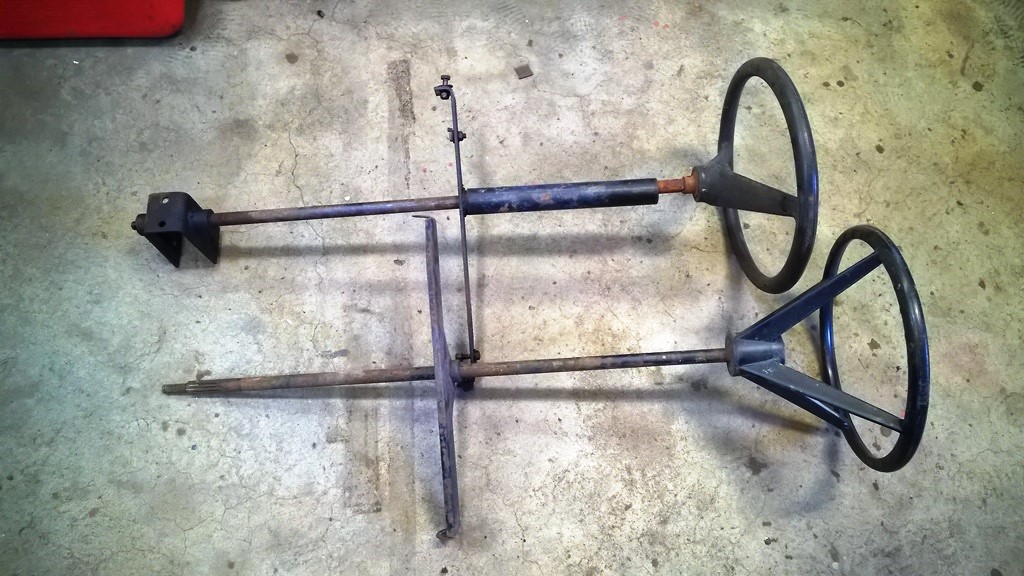
So I’m picking and choosing the parts I want to use.. And I’m finding all kinds of compatibility issues. I want to use one part of the steering from the newer TJ and that means I need to change a bunch of stuff.. and ! I will need to use all the steering parts from that TJ all the way to the wheel hubs.. On top of that ..
The brake pedal , and it’s hanger / cross piece are a bit different to allow for the steering shaft and the park brake to work.
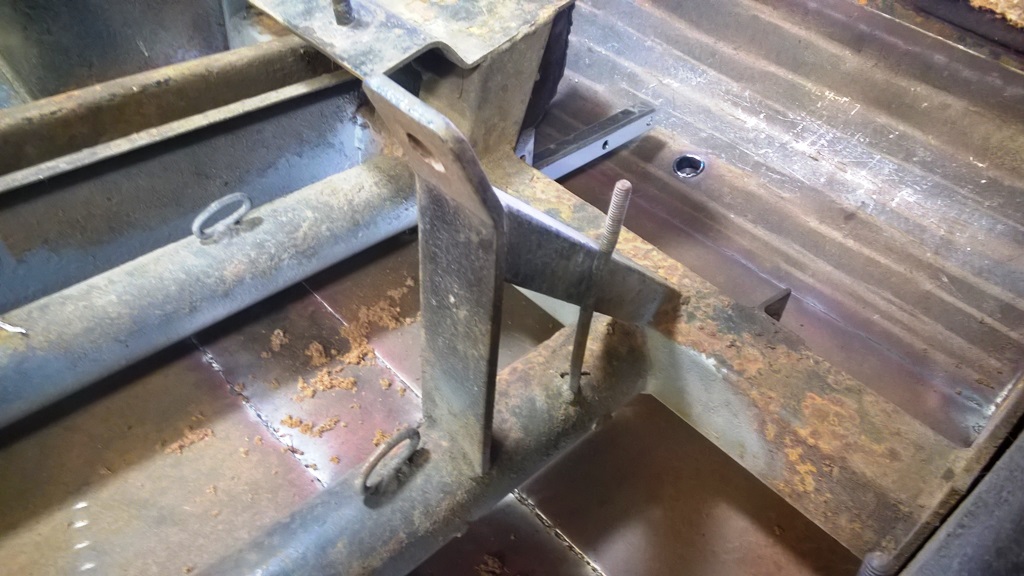
And this bracket .. for the steering will need to move 2 ” over to the left. Because the new steering is offset to the left.. Geez ! I’m sorting it out..
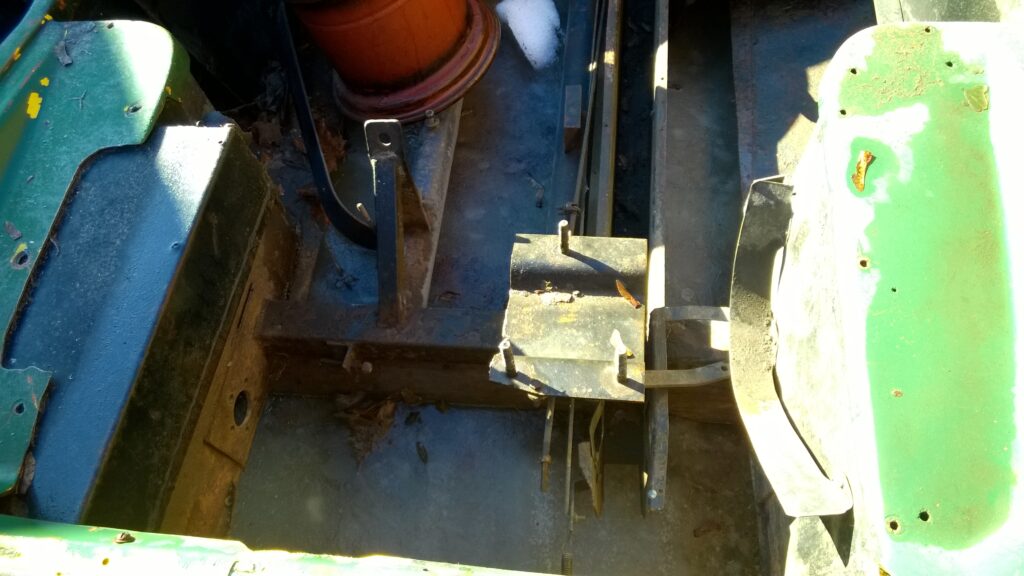
Inside the tub:
Lots to do as soon as the paint cures good.. I will need to move that steering bracket, weld on a center seat support.. and a battery tray. Also I have to remove the transmission adjustment bracket. This setup is for a two stroke motor. It will be in the way of my bigger motor.
This will be changed to the newer style.
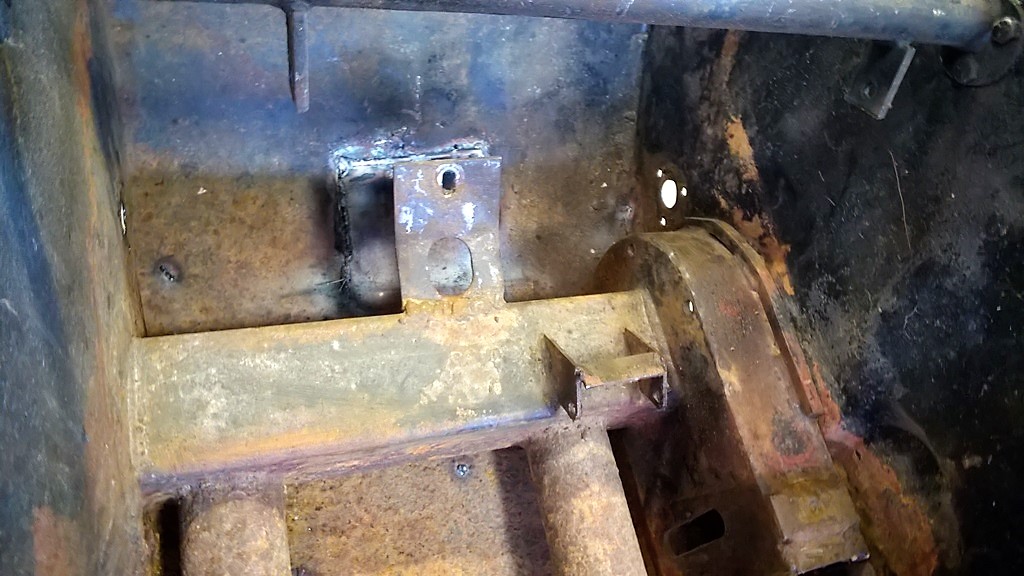
This is the new way.. the bracket goes.. to the back wall. This is also an adjustment for the clutch belt. And a mount for the clutch brake.. that stops the transmission for changing gears.
Got the inside all cleaned and the steering bracket moved.
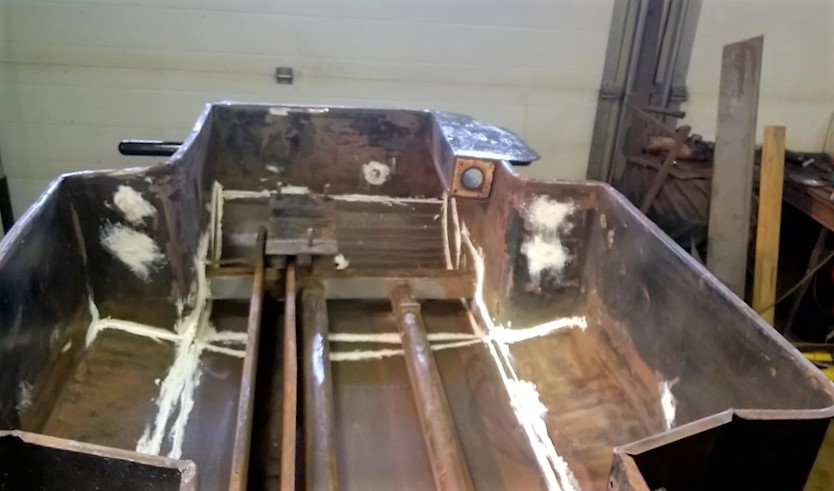
The other unnecessary stuff removed.. Above you can see the body seam caulking .. A little added leak proofing.. and it smooth’s out the sharp edges for painting. Again I’m going with gray paint.. it’s easier to see leaks and to work on stuff with a lighter color.
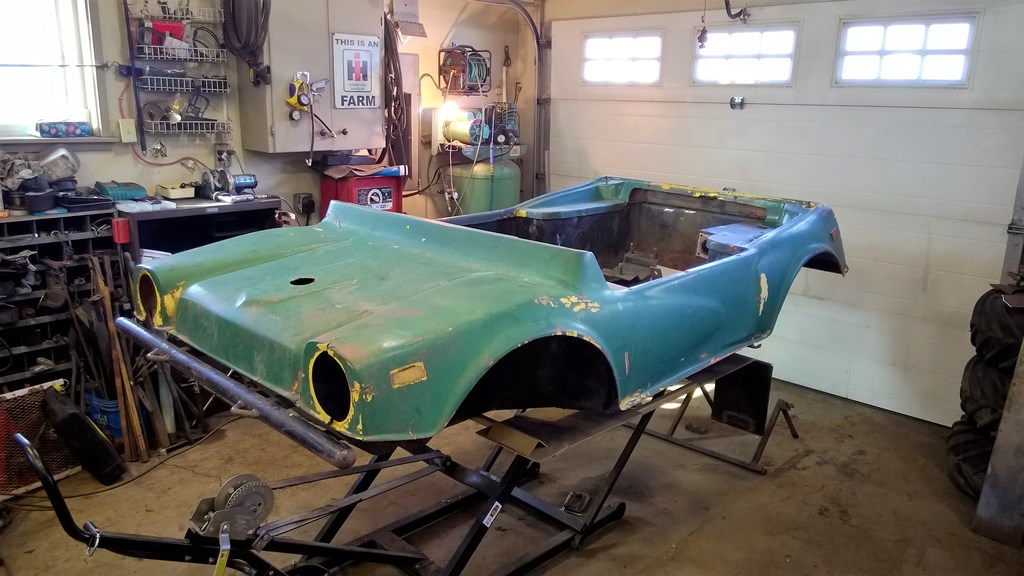
PLUS… It looks good with the black tub.. blue body. Just need to install a battery holder and modify the motor mount to suit the Honda. And that leads to the Re- assembly . And another page !
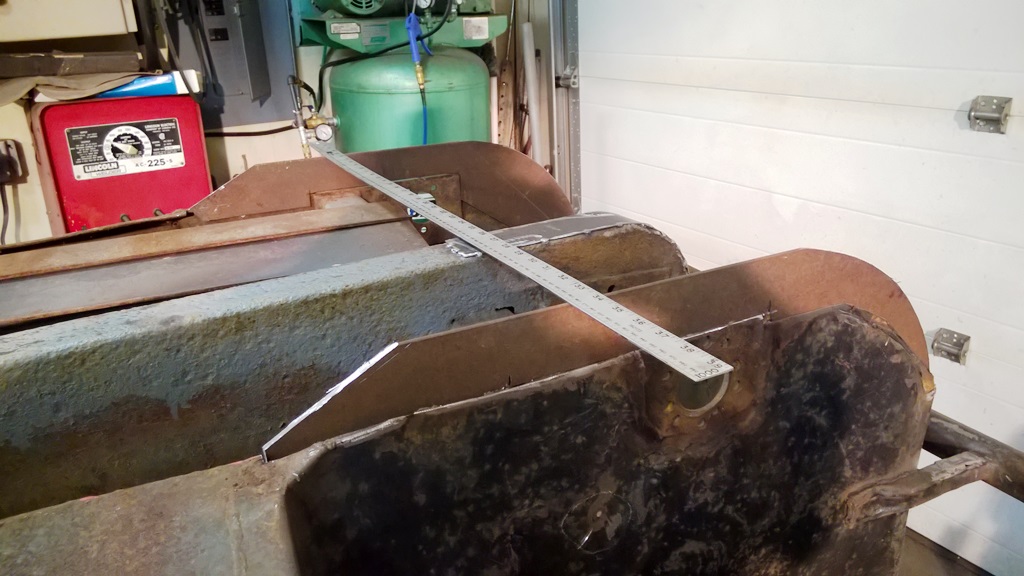
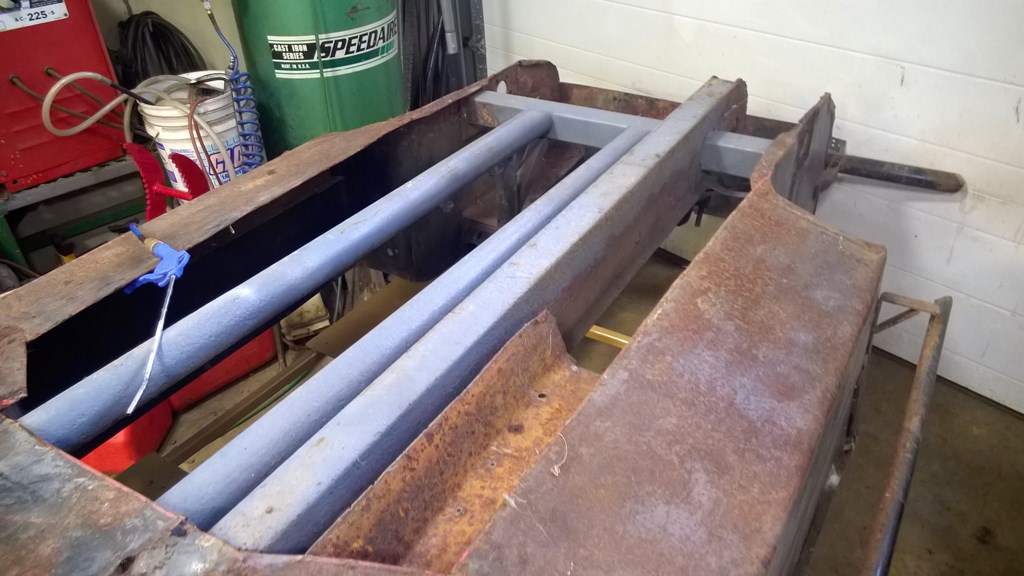
I have a great way of dealing with the bulge of the chain run that plagues the underside of all Terra Jets. In the case of this one it hangs a further two inches below the bottom at the rear axle. And that makes it vulnerable to hitting rocks … and therefore making a hole …that lets the water in ! Can’t have that. Nope.. And I don’t want to be repairing that after I have gone to this much trouble. My solution:
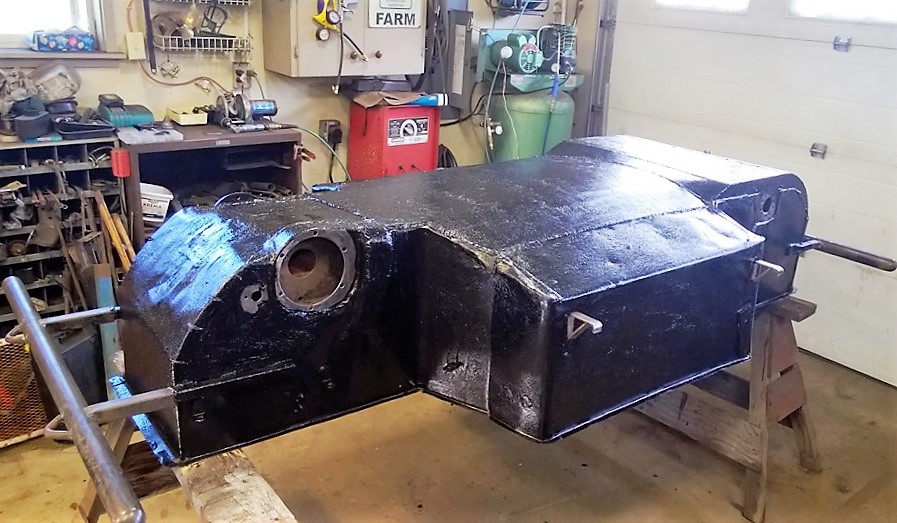
Add the two inches right across the back.. and cap it with 1/8 ” plate steel. Ha ! take that rock ! This also makes a good sump for the bilge pump, and changes the curve at the rear.. ( stern ) This is just the test fit.. but I’ll be welding these new 3/16 ” thick sides to the frame.
Done.. Also have to think ahead to what will be needed and easier to install now.. like the brake holder. Two small pieces to stiffen the 1/8 bottom plate too.. and a quick paint job on the underside.. Next…
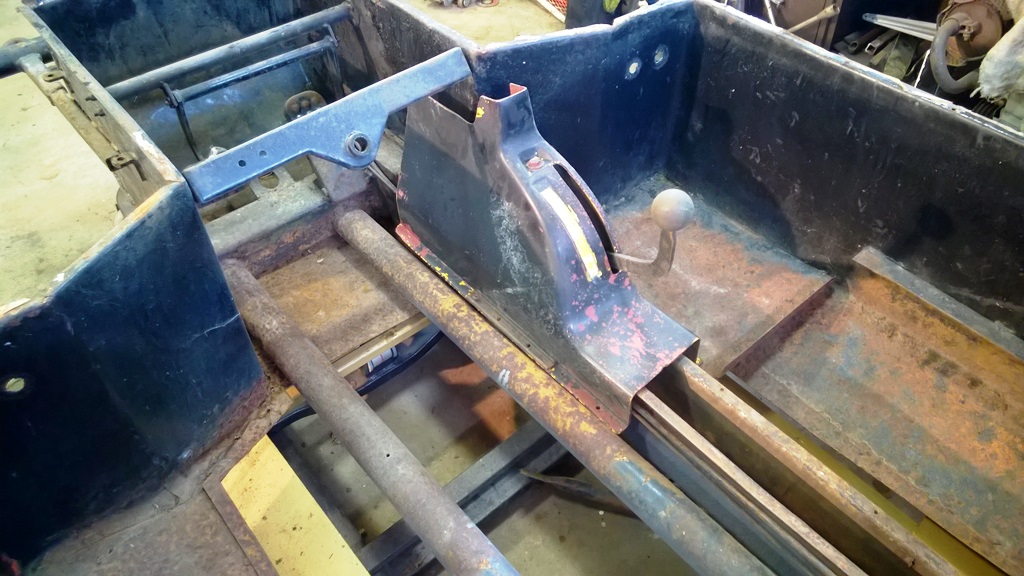
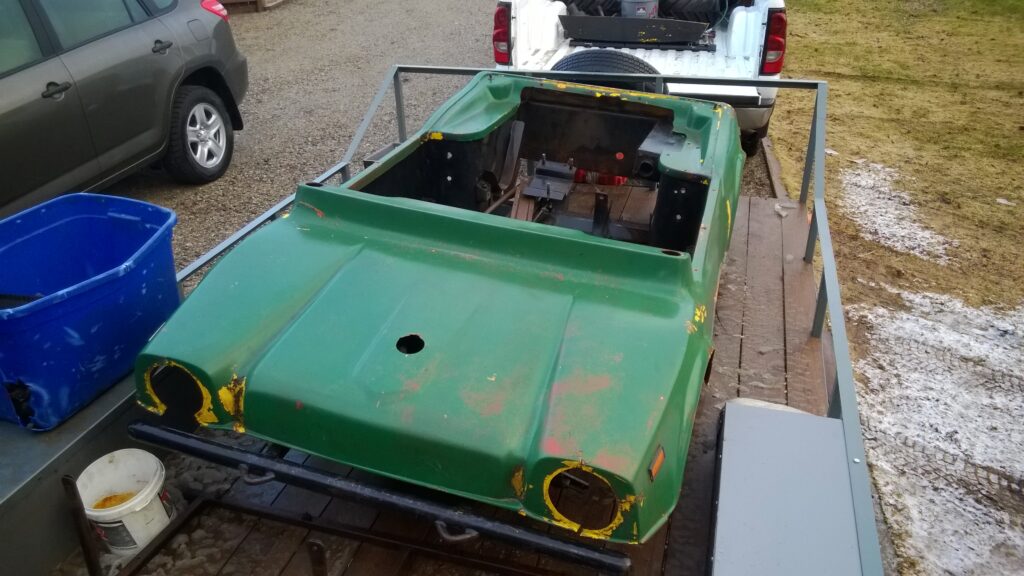
I tacked the 1/8 th plate into place.. so I could flip the tub over. and weld up some of the holes.. There was lots of those holes.. It’s a good thing the tub won’t have to win any beauty contests. But I’m wanting it strong and leak proof not pretty. Things have to work with the other parts though.. Like the body needs to seal to the top of the tub.
So I’m rebuilding parts like these front corners. I will test fit the body too.. And other considerations like the fuel tank , the seat and the battery holder. They all need good mounting .
This is the tank from an Argo.. It’s nice and flat.. but still two inches higher then where the seat was.. Is a higher seat a problem ? will have to think on this one. In the mean time I cut the welds ( they were bad anyway) on the seat supports. I want them bolted through the tub …no welds. With this setup the tank will be hidden under the seat.. Once things are going together I’ll test out seat locations.
I brought the body in for a test fit.. and to see how things line up. I’m going to build a winch mount on the front bumper ..and need to know how far back it can go.. And also the sides need to fit in the running boards.. Got it figured out. Almost all holes are filled in the tub. Just two more big patches.. and the bottom can go on.
One down.. one to go. This was a big flap cut into the front .. Not the tidiest welding.. but strong.. Time to get the bottom done. lots of careful welding to do.
Well that was NOT easy.. We used straps and blocks to get the bend in the bottom.. That 18 Ga sheet will not bend easy. The small transition piece had to be heated and hammered into submission. But it’s done except the curved piece for the back… I’m thinking a press will be of help there. And here’s a new short video .. part 2:
I’m taking a few days off to heal up my eye.. got something in there and was finding it hard to see detail..
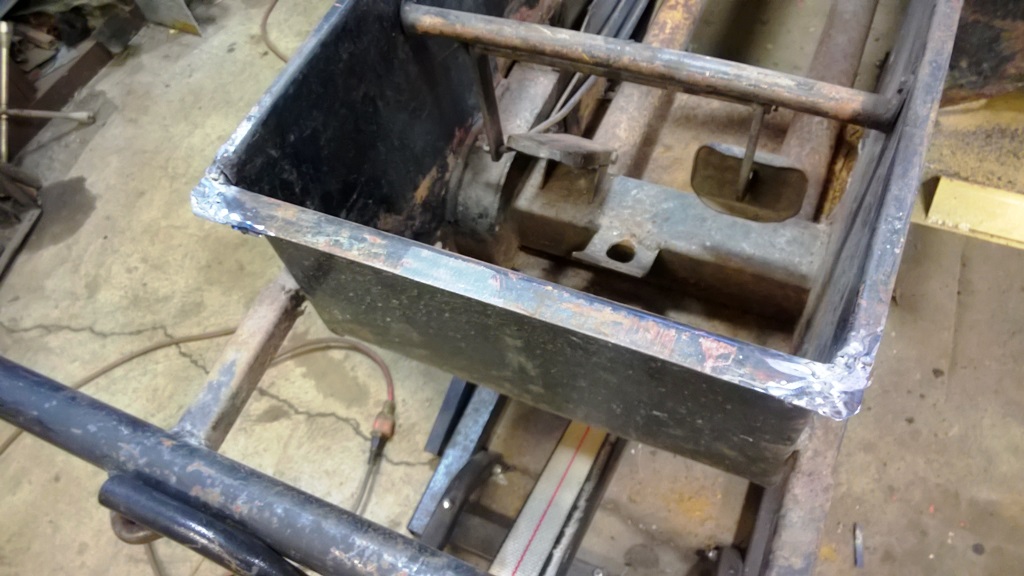
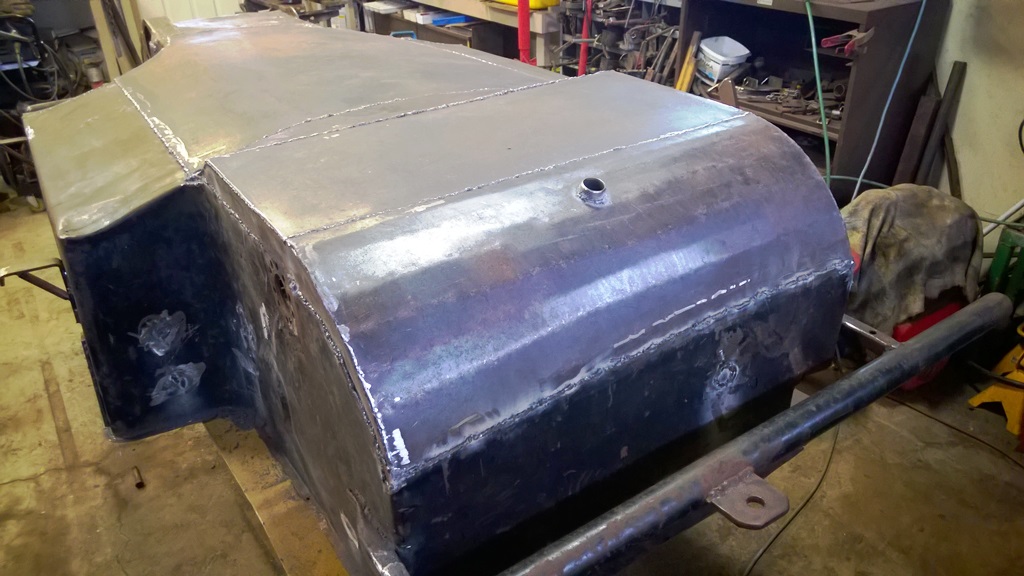
Back at it.. and I got all the welding done on the tub.
Here we go.. the rear is done.. even have a new drain plug. The next step is applying the box liner finish.. And it’s time to start another page..
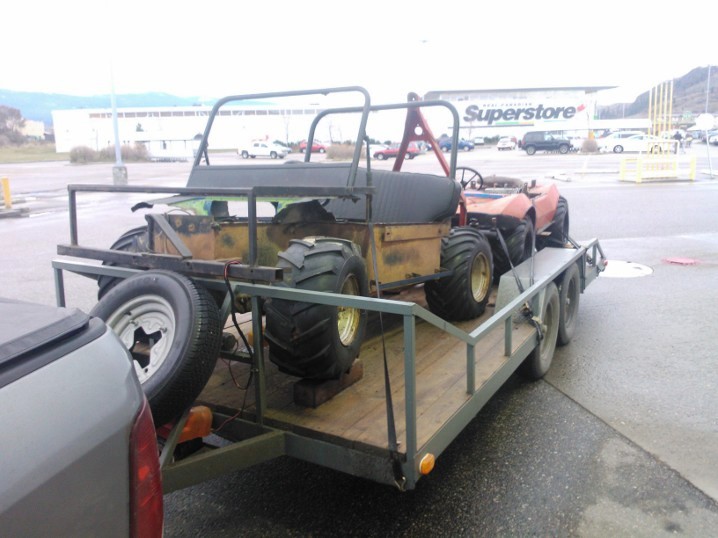
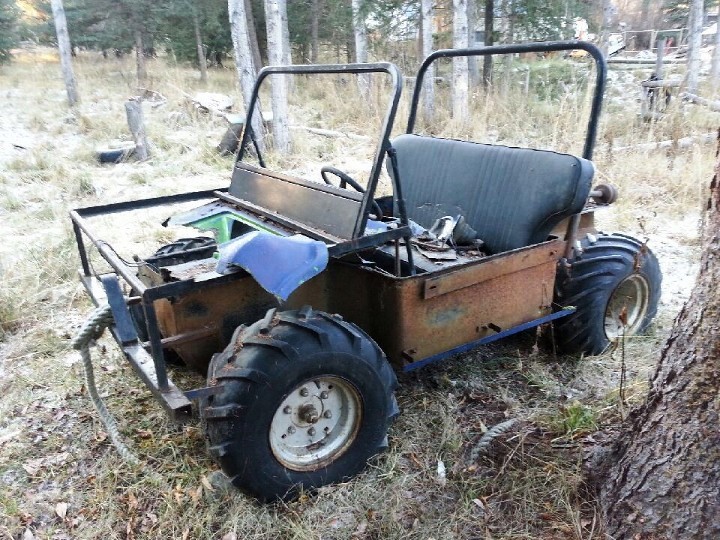
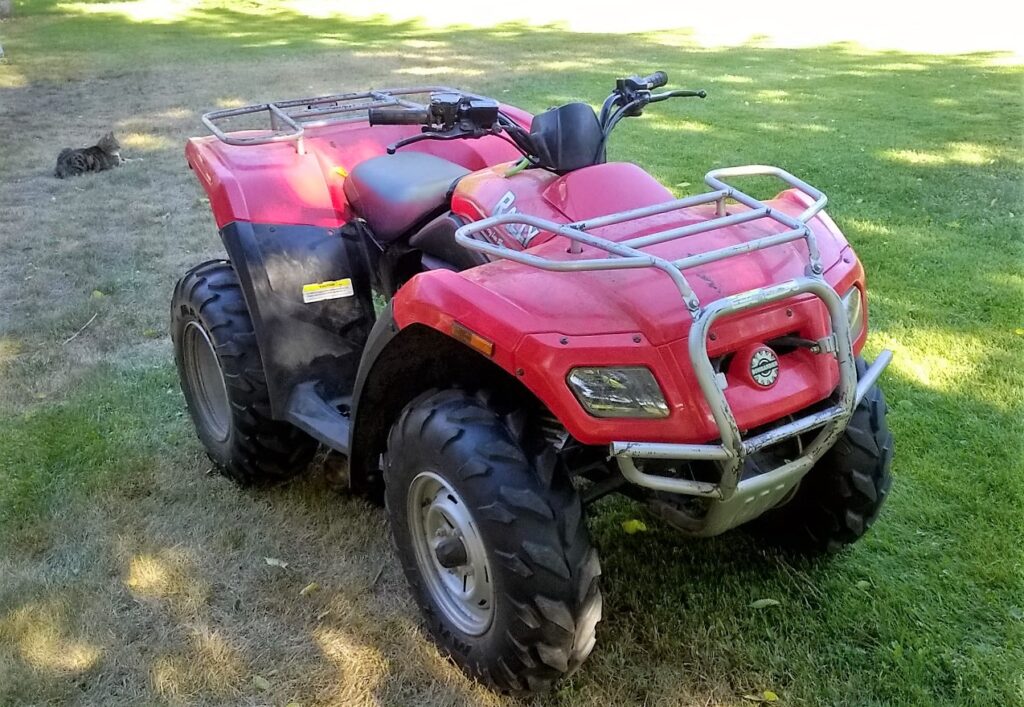
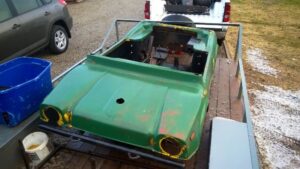
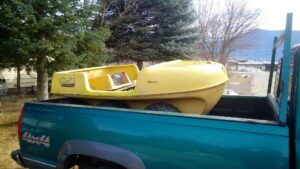
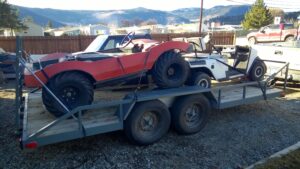
This is #2.. of the 3 Terra Jets I had. # 1 was sold over a year ago.. Number 2 & 1 came together as a deal.
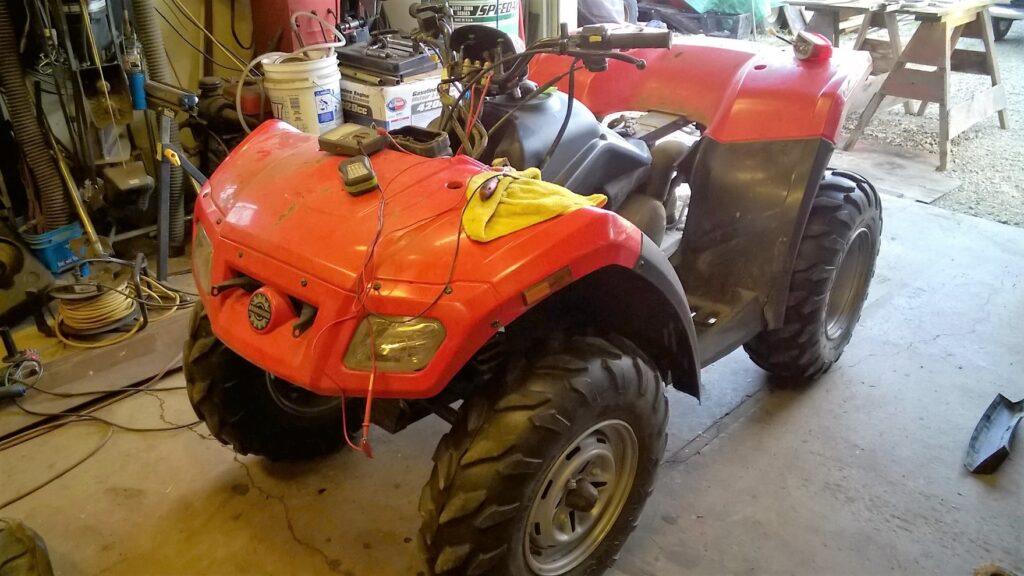
Number 2 is the one up front on the trailer.. And other than missing it’s body.. it’s very complete and almost in working condition.. ( if the motor ran ).
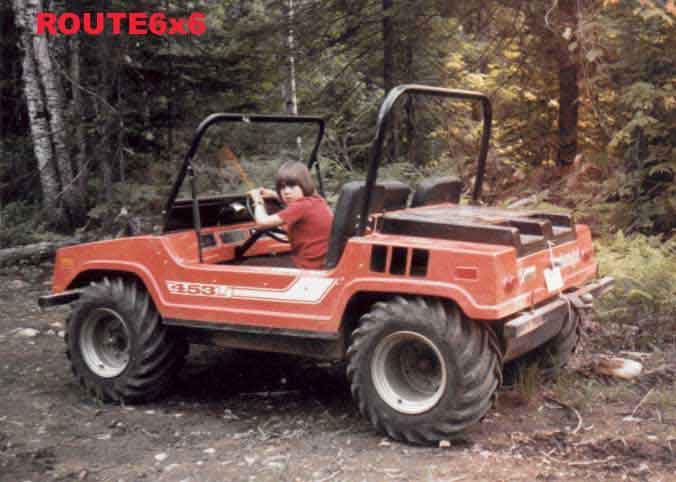
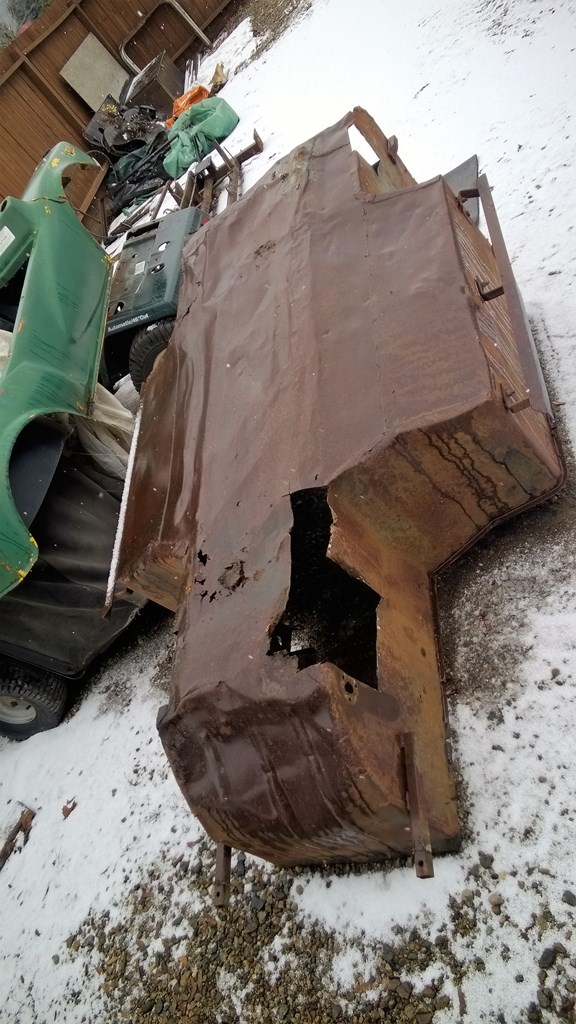
It would have looked like this one above.. except it was blue. However it looked like the one below when I rescued it.
There was shreds of the body still clinging to the tub. Just the head lights left ! I always figured this was the good one of the three.. it rolls , shifts and steers. And it has the better driveline. The third Terra Jet that I picked up from a different person gives me a body for this one.. a great running Honda 20 hp motor, and a lot of good parts. # 2 here has been sitting in the wings waiting ( two years) for it’s TIME. Now is the time.. so lets get going:
The first step is always… bring the project into the shop .. It’s not quite spring yet .. so I have a bit of time before all the spring stuff happens.. and then I would be too busy to do this project. I want to note here that I intend to use the best of the two Jets I have.. Whether it be the tubs , transmissions.. or any of the parts. TJ number two is a 1976 model, with a few extra features that are nice to have. The third TJ is a 1973, with the body, lots of good parts, and a good tub / frame with the bottom cut out.
Let’s Start:
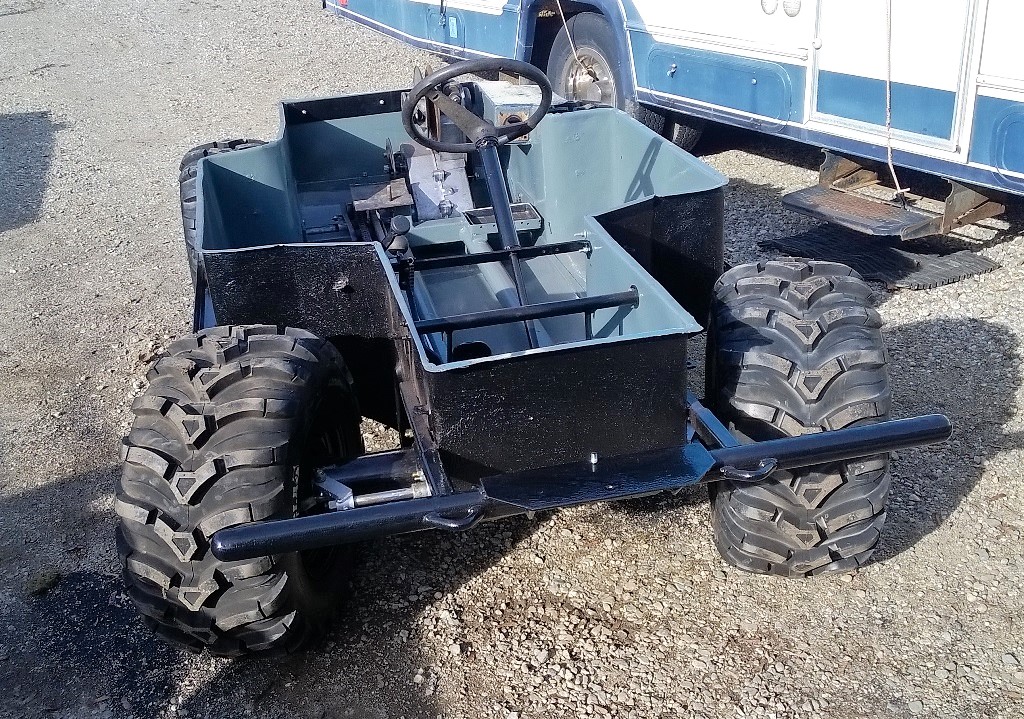
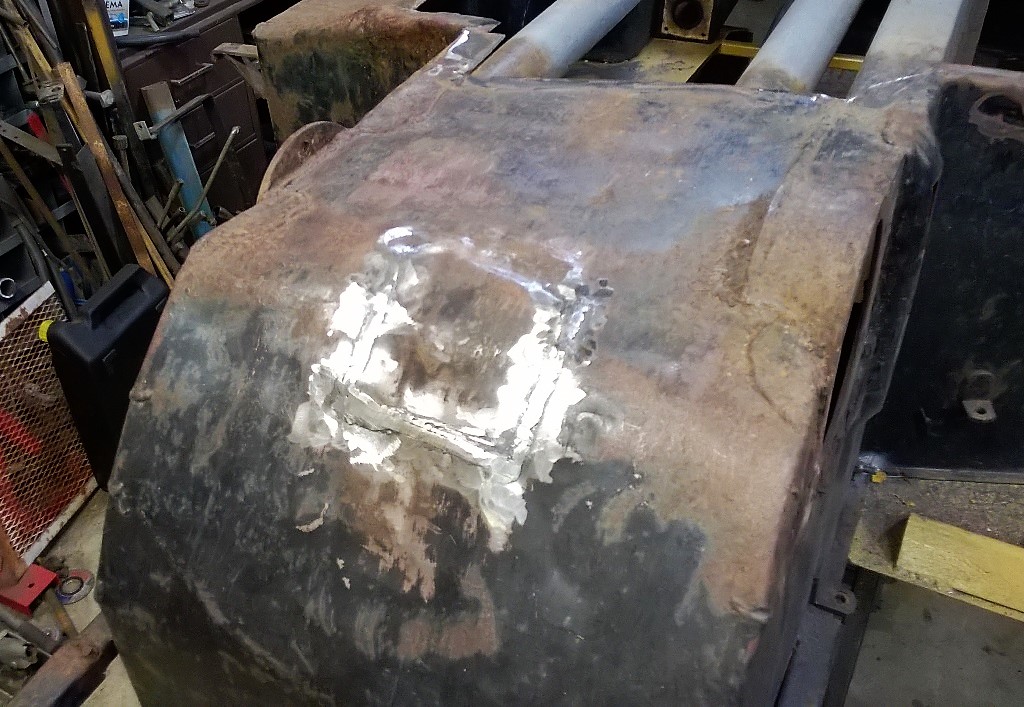
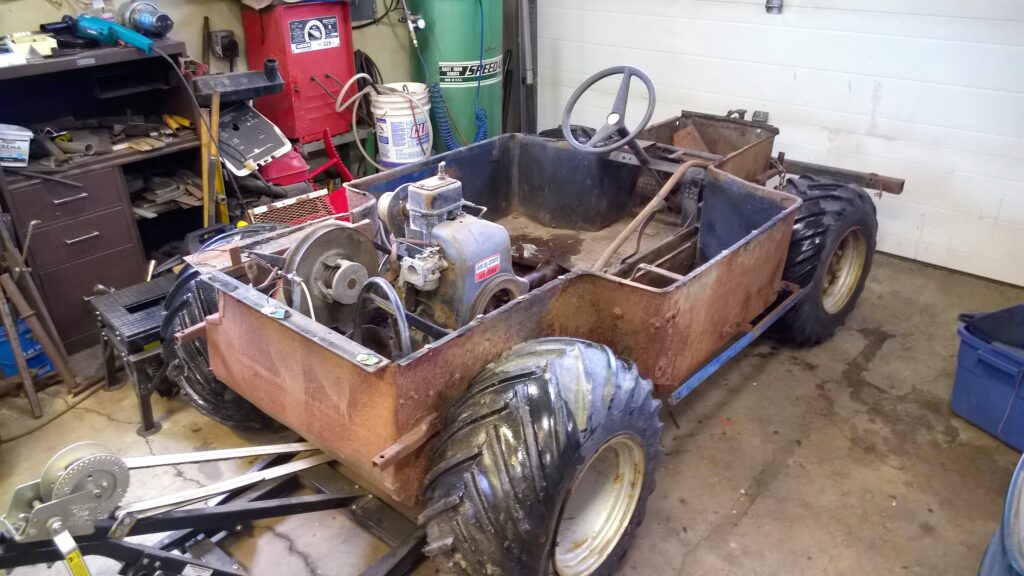
But where to begin.. I pulled the wheels off.. and put the TJ up on stands. Then I got down and had a good look under the TJ.. well I found five cracks and holes.. and the underside looks like it was in WW II .. So we could be looking at a new bottom, and I’ve done that before.. looks like the frame is welded into this one too.. So.. I need to compare this tub to the one outside #3 TJ.. the bottom is already cut out.. And it’s all in pieces. This is what number three looks like..
And the tub looks better… But I still have to take the 76 apart.. I need the transmission no mater which tub I use. And taking things apart on something old and rusty is never easy.
The rear axle is the most fun! It is through the transmission with a long key.. and after all these years ..refuses to let go. We did get the hubs off with a torch, a puller and a lot of banging. And so far all the aluminum bearing holders are in great shape. Now I’ve seen others doing this and cracking the transmission case… so I’m trying a different way.. by pushing on the transmission final drive where the axle passes through.
I’m using a pipe that slides over the axle and presses on the transmission. And using the axle nut / washer to pull the axle out. This is proving to be very difficult. Finally I had enough and took a big hammer to the axle.. and it came out. All is good.. So we removed the steering and the front axles … and flipped the tub over to see EXACTLY how bad things were.
VERY BAD.. There was two fiberglass patches.. and a few places where I could just poke a hole with my finger.. Plus it’s bent up bad.. So I’m thinking the tub from the 73 jet is looking better and better… And the fact that it’s all apart and the bottom cut out is a time saver. looking like I will have a Frankenstein Terra Jet.. 73 and 76 parts. and Honda power.. new bottom.. yahoo. Here’s a quick video with a look at the better tub..
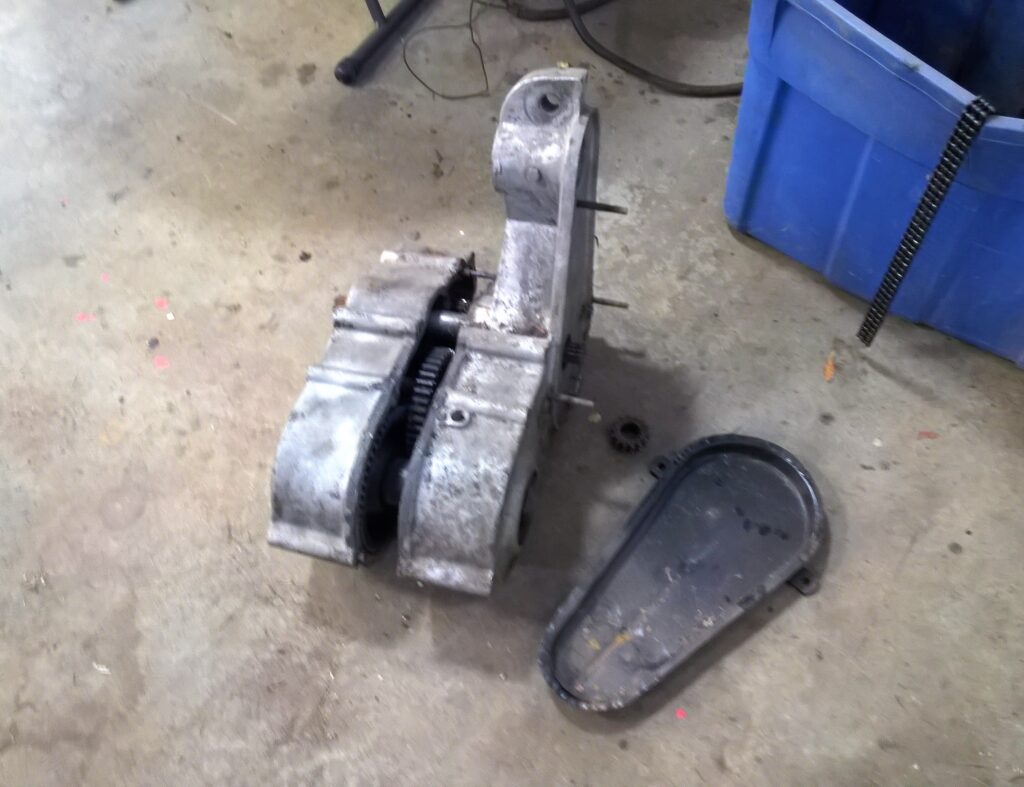
Transmission :
I took the time last night to clean the grime off the transmission we just removed. It had a bit of oil showing on the dipstick. Also functioned as it should.. So I figured all is good. Well maybe not !
Once cleaned I discovered that it had been welded to repair some cracks. so the big question here is dose it leak ? I will finish cleaning it good and fill the oil up and see. It’s now 3/4 full of oil.. and no leaks.. The axle seals look like new.. and lots of form-a-gasket was used. so I’m not taking it apart.. It’s good. On to other stuff…
The Tub:
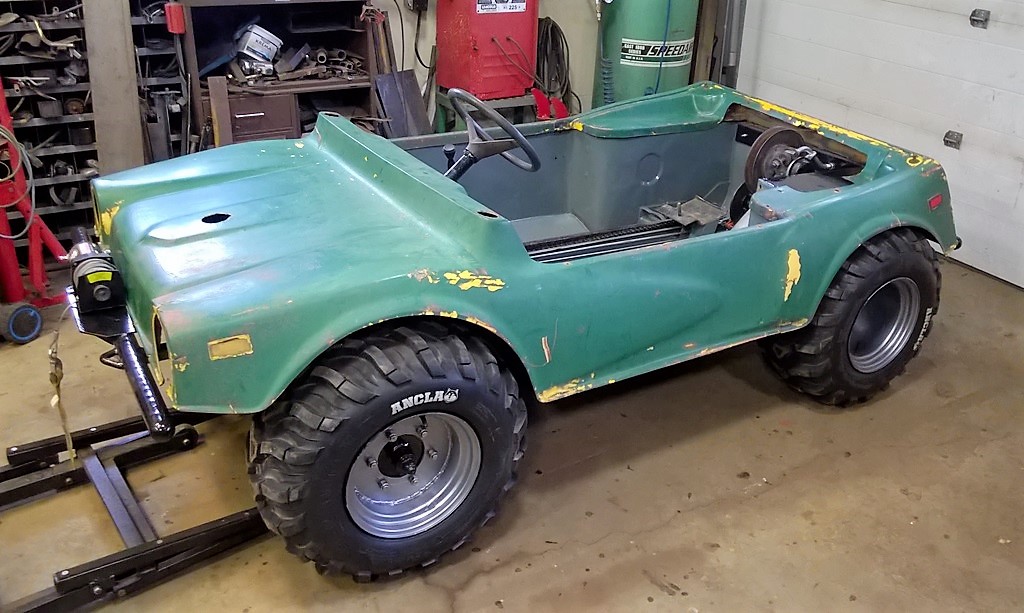
I finished stripping all important stuff from the 76 tub. Even cut the frame out.. And it all got dragged outside. The tub from the 73 TJ got brought in and flipped over.. And its’ great..
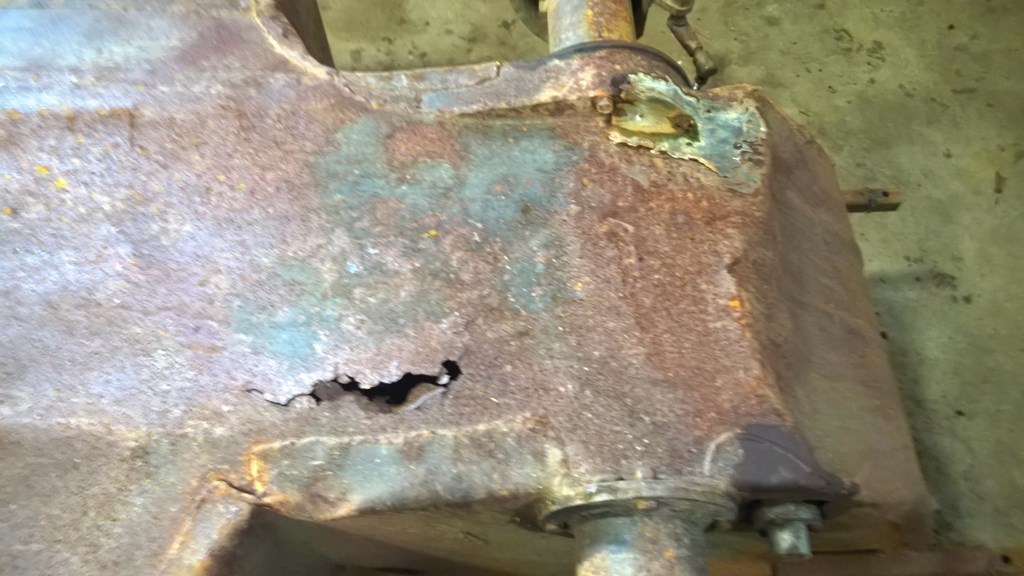
Someone even painted the bottom of the frame ! BONUS ! Plus the metal is in way better condition.. A few patches are needed..
Which you can see in the above photo.. They did not know how to remove the steering and the chain tensioner.. so they cut holes ! Geeze.. oh well I can fix those.. it’s just more welding..
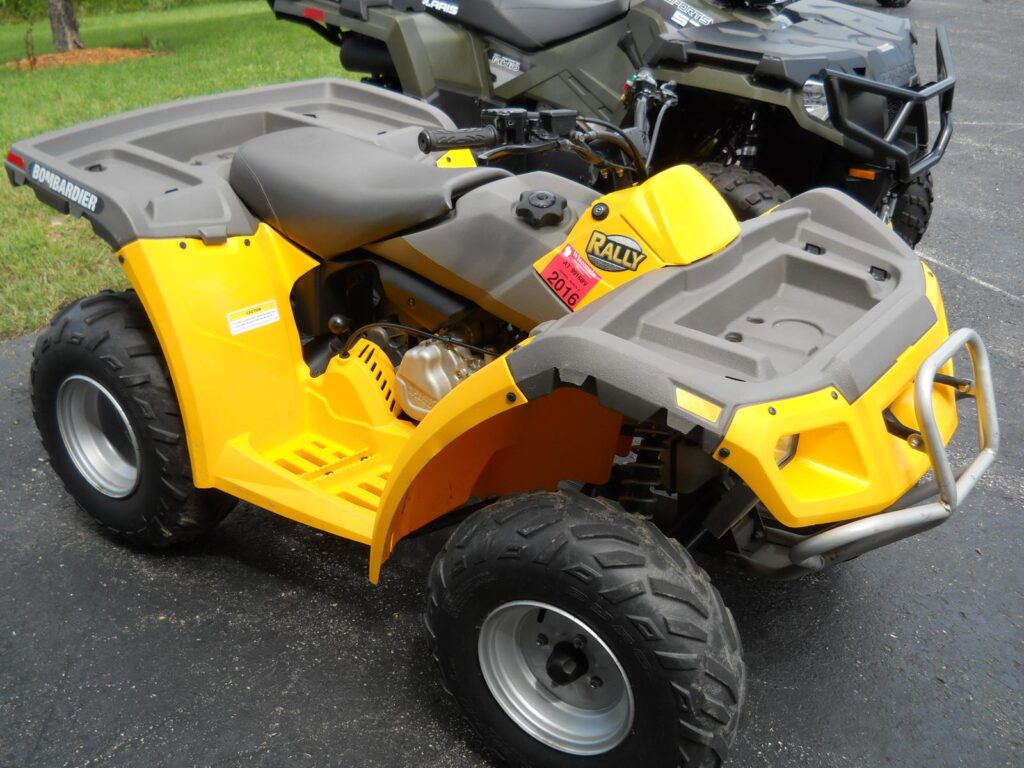
This is a photo from the web.. Same yellow Rally.. just all together.
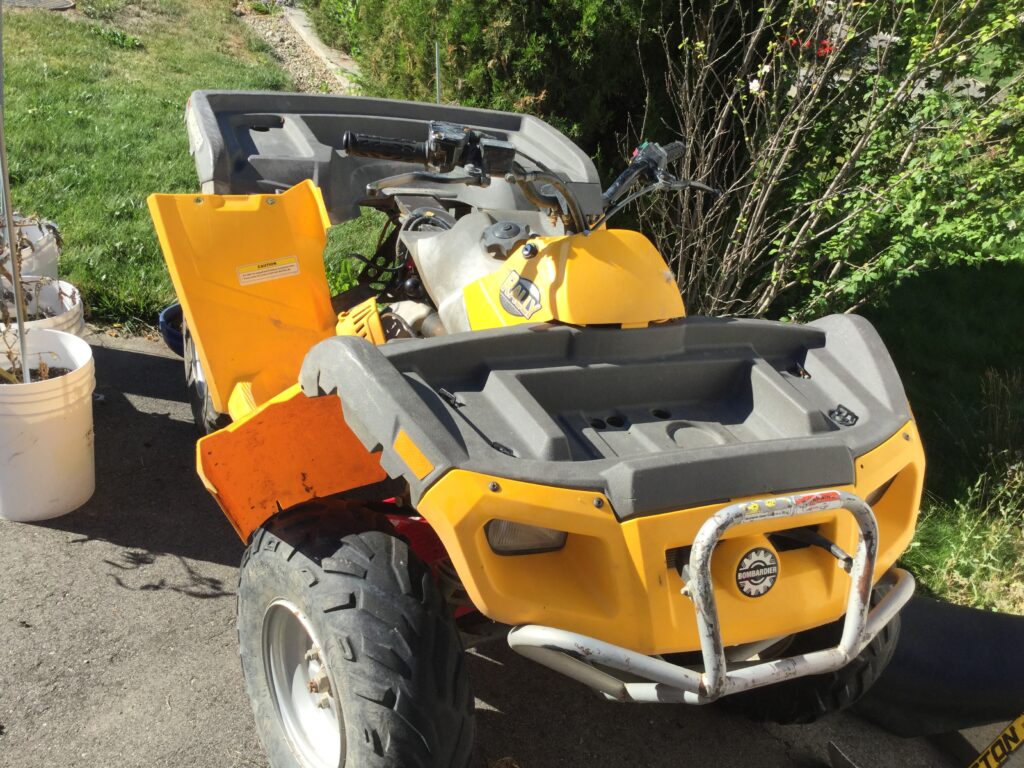
This is the one I bought. The foot well was taken of to better access the motor. A bunch of other bits are in a box too. But it’s all there, and this was a running quad before the valve decided to say hello to the piston. Tires are worn . .. but holding air. The plastics are great, the seat has some stitching coming apart on one side. Everything else seams to be in fine shape. So I’m thinking it’s worth fixing the motor..
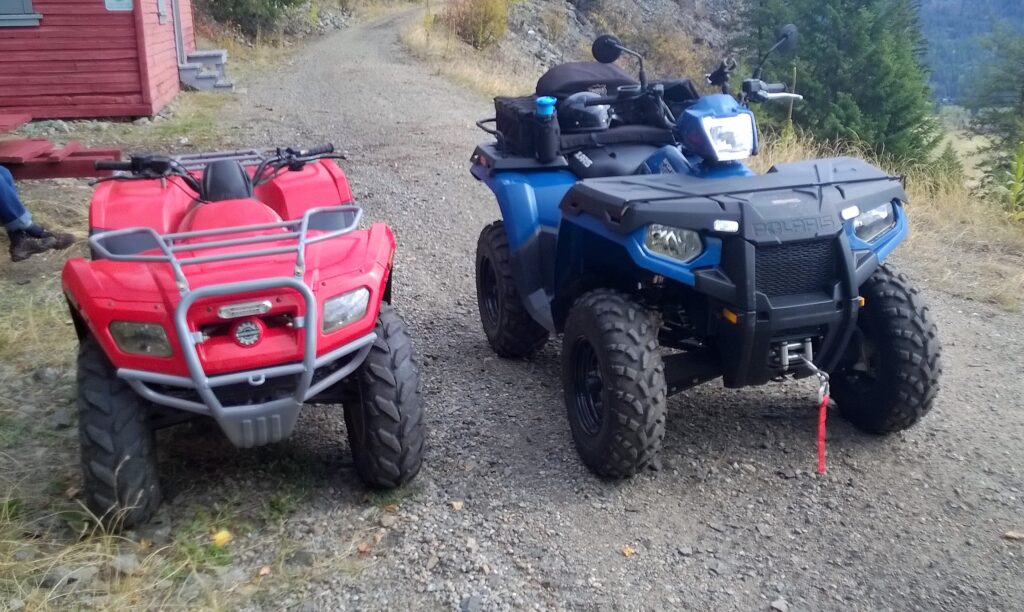
2003 vs 2005
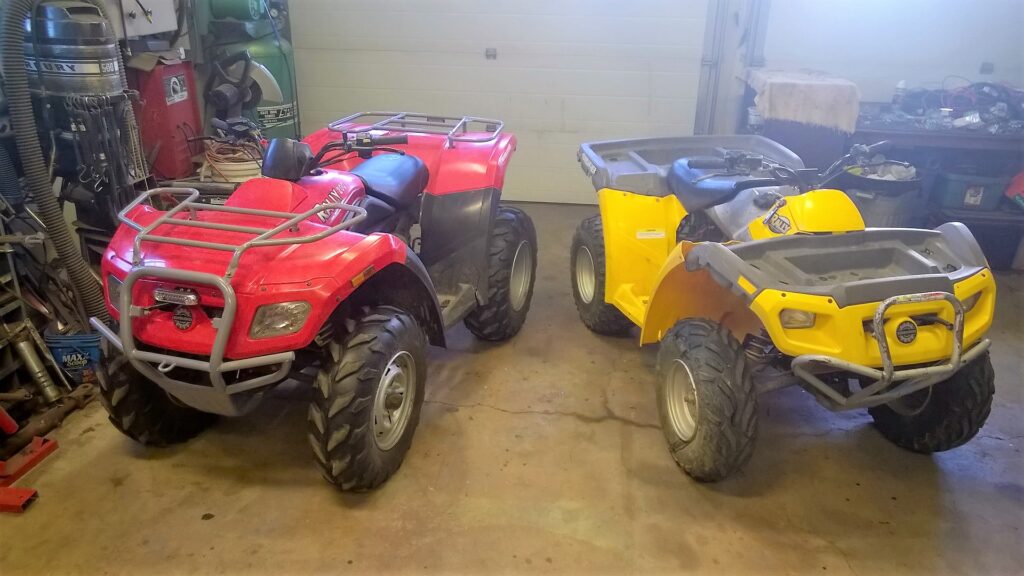
Bombardier made the Rally 200 for a few years only. Designed as an entry level quad with some big quad features. Water cooled 4 stroke Rotax motor, hydraulic disc brakes. CVT drive . These are good stuff to have. 2003 was the first year, and the design was pretty cool for then. Instead of racks they molded in trays front and back. I like that.. but they quickly went back to racks the next year ? also the 2003 has a manual disc brake on the transmission .. and the 2005 has a hydraulic disc on the rear axle. Some little changes like moving the key and indicator lights up on a handle bar pod. Later I will take some photos of the two side by side..
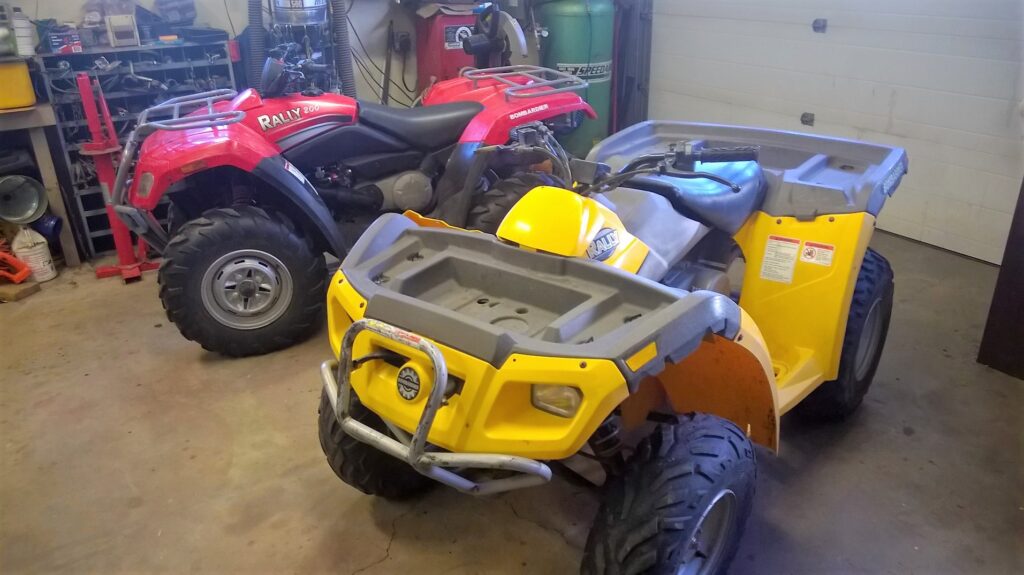
It’s later ! Here’s the two together. See the wheel size. Which changes the height a bit. The racks make the red one look much taller.
So there are no plans for this quad YET.. I parked it and covered it in a safe place for now…
February 26 2017:
It’s seams impossible to find the top motor parts to repair the motor.. They just don’t make that size motor anymore and no one has even a used motor.. It is said that these are a weak motor and easily drop a valve. SO I have another plan.
1994 Yamaha Timber Wolf 250 4×4
This sad quad has been hanging out in the yard waiting to see if it’s worth fixing.. And there is one big question ? Does the motor run ? So we dragged in into the shop.. I removed all the wheels , plastics and racks. Today I’ll clean the carb, check the wiring and see if we have at least a motor.. Well it runs.. but not well enough to go through all the work to transplant the motor. so back to trying to get the motor parts.
Update : Years later… I finally got tired of the Rally 200 so I sold it cheap.
Well this came up for sale .. at what I’m going to say was a very good price.. Seems not to much interest because it’s a two wheel drive Quad.
So what ! It runs great.. Has NO damage . Aside from 4 wheel drive .. it has all the good stuff. 4 stroke 200 cc water cooled motor. CVT drive. three hydraulic disc brakes. newish tires. Above is the photo in my yard before I even cleaned it.. It’s not perfect.. there are things to do. The battery needed to be charged.. the racks need new paint. and they have by-passed the starter solenoid with a big button ? So I’m going to take a few days and go over the Rally and adjust … fix … and add a few goodies.
Into the shop and start removing bits and pieces.. So far I’ve got a list of things that need fixing and things that bug me. And one thing that I did not see at first.. :
The front brake reservoir window is missing. Therefore no fluid .. no front brakes !
That hokey start button.. it’s wired directly to the starter, bypassing the solenoid. Why ?
The foam air filter is shot.. I’ll make a new one.
The front clip on the seat is loose. You can lift the seat there.
Battery could be bad..
The chain needs to be adjusted.
The rear wheels .. they have been mounted backwards to make the wheels wider ? not needed… Kids !
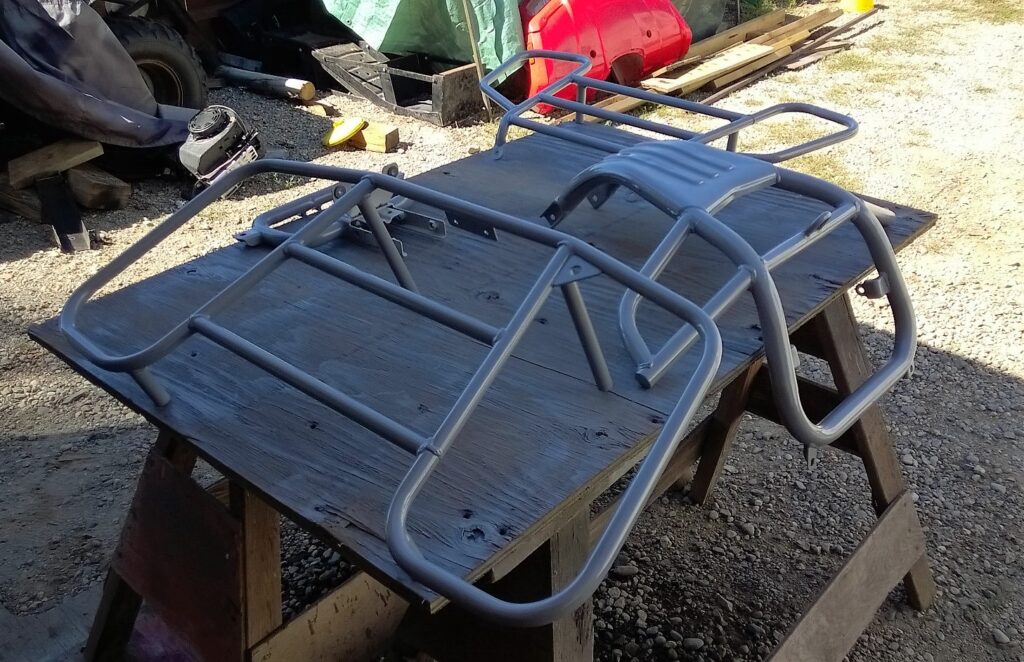
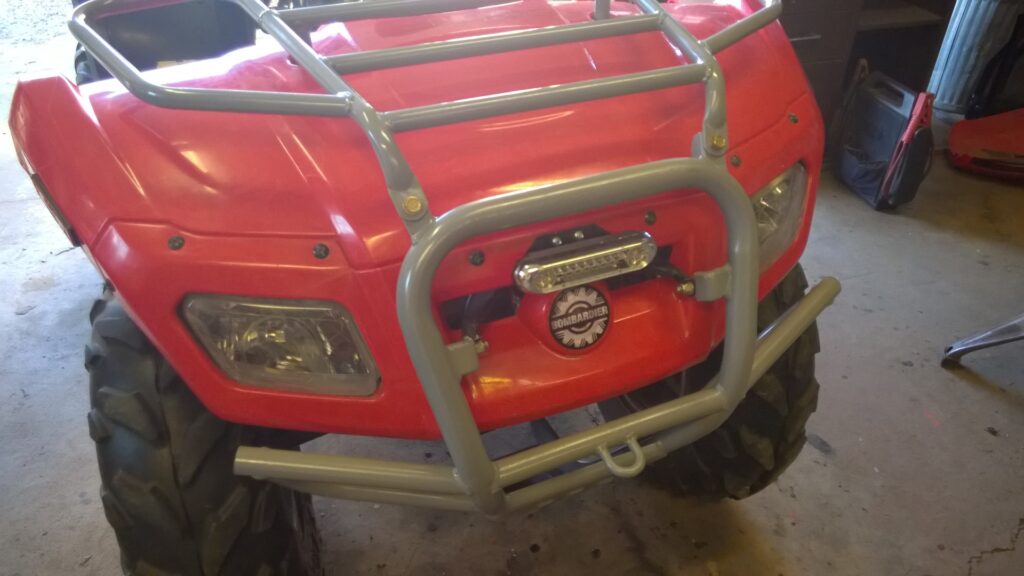
It’s not that big considering the price we paid. The first thing I did was cosmetic.. I removed the racks .. sanded them and welded a hook on each end.
There’s no plans to put a winch on this quad. And the paint was all scratched of the front and back bars.. so I installed these hooks to use for pulling on.
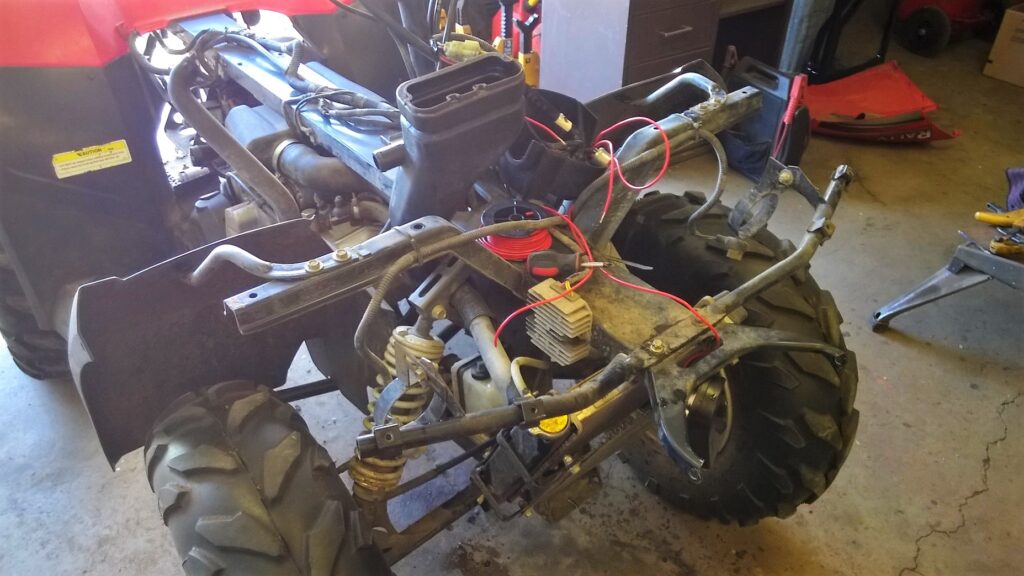
Then the four pieces got a new gray paint job. I removed even more parts from the Rally so I can get to some of the cleaning and wiring. Because first on my mind was the hard wired start button. I needed to know what was wrong with the factory start button. So I took it apart and found a broken solder connection. Simple fix. Meanwhile I’ve had the battery on charge .. three times and it tests out just on the verge of bad.. so a new battery was bought.. something we thought was going to happen anyway. Ok a little “pimpin” while things are apart.
What to do with that hole where the start button was ? A horn button of coarse.. And why not a power plug too. !
Routing the wires is easy when this much of the quad was apart.
And lets not forget the all important LED running light.
I’ve got the quad all back together now.. Replaced the window in the brake reservoir, Found out the chain has been adjusted to the limit.. so maybe a new chain. The rear wheels have to stay as they are .. the rims are not the original ones.. so the offset is too much inward if you turn them around. New battery installed. New foam air filter. I even replaced the gas line. I don’t like those clear hoses. It’s running good.
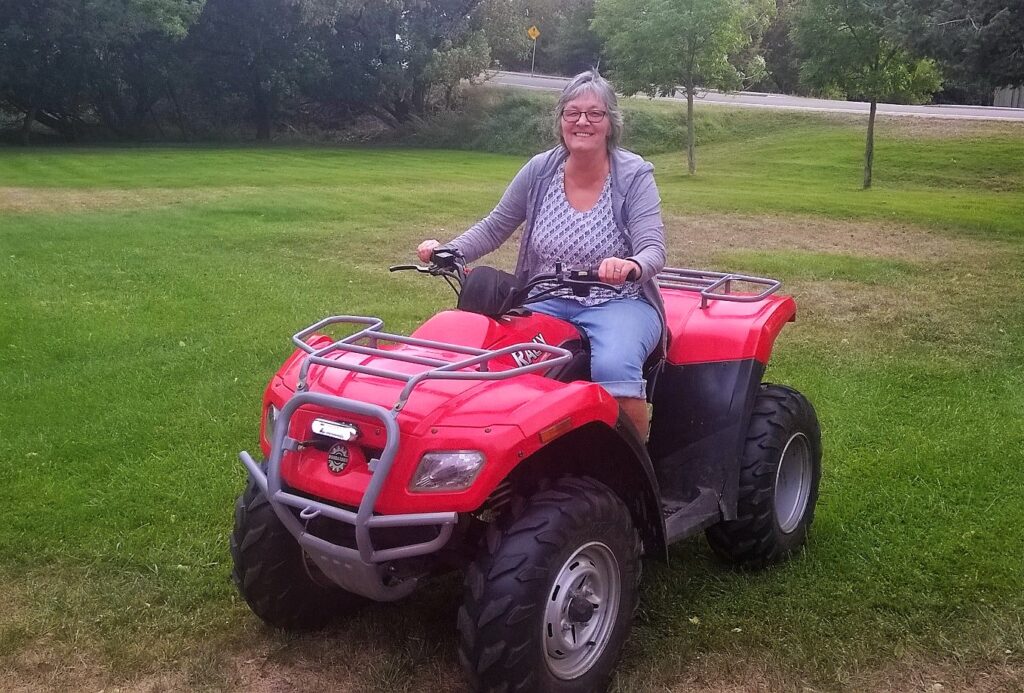
And Mo is liking the new ride.. just the right fit for her.. Remember the chain had a lot of play.. I bought a new chain.. made it the proper size and it fits perfect .. with the adjustment set back. So it will be easy to take up any slack. We now have a 100% working quad. Time to take it out for a run..
While I was looking for parts for the 2005 Rally, I came across a 2003 Rally being sold very cheap. The motor had a broken valve which also wrecked the piston. It looks fixable.. so I bought it and brought it home… See the new post 2003 Rally HERE.
Sept 28 2016… and we finally got to take out the two quads.. mostly to see if Mo likes this as a activity.. we had NO troubles.. BUT she feels that this is not her “thing”… so she want’s to sell it .. no need for two..
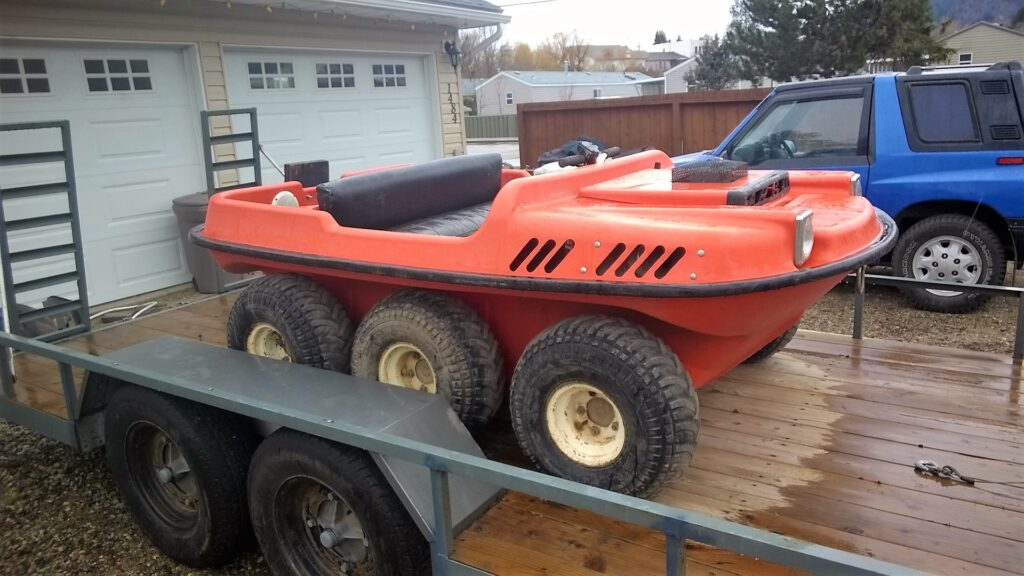
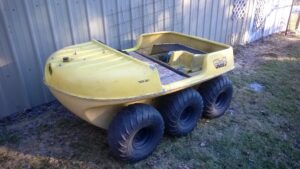
What do they all have in common ? SIX wheels . YES.. but they also FLOAT !
Honest hon… it followed me home… no matter how fast we drove.. it was still there ! But seriously it was planned. I traded one of the Terra Jets for this Argo 6×6. The 1970 Terra Jet that I did not get totally finished last year. Too many Jets not enough 6×6’s. The Jigger is gone now.. So room to fill.. We’ll see. Now that I have one ..I thought I better understand these .. And the more I understand the more I like them.
Facts : Argo is a Canadian company started in the sixties. still here in Ontario, still making them… still has a dealer network ! They make six wheeled and eight wheeled versions. A new one starts at $14 grand.. The body is made of thick poly plastic like a kayak. They are tough.. they float and go anywhere. These are favored by hunters all over.. There’s room for two adults and two kids.. or a lot of gear.
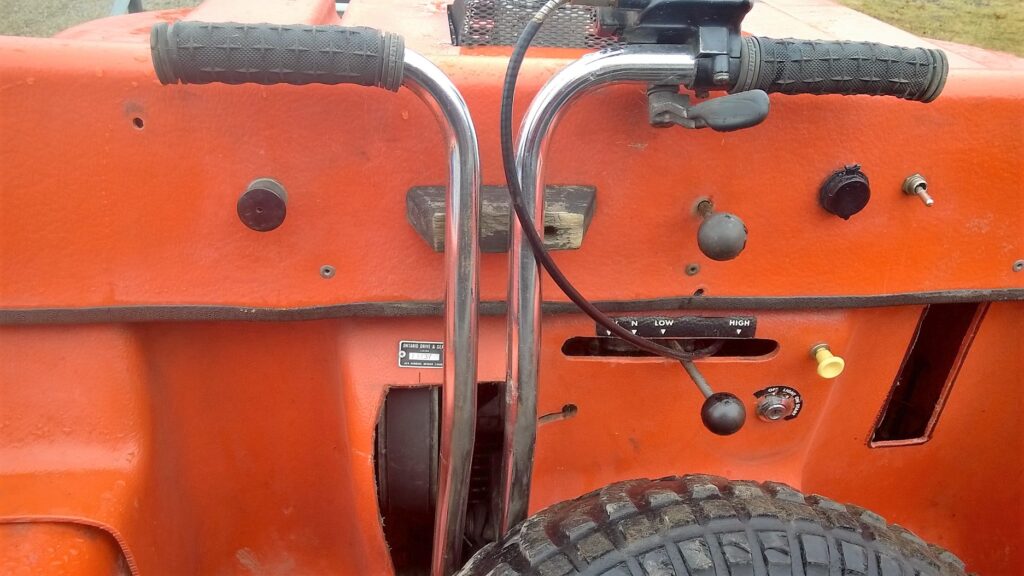
I really like the controls .. easier than the Bazoo or the Jigger.. Steering is simply done by pulling back on the lever that’s in the direction you want to turn. Go straight is just the thumb throttle.. like my quad. You can see the gear selector in the photo.. Reverse, Neutral and two forward speeds.. What’s not to like about that.. The tires are looking a bit worn out.. but this one came with seven newer tires so no worries there.
An extra rim too.. Not sure how I’m going to change out 8 inch tires .. All the tire changers I have access to won’t go that small.
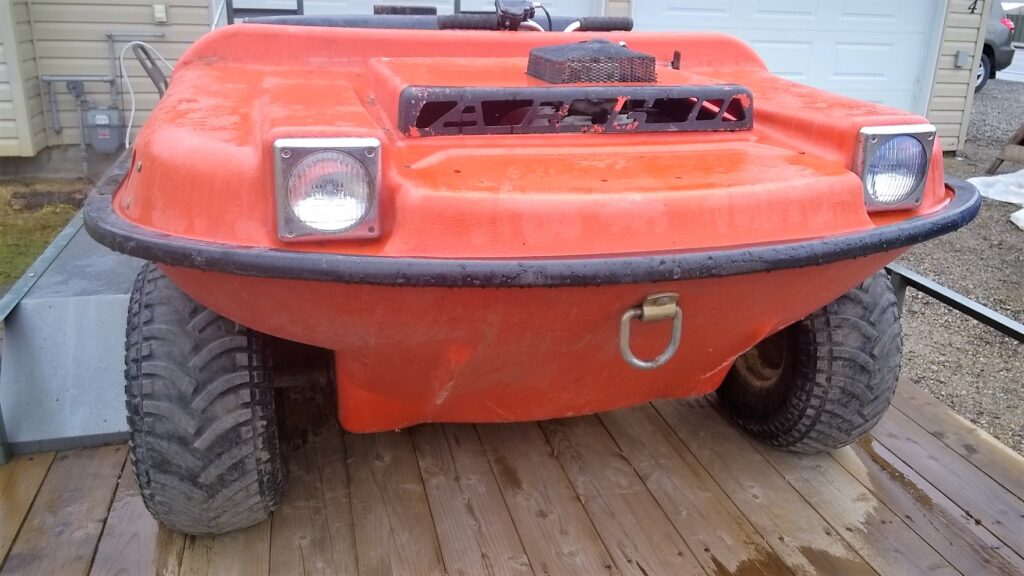
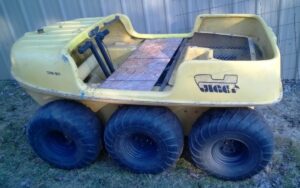
Anyway it found it’s way into the shop. I figured since I was waiting on the door locks for the Sidekick … I would take a few days and sort out the few things that prevented me from just going for a drive. As you can see in this photo the first thing is the missing wheel. I had to order the proper wheel nuts , then I’ll put that wheel back on.. It’s flat but that will do for now.. Here’s a video I made….
Most of the stuff I talked about in the video is done.. I never found a carb kit for that carb.. but there was enough good parts and a new carb to get things working.. The motor runs good.. So here’s a new video ….
Still in need of a new choke control.. Then the motor cover can stay on.. Soon I’ll have to give it the boot from the shop so I can carry on with the Sidekick project. So what to do. ?
If I’m to use it I would want to address a few things.. To take this on an ATV ride may not be the best thing.. It’s slower than all the Quads so they would be waiting for you to catch up. Plus Argos have no suspension so my old body would protest a long day of only the tires and seat to absorb the bumps. However the seat is soft and if the tires are inflated properly it’s not bad. If a ride is to a small fishing lake.. then the Argo carries on where the Quad guys stand on the shore watching.. That’s cool. But in order for me to consider going on a long ride I would want to fix a few things.. Now that we have looked it over, and used it here’s my list.
New motor.. I have a 15 hp OHV new still in the box. comes with a new key start to replace the old mower key switch. Not that the Tecumseh is worn out.. but it’s old , can’t get parts and the charging is questionable.
Replace any worn out bearings and axle seals
Replace the chain tension idlers
Fix the filler tube for the fuel tank
Replace the throttle cable. ( it’s a bit short)
Replace the choke cable. ( it’s crap)
Re-route the muffler out the side. (it’s in the wheel well now)
And of coarse install the new tires on re-painted rims.
Most of that work would require removing the top deck from the Argo.. no big deal.. but it’s the way to do it.. Big job… and cost for parts. On the up side… I would have a perfect Argo.
For now I’ll put it in storage:
2019: I did sell the Argo shortly after this post.. SOLD
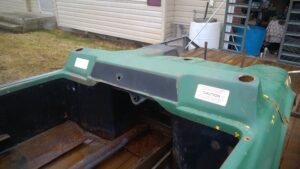
But unlike the second one .. this one has the body. And the tub is original except for the missing bottom ! Yes someone cut the bottom off intending to replace it and ..never got far. No biggy that’s half the work done.
All the parts & pieces are in bins.. ALL taken apart.. Again that’s half the job done ! Win Win.. So what’s missing:
The motor. However I got with it a 20 hp Honda.. Yessss
The Clutch.. which was most likely still on the motor.
The seat cushion.. But I got the frame !
Now… more importantly I got some things that I did not have ! Even though the 453e I got last fall has most parts, it’s was missing :
The Body ! and the motor hood
The fuel tank
the seat frame
The cover for the chain.
I was pretty stoked to see a fuel tank.. then not so much cause it’s cracked..
Fixable ? I’ll try. If nothing else it’s a good template to make a steel one. The body like everything else needs repair.. I thought I was just buying some spare parts.. but I’m thinking this is a repairable Terra Jet..
All the terra jets are stored for the time being.. future projects when the mood strikes me.
Sept 2019… This is the one that I chose to restore.. even though the bottom of the tub was missing I would replace it anyway.
Once again I could not resist a deal on something weird.. or cute.. or Yellow. no wait my favorite color is blue. Oh whatever it’s still cute.. it’s still got gears and chains and a motor. I love it.. Don’t need any more projects.. This one runs.. not great but it runs. Drove it into the back of my truck.. That beats winching or pushing it into the truck !
Shorter yes… But it’s wider than 4 ft.. cause two wheels had to go over one wheel well.
So welcome my little yellow friend to the place where old things get made new again… When I have time ..
Fact: jigers where the first AATV’s made. Fact: made in Canada EH. It is believed that these were the reason Argo’s were made.. And Argo’s are the longest production AATV.
This little yellow guy is the last of it’s kind.. speaking of production that is. 1968.. last year for the jiger.. It’s just a tad longer than the first Jigers. (can’t imagine it shorter).. and it has a hydrostatic drive. I’m a fan of hydrostatic stuff.. However.. this one I may not like.. as much.. Being old hydro units.. they are not as “refined” as the newer stuff.. They seam a bit “jerky” Now this could be something else like the chains driping with oil .. yup .. Skippity Do Da.. Or maybe the sprockets are worn.. Skippity Do Da.. Or when you break a linkage to one of the hydro units.. and are trying to drive with power to one side only.. and that side want’s the other side to help too… Well maybe.. I guess I’ll know when I fix that. YES I drove it about 50 ft from the truck when I noticed that the right lever was not doing anything… Kinda drove in a big sweeping curve.. So Here’s what we have :
Newer 12 hp 2 cycle single motor , runs good , pull start only 🙁
Re Engineered ??? levers, with a twist throttle.
Wheels adapted to 5 bolt 8″ trailer wheels… Yes Good
Good fiberglass body.. No repairs needed. could use paint.
Missing seat ? not hard to make one..
Key switch not hooked up.. ? I’m good with electrical.
Plus there is a few details that I could look after.. It’s one of those things you fix and use or really get into.. yes… restoring… or maybe improving ! It will never be original again.. the T-handle control is gone. I like the new lever set up that is there.. with a few improvements it may be great little runner.. OR maybe this is the one that gets the “Toro Treatment” And by that I mean taking the drive system from this ……
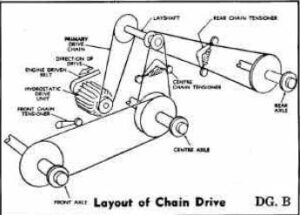
This is a diagram right out of the service manual.. and this is one side of the drive chains.. I see 4 sets of chains.. each side.. I also see one of those sets is unnecessary. But only from my point of view. Extra chains means extra points of failure. I think this can be done with 3 chains and 2 less sprockets.. But it is what it is .. and unless I’m totally changing the drive system it will stay like it is.
Update: Feb 2016..
The jigger sat broken under a tarp for most of last year.. just too much going on.. when the chance to trade it for a broken Yamaha quad came.. I did just that.. It went back to the guy who owned it several years back.. He knows how to fix it.. In his place is a good thing.
It’s the beginning of March and it feels like spring out there.. But I carry on with getting the jet together..
I did get the tires off the rims.. and I did order new tires.. but about these rims.. the two on the left are real Terra Jet rims.. 12×12 with a 8″ off set. The other two are different.. I’m thinking that this Jet being the first production model they hadn’t figured a few things out yet. Like the length of the rear axle. Let’s just say these rims compensate for that nicely.
It’s very hard to source the proper tires that are used on the Terra Jet.. these come as close as I can.. and they are a good price. Should arrive in a week. Also waiting on more chain.. I used all ten feet on the front drive.
The new drives chains are on and we made a new idler sprocket for adjustable tension. There is new nylon in the bottom of the chain trough too. So many parts & pieces were missing from this Jet.. Having to make a lot of things from scratch… But that is also a chance to do it better .
Mid March:
And this weekend I went and got another Terra Jet all in pieces.. So here’s the Post for that.. HERE
I think it’s more than just pieces, I’m thinking a third Terra Jet.. could be had… the important stuff is there … I may just take two of the rims & tires.. and the best two tires I have from the 400E and keep the new ones for one of the other Jets..
Got the tires all mounted on the nicely painted rims.. Tubes in the tires will keep them good.. And I put the wheels back on and pushed the Chassis out the door for a photo.
YES.. getting closer to that drive.. That’s the proper Terra Jet fuel tank in the front.. needs a repair.. but that’s where it goes.
Getting closer.. If I wasn’t so lazy.. and took less breaks.. I might just have finished the jet today.. but it still needs wiring and the brake caliper installed.
Unfortunately this is as far as I got before the yard work was calling. It’s full on spring now and lots to do.. So I moved the Jet out of the shop and tucked it away. Fully intending to get back to it in the fall.
Feb 2016…. Update:
In the fall I agreed to sell the Jet to a friend in it’s un finished condition. To be picked up this spring.. So it was left under cover for the winter.. I had a look and it’s all good.. tires are still up and only a little surface rust on the bare steel bits. So very soon it’s off to it’s new home.. Kinda sad I did not finish.. But I have a newer Jet that I can work on next winter. So off it went…..With an old golf card for company.