Now comes the fix’n and put’n back together!
June 2025
So let’s keep going shall we…. It’s time to re- install the axle and the hubs. Easy when you have new bolts and parts. And this allows me to double check the squareness of the hitch. Only 1/8″ out.. not enough to cause a problem.

And bonus ! That means it’s not seized anymore. Cleaned up the hubs and replaced the broken wheel stud. The grease is still good, which really surprises me. And the outer bearings are like new ! So a little paint and then put them back on, with new grease.

I’m thinking this will be presentable. Those dust caps are interestingly big. They are threaded on too. I need to get some 3/4 plywood now for the floor and the tailgates, so I can weld the hinges in place and finish the painting. And I had to make a new frame for the lower tail gate using some pieces from the top tail gate.

This is my new frame… taller when closed and over laps the top one to hold it closed.. It was the opposite way originally on the trailer. this will be 3/4″ plywood and the top will be only 1/2″. The hinges are in place and work great ! You can remove the tail gate only if you have it horizontal.

It’s not heavy so easy to remove if it’s in the way.
I now have all the plywood for the trailer.. so a few cuts and some grey solid stain on the good side for the outside. This is the front panel.

Two coats of the grey, and this one is done and ready to install.
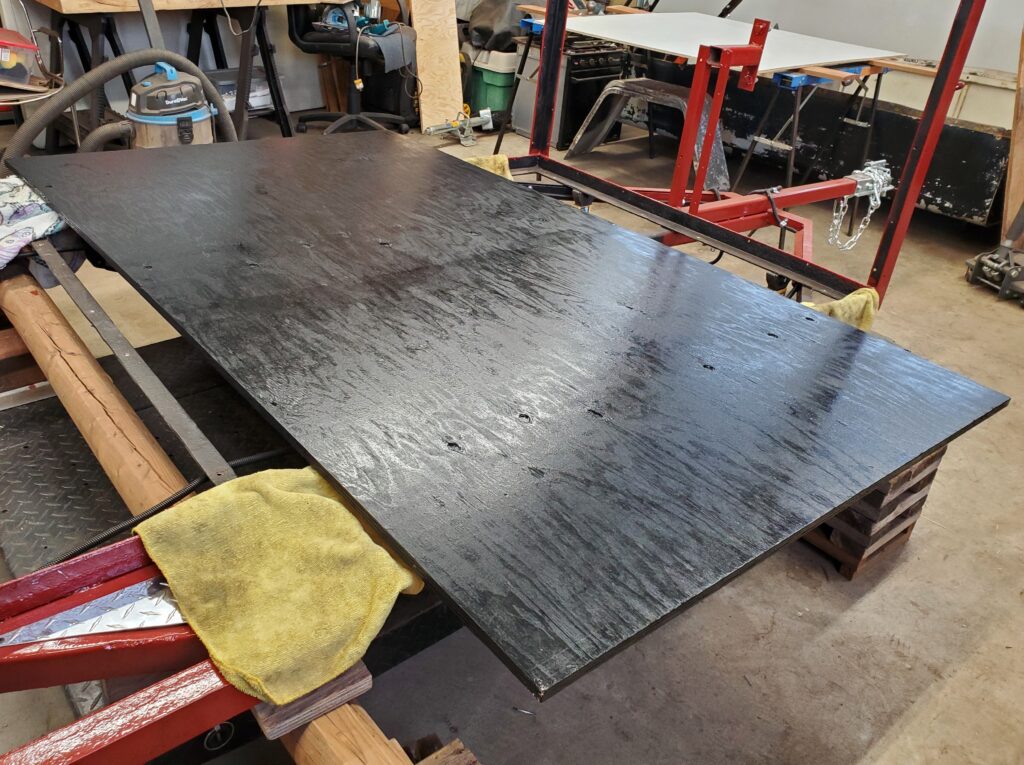
The 3/4″ floor sheet gets a black enamel paint on the under side. When it was dry I flipped it over and slid it into place. Then the front wall could tuck in there too.

And there’s a peek at the way things will look. The sides are next. I kinda wish the grey was a little darker.

And there we have it… a three sided box..of sorts. Not painting the plywood inside because it will stay dry and will be subject to abuse of all kinds.

Also I’m going to put 3/4″ fillers along the sides of the floor. I’ll also be trimming off the excess bolt threads flush with the nuts. I’m cleaning up the fenders next, because they can also get put back on. They are going to stay bare aluminum.

If you look back at the photos on PAGE 2 , you will see a big improvement. They were painted white (or what’s left of that) and covered in moss. My jack is possibly coming today and once that’s on I’ll put the wheels back too. Time to clean up the garage and juggle things around for work on the roof. No jack yet so the trailer mover is needed..

Wow everything fits in the garage! I’ve already pried the pieces of the walls from the slots. Time to clean up the inside and paint that first. And then I realized why the roof was not heavy, and not rusted ! It’s aluminum… Geese do I paint it or sand it down ? Anyway it’s on and soon to be bolted down too.
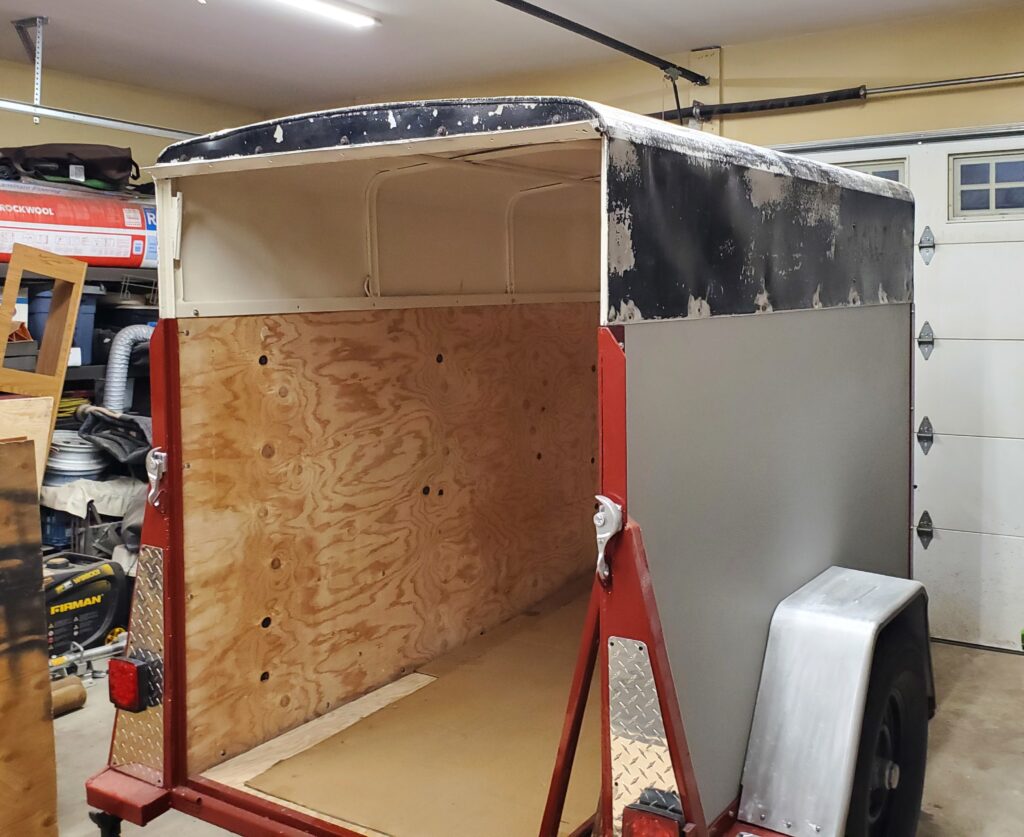
See the nice cream colour on the inside.. Ya no more ugliness. And for those asking the question ..How did he get that big roof up there? well with the help of a beautiful assistant of coarse. I use the pipes that stick out each side so it doesn’t fall off.

With a bit of persuasion.. it slotted down on the plywood sides. I am going to paint the roof.. It’s pitted quite a lot, so the paint will help keep it nice longer. And done…

It’s not the best looking trailer. Using what paint I had has it’s challenges that way. But it’s in like new condition, which is the real goal. Hope my jack shows up soon. But next is the tailgates. And now I’ve painted the lower panels and will bolt those in place soon. Meanwhile my jack finally came today just a week before Christmas.

And it’s a perfect fit , and a perfect height. So the front stuff is all done. On to the rear doors..
DONE !
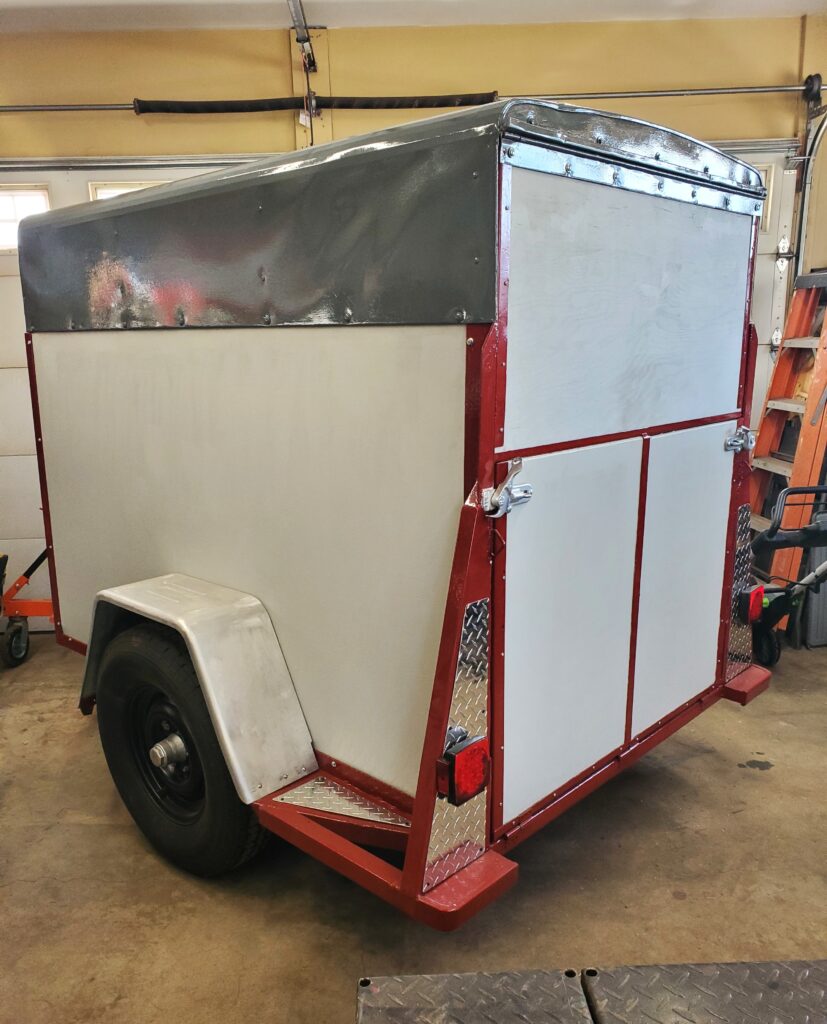
Perfect ! Everything works as it should. Ready to hit the road. I’m keeping this little guy for awhile. Will keep you posted. And one final video….
So as I close off this trailer project , someone suggested a before & after photo…
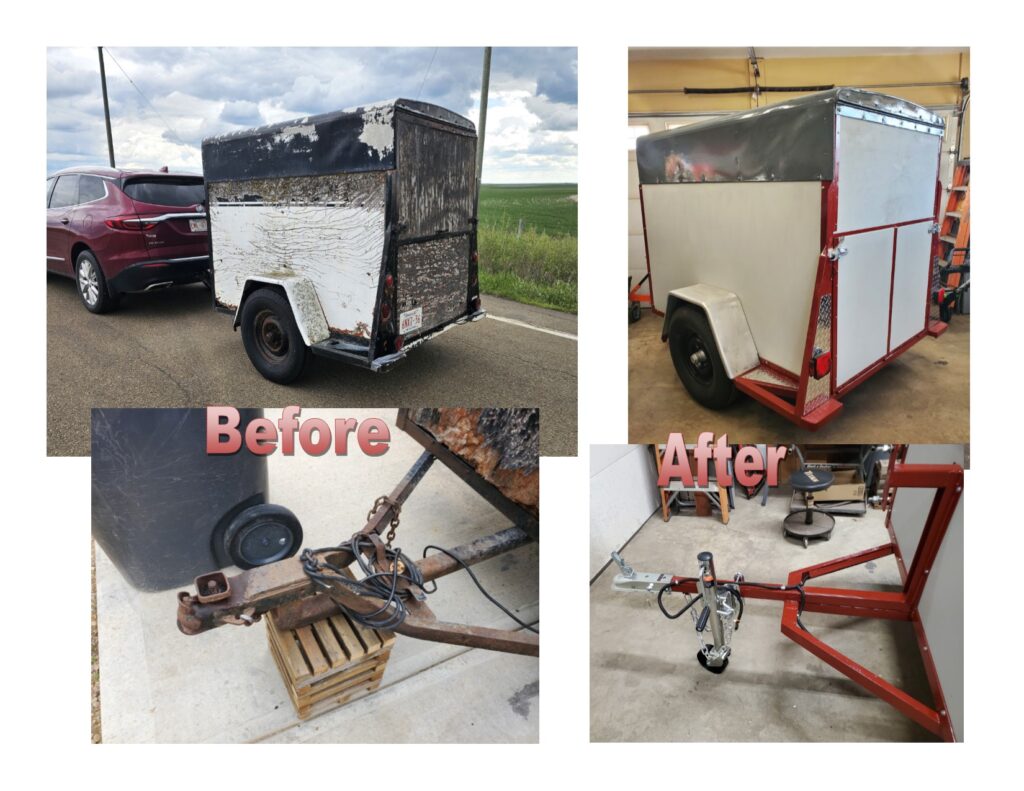
All Done!
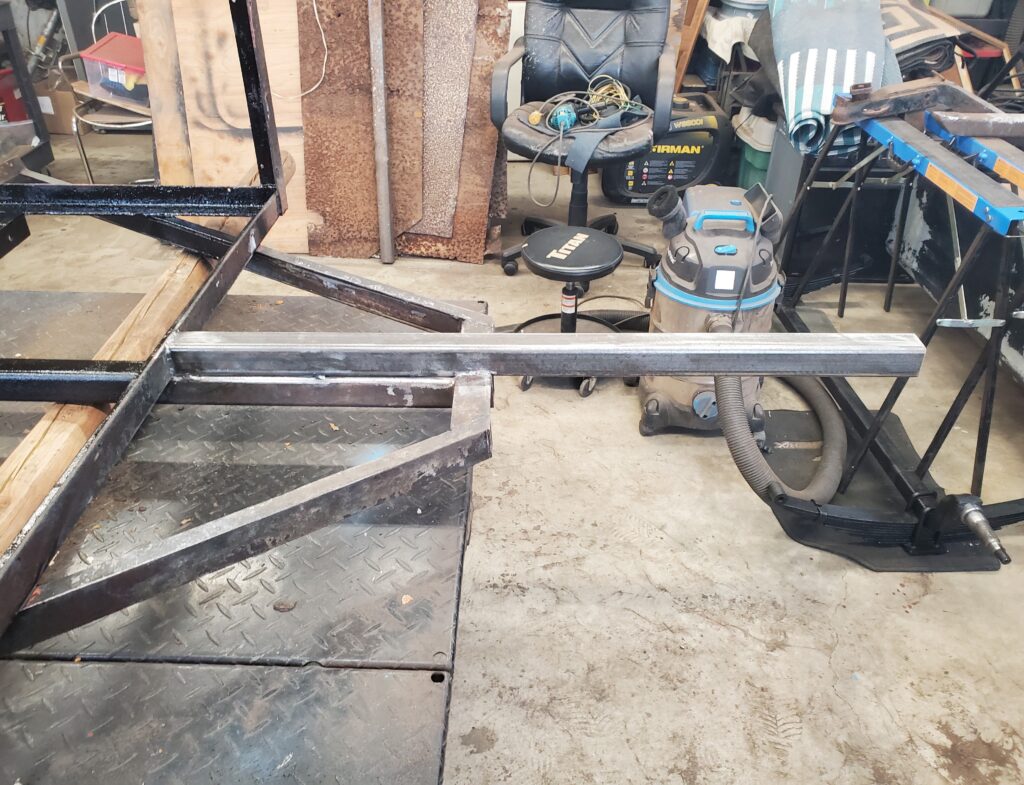
Couldn’t line it up with the old tongue one under this one.. it was not true. But the frame of the trailer is square so I’m going with that. Worked out good . one more piece to weld on the front and some hooks for the safety chain, but I’m not sure where it goes. However I am sure where this goes… The front cross plate.
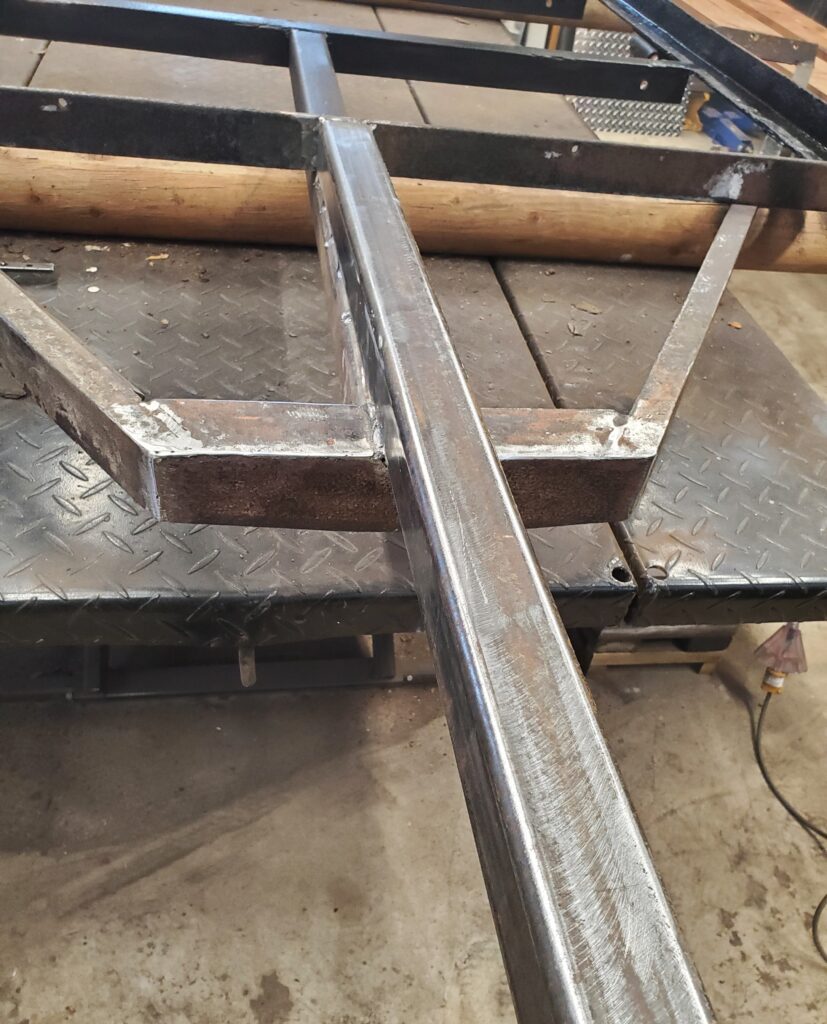
It’s really just a cover for the tubes so they don’t fill with crap. I almost forgot about a spare tire mount.. That’s next.

And here’s how I did this.. For extra support this will be bolted to the front wall, and that is planed to be 3/4 plywood. And we are ready for some paint…

Yes nice colour… That’s my little bit of brown to make the red darker. How about a new video update..
Will need two coats as usual, and once that’s cured I can get too the wiring and my aluminum plates. Taillights are coming soon so that should finish up the wiring. So let’s make a place for those lights.
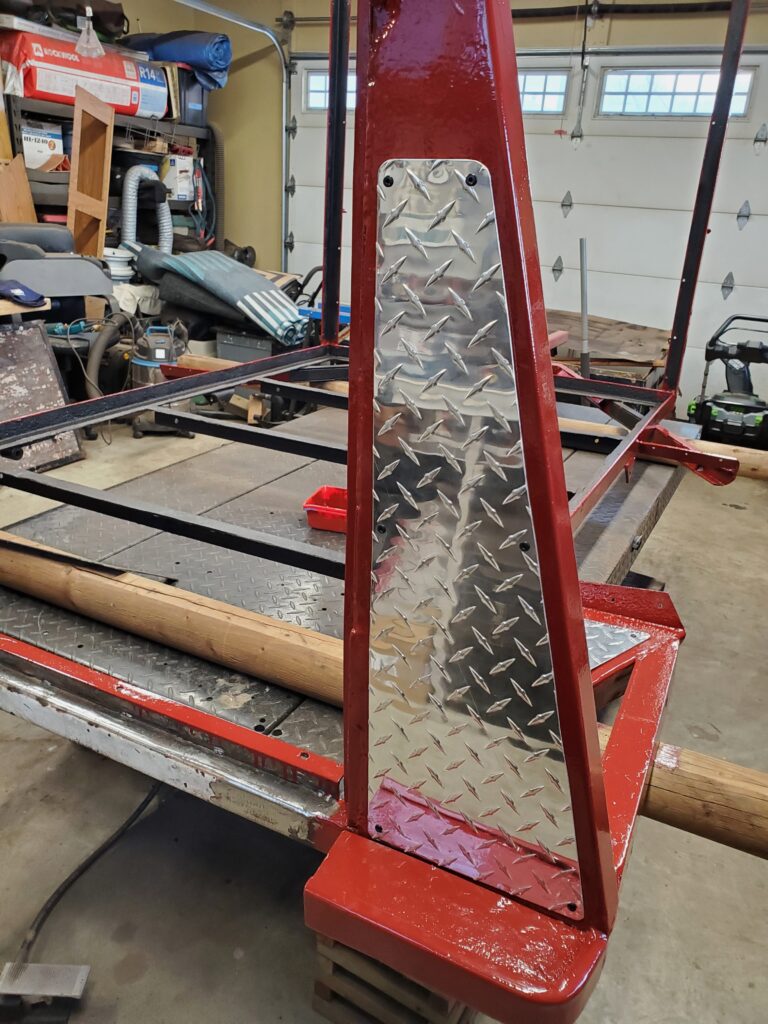
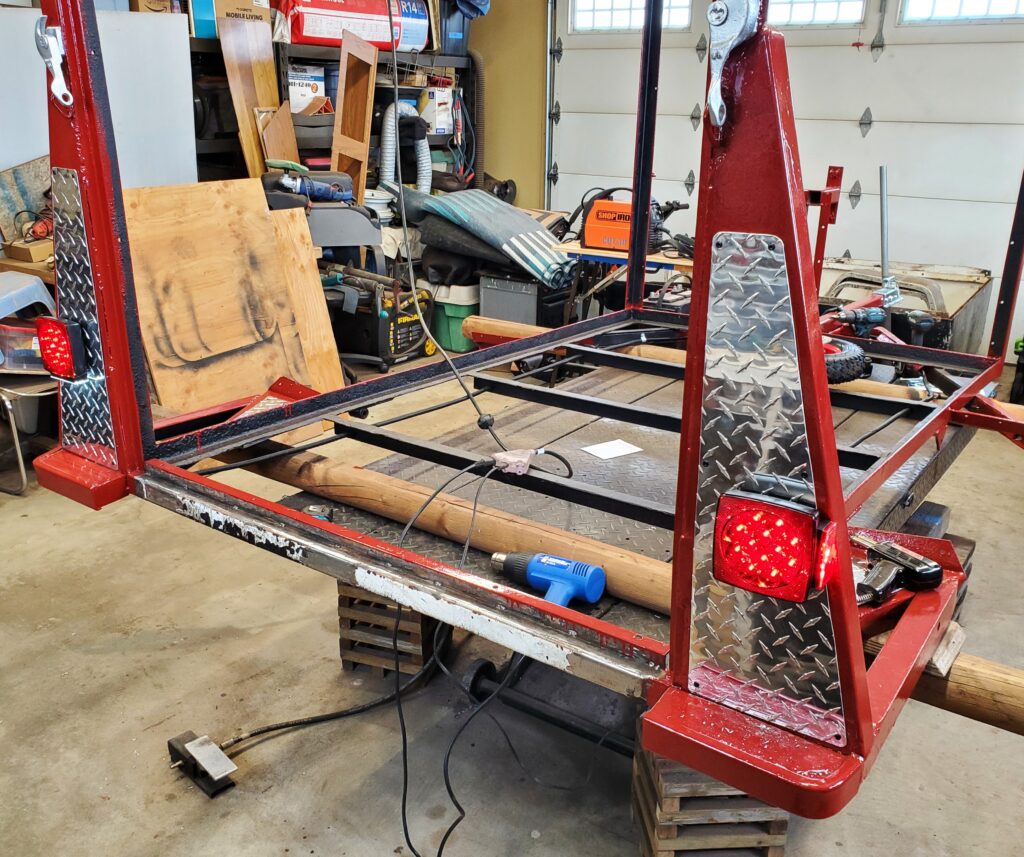
Yes it’s my one bit of fanciness. But really it’s to cover the holes from the old lights. And with some of the extra aluminum sheet I made these purely decorative triangle plates..

Now time for some wires.. And as always I run ground wire direct to the lights. Using the frame as the ground can end up being unreliable over time. Also all the new LED lights that I use have a ground wire coming out with the other two. This trailer will have the simple wiring. That’s a four pin plug with just three wires running down each side to the back. Here’s the harness I found in my stash.
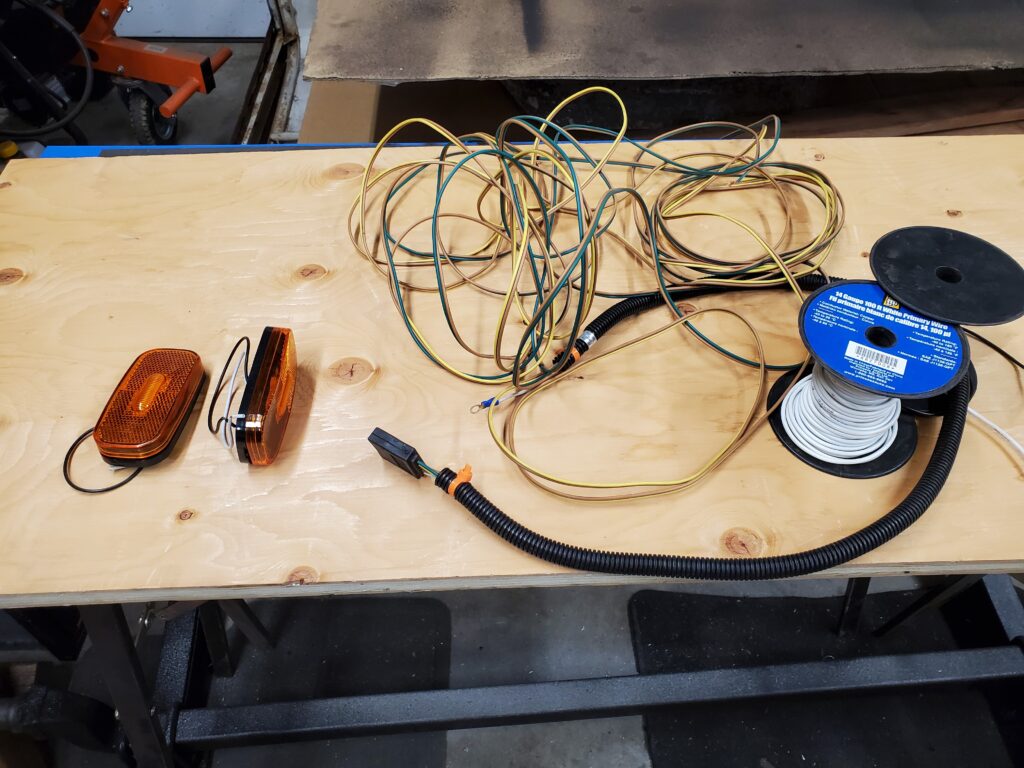
And two amber marker lights …also from my stash. No penny lights on this trailer.. we are going more conventional, but still LED’s. And they have a nice home on the front angle brace.


See ! Ground wires.. yes they put a wire ring to attach the ground wire to the body / frame. But not me.. I was going to go with the long skinny lights like I used on the Westward Ho trailer. But I’m going with these because they work best on this trailer.

And the license plate light and side markers are all in one.. Easy peasy.. And as simple as it gets. While I’m waiting for the lights to come, I tipped the frame back on it’s side. This way I can weld the eye that the safety chain will attach too.

Remember the trailer is tipped on it’s side… so the eye is welded to the underside of the tongue. There’s the jack with the BIG wheel that is going on this trailer. While I was in the painting mode.. I painted the good side of the wheels.

Sure would be cool to find hub caps for these. My coupler and tail lights came ! A couple of holes later and….

There you have it. 1/2 ” grade 5 bolts with ny-lock nuts.. Not coming off any time.. And I got right to work on installing the two tail lights. Solder and heat shrink inside loom, Nothing better. And I got to try out my new trailer wiring tester that I made.

I like these tail lights they are perfect for this trailer.
I tried the wheel jack and it’s too big, and too tall. So I’ll have to see what to do for a jack. Here’s a quick little update video…
And with that it’s time for a new page..

And the trailer stands like this safely while I clean up the underside. I’m having second thoughts about my plans to add a foot to the length. Adding to the tongue length is a very good idea.. But the amount of work to add that foot… maybe not. And there’s other considerations, like the spacing of the cross pieces. So I’m really talking myself out of that idea. And this video tells why.
Yup.. got a new plan.. And since it’s easy for me to tip the trailer by myself … I put it back right side up. Cleaned up the last of the welds on the floor panels. Trimmed the back so my tailgate will work.

That should do it for clearing the tailgate. And I patched the strange shaped hole in the panel behind the left fender.

Not prefect but good. We are not restoring a classic car.. it’s an old trailer. The next thing I did was wire bush the frame… Yes just a wire brush not the one on the grinder. Rather than fill the garage full of rust dust and who knows what. I’m trying something else. The “krud kutter” mild acid and rust sealer.

As you can see it turns rusty metal black. Once dry in a day or so, it will be ready for paint. Most of the metal on the trailer is rusted bad and pitted but still strong. I say embrace it and let it be ! Meanwhile I cleaned up the axle with the springs and gave it a satin black paint job..

It’s not dry yet.. hence the shiny spots. My new bolts and the shackle arms came today so this will be ready when the frame is.. And the wheels are next, so they will be ready too just in case I want to move the trailer. There’s a bit of welding to do for the under side of the trailer. Then it can be right side up for the rest of the work. And I have a plan ! I’ve been looking through my paint and I need to use what I have.. I have the white paint for the inside of the roof. I have a can of the regal red and some brown … so I’ll mix up the burgundy colour again for the lower frame. I still have some grey solid stain I can use on the outside of the plywood sides. And I’ll make up some off white for the roof. I’ll need to buy the plywood. Two sheets of 3/4″ , one for the floor and one for the front wall and the lower part of the tailgate. Two sheets of 1/2 ” for the side walls. Left over pieces will be handy for the Award trailer work. With the welding on the underside done, and the undercoating paint on..

This stuff is easy to spray on.. And this is 80 % of the frame painting done. As part of the welding I did , the filler pieces where I cut the bumper are in place too.

When all is dry it’s time to go right side up for the final time. And now that we are sittin pretty I have a plan for the tail lights. So I do need to remove the old ones.. The torch came out for this and off they came.

You will see later what my plans are. Now it’s time to weld the plywood protector piece back on.

And there you have it. The 3/4 plywood floor slips into this at the back of the trailer. It’s now time to work on the trailer tongue. And also time for a new page….
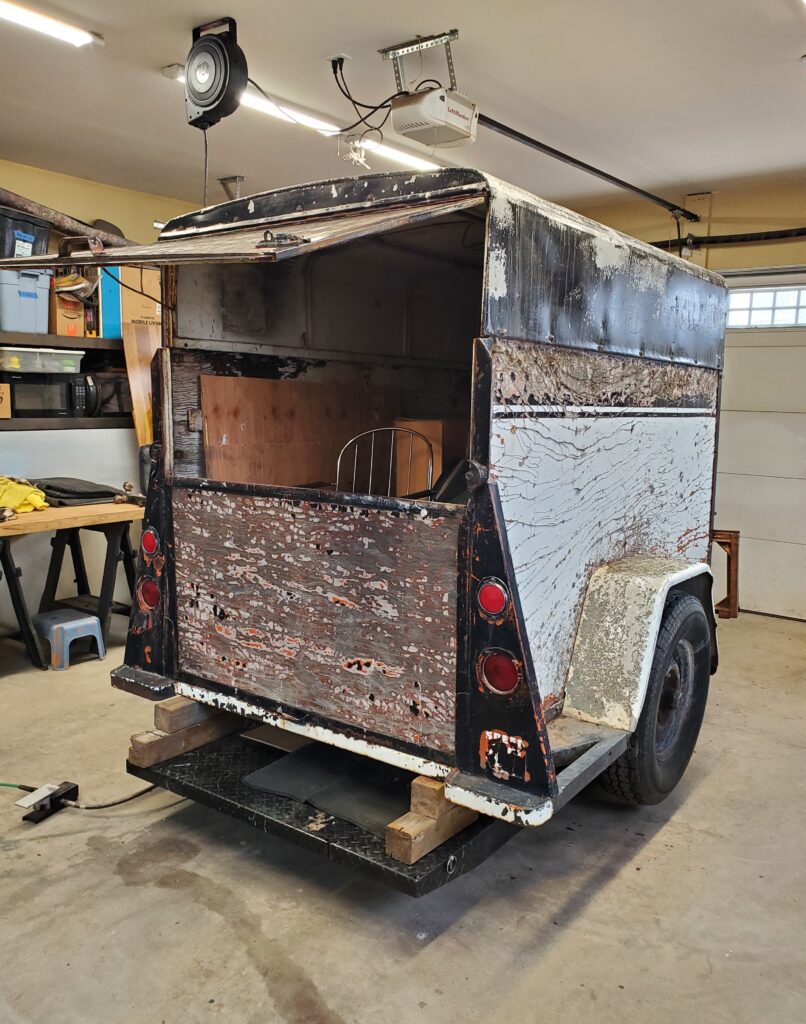
I stored some things in there… out they come.
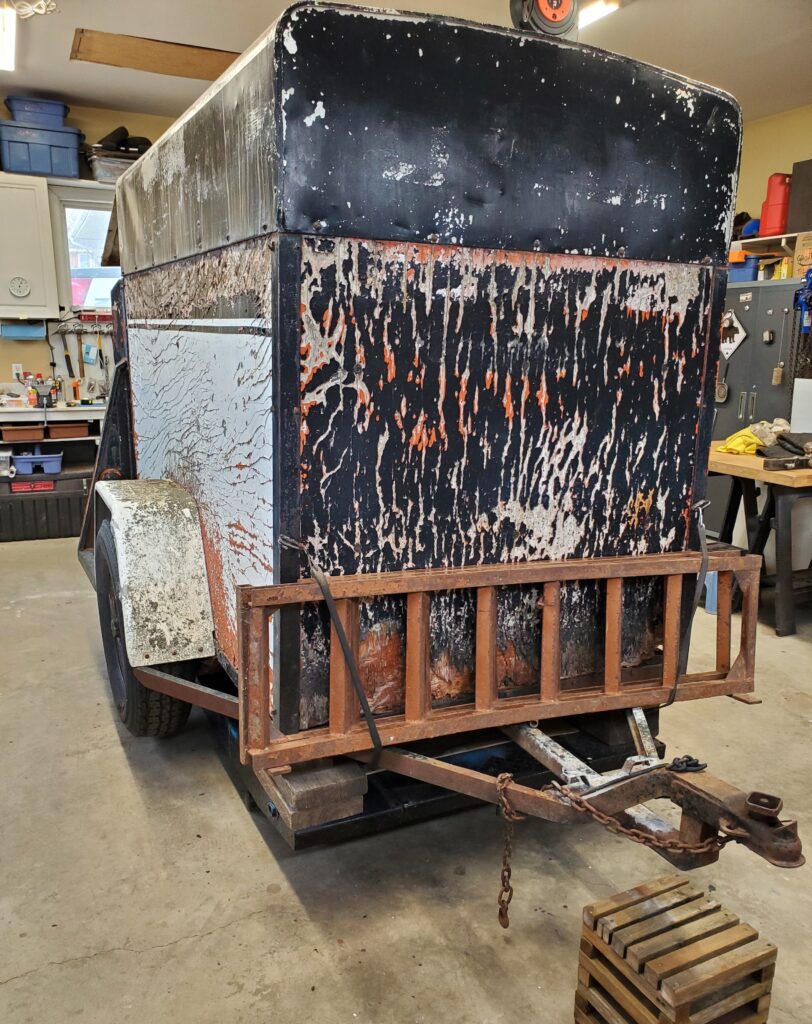
And the ramps for weight… not needed anymore. Made a video as well.
Well I got right to it.. cutting rusty bolts and separating the roof from the walls.. Ended up just cutting the plywood sides.
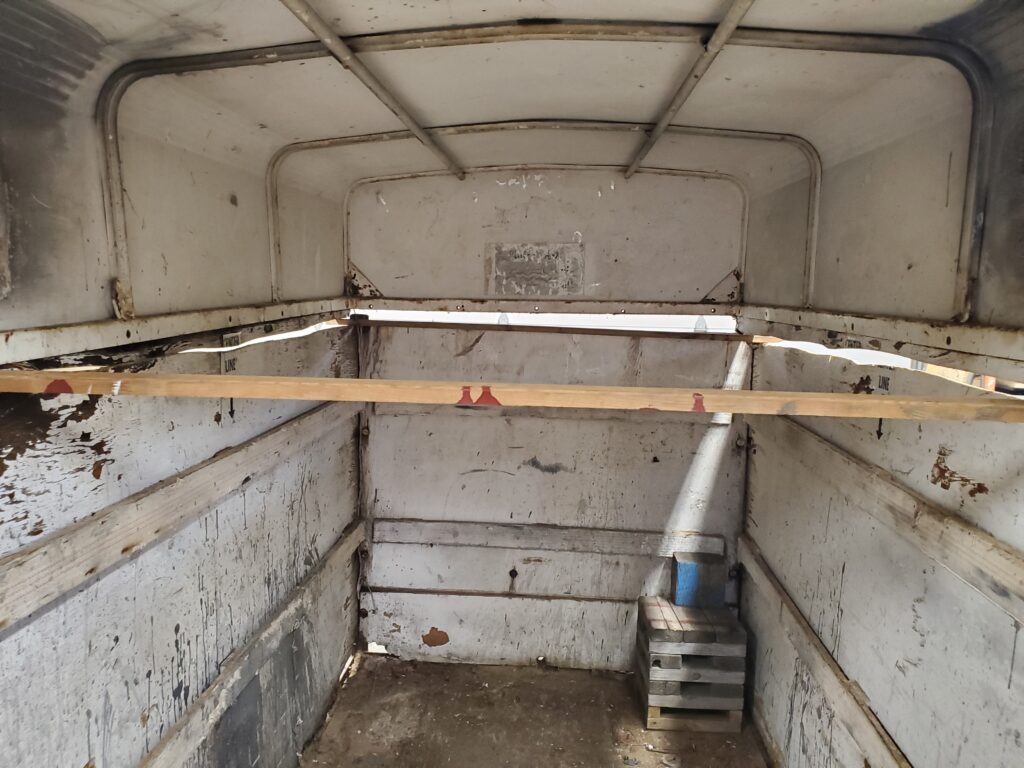
Those 1/2 ” plywood sides are stuck into the roof really good, even though there’s no bolts holding things. The bottom rail of the roof is slotted for the plywood. I’ll remove those pieces later. All the bolts that hold the plywood to the angle iron will need to be “force ably” removed with a cut off wheel. Once I have the roof off the (much lighter) trailer can be lifted to a good working height. It’s Demo Time !
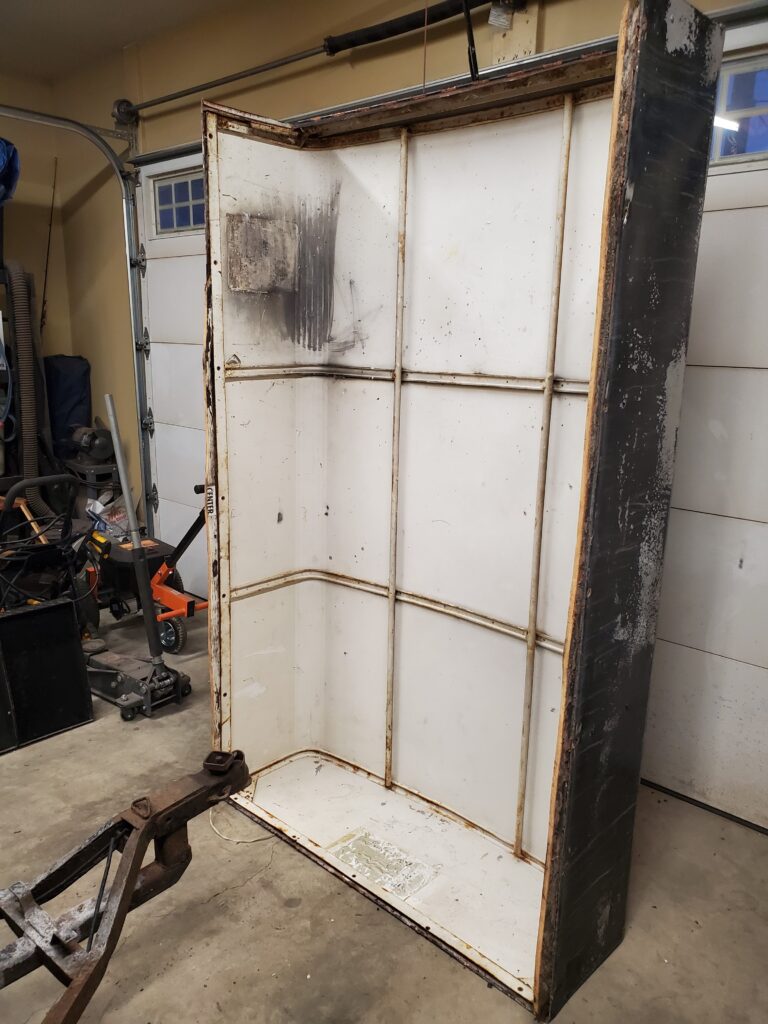
The roof is off ! Now I can work on the walls.
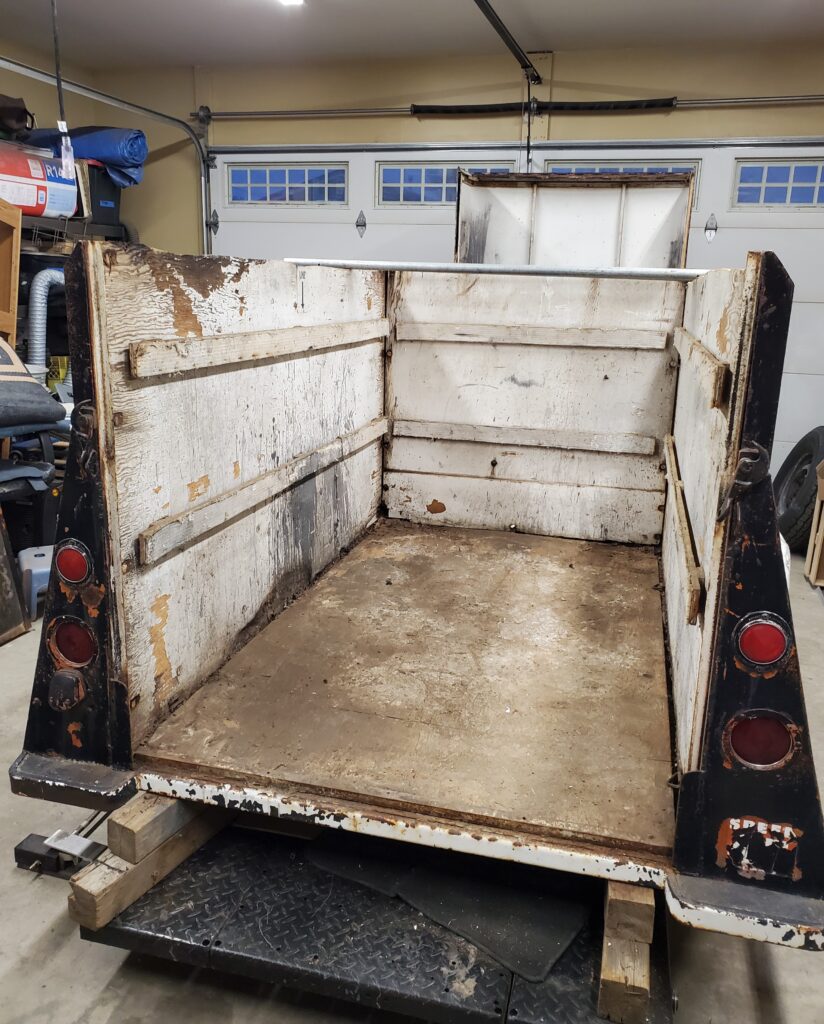
Hey look a nice utility trailer.. Pretty soon just a metal frame. It’s a lot of work stripping this one down. And no I’m not keeping the rotten plywood.
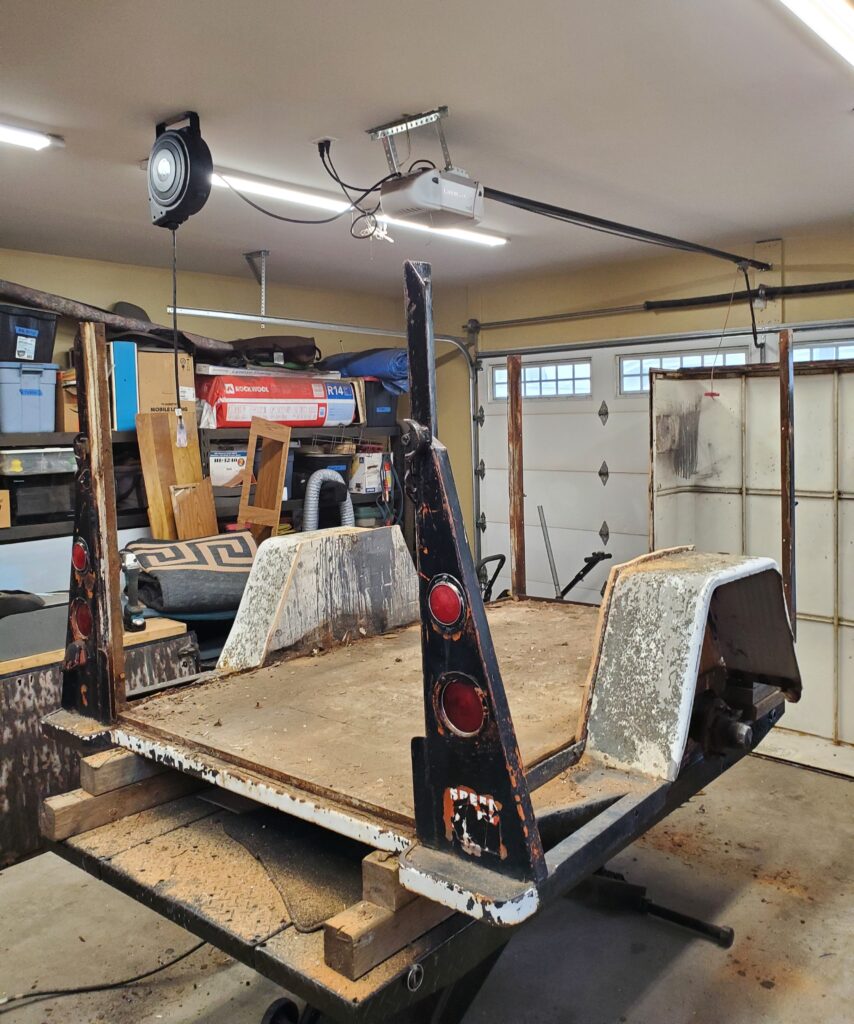
Notice how I cut around the fenders.. It was easier to work this way. It would be sad to have to cut the four uprights off. Well particularly the two with the tail lights. As well as a lot of work. I can’t flip the frame over obviously with those there. But I’ve decided to just tip it on it’s side to avoid cutting too much. That 4 x 7 ft piece of plywood floor is next.
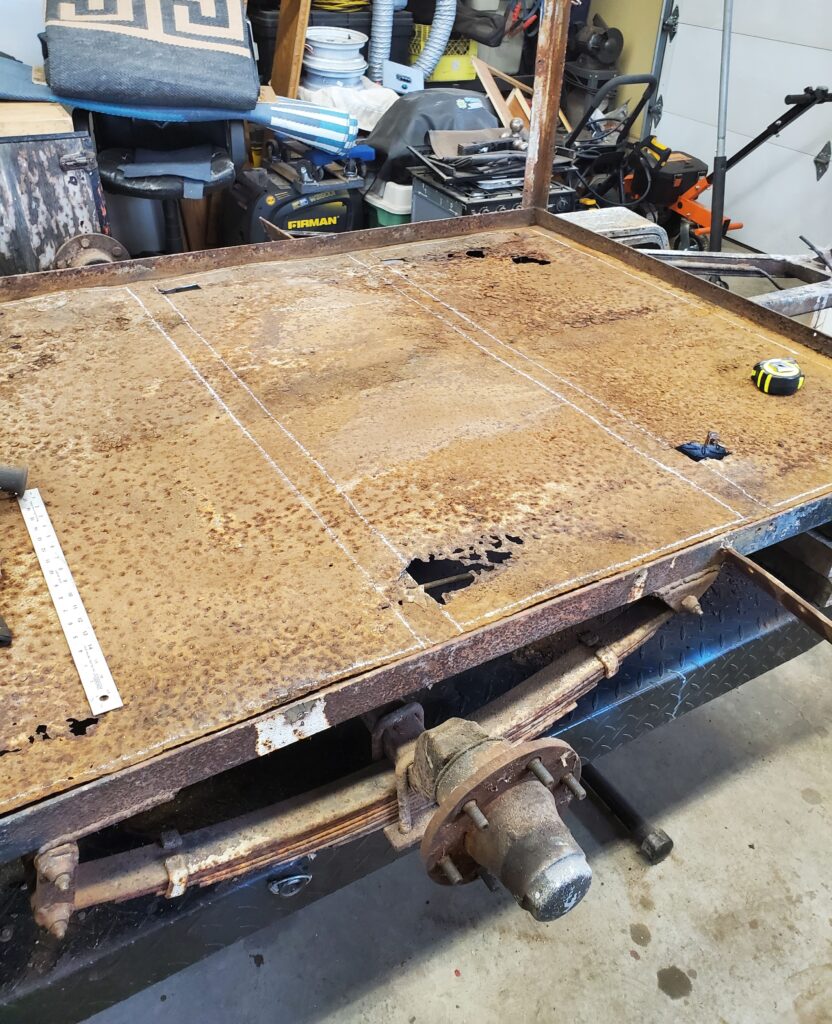
And under that is a badly rusted steel floor full of holes and not flat. This needs to go Bye Bye. I have to cut it in sections because of the cross frames. And hopefully get all the welds. I now have a clear plan of what to do.. Starting with the hitch.
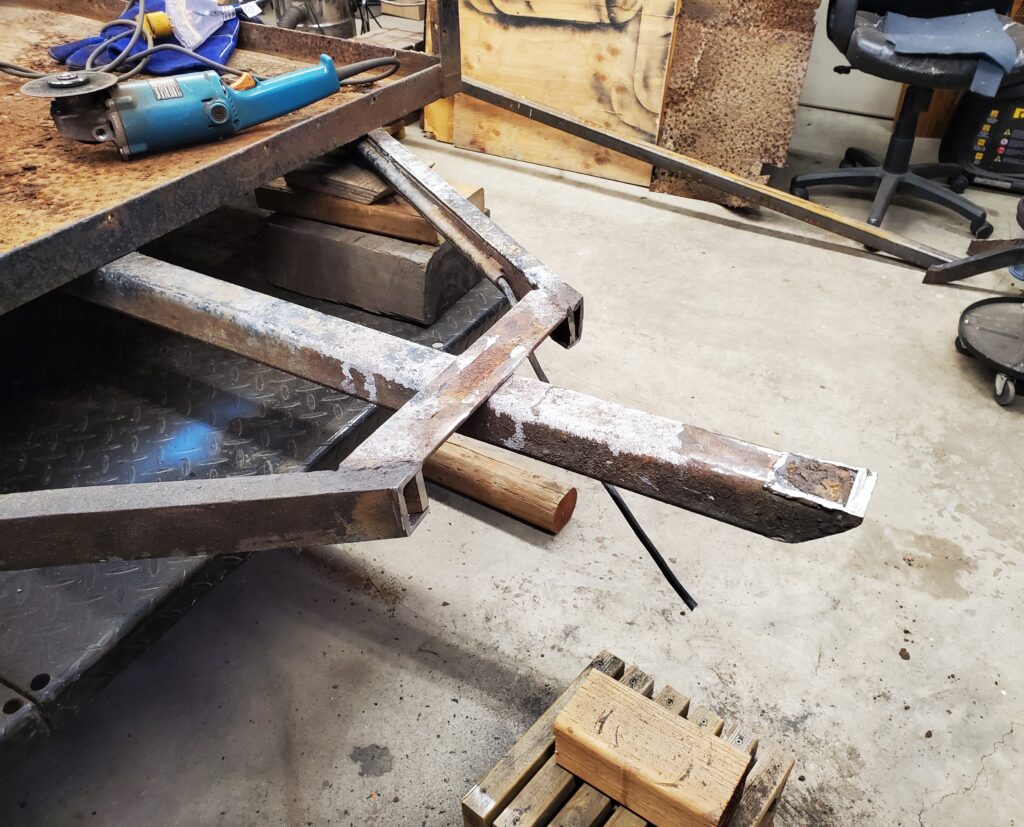
If I cut it like this… and add another 18 inches of the 2×2 tubing beyond the end, welding it to the top of the one already there. That will give me the right height I want. And room for a fold-up jack. The frame is still quite heavy… so I need to remove as much as I can. I see that the spring eyes and the bolts are rusted solid. That’s not good , so I’m having a battle with them.
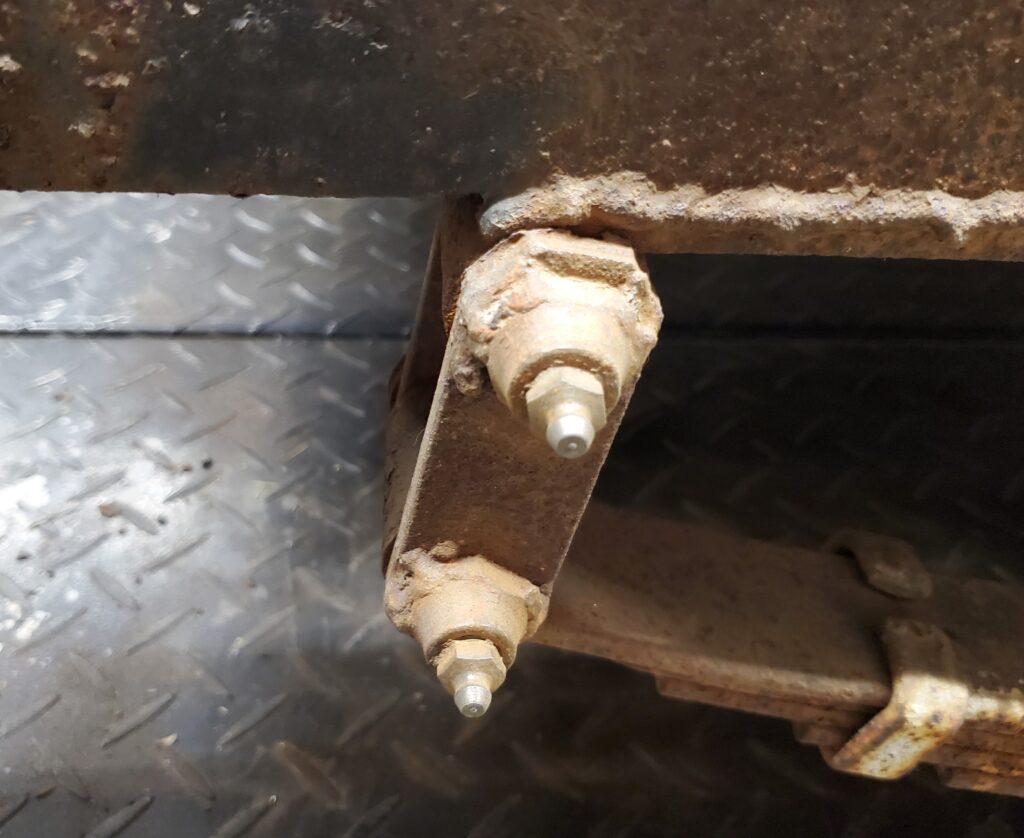
There’s no way to save these. Need to cut them, and that’s a shame because these ones have grease nipples. HA! I won the battle… and I did not need to cut them. Heat and a big hammer was the ticket.

Now I can put the axle on a saw horse to clean and paint. I’ll get a new set of bolts and shackles so things will work the way they should. The naked trailer is still heavy but I think I can get it tipped on it’s side. That rusted sheet metal under the floor was adding a lot of extra weight. So I went to work and removed all of it. Now I really can manage it.. So let’s start a new page..
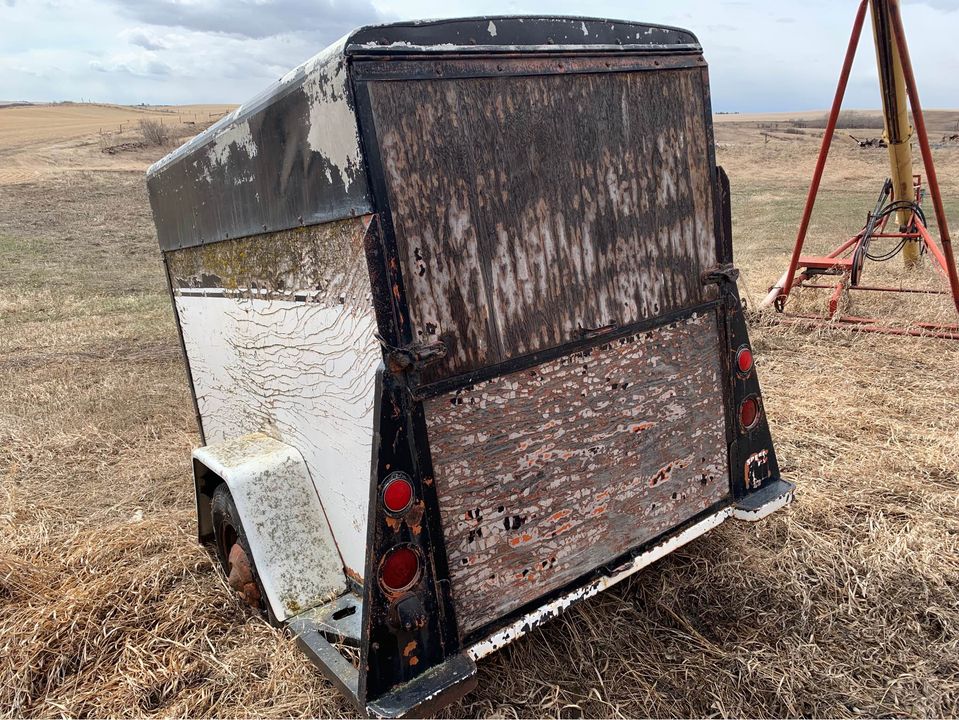
This was an old U-Haul rental trailer that somehow found it’s way on to a farm not far from home. And I found it in an estate sale. I’m told it’s been sitting here for many many years. Yup I’ll agree with that. The plywood is rotten. The tires are shot so it’s not going home with me today. Price reflected the sad condition, and it’s still solid except for the plywood.
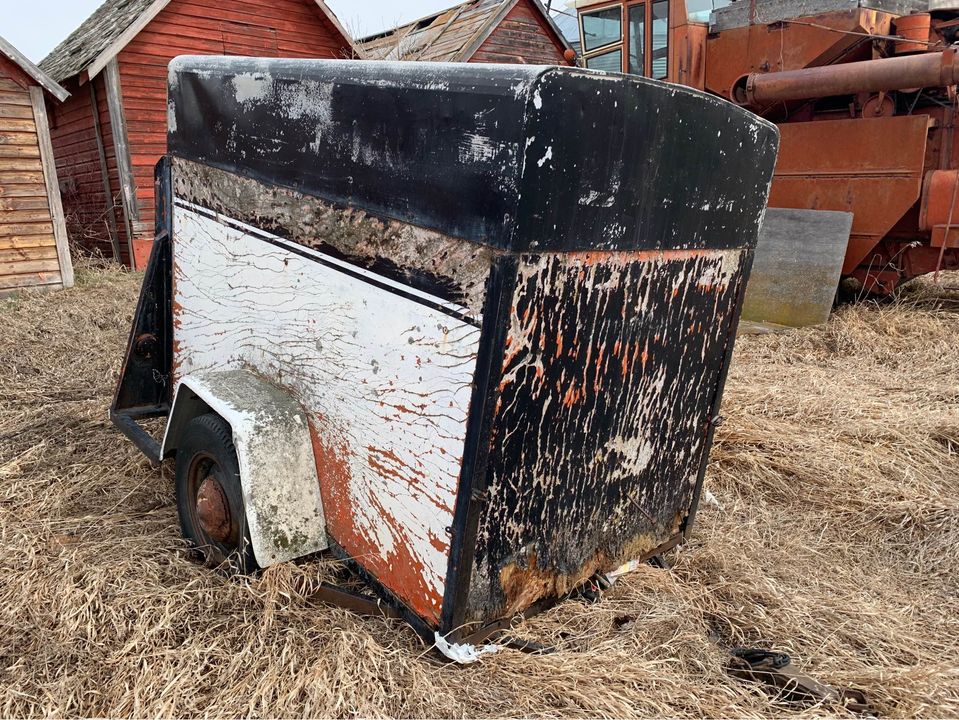
These are the only photos I have for now..( I’m so busy looking it over that I forget to take photos). I need to go back and load it on a trailer to get it home. And he needs to clean out his stuff stored in there. By the way that stuff is dry ! Yes the roof is in good condition. This will be a fun and different trailer project.
Today I made the trip back out to the farm to bring the trailer home. I don’t have a flat deck trailer nor could I rent one. So I made the decision to get it road worthy. Two things needed to work out for that. The old rusted wheels had to come off, and the coupler had to work ! (in other words stay on the hitch). I brought lots of tools and a jack with some blocking. First thing… see if the wheel nuts will come off. I soaked everything with WD 40 and the first one came loose ! But the second one broke off. Yikes.. But as luck would have it all the rest came loose. Here’s a quick video I made when I got to the farm and started that process.
Jacking the trailer up was not fun. The duff on the ground was 4 inches deep. And the trailer wanted to head down the hill. So with the wheels in the car I headed to the nearest tire store and had them install new tires. It’s crazy that these wheels are 6 stud 16 inch load range E tires. What you would use for a car / equipment hauler.. not a little trailer. Anyways got the new wheels on and the coupler working. Off we go. Towed good ! full speed down the road no worries.
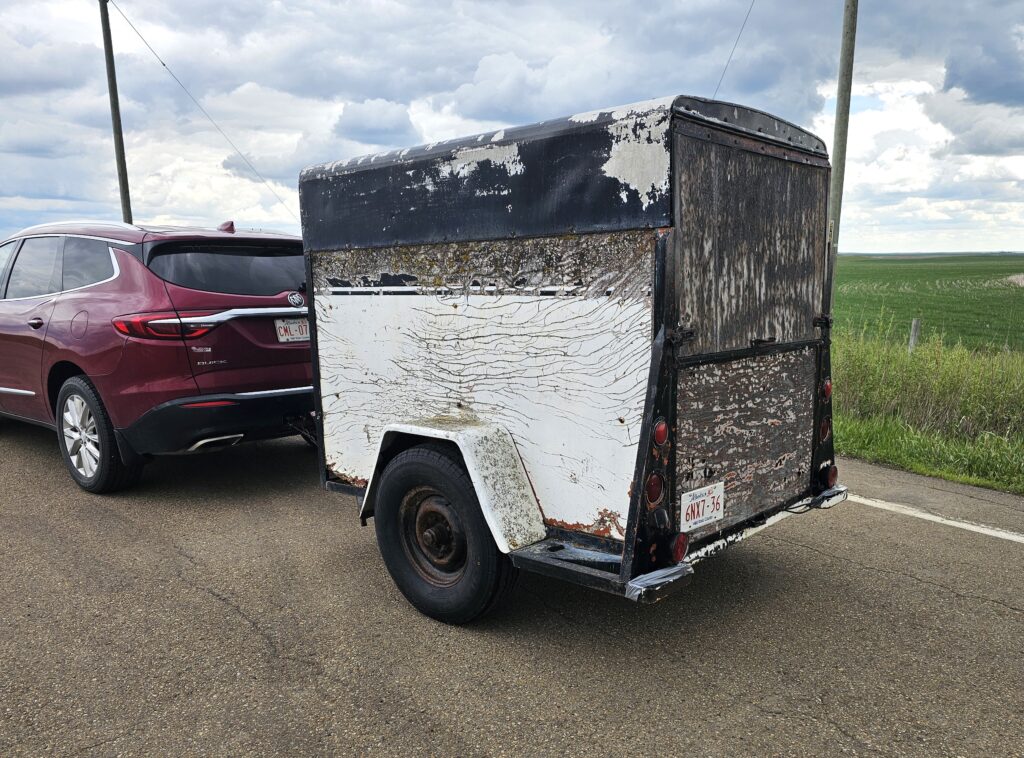
Made it home..
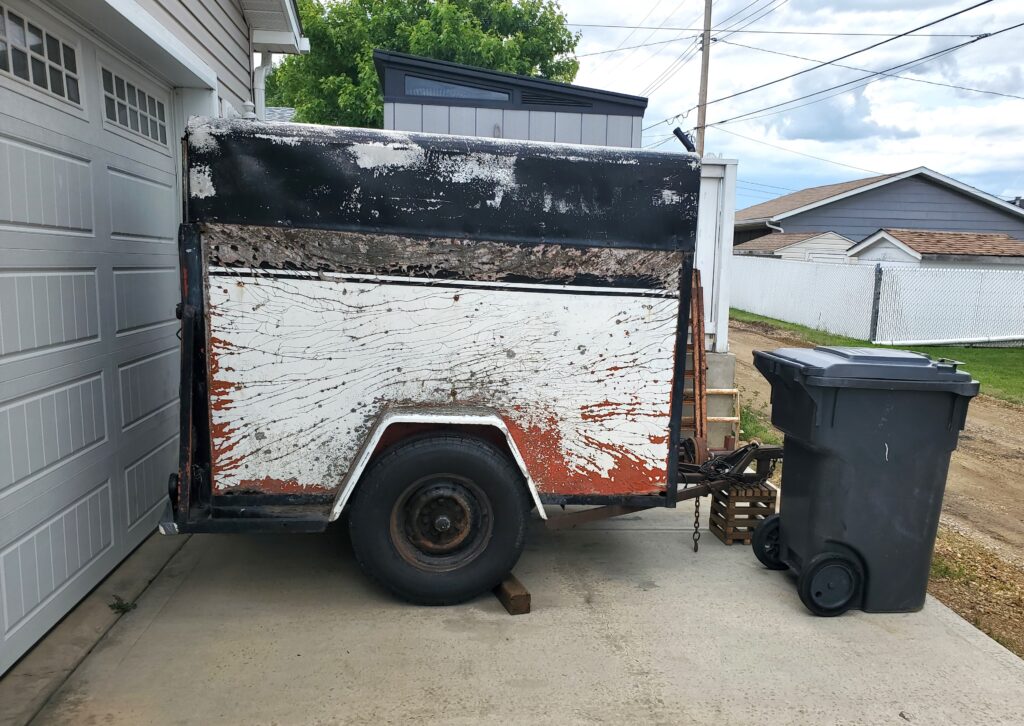
And here it is … Big wheels …Little trailer. I forgot to say ..I took the tools to re-grease the hubs.. but even after sitting so long they turned smooth. So I left them as they were. However now after the trip home they are a tad loose. No big deal.. It’s not going anywhere till it’s had it’s make over, and those hubs are only for those big wheels. After all that I’m seeing the things to change for sure.. Those wheels are not needed. 15 inch or even 14 ‘s would be a better fit. But to do that the axle would have to be changed, because the hubs are big old 6 stud ones.. We’ll check it out later.
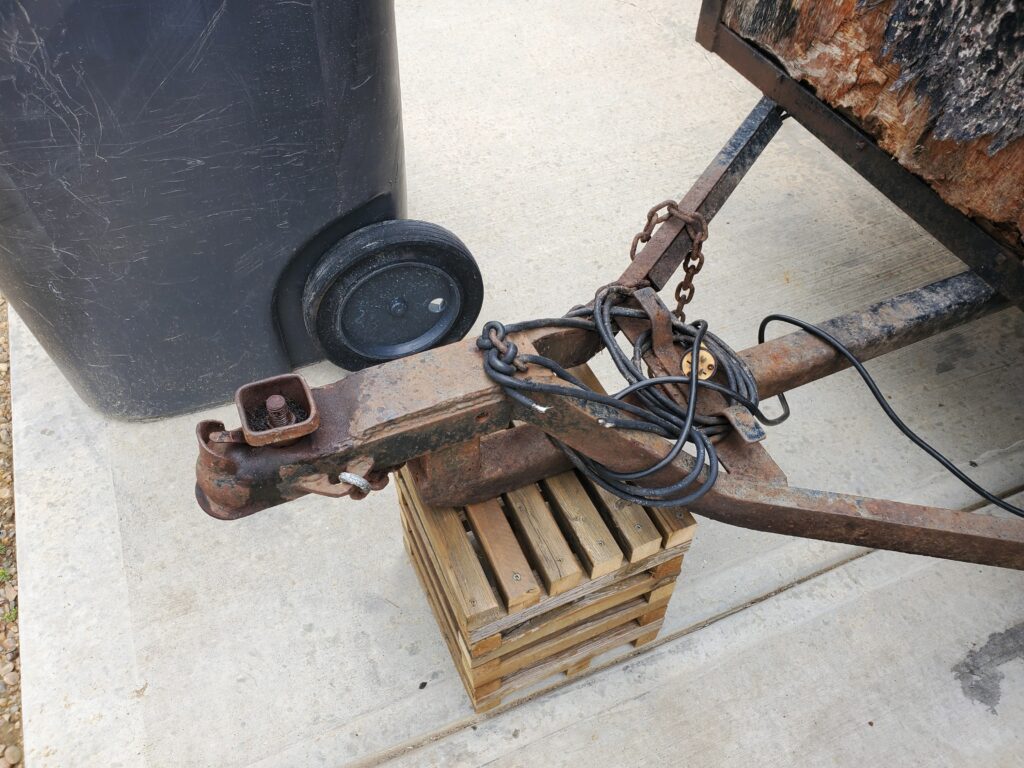
This hast to go.. Those old couplers come loose when you hit bumps. and we hit bumps. It’s nice that it’s raised a bit so the trailer tows level behind the Buick, which has a higher than normal hitch. All I need to do is cut the old one off right behind those ears and …..
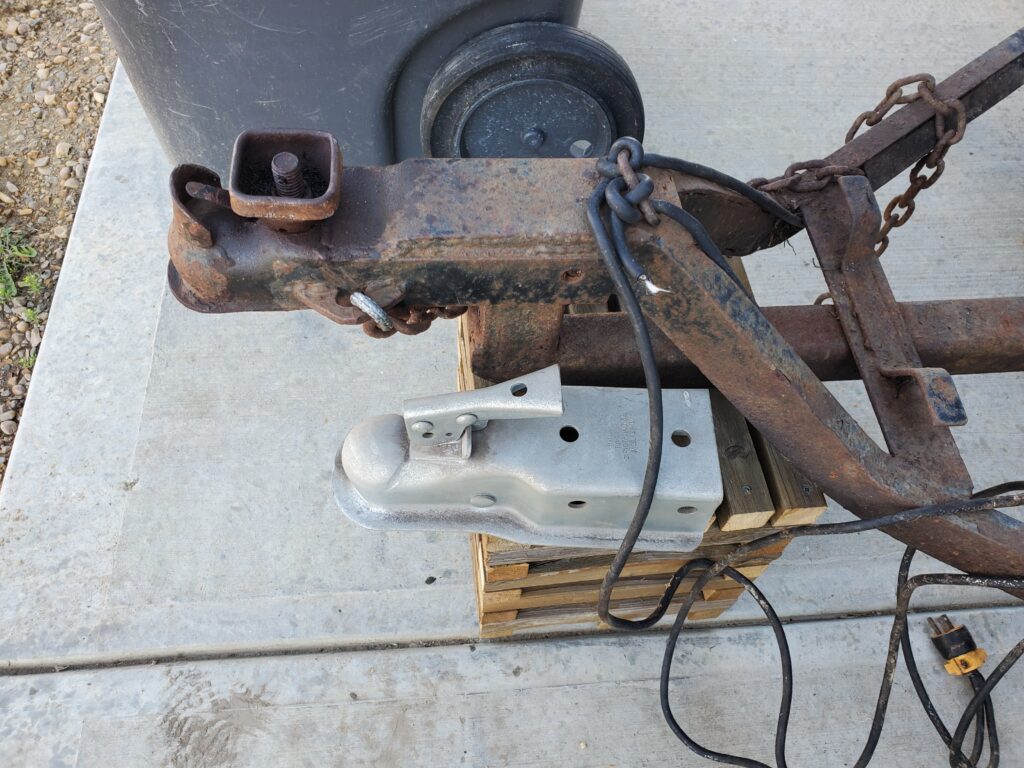
Here’s a proper 2″ coupler that will bolt on. I will also need to figure out a tongue jack. And while we are up at the front of the trailer… Check out the old 14/2 house hold cord and plug they used for the lights.
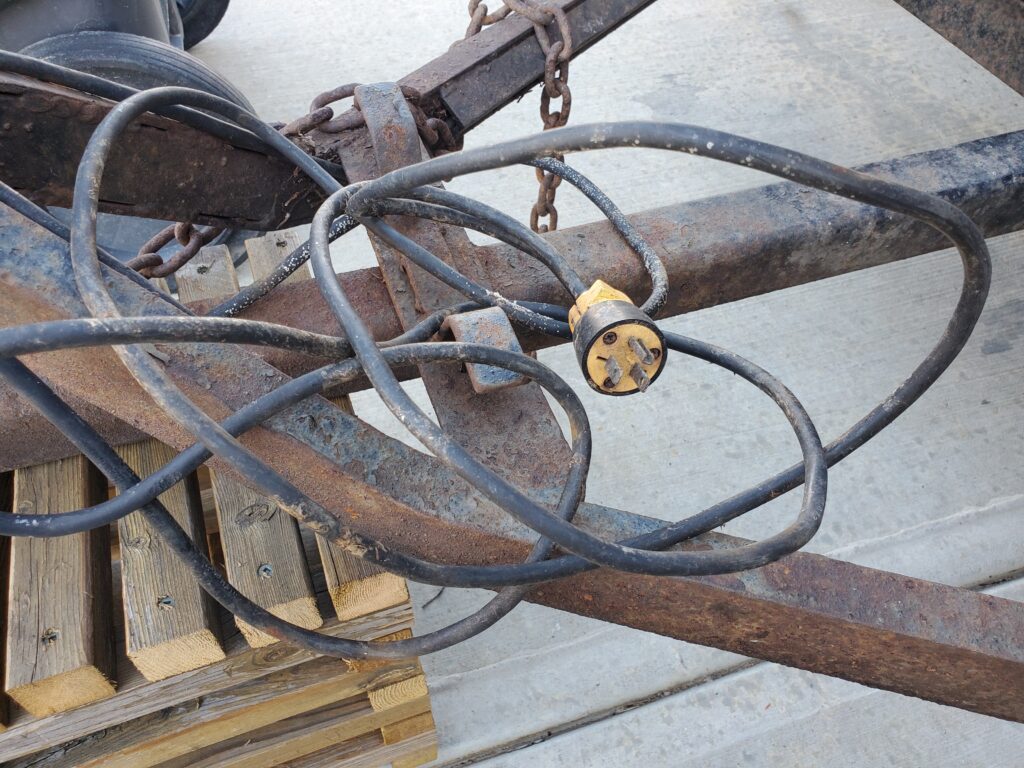
Farmer fix for sure ! Plus there is no ground wire, just the lights. They used the coupler as ground… Okay that works (maybe) when everything is new and not rusty. Not sure what would happen if you plugged that into a 110 socket, and I’m NOT doing that ! The way the trailer is right now there is no tongue weight at all….None. You can lift it with a finger. And that translated to a lot of rattling while towing. I will mount the spare (when I get one ) to the front of the body. And while we are talking wires…
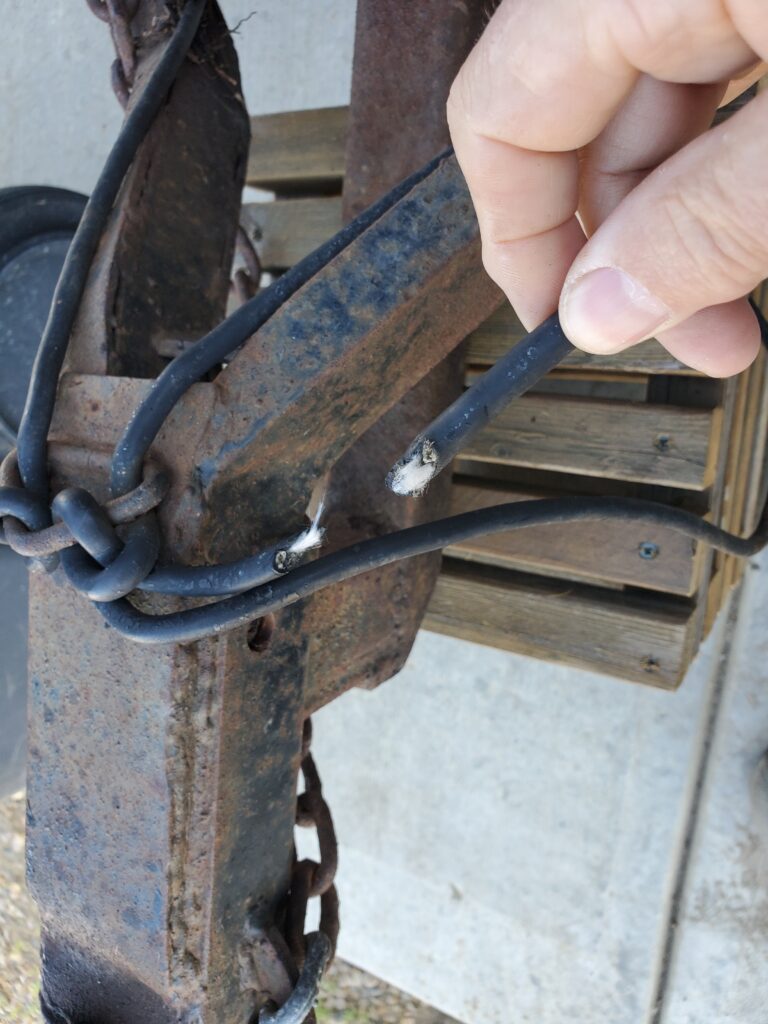
The “extension cord” to the left side is broken. That’s why I have a set of tow lights. Oh and I weighed the empty trailer at the scales on the way home.. 1000 lbs ! EMPTY. That tells me that it should have a 3500 lb axle at minimum. Check out the springs…
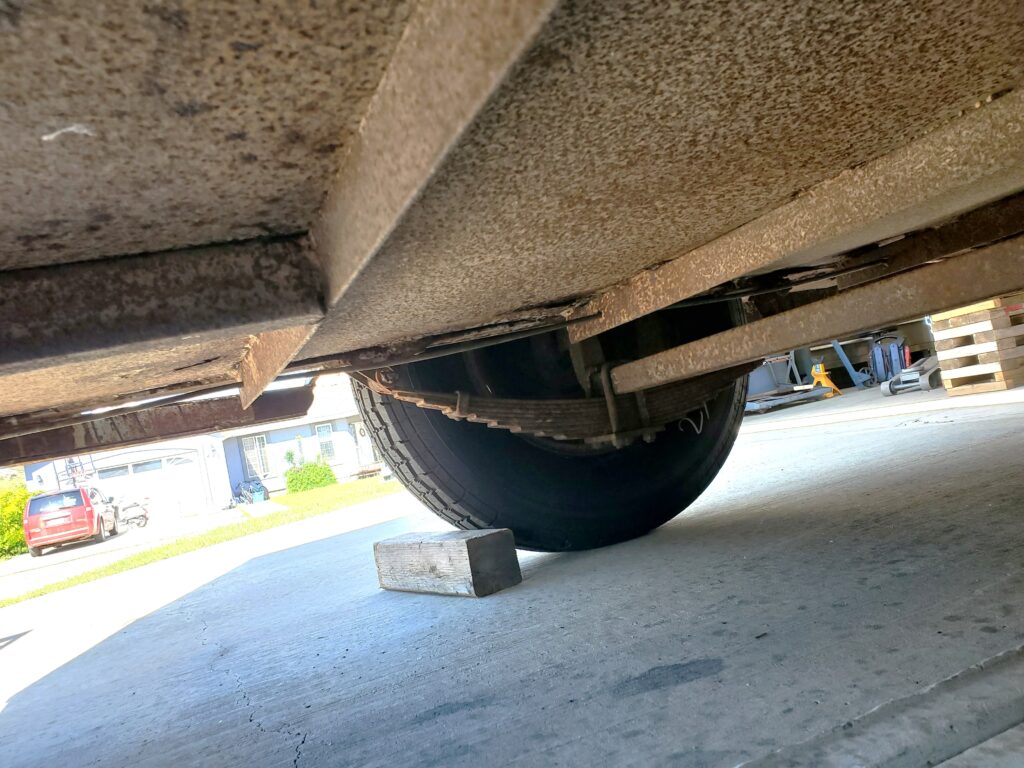
Count em… 9 leafs ! I don’t know what to think about that.. good or bad ? The axle is however just a 48 ” spring centre drop axle. And there’s that “extension cord” so it must be from the factory. But all other things aside.. the biggest problem is the lack of Vin#. That’s a $250. dollar expense right away. So I’m in no hurry with this one.
For now it’s tucked in a corner, and I’m storing a few things in it.

Those ramps are for weight up front.. Very annoying when the trailer tips backwards just cause you did not put enough weight up front. I would like to get working on this now that the garage is empty. But I’m still thinking about how to deal with the wheels ,axle and lack of vin#.
I want a winter project. I will do the vin number thing in the spring. Keep those big wheels (because they were expensive) and find a spare. I would like to ad another foot to the front to make the inside eight feet long. This would also help with the lack of tongue weight. Can’t wait to start. Sooo let’s start a new page.
Also the side walls too.
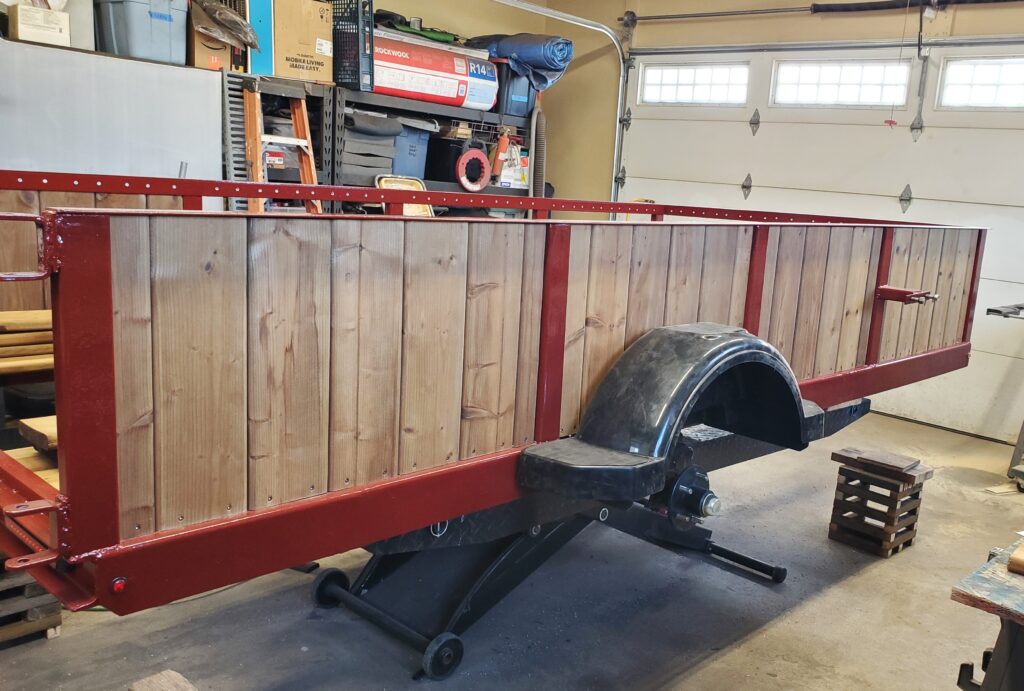
Before I could attach these walls I had to drill thousands of holes and counter sink them along the top rail. You can see them peeking over the top. Took me days and many small drill bits.
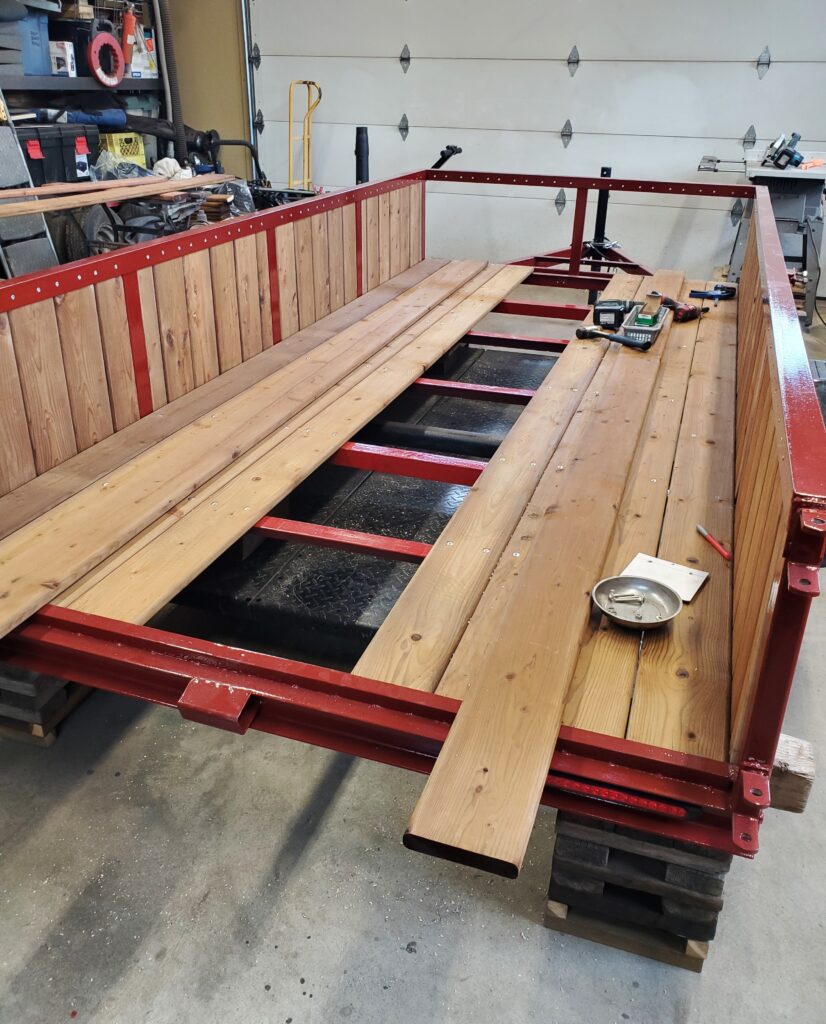
However the outside deck boards had to go on first. The wall boards attach to those.. It’s like a big puzzle ! Video for proof..
The deck boards get bolted down with carrage bolts… lots of them.
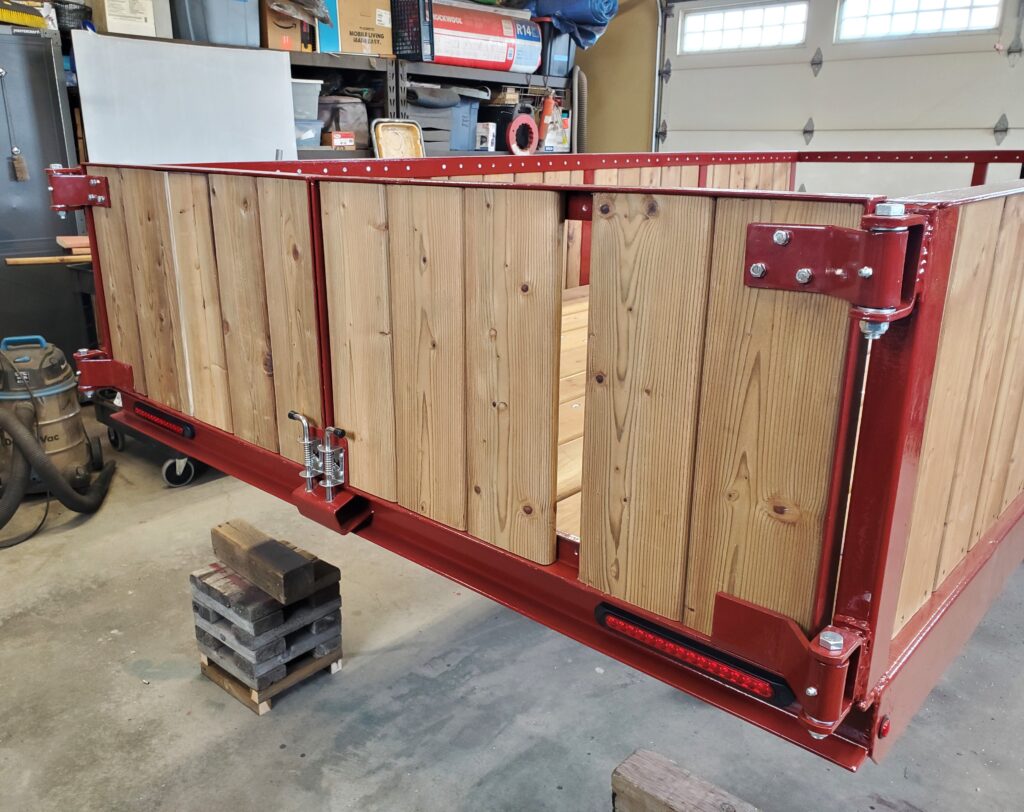
Then it was time to get the gates installed and working. YES… this is how it’s done and they swing wide to the side and also latch there.
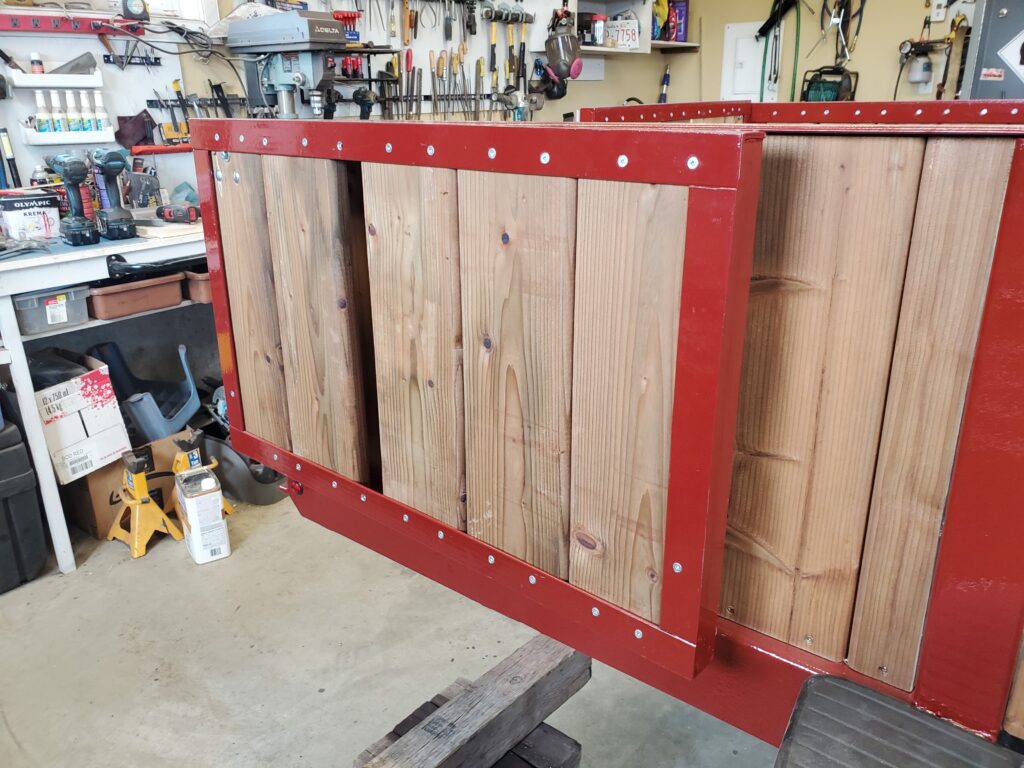
I know missing a tooth.. Had to buy one more board to finish. I painted all the wood screws so it wouldn’t look weird. Install the jack and wheels and put this puppy on it’s feet.

I also installed the box and locked the keys in it.. How embarrassing ! That’s a very secure box .. I know. Had to cut the hasp and buy a new one. I also water sealed all the wood. Hard to tell because it did not change to look.
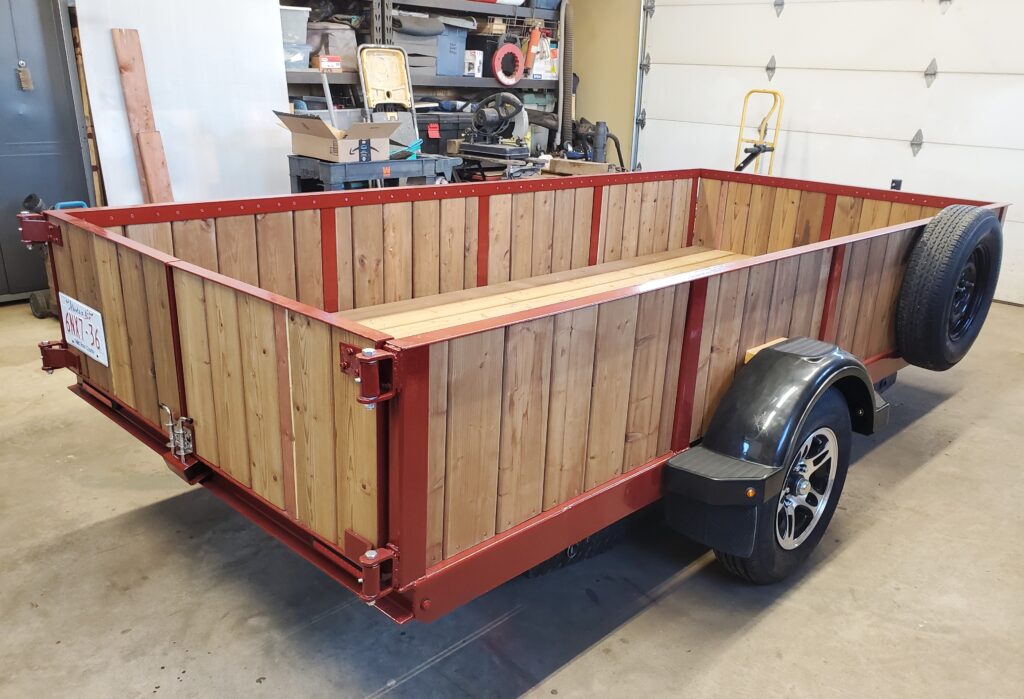
On the next nice day ( because I didn’t want it dirty YET ) I took it for a spin up to the highway scales.
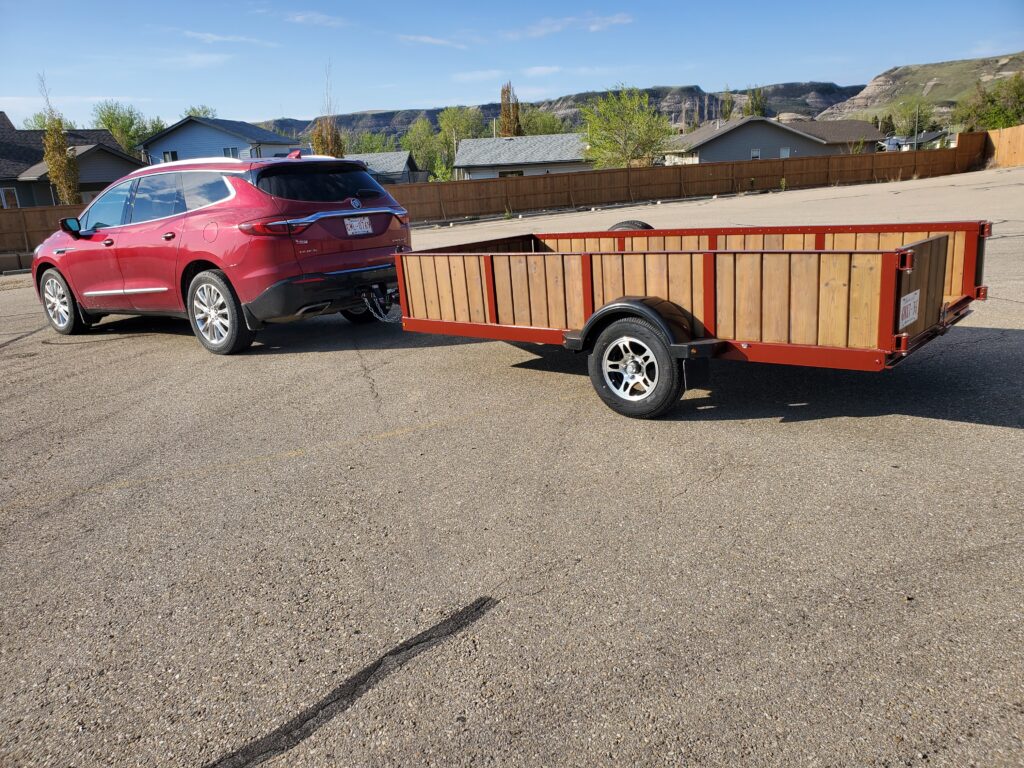
It weighed in at 800 lbs. Not surprised she’s a big trailer. Had a few things to adjust like the latches for the gates. and the right side bearing needed one more turn on the nut. Tows great which is good cuz in a week it’s going on a 4 + hour drive north to move my Son. Then it will be going to BC for our yearly camping. Kayaks on top !
Did the trip north, loaded up with lots of stuff. No issues at all. Just a little dusty. We are good for the big trip in a month. I wish I had taken a photo of the loaded trailer.
The trailer is all loaded up for our yearly group camping.
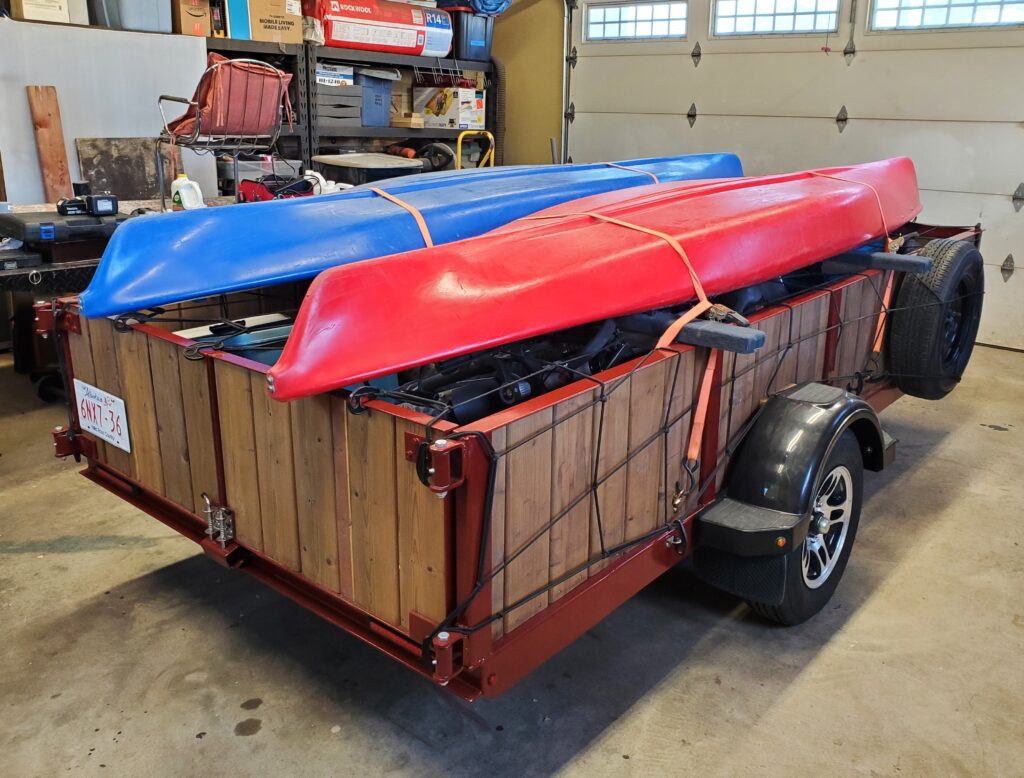
Just perfect for this !
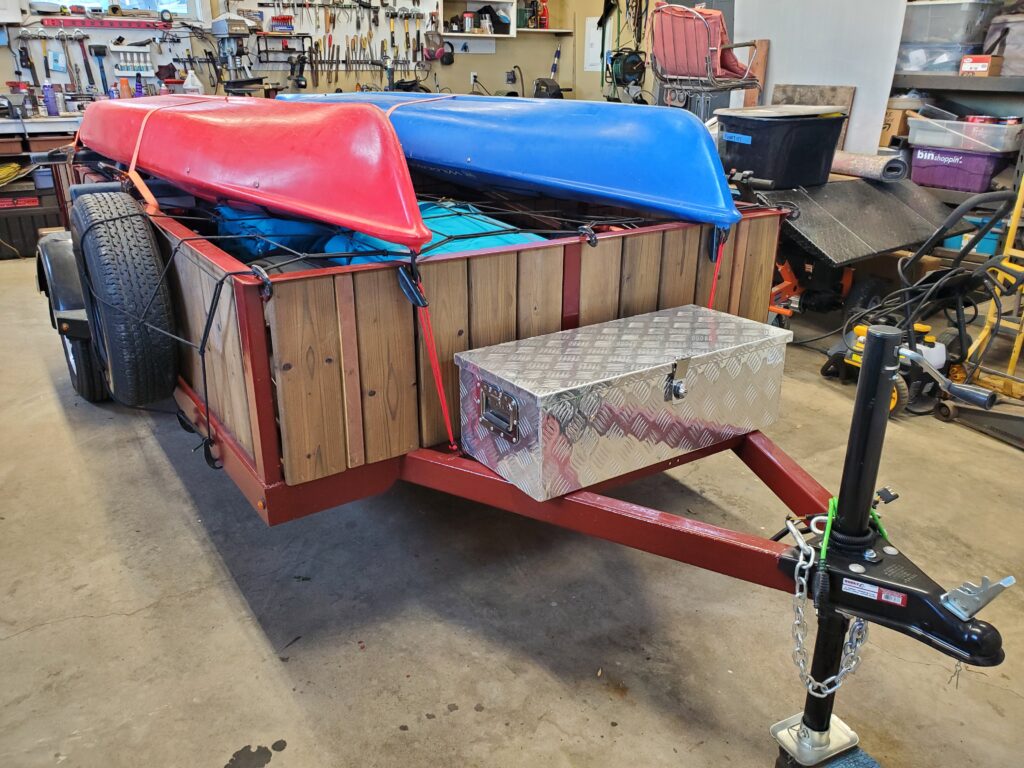
Two kayaks, two e-bikes, and tables, chairs and camping stuff. Not as heavy as the moving stuff… Good cause we are hitting the mountain passes.
We are back from camping and the trailer worked perfectly. Somebody will get a great trailer cause it’s up for sale..
I now have the new fenders. Good thing because test fitting showed a problem.
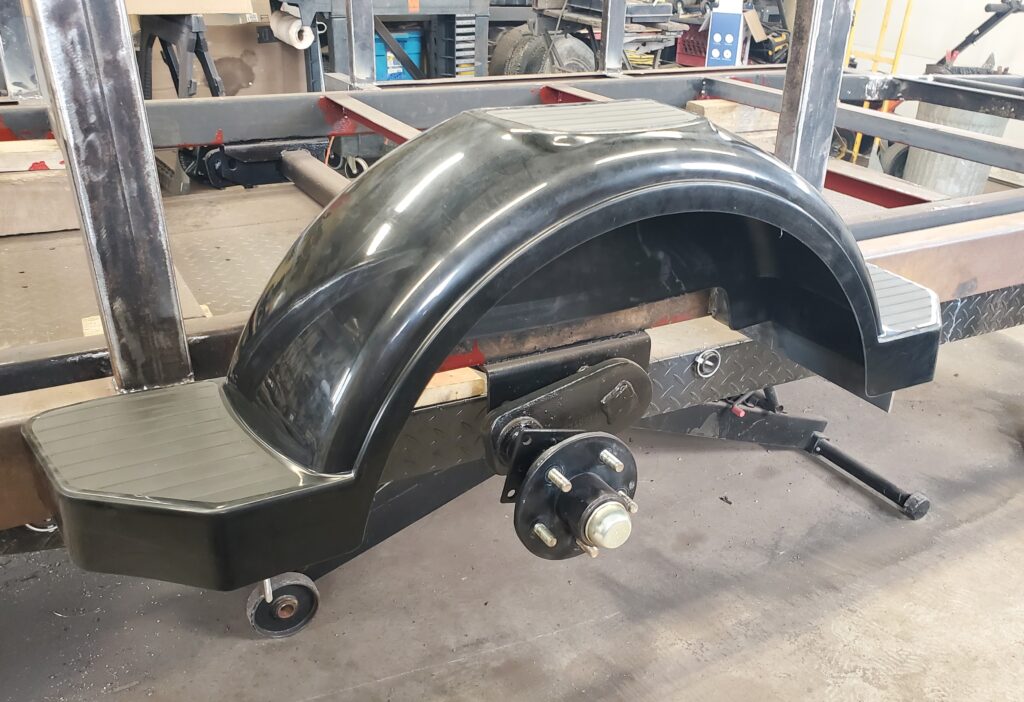
They were too low so I had to add another piece of angle on top to bring them up. No worries easy fix. I made lots of short videos with the updates, here’s the latest one:
I now could build the two gates for the back. and I picked up the new metal to do so..
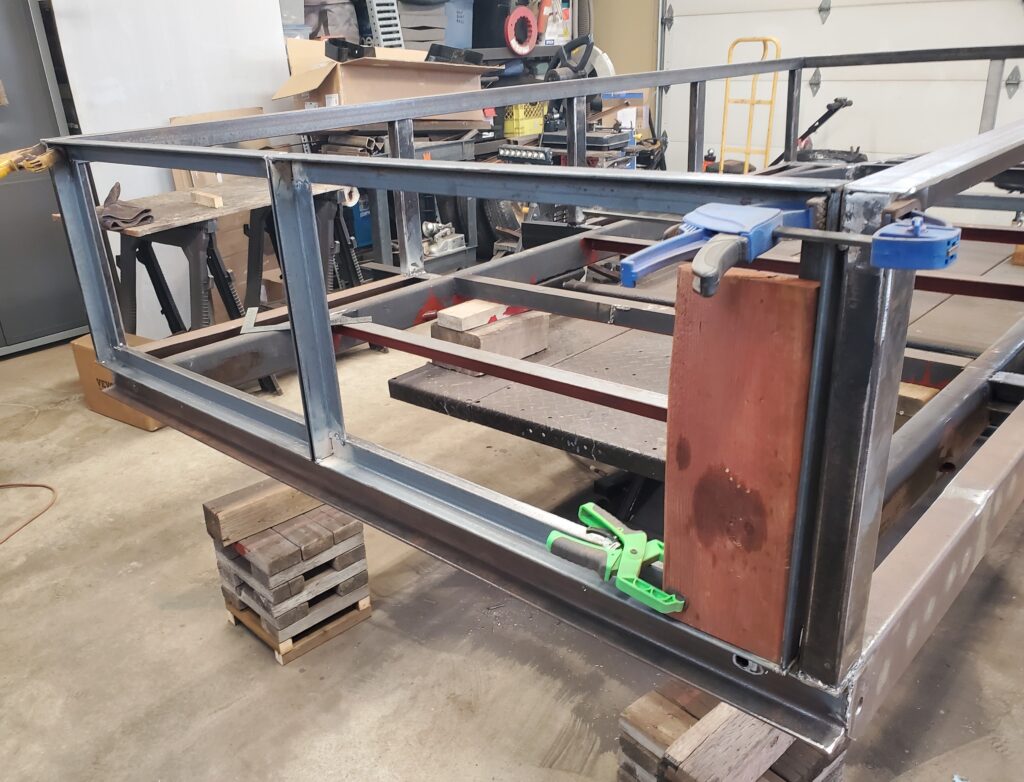
Here’s the test fit, making sure there is enough gaps . I also made some things like the spare tire holder.
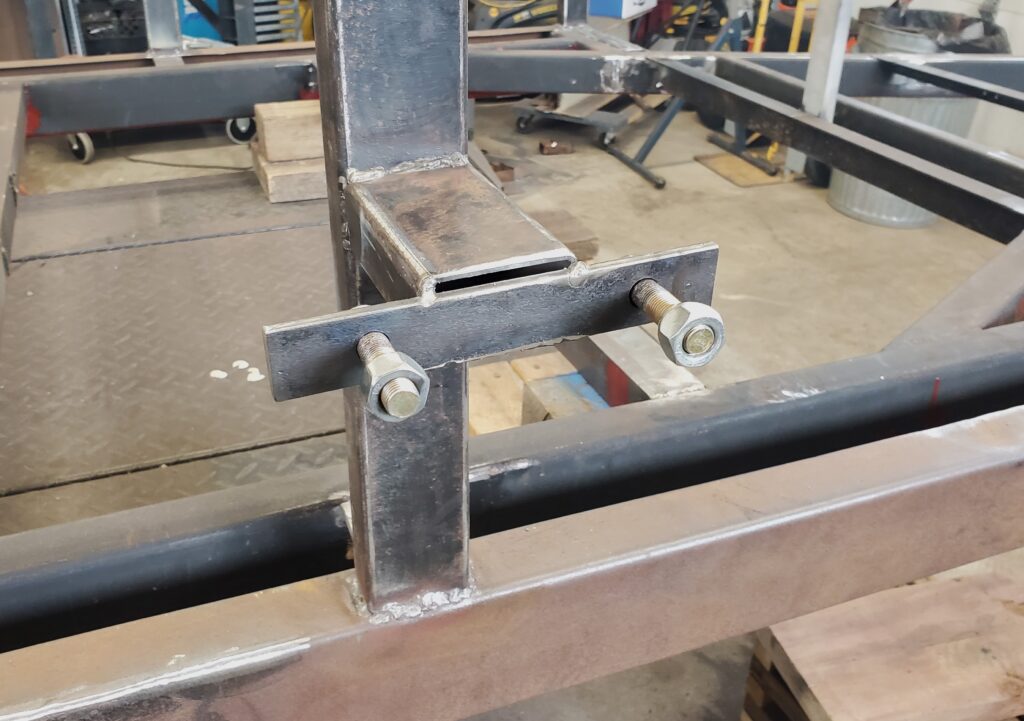
This should be the ticket, nice and strong. Also the new coupler was installed.
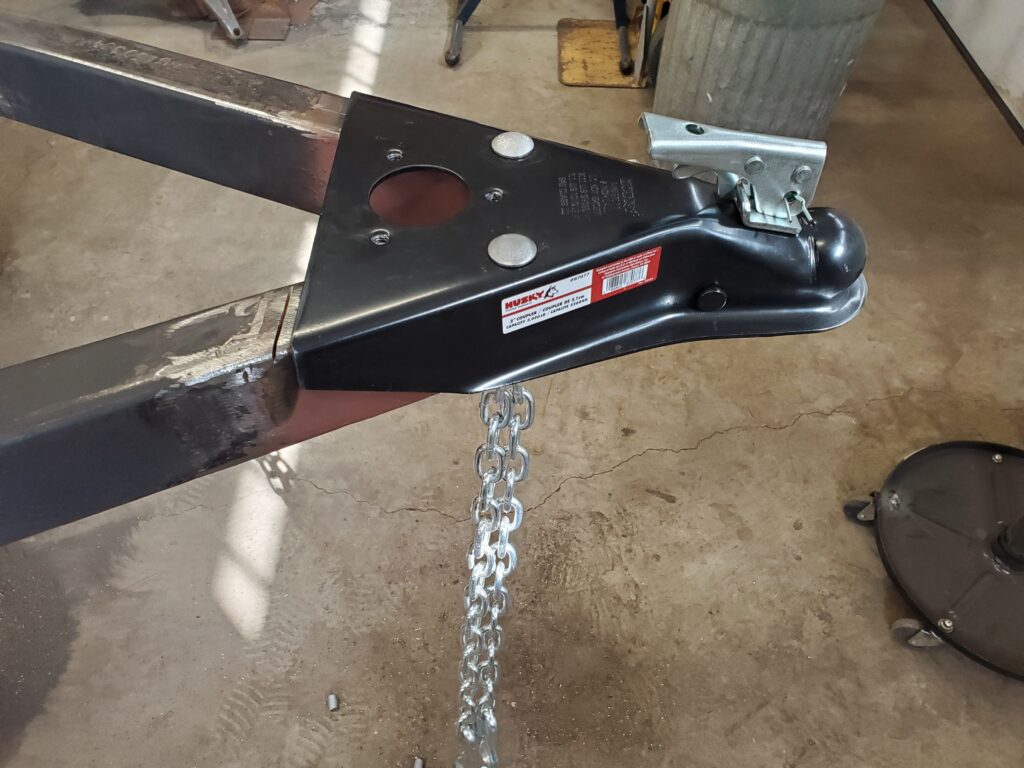
Bolted and welded ! New safety chains also installed. Almost ready for paint.
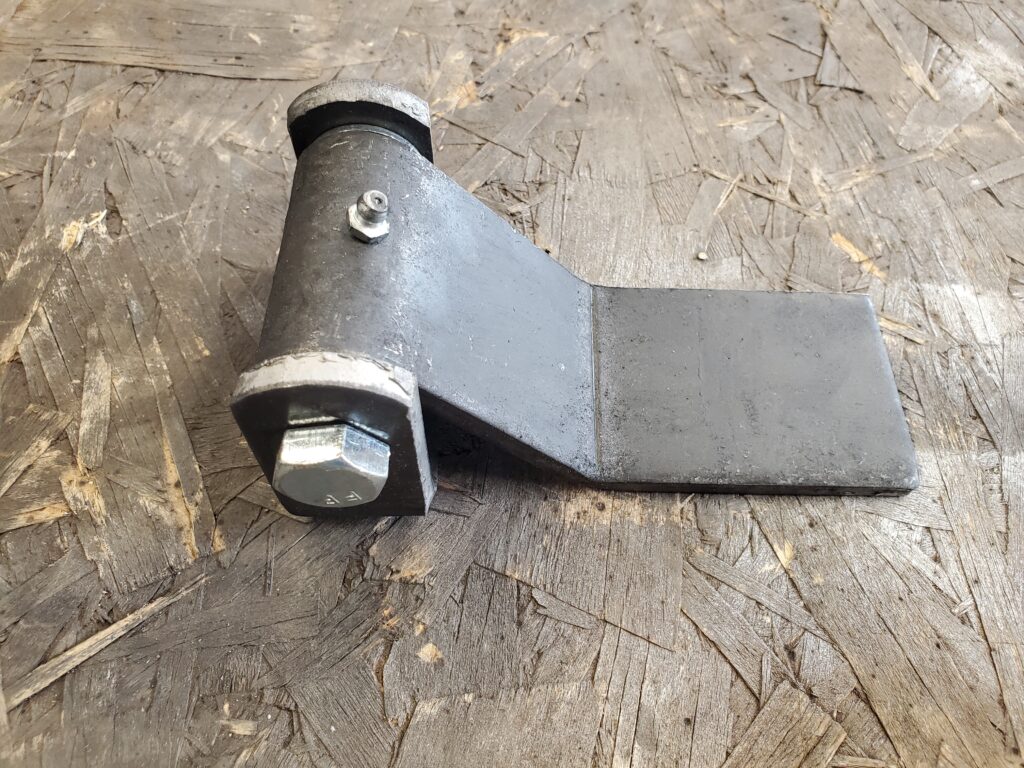
This is one of the four hinges I’m using. Very strong and greasable ! Paint time !
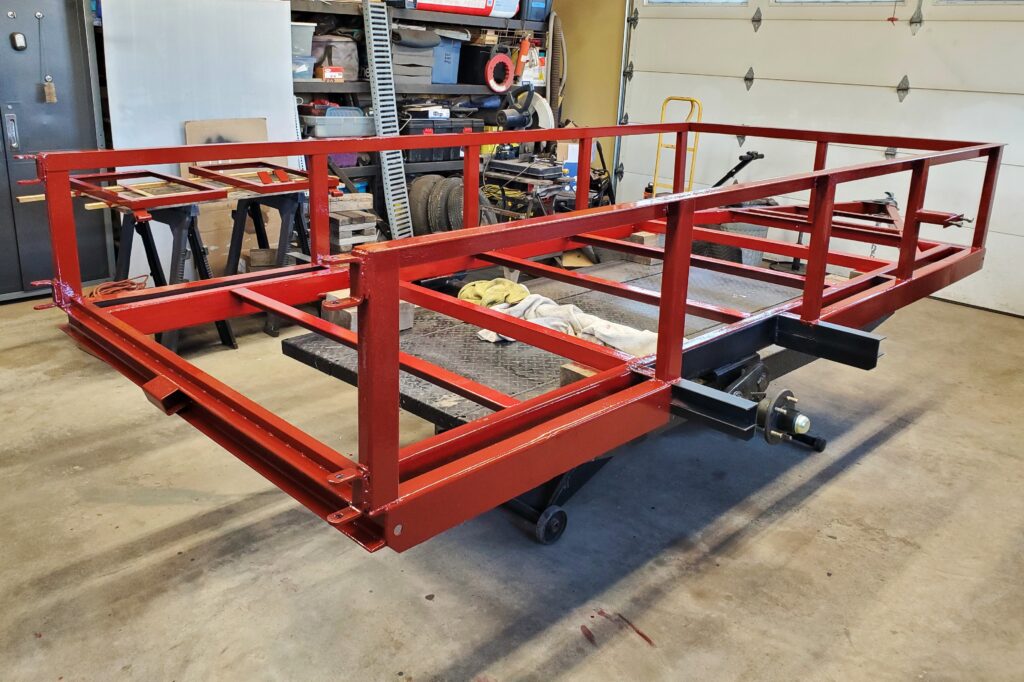
Just like that ( took a few hours) it’s all red. Black under the fenders. I’ll do two coats. And made a video :
Wiring is next. You get to see those nice LED lights the same ones I used on the Jayco trailer.
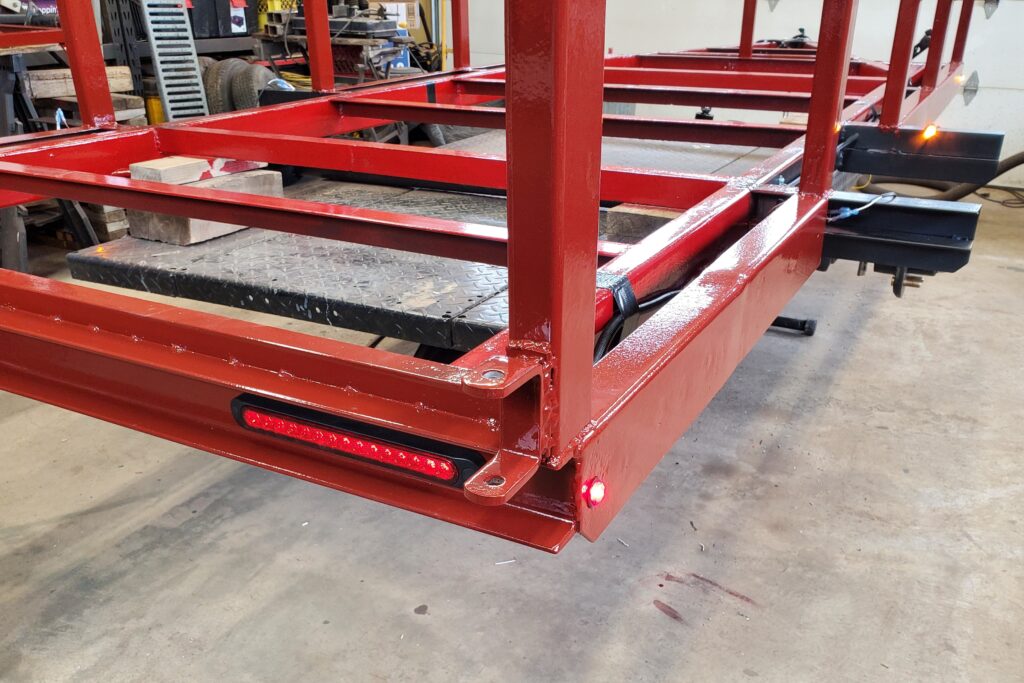
Isn’t this great tucked away but very easy to see. The wiring runs in the gap to the front where it goes inside the frame tube to the very front.
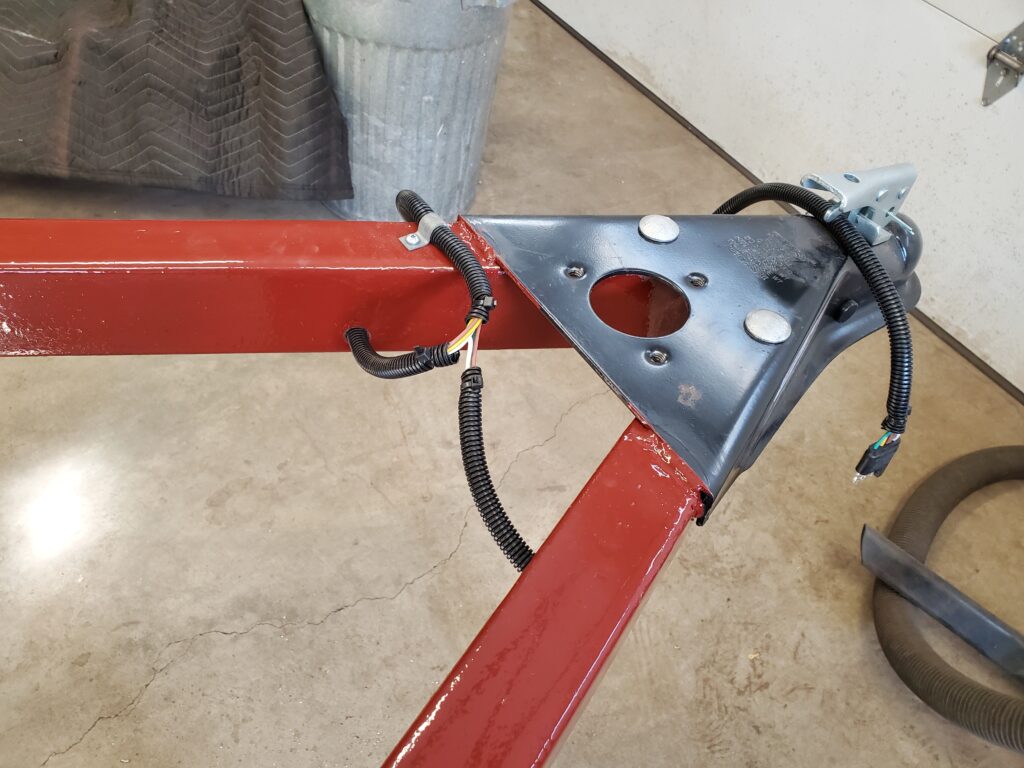
Where they appear and become the 4 pin plug. Works perfectly! and here’s proof…
The penny lights that go on the fenders are plug in because they poke in from the outside. and with this milestone it’s time for a new page.
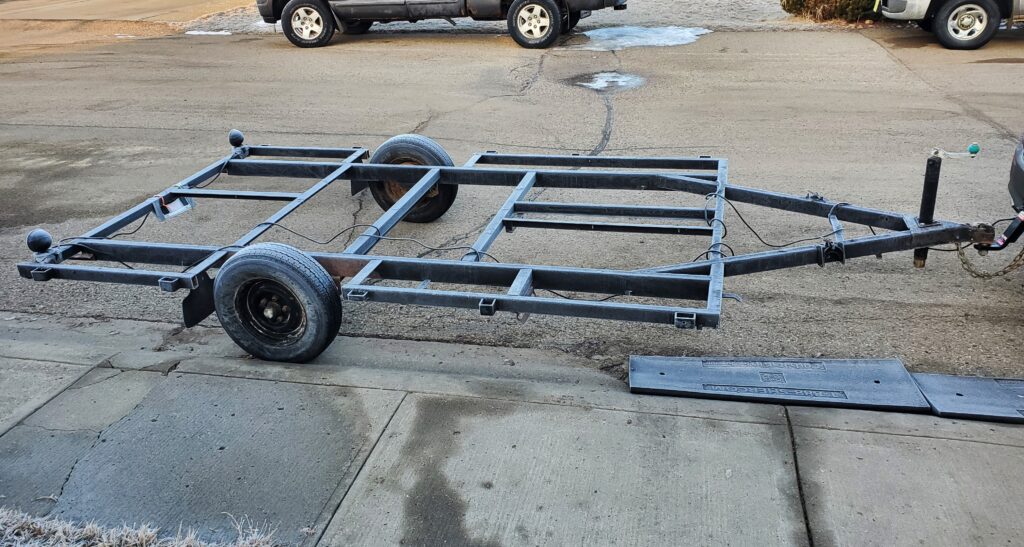
Another tent trailer frame.. This time I don’t have to deal with the body. So Let’s start with a video:
It was only in the garage for a bit. I was still working on the Jayco trailer. However after the Jayco was sold I wasted no time in starting on this trailer. So let’s move on to that.
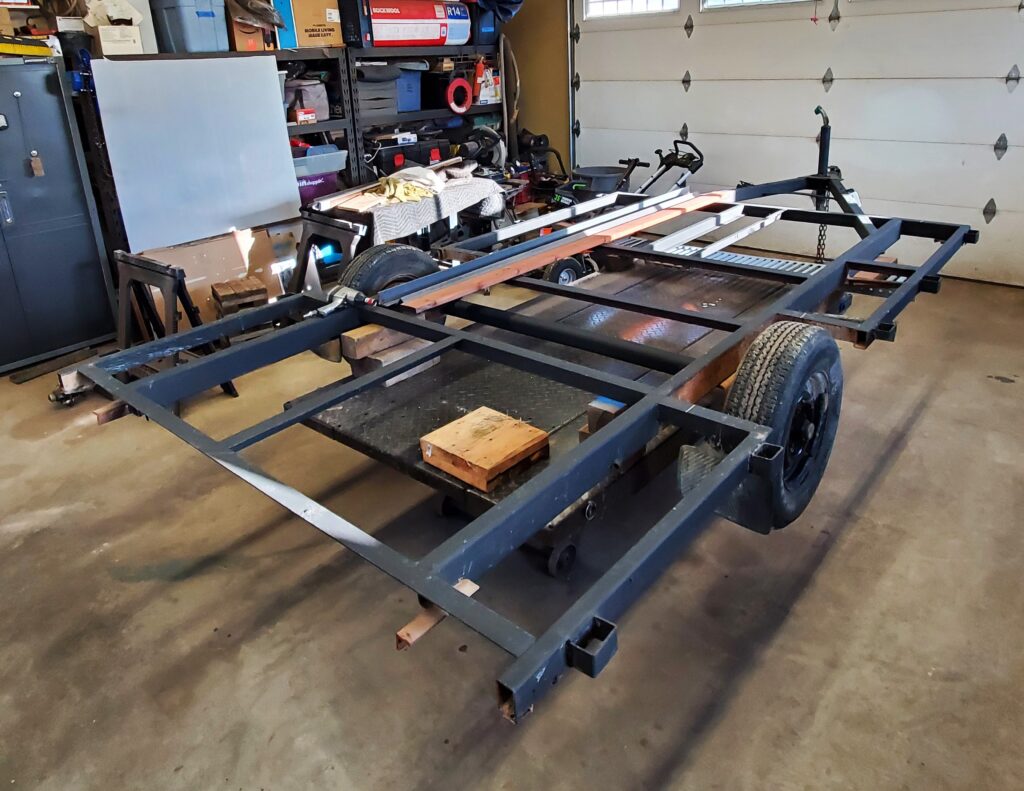
Okay it’s on the lift and just like before out comes the cutting disc. Not removing the axle, just the wheels. New wheels are on order.
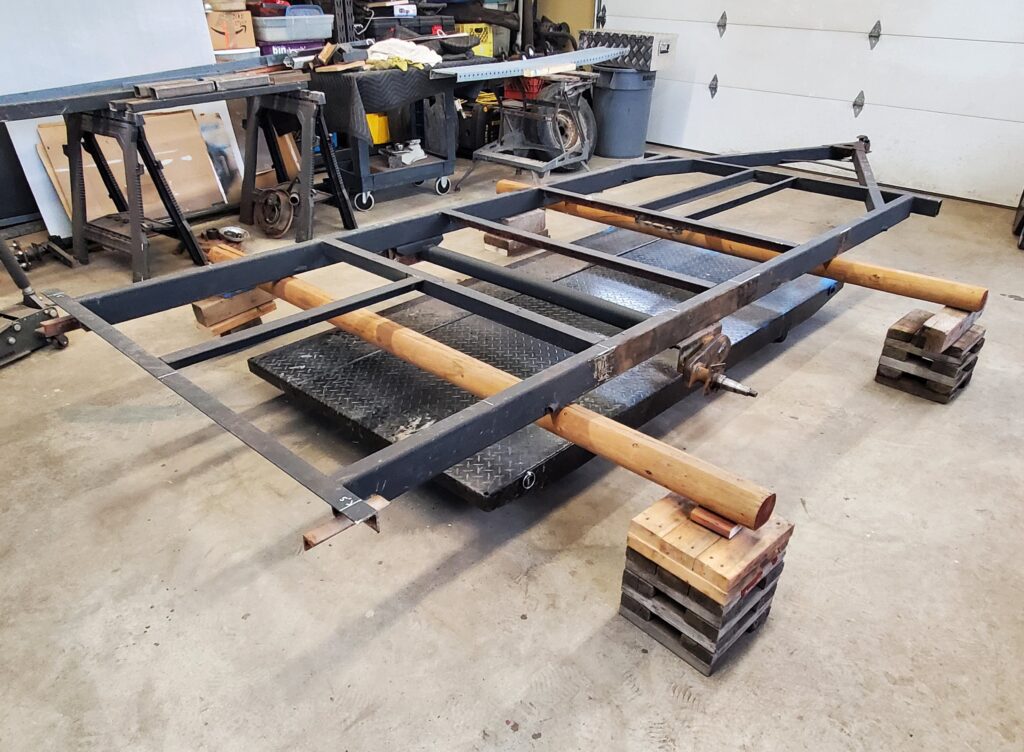
Most of the unwanted stuff has been removed, or cut through. Ready to flip over and finish the cuts. I’m not thinking too many folks do this step. For sure not on a big trailer. This one is at the top of the weight that we can flip.
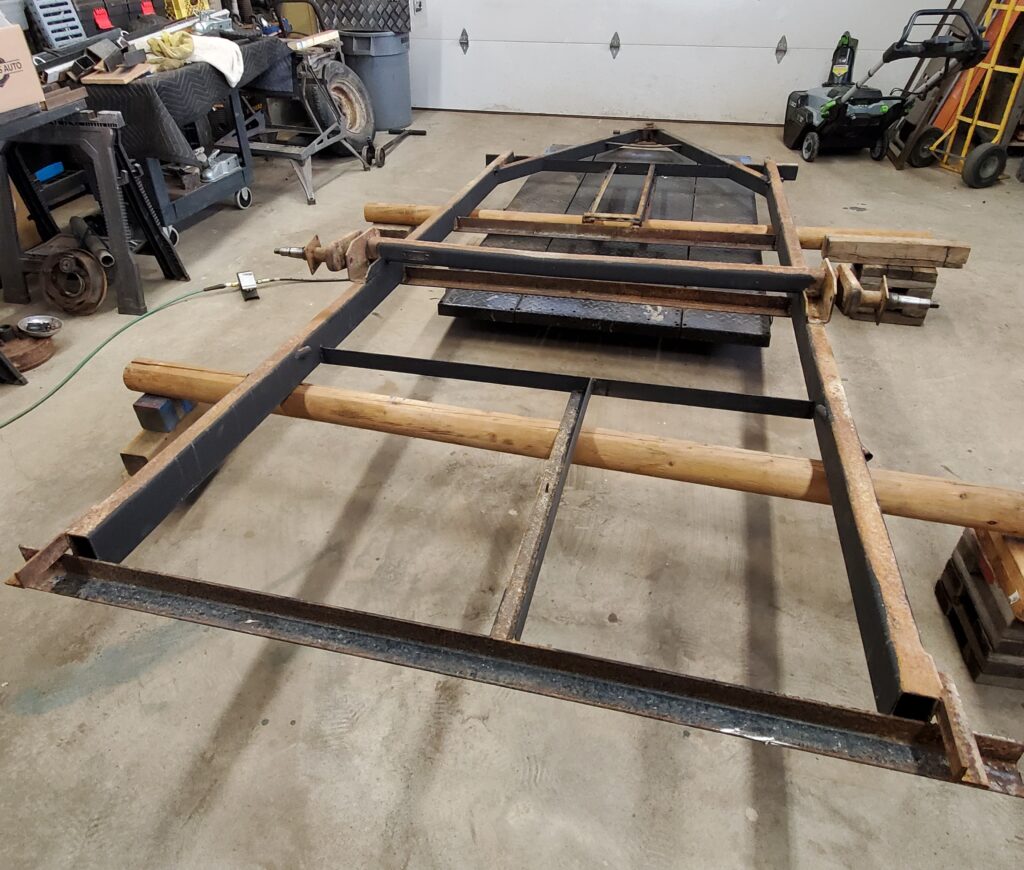
Belly up ! Well look at that no paint on the bottom.. The lift table will be pushed back under and up she goes.
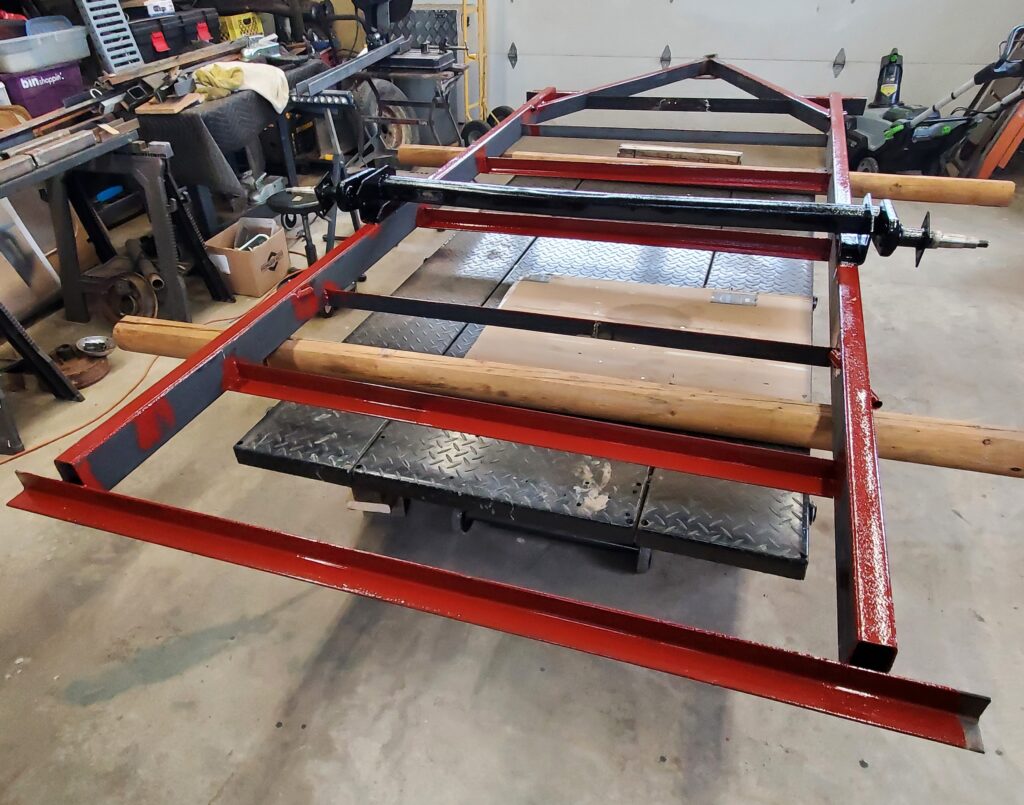
Two new cross pieces welded in and the axle and the underside painted. The label on the axle says 1800 lbs, but those spindles are 3500lb ones. Hmmm. New video about that.
And also talked about was my custom colour, dark red. Oh and the new wheels are here.
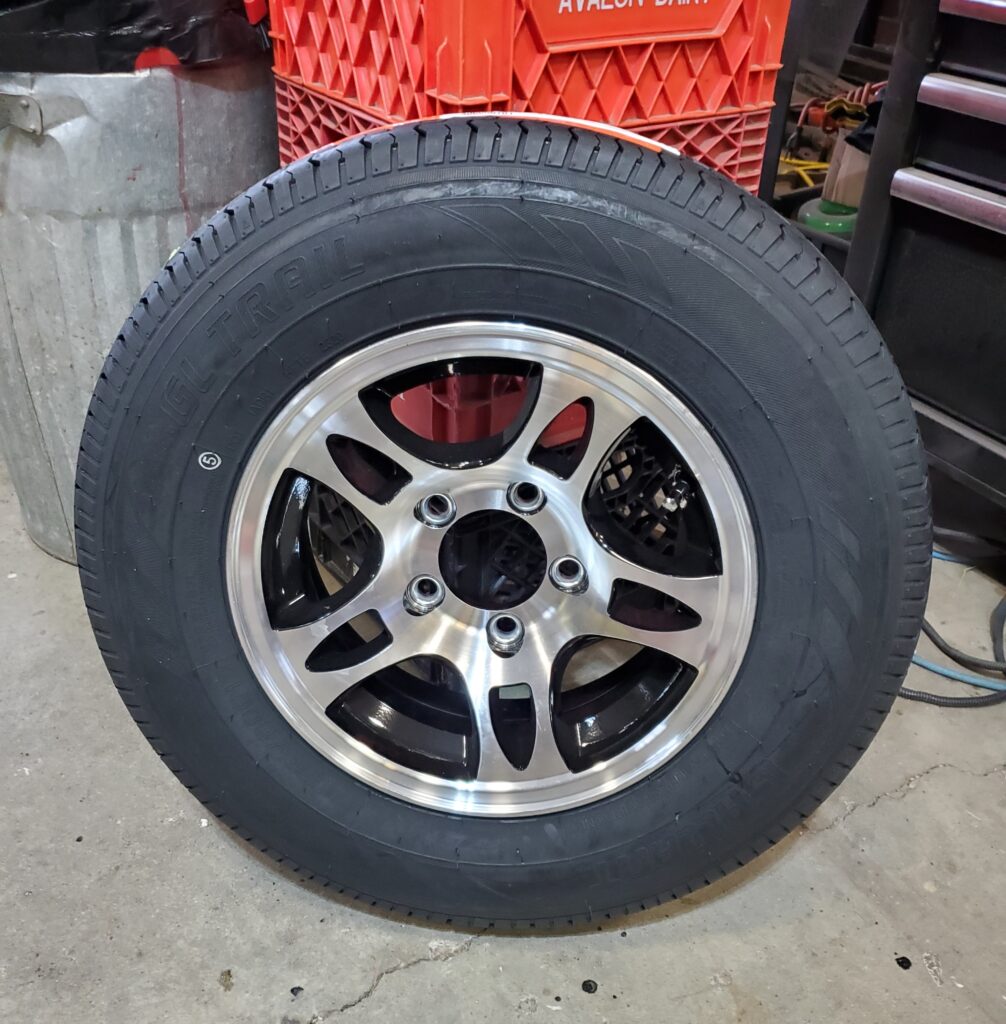
So fancy ! These are a great deal from Princess Auto. Time to flip the frame over.
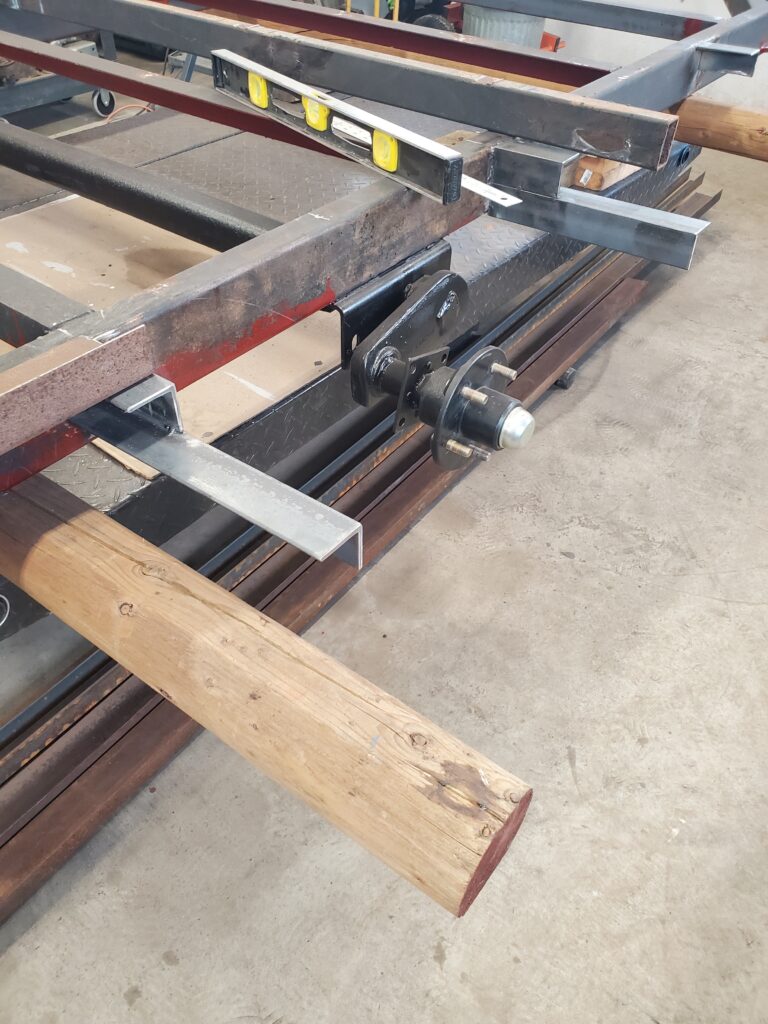
As you can see I did install those hubs and they fit perfectly. I’m now adding the new bits of steel back on, like the fender supports. I’m doing a bit of planing as I go here.
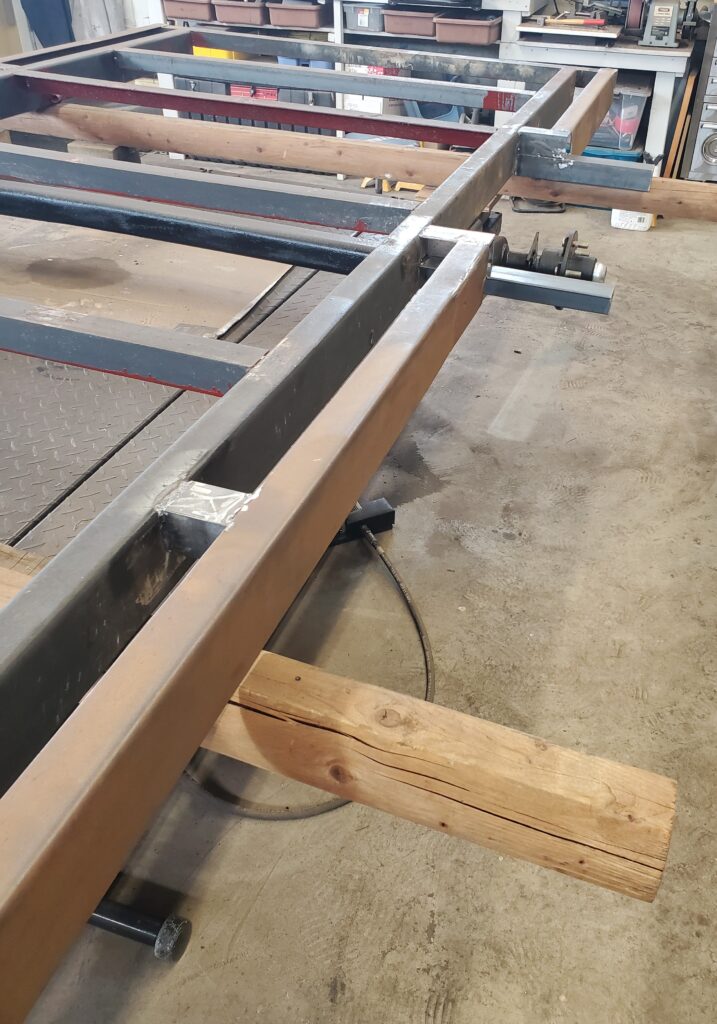
Using some of the old metal left over from the Ponoka trailer. I wont have much extra metal left after I’m done. Here’s the latest video..
Like I said planing and changing things as I go.. Lot’s to do before the paint.
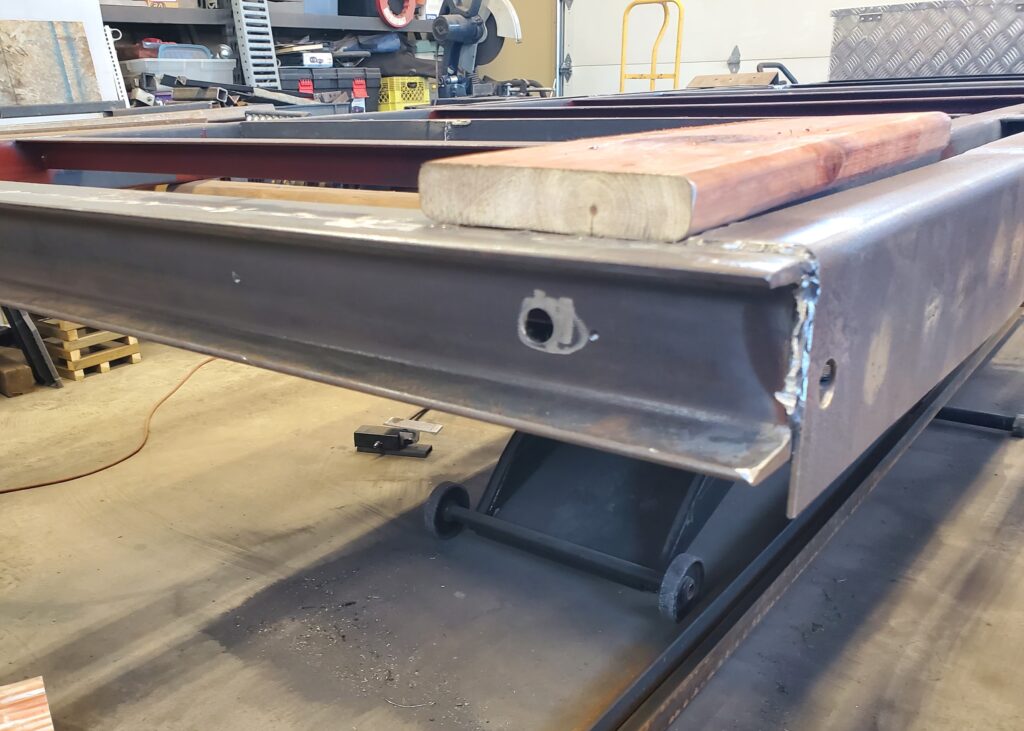
And this is what I decided to do for a rear bumper. The taillights are recessed in here so they are protected. It all makes good sense when I’m done.
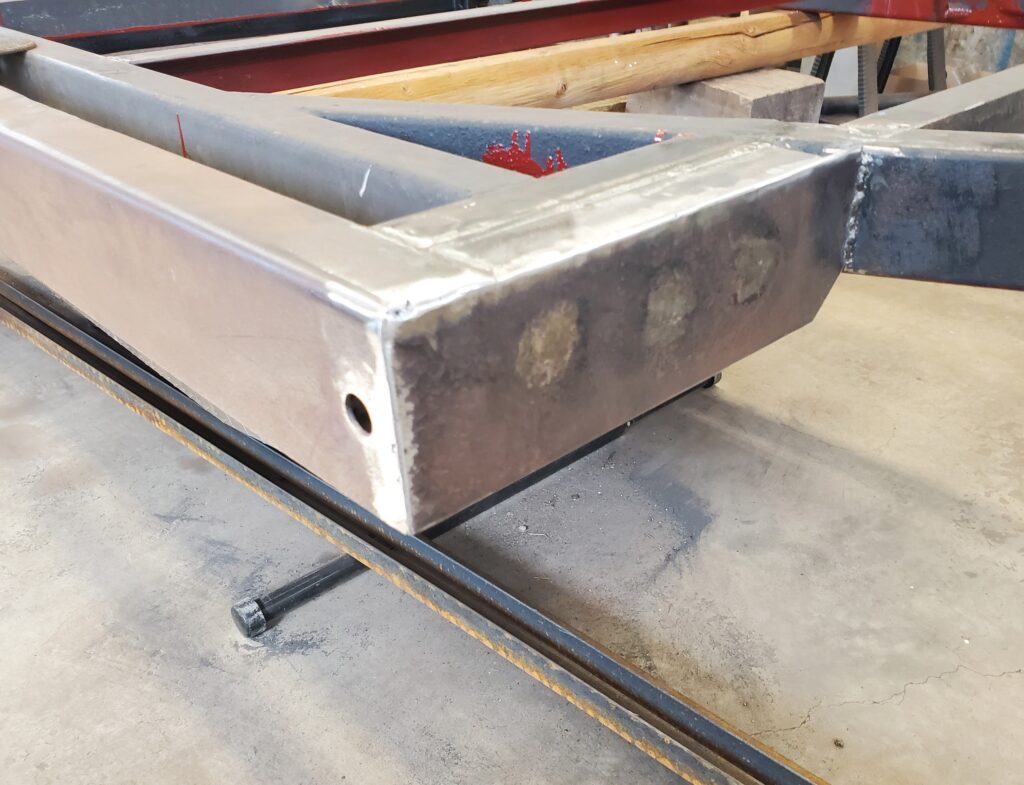
This photo shows how I finished off the front corners. Holes for the penny lights too. Here’s a video that talks about how the rails will go :
And let’s do it !
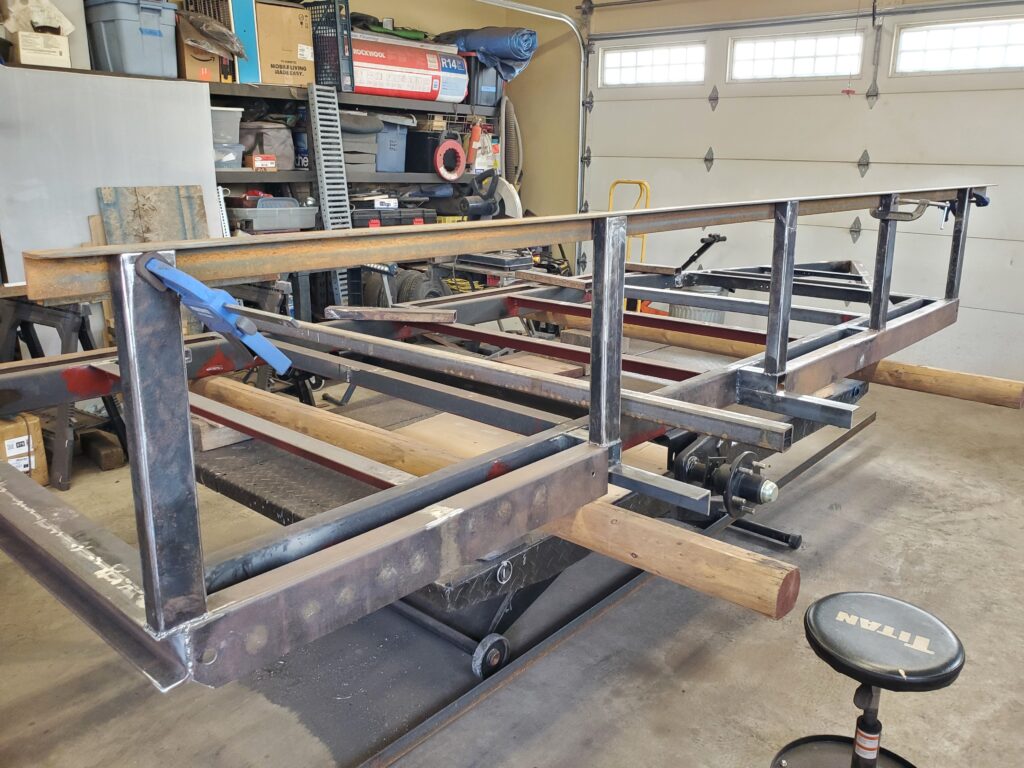
Starting to build the railings. Decided on 18 ” high, seams plenty. This is were weight gets added but also strength too.
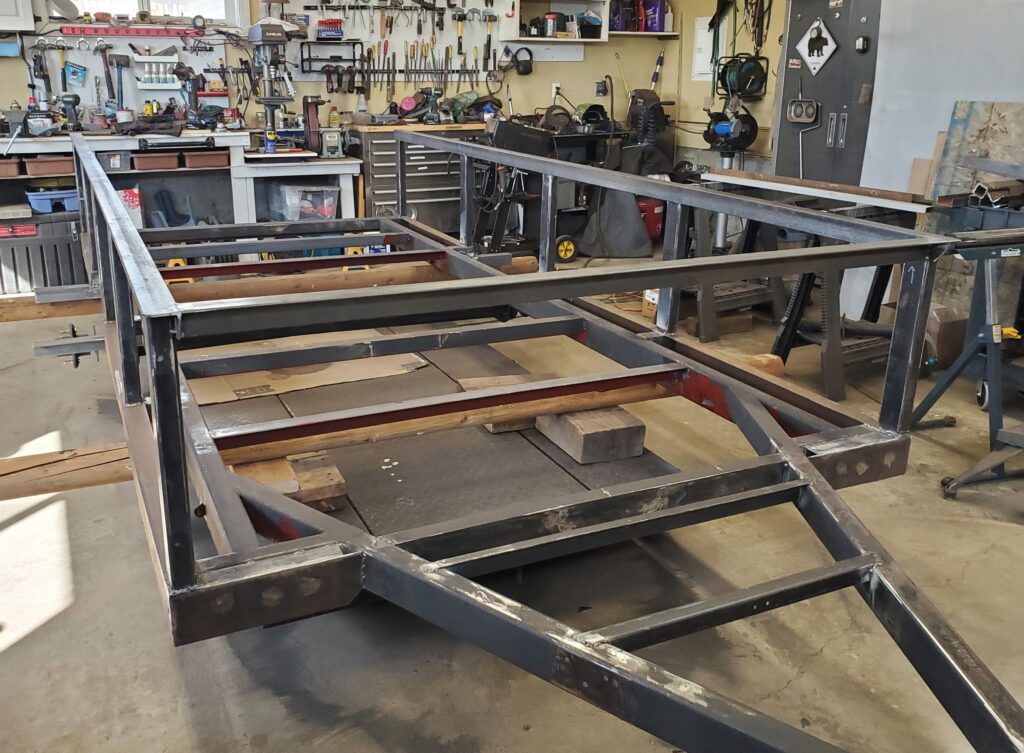
Here we have the sides done. I’ll be adding one more upright post in the middle. It’s really taking shape now. Time for a new page as work continues.
I’ll be using the 5/4 x 6 treated decking boards for the deck.
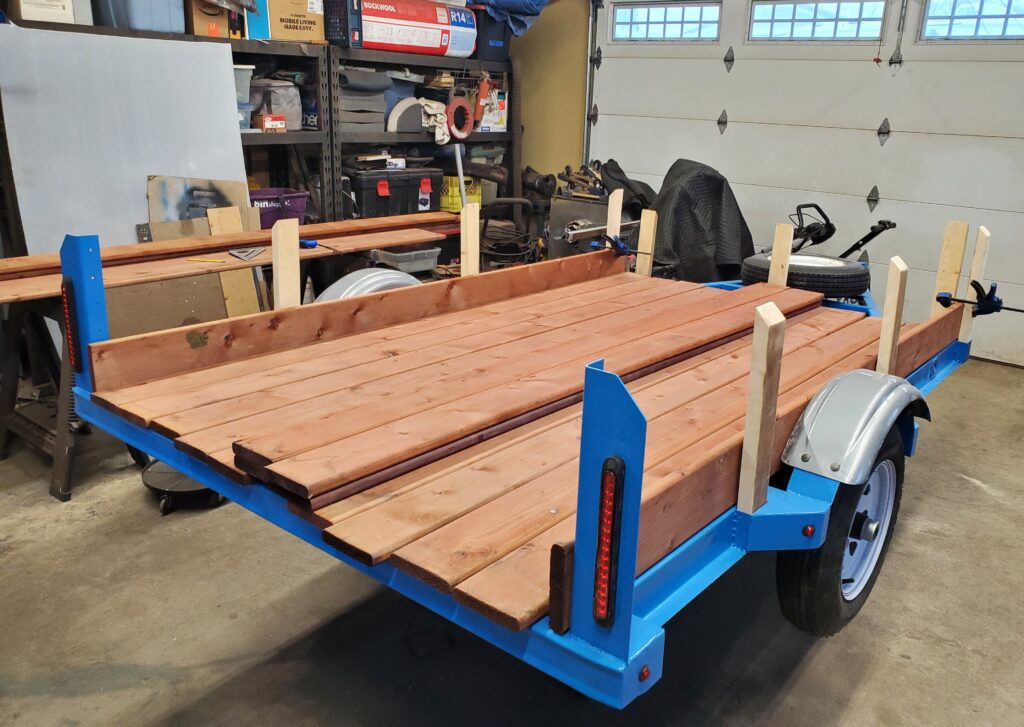
And the sides too. You can see all the custom cut stakes I made for the sides. And here’s another video:
Now here’s what makes the blue paint work better… light grey stain on all the boards.
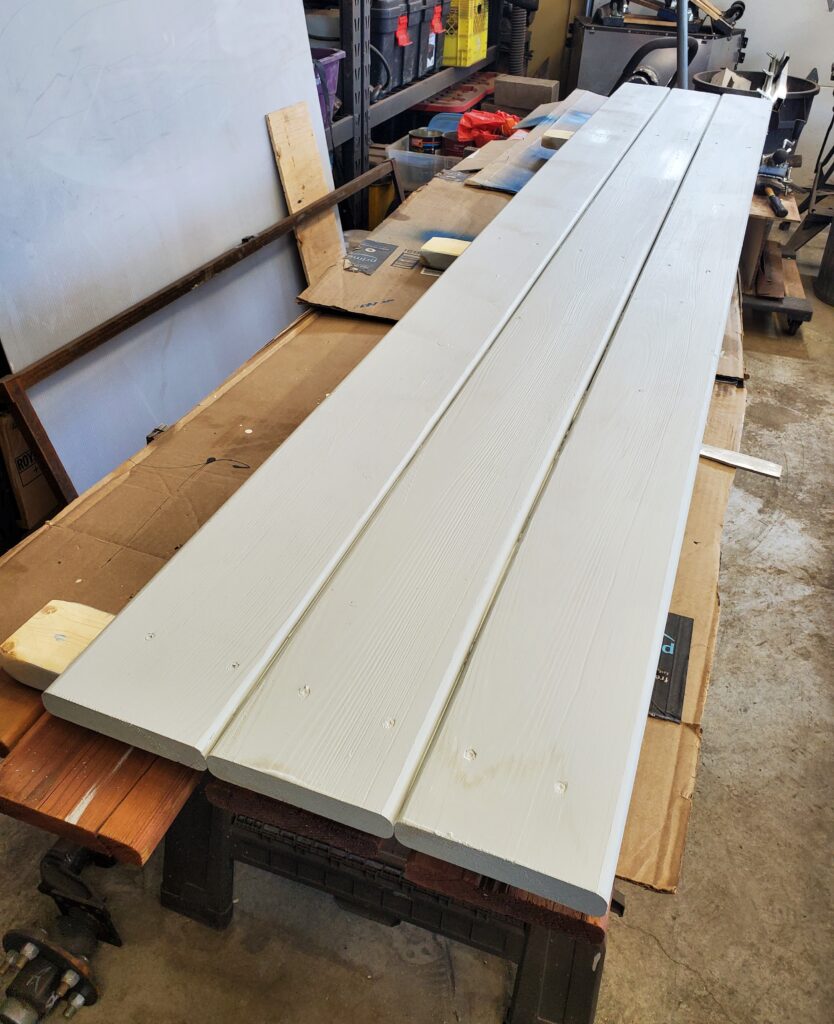
The deck boards don’t need this but the look of the trailer does.
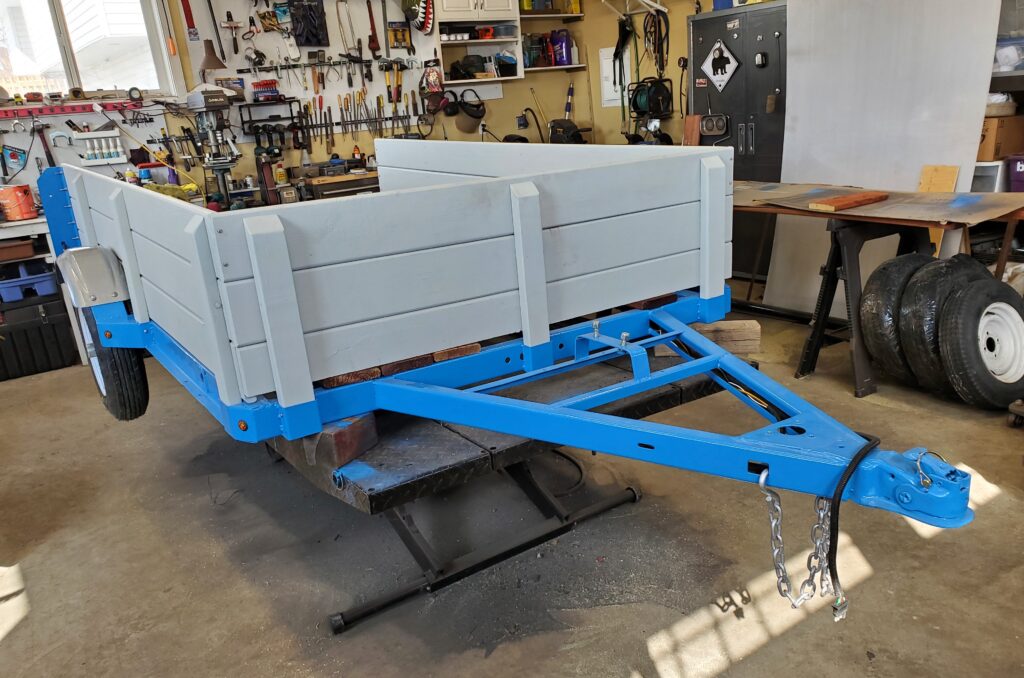
Am I right ? I think so.. Then the deck got the same stain.
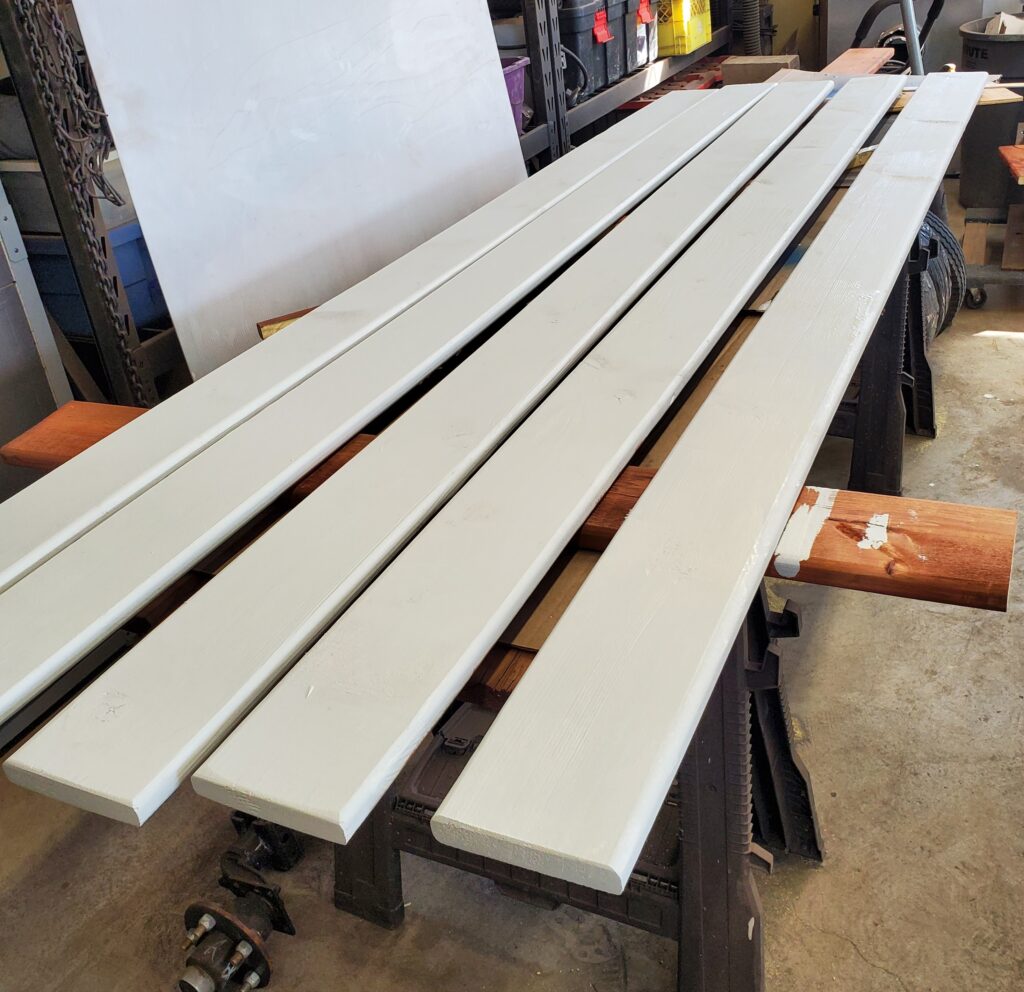
Now it’s time to build a tailgate. With more of the boards to finish it off too.
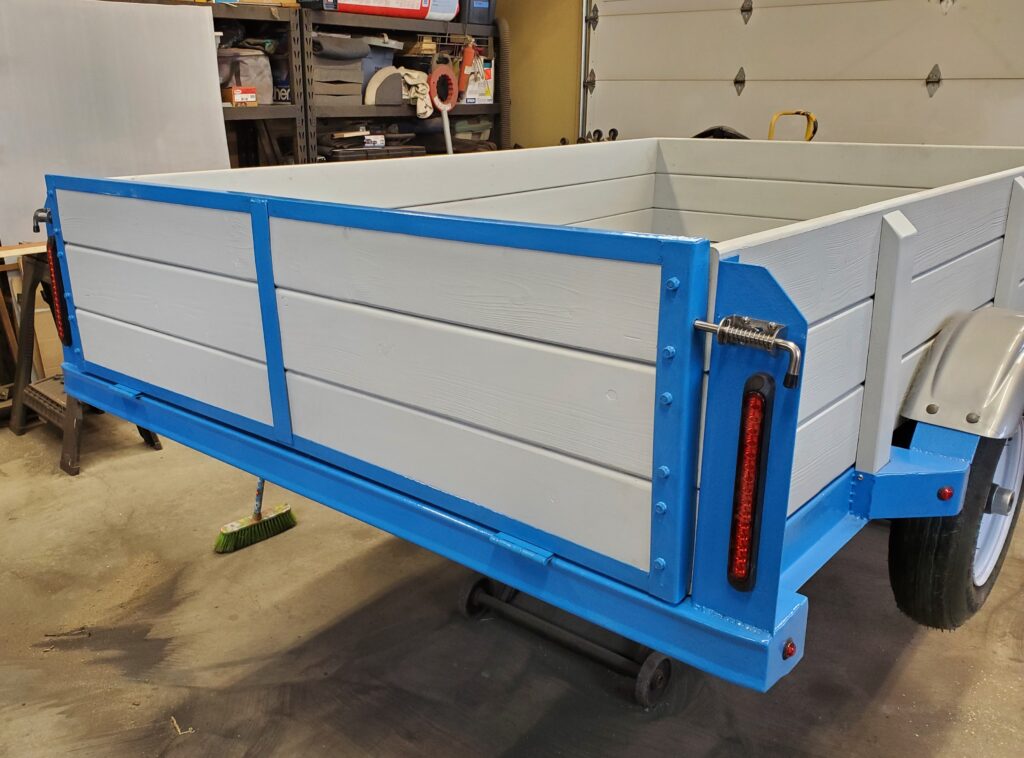
And here’s a ” show off ” photo.
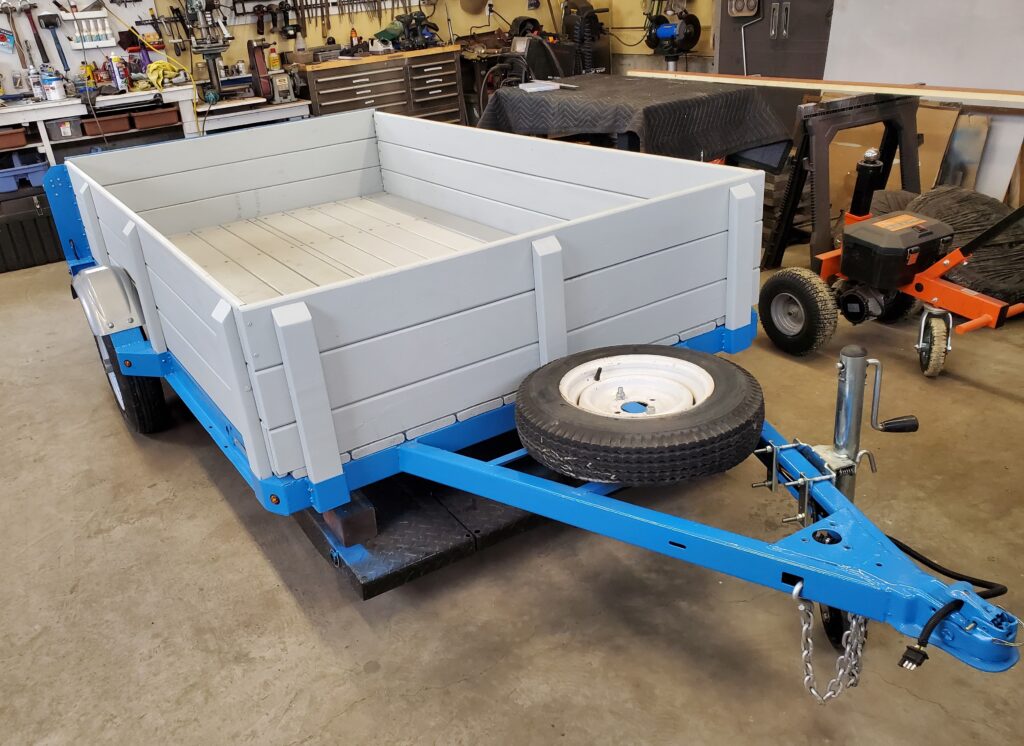
And the “show off ” Video.
Nice EH ! I must have done this one right… because I SOLD it the same day I listed it for sale… FOR full price.