Jan 12 2014
And no I did not sneeze !

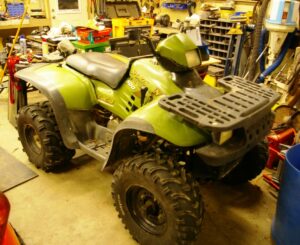
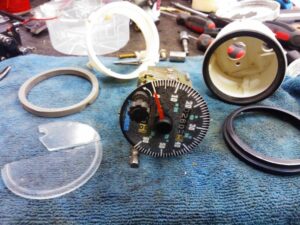
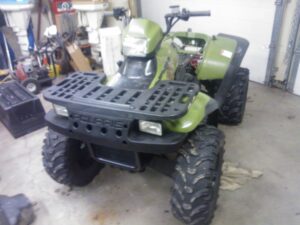
That’s what it’s called.. It’s an amphibious 6×6 ATV.. Or AATV.. very much like the Argo that everyone is familiar with. This Bazoo was made in 1971.. yes it’s old and kinda rare. Made here in Canada by Otaco Industries in Ont.. there is very little info on these, just a couple of copied brochures and one or two running ones on the forums .. So I’m thinking a cool project indeed.. and This little buggy looks like WAY more fun than a quad. It seats two people… side by side ! has room to carry stuff.. is the same size as a quad.. and goes in water, snow and through the bush.. What’s not to like about that !
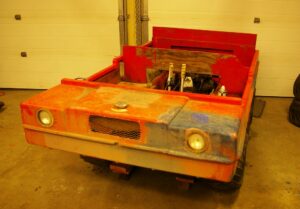
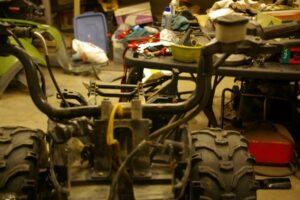
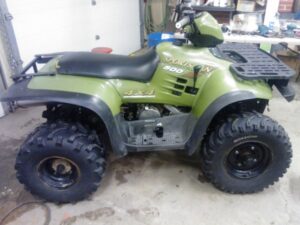
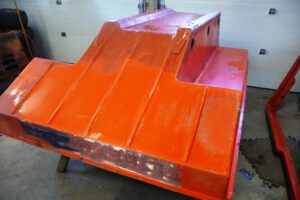
So here I have one in my garage. acquired from a fellow lawn tractor guy.. who did not want to bother with the Bazoo.. Mostly original , and a little cosmetically challenged. Just dying to have me put some love into it. Oh.. and the orange is the factory color.. and I intend to keep that.. however newer paint. I’m excited !
Not to forget we are talking about a 42 year old mechanical device here..
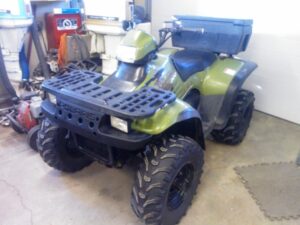
The tires are old and cracked / flat . However two unused tires came with it.. so that still leaves four crappy tires. Not really a problem since you can buy six new ones for a reasonable price. I’ve been told the drive chains are “newer” but until I get into this buggy and start testing things out it’s very hard to say what is needed. I can put tubes in the four bad tires so as to be able to drive the Bazoo around.. I can do a compression test on the motor to see if it’s worth spending time on. Then there is other parts such as the transmission that may or may not be good.. anyway I could go on .. but I really need to get the Polaris Quad finished up and gone so I can get going on the Bazoo..
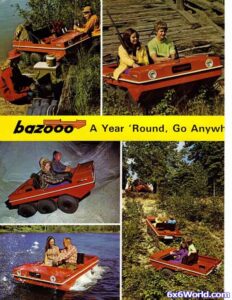
Hmm I was about that age.. in the ad. the kids in the top photo that is ! So the big question ? Is Bazoo spelt with three “o”s ? I’ll be sure to use three in the new decals. As for this post.. I’m lazy and 2 will do.
And Now :
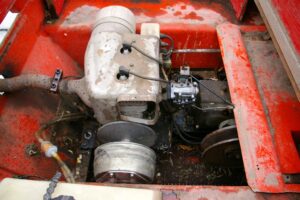
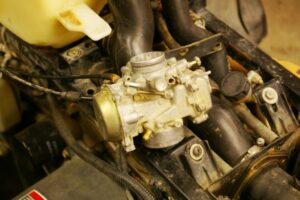
Here’s a quick photo of the motor in the Bazoo. A twin cylinder 2 cycle snowmobile engine. Very simple indeed, at least compared to the Polaris Quad I just worked on.. Now here’s a little info on the motor.. This is a CCW.. or Canadian Curtis Wright 290 cc , and yes Curtis Wright … of Wright Brothers fame makes airplane engines.. But here in the great white north.. the Canadian division made motors for snowmobiles.. Go figure ! The carb on this wonderful piece of history is a Walbro WR6.. and Walbro still makes carbs. so there is parts and info still out there. I printed the carb diagram.. and did a quick dismantle… conclusion.. I’m suspecting there is three missing springs inside the pump in the carb and thus the carb may not work , but we have not tried.. so I’ll be sorting that out first. After tests on the motor.
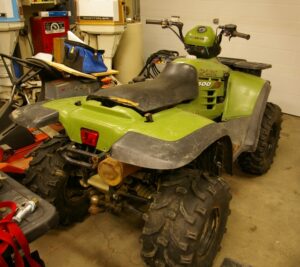
A Note Here : A bit of news I found out later.. I was told by the fella I bought it from that the motor was a 400cc.. well the label and the model number on the motor disagree. This is the 290 cc twin that was offered as an option for the bazoo. The standard motor being a single 240 cc. That explains why other photos of Bazoo’s have singles in them. Also of note is that the “Bazoo” was only made for two years.. and Otaco industries went though many changes and was bought by American Seat Inc.. and up till 2007 they made seats for buses and trains.. Then closed the doors. They are better known for the tin & cast toys they made in the fifties.
Thinking to myself:
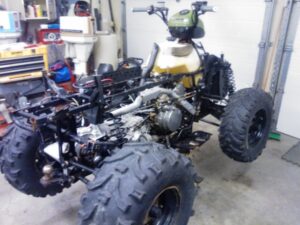
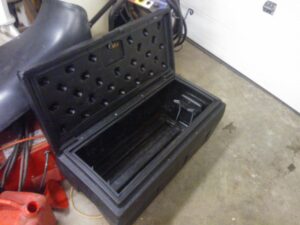
How fortunate that this Bazoo came 99% complete.. all the inside covers, the original seat in good condition, all the original controls.. and a few questionable extras ..like a trailer hitch and some ugly mud flaps. The fuel tank in the front has been abandoned and now one sits in the back next to the motor. I’ll find out why ? The potential for improvement is churning through my mind.. One is the complete power train.. I can get the Hydrostatic drives from a zero-turn mower and then use a Briggs & Stratton V-twin motor that would be newer and easy to repair. That would mean no more transmission, clutches & brakes. Hydro drives would chain drive right to the wheels.. and provide instant reverse and braking on hills.. Think about it …. I am !
Hey While your waiting to see & read what I’ll be doing with this little gem.. or if you’re scratching your head thinking Rob’s lost it again..
Jan 24 2014: and the work starts..
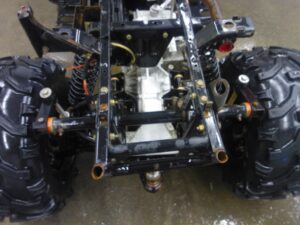
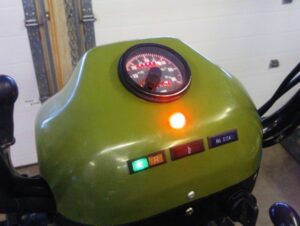
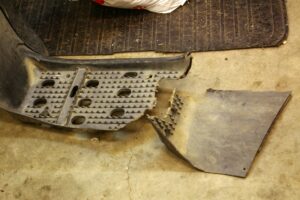
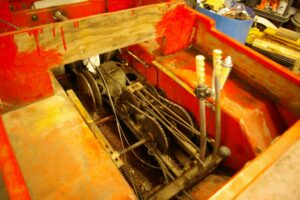
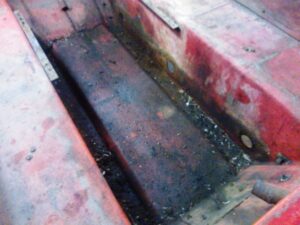
Tonight Dave and I pushed the Bazoo into the shop.. let it thaw out a bit. See those two ply wood cross dividers .. they are gone.. first thing I removed . The second thing on the agenda was to pull all six wheels off. and I was anticipating a problem.. was told by the previous owner that he could not get them off.. stuck ” you need to take a torch to those wheels” .. OK . Well he must have loosened them or?? because they came right off with a bit of a tap of the hammer. Looks messy , but it’s very simple. Dave & I tested the function of the drive line.. and it works good. The transmission shifts ..forward /neutral / reverse like it should .. the chains all seem good and the framework that holds it all together is not rusted or broken. There’s a bit of play in the levers, and the throttle cable was broken.. Minor stuff.. I’m impressed for such an old machine. But as far as use goes…. The Hobbs hour meter.. which looks original .. says 165 hours ! Wow that’s low ! Does it work ? Also it looks to me that someone at sometime replaced five of the drive axles & hubs. I know this because I’ve seen a photo of the factory inner hub.. and there is only one left. And the wheel nuts on that hub are 1/2″ and the others are 9/16″ ? That axle is also the loose one of the bunch.. So it may be the leaking one too.
I took a few parts to work and gave them a bath.. It’s sure good to have the two interior covers.
Testing The Motor:
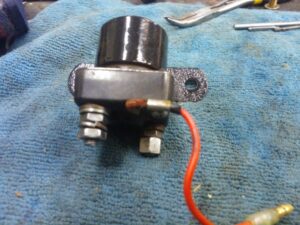
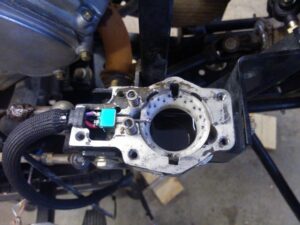
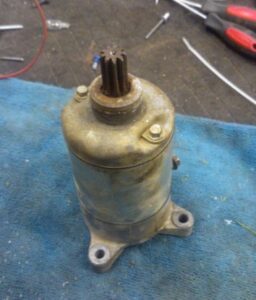
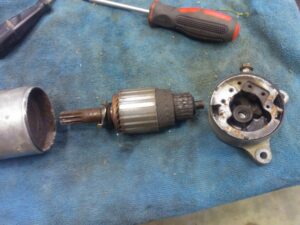
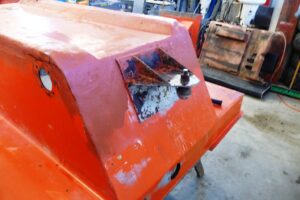
Before I go taking too much apart.. I need to know the condition of the motor. Part of that involves the use of the starter.. So I needed to sort out the rats nest of wiring.. People do make a mess with the wires.. tons of tape & cable ties. There’s dead end wires , there’s dirty connections and fuses that don’t work… Well then I like to study the wiring diagram.. and in this case it’s not for the Bazoo but instead for the motor. And it turns out to be dead simple.. just like a lawn tractor.. kinda simple. Even the key switch is from a lawn tractor. It has four positions.. off/kill… on with lights… on without lights.. and start. I thought of using a new key switch till I realized that it needs to have a kill circuit in the off position. So I’ll keep the key switch ..it works ok. And what’s this in the photo below ? Checked the compression on the cylinders with two different gauges and we have 118 in both cylinders. That’s respectable considering the age. The spark was good too.
Check out the video.. After having a snowmobile mechanic look at the Walbro carb and tell me that it’s good and we are not missing parts .. Dave & I put it back on and hooked up the gas tank. Had to do a bit of adjusting but finally ..vroooommm… Dave is seen tweaking the mixture.. and the clutch is working too… Bonus ! So now we are getting six tires up and working.. Two are new and two will have tubes put in. These tires are badly cracked.. but I just need them to hold air for a test run.. And I need a new throttle cable, which is a bicycle brake cable. And a new belt for the drive. Then we should be BAZOOING !
Slight change in plan:
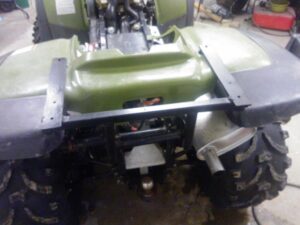
I had everything ready, Tires mounted, throttle cable… except the belt was on order.. Then we are standing there looking things over.. and we noticed the motor was not lined up with the secondary drive. And on these belt clutch / drives alignment is everything. So the motor would have to be moved over 3/4 “. Totally not to big a deal.. but a bunch of work none the less. The motor runs good… the Drive line could use a few adjustments.. So I made the decision to forfeit the test drive and get right into the “taking things apart” job. Hey we had the motor out.. anyway..
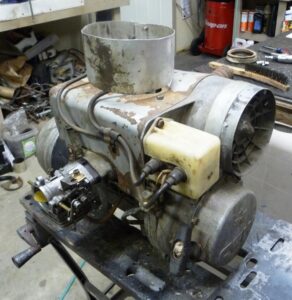
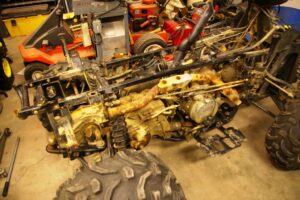
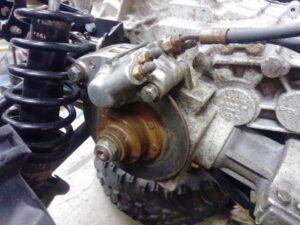
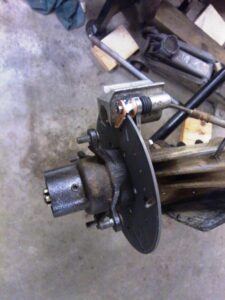
With the frame removed from the Bazoo it will be easier to work on stuff like mounting the motor. So I went to work on removing the axles & seals … They hold the frame in. I was right about the center axle on the left side.. needs to be replaced / or machined. One out of six … not bad !
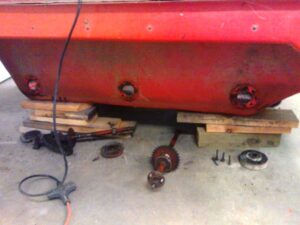
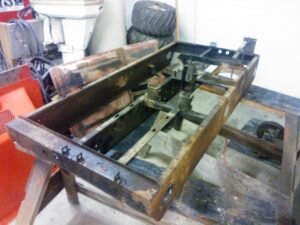
All the chains had master links , and so once they are off and the set screws loose on the collars on each axle… they just slide out. Each of the outer seals has four bolts through to the frame rail inside.. The frame is loose now but I need help to lift it onto some saw horses. Then I will have two separate things to work on.. The fiberglass body.. and the frame with all the mechanical stuff. Oh I almost forgot the motor.. I can’t leave it looking like that.. It needs some love too.
Well the frame is out and on the saw horses. And that’s one greasy place where it came from. I also got a few of the external stuff removed like the muffler & the stupid mud flaps.. Just need to remove the plywood from the sides and the top and bottom will separate.

It’s going to be easy to work on the drive up here on the saw horses.. way better than bending over the side of the Bazoo. I plan to remove the transmission and the chains. Then degrease the whole thing at work in the wash bay. Same thing with the bottom fiberglass tub. Lots of cleaning ahead of me here.. I need to think of a way to keep the chains lubricated without the mess. I believe there is a sticky chain lube that won’t get “flung” all over. We can do things better ! I ordered the paint I need for the fiberglass.. I use Interlux Brightsides polyurethane boat paint. I’ve used it before .. pricey but tough. Not wanting to get things mixed up..I used colored cable ties to mark the chains as to where each one goes.. there is nine chains. Same thing with the axles, want them back in the same place they came from.
Here’s the frame stripped of the drive parts and ready for the bath. This weekend I hope to get the body split in two and washed.. as well as the other parts.. The workshop is going to be a bit crowded with so many parts..
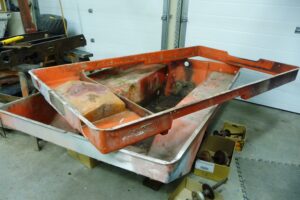
Here we have the top & bottom in two pieces. Now I can clean them properly.
Here’s the old gas tank .. looking at it from the underside. I see they had problems with a leak.. It’s been patched , but the outlet is not there.. I’m guessing the outlet fitting would leak and so the new tank was the easy solution.. I would like to fix this and use it again. So that would be one of the improvements.. I have some others that we’ll see about later..
Rub-A-Dub-Dub.. Scrubbing my Tub :
Sunday Feb 2 2014: It took a lot of scrubbing to get the greasy mess out of the bottom of the tub.. All clean now.. so I can see what’s going on .. Found two holes drilled in the bottom.
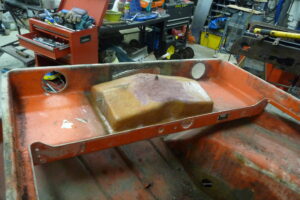
It would never float for long with all the holes I had to fill today. Once it was warmed up in the shop I mixed up some resin and plugged those UN-needed holes. A lot of messy patching has been done over the 42 years.. so I’ll be trimming some extra lumps down.
That’s quite the heavy duty hitch there ! I had to cut the ball off. Dave & I tried to wrench it off.. no way was it coming off. I’m deciding weather or not to remove the whole hitch .. and put it back on later.. I will keep it though. Ok I did remove it.. cleaning it up and it will get the satin black paint treatment. One thing missing .. is drain plugs. The holes were there.. but they’ve been fiber glassed over.. Need to deal with that.
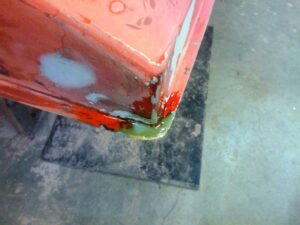
I’m taking the time to fiber glass the front corners to be like the rear ones… As seen in the photos.. This way I can wrap the edge guard completely around. I will be bonding the top & bottom when I’m done painting..
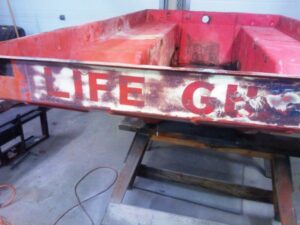
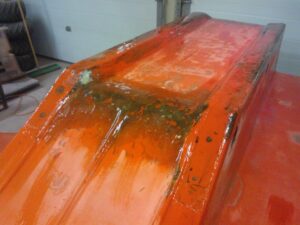
Funny what you find when you sand the spray paint off.. There’s three LIFE GUARD signs on the Bazoo… all painted over with BLUE ? paint.. on a orange Bazoo. ? WTF. Hmm what stories it could tell… Anyway all this body work is messy / dusty stuff.. so I want to get it done before I work on the frame and motor..

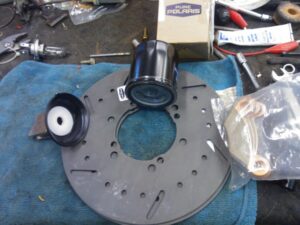
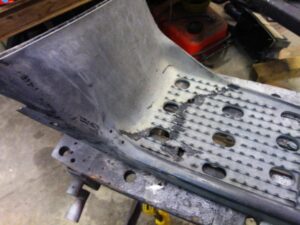
If you look at the photo back when I brought the clean tub back to the shop.. you will see that there is red primer all over the bottom.. And under a very messy layer of fiber glass was two metal plates. One is easy to see.. Presumably to protect the front of the bottom from damage. That would be OK.. but they are badly rusted.. and in a year or two would have dissolved into muck. On top of that they were leaking.. I found that out when I was washing the inside.. Mostly because not much of Buddies glassing job stuck ! I’m careful to sand & clean the surface before putting resin on.. Anyway they are removed and the holes filled and three coats of glass & resin go on the bottom. I have an idea for protecting the bottom from damage. It’s been a lot of work to fix up the bottom tub.. But if you do all this taking apart… don’t put it back together with things wrong.. I DON’T want any leaks. Nor do I want damage from rocks & stuff. So here’s what I have dreamed up for protecting the front of the Bazoo..
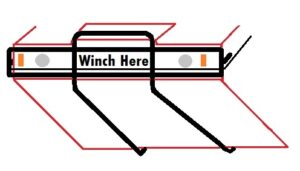
Yup.. I’m thinking this would serve best to protect the body of the Bazoo from unwanted bangs & scrapes.. I would make four strong attachment points while I’m glassing.. Build it out of square 3/4 ” tube. Attached to the bottom with metal skid plates… And … Once all the resin on the bottom is dry, I’ll do some more filling and then flip the tub back over and do a bit of reinforcing.. Got my supplies from the fiberglass shop.. including the Interlux paint. The bottom tub is all done ready for paint now. Time to start the top half.. not worried about leaks up there.. but I would like to have it cosmetically nice. Lots of work needed on the left front where Buddy fixed some damage.
Decal Time:
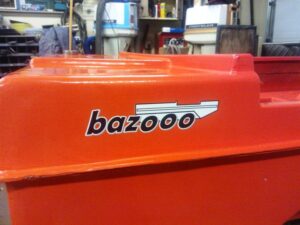
Nailed it !
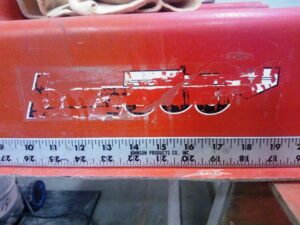
It’s these little details that really make the restore. I’m having the decals made. Had to do this before I scraped it off.. Another weekend.. more time working on the Bazoo. It’s the top of the body that’s getting the love.
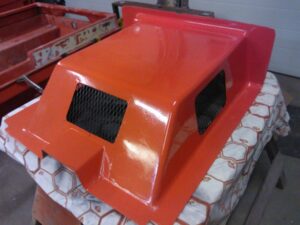
I’m continuing the body work stuff.. like I said I want to get the messy stuff out of the way and clean up after. Above you can see the motor cover is getting a few patches where there was holes.. and Buddy cut slots for the fuel line. Same for the front cover that goes under the seat.. With the body work finished., I cleaned the shop up.. Getting ready for PAINTING ! one of my favorite things to do..

I cleaned up the two interior parts … And mixed my paint.. 1 Quart Fire Red + 1 Quart Yellow. and the color was a pale orange.. most likely because yellow has a touch of white in it.. but after brushing some one.. I liked it.
It’s not a vivid orange for sure.. but it’s easy on the eyes.. Interlux does not have a ready mixed orange.. so this is what I get. This is a polyurethane paint with a hard glossy finish. I used a good brush on these small pieces , but a foam roller will be used on the other big stuff.
I’m slightly ahead of my time…
Actually I’m trying to think ahead.. By gluing these pieces of pipe in there I can keep the wires tucked up out of sight. The long one across the rear is for the tail light wires. Yes there will be tail lights .. Yes they will be LEDs . I can’t help myself.. just got to pimp my ride.
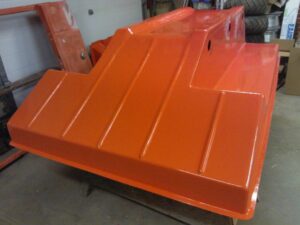
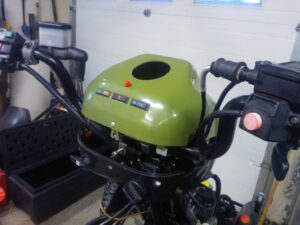
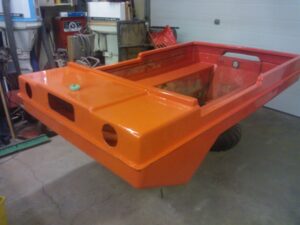
Rolled the first coat of orange on the tub tonight.. It will have overnight to cure good, then it gets a sanding and second coat.. The plan here is after the bottom is all painted then I’ll glue the top on. Then I’ll paint the inside. Last will be the top.
This Post is getting long… So I’m creating a second page
Page 2