This is page 2.. the starting / introduction page is HERE
Into the garage and the work begins…
I stored some things in there… out they come.
And the ramps for weight… not needed anymore. Made a video as well.
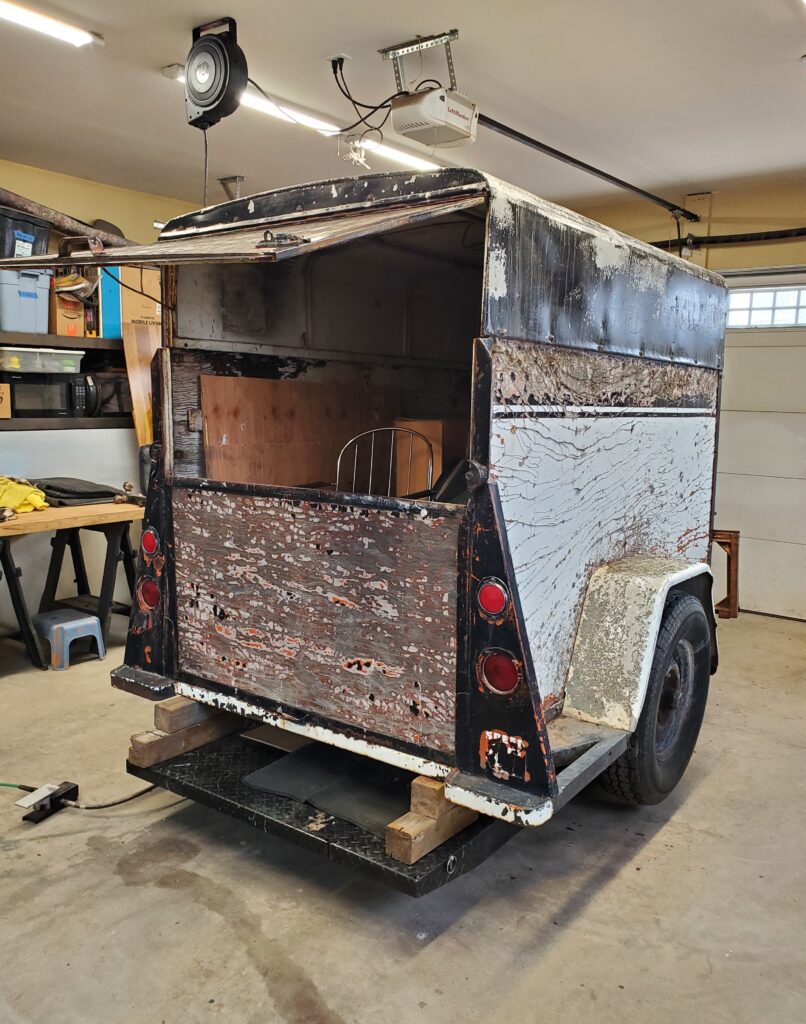
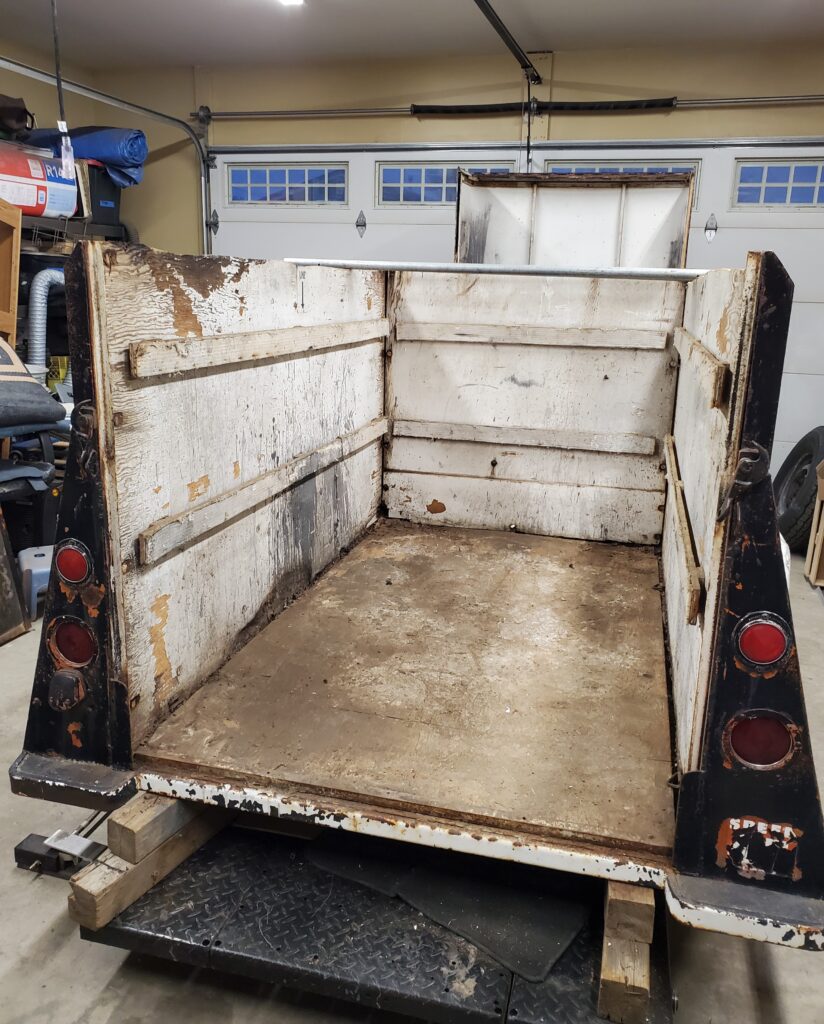
Well I got right to it.. cutting rusty bolts and separating the roof from the walls.. Ended up just cutting the plywood sides.
Those 1/2 ” plywood sides are stuck into the roof really good, even though there’s no bolts holding things. The bottom rail of the roof is slotted for the plywood. I’ll remove those pieces later. All the bolts that hold the plywood to the angle iron will need to be “force ably” removed with a cut off wheel. Once I have the roof off the (much lighter) trailer can be lifted to a good working height. It’s Demo Time !
The roof is off ! Now I can work on the walls.
Hey look a nice utility trailer.. Pretty soon just a metal frame. It’s a lot of work stripping this one down. And no I’m not keeping the rotten plywood.
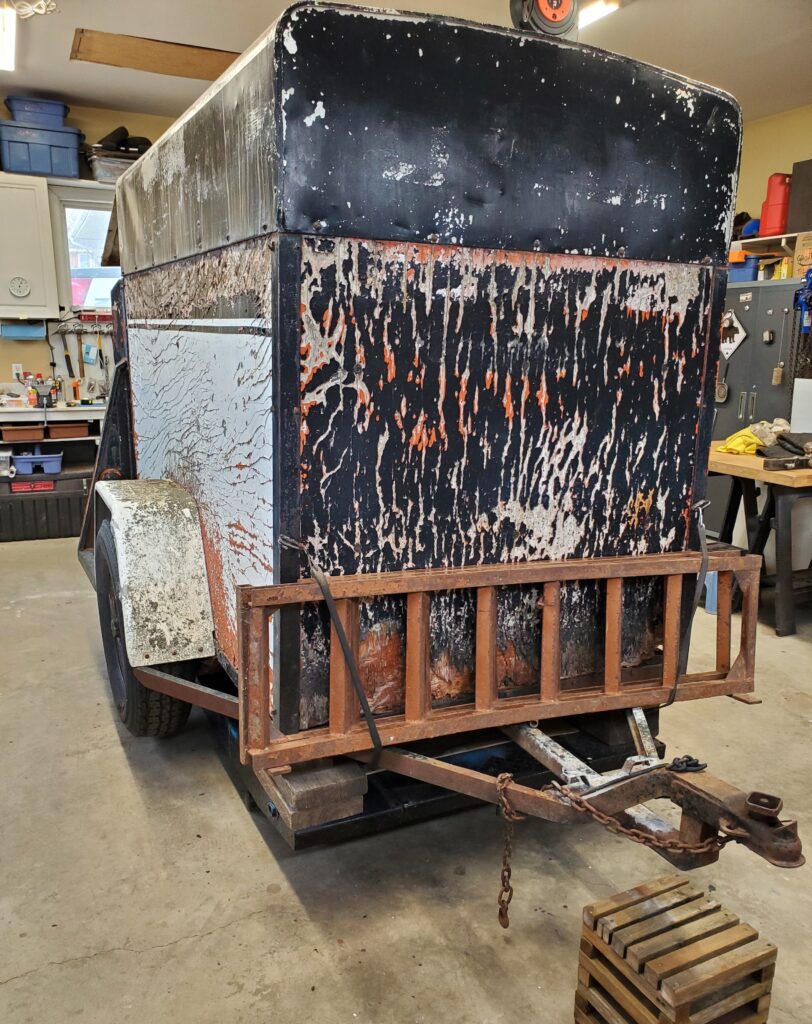
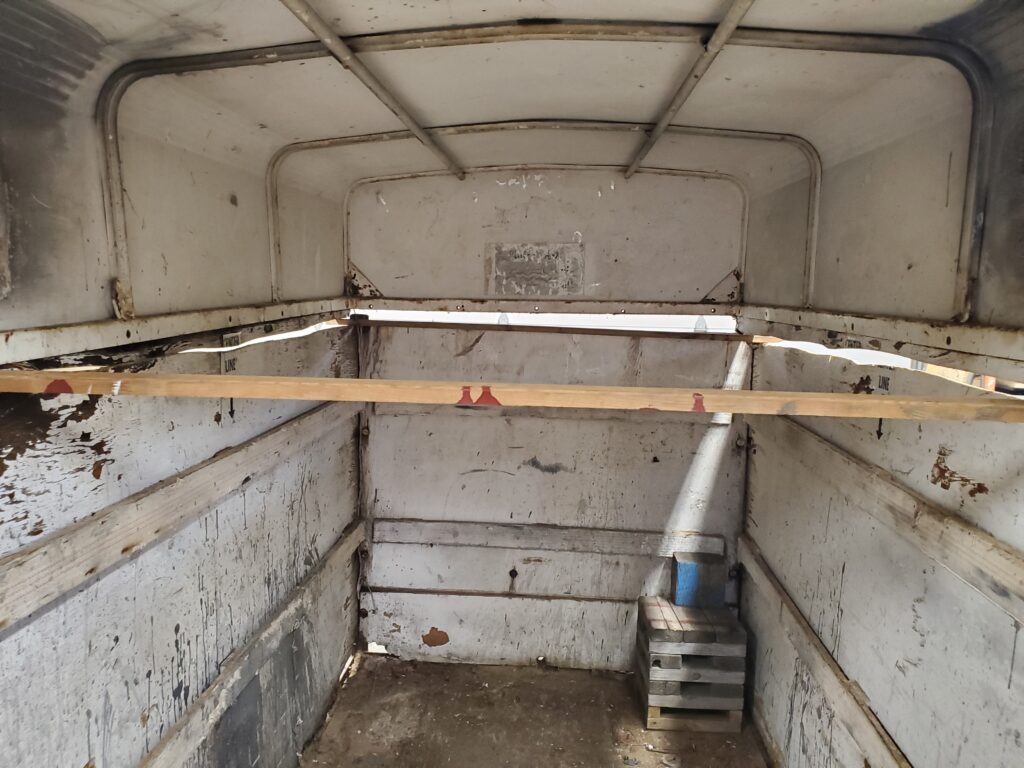
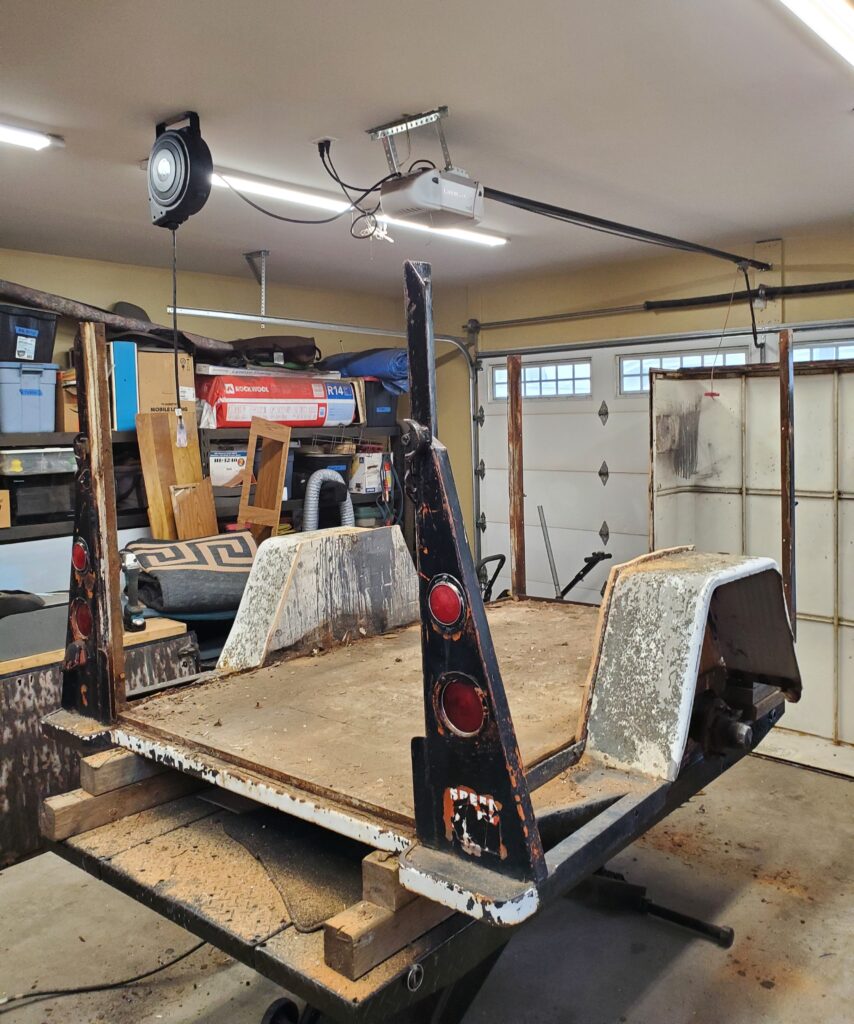
Notice how I cut around the fenders.. It was easier to work this way. It would be sad to have to cut the four uprights off. Well particularly the two with the tail lights. As well as a lot of work. I can’t flip the frame over obviously with those there. But I’ve decided to just tip it on it’s side to avoid cutting too much. That 4 x 7 ft piece of plywood floor is next.
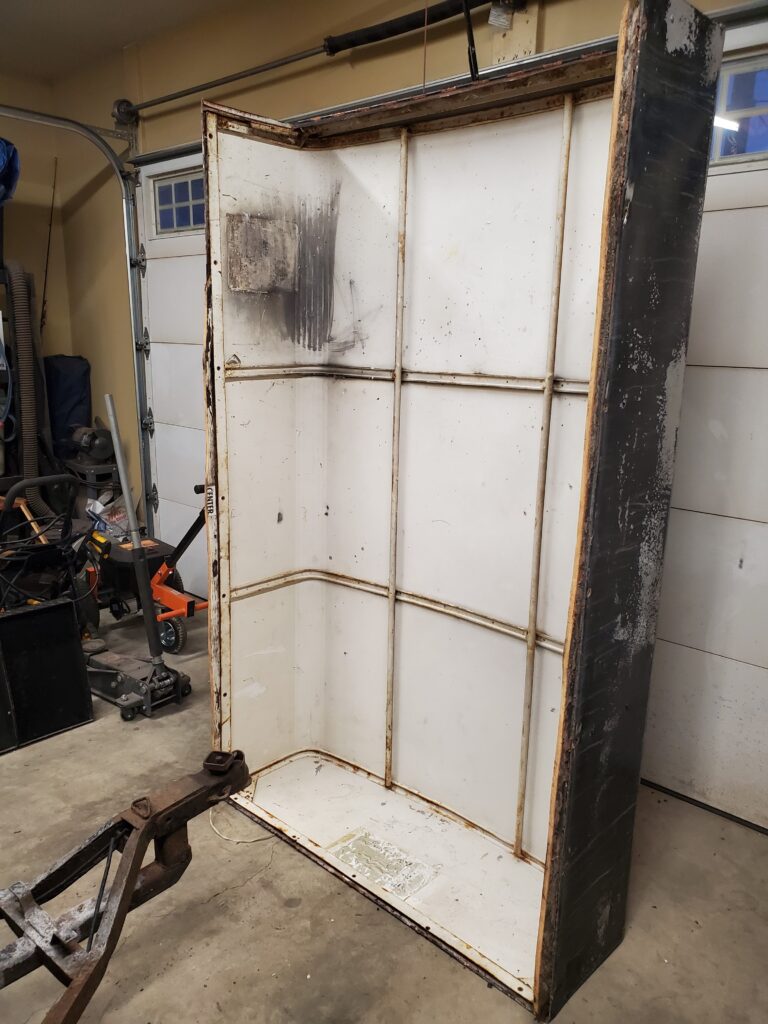
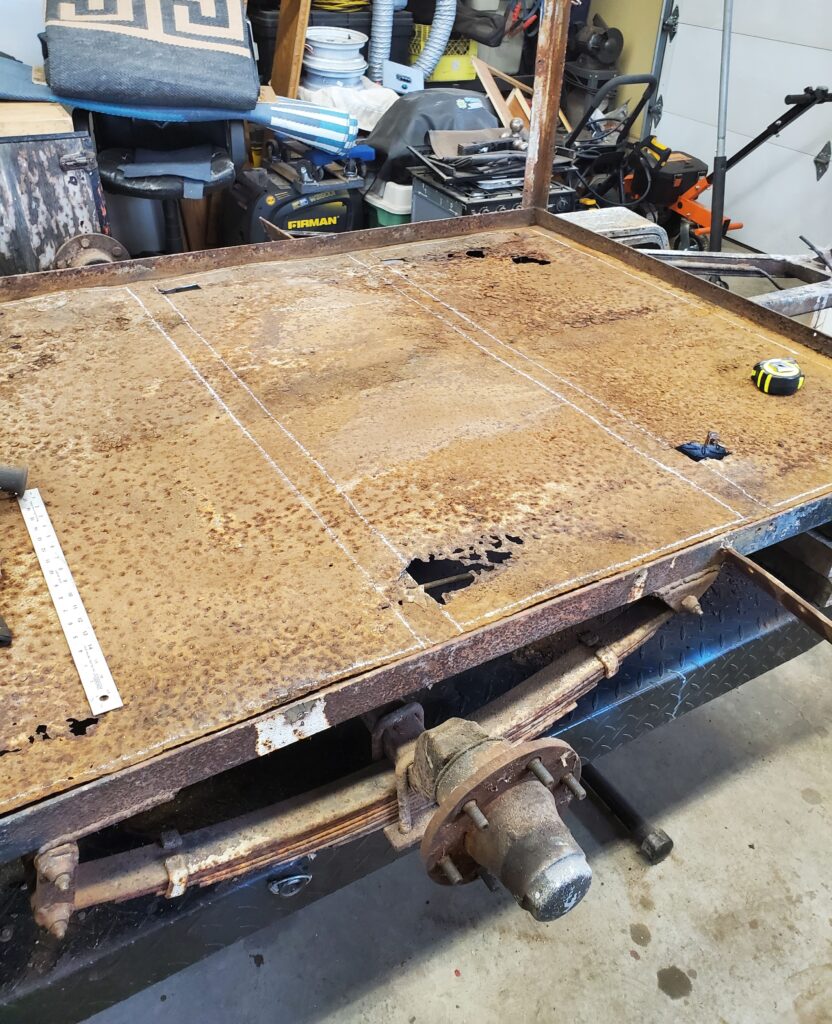
And under that is a badly rusted steel floor full of holes and not flat. This needs to go Bye Bye. I have to cut it in sections because of the cross frames. And hopefully get all the welds. I now have a clear plan of what to do.. Starting with the hitch.
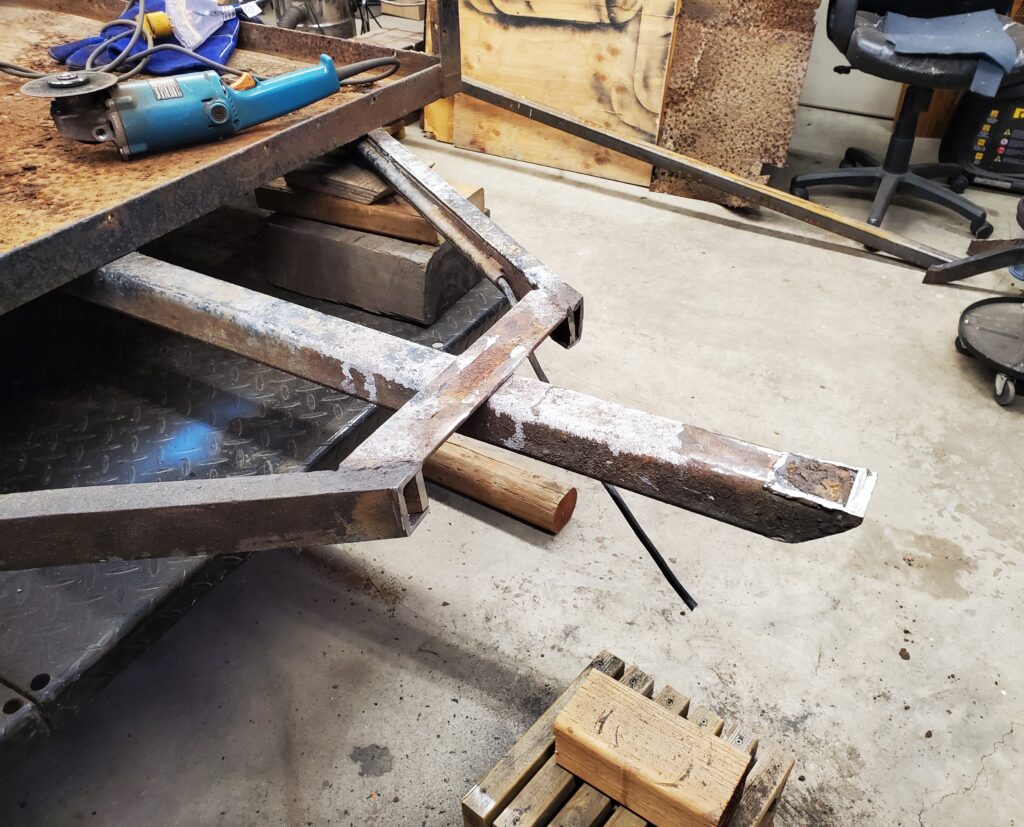
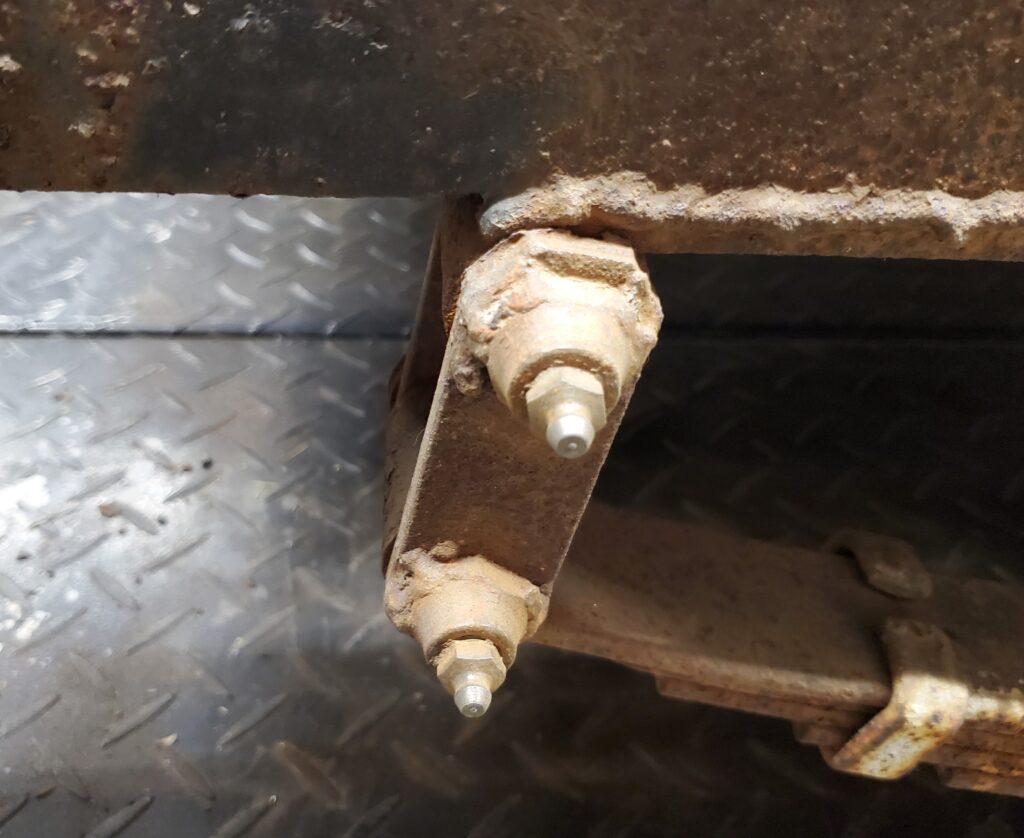
If I cut it like this… and add another 18 inches of the 2×2 tubing beyond the end, welding it to the top of the one already there. That will give me the right height I want. And room for a fold-up jack. The frame is still quite heavy… so I need to remove as much as I can. I see that the spring eyes and the bolts are rusted solid. That’s not good , so I’m having a battle with them.
There’s no way to save these. Need to cut them, and that’s a shame because these ones have grease nipples. HA! I won the battle… and I did not need to cut them. Heat and a big hammer was the ticket.
Now I can put the axle on a saw horse to clean and paint. I’ll get a new set of bolts and shackles so things will work the way they should. The naked trailer is still heavy but I think I can get it tipped on it’s side. That rusted sheet metal under the floor was adding a lot of extra weight. So I went to work and removed all of it. Now I really can manage it.. So let’s start a new page..
Well let’s get down to the mechanical work that needs to be done.
The visit to the shop I use here where I live was yesterday, and I got a new list. Some has to be done within a month for insurance purpose’s. I’ll list those three first. Some can wait a bit. Here’s the list:
New tires. No surprise but needed badly
Steering pump and Pittman arm. That’s my loosey goosey steering.
Wheel alignment. Also part of the problem.
Left CV axle. For sure.
Rear shocks.
Right front axle seal.
Rear differential cover seal leaking
Left rear wheel has missing stud.
Two codes show up.. Evap leak & key in ignition.
Battery is weak.
Some of these things I will do, like the rear shocks. One thing not covered in the list is the hard shift from 1’s to 2’nd gear. Very common for these transmissions, and fixable by a transmission shop. Meanwhile I got the new LED flasher installed, and the the bug / hood protector too.
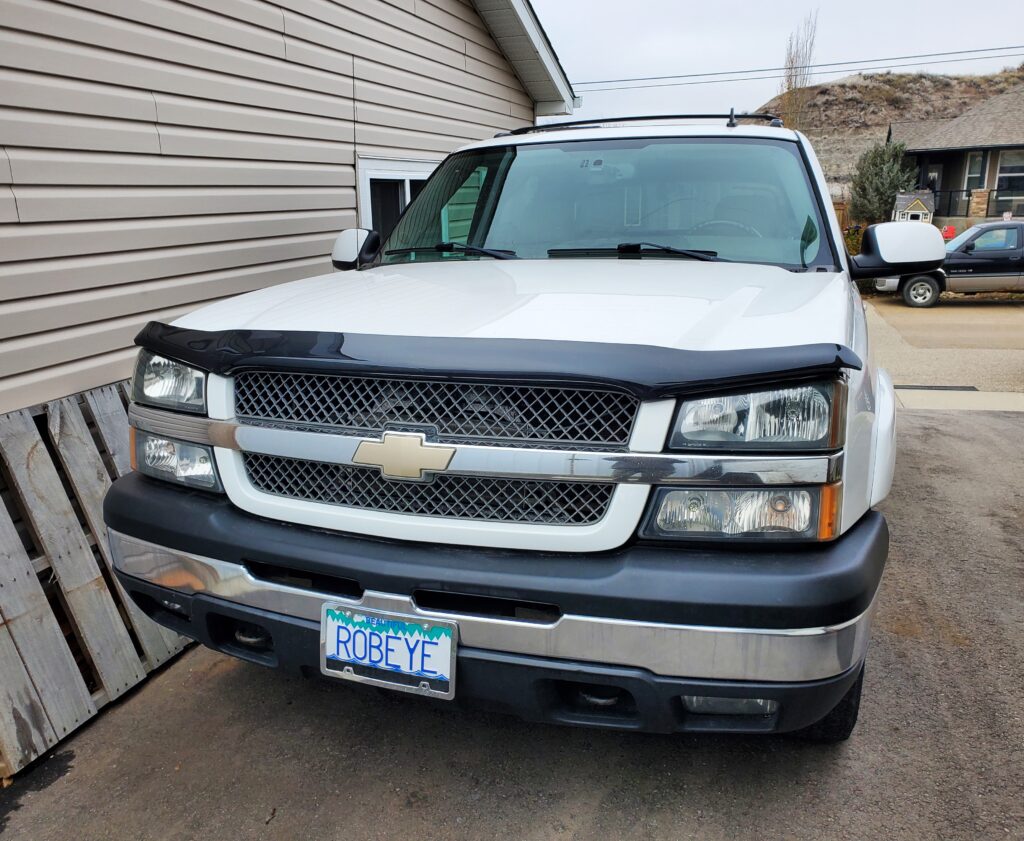
Look’n spiffy.. A week from now the Avalanche is scheduled for four new tires, and the next day for the steering fix and wheel alignment. Then we’ll see how nice it drives.
# 1 Can get crossed off the list.
New tires are on and the driving experience just got better. Still wanders all over but that is next. Defiantly a quieter and smoother ride.
This are the same brand of tires I had on the 2009 Avalanche. All season all terrain. Now #2 is the steering.. New power steering pump and some other parts… plus a wheel alignment, and now we have no more wandering Avalanche . And we passed the safety inspection. So I’m now driving it. And that’s a good thing because as if on cue the Buick has a failed alternator. And it’s going to take a week to fix.
December 2024:
Alrighty Early this month was another visit to the shop and we can cross more off the list.. # 2, 3, 7 and 9 all fixed. Also some wiring in the steering column. No more check engine light. We don’t need number 6 on the list. And it’s driving great. So much so that I’ll take it to Edmonton just before Christmas. The CV axle can wait till spring.
Update: Wouldn’t you know it the check engine light came on again… This time it’s the knock sensors. Motor operates just fine without them, but they will need changing if I want the light out. I drove over 700 kms over the holidays without any problems. Somethings I have noticed… Warming up in the cold takes longer than it should . So I’m thinking the thermostat needs replacing. But the heated seat makes up for it and I have to turn that of within ten minutes or my but gets too hot. There is a howling noise coming from the drive line when pressing the gas pedal, or under pressure. Also the motor roars out louder when climbing a hill. this could be an exhaust manifold leak caused by broken bolts. So I’m going to make a new list.
Transmission needs a service.
Needs a new thermostat.
Replace the knock sensors.
CV axle still needs replacing
Exhaust manifold bolts needs replacing.
I will need a new windshield come spring.
So we will pick away at these things as funds allow. So far the battery is hanging in there, but winter is just started and some very cold weather is yet to come.
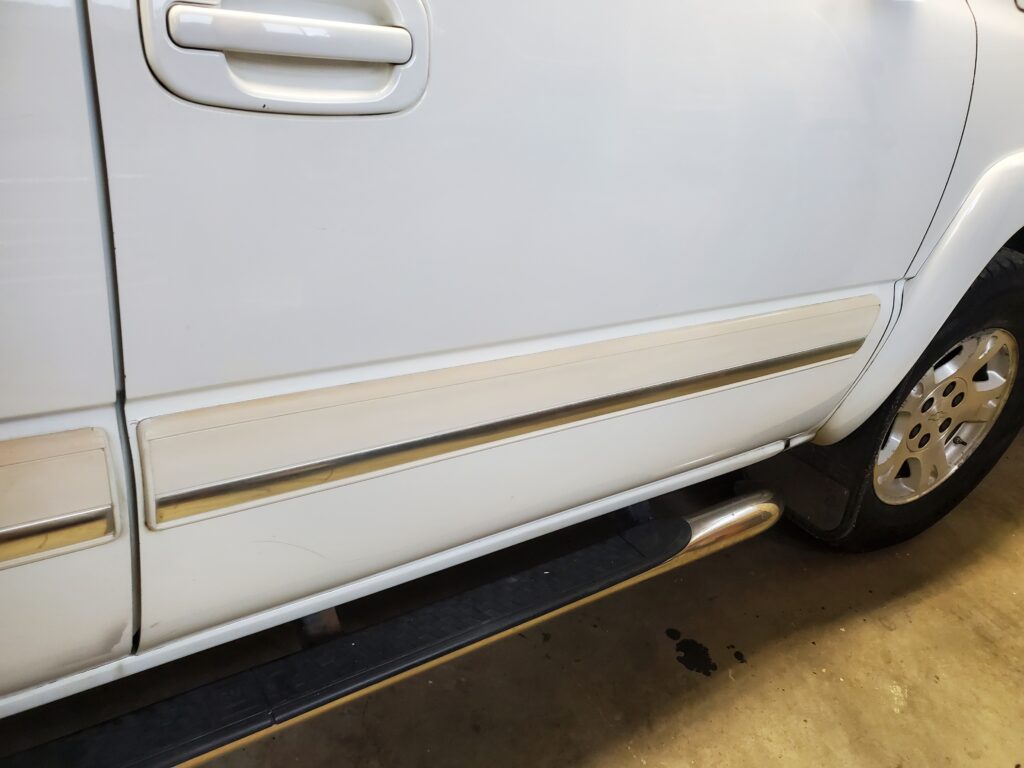
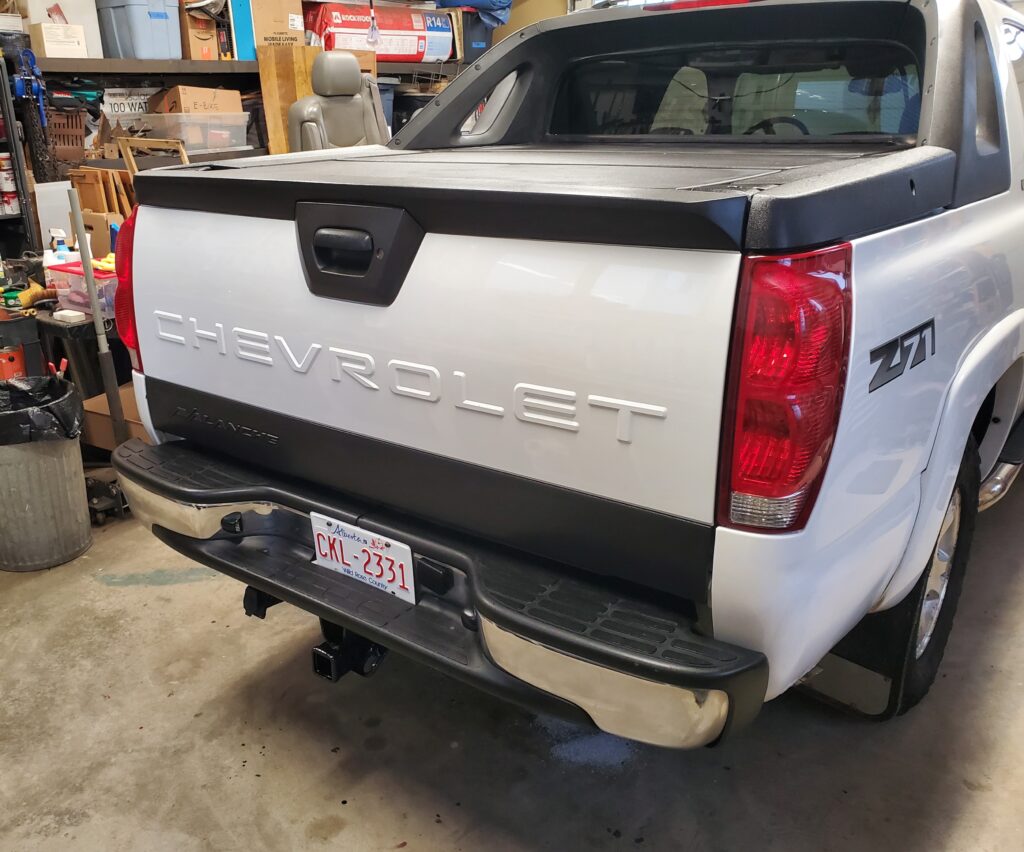
Got to fix the rust hole in the rear panel.. and the flaked off paint on the passenger front door. Oops no “before” photo.. but it’s in the video. Trust me the paint was flaking off just above the rubber side moulding. Only the front door. Right down to the primer.
Not no more ! The great thing about a plain white vehicle, easy to match the paint. And here’s the last body fix.
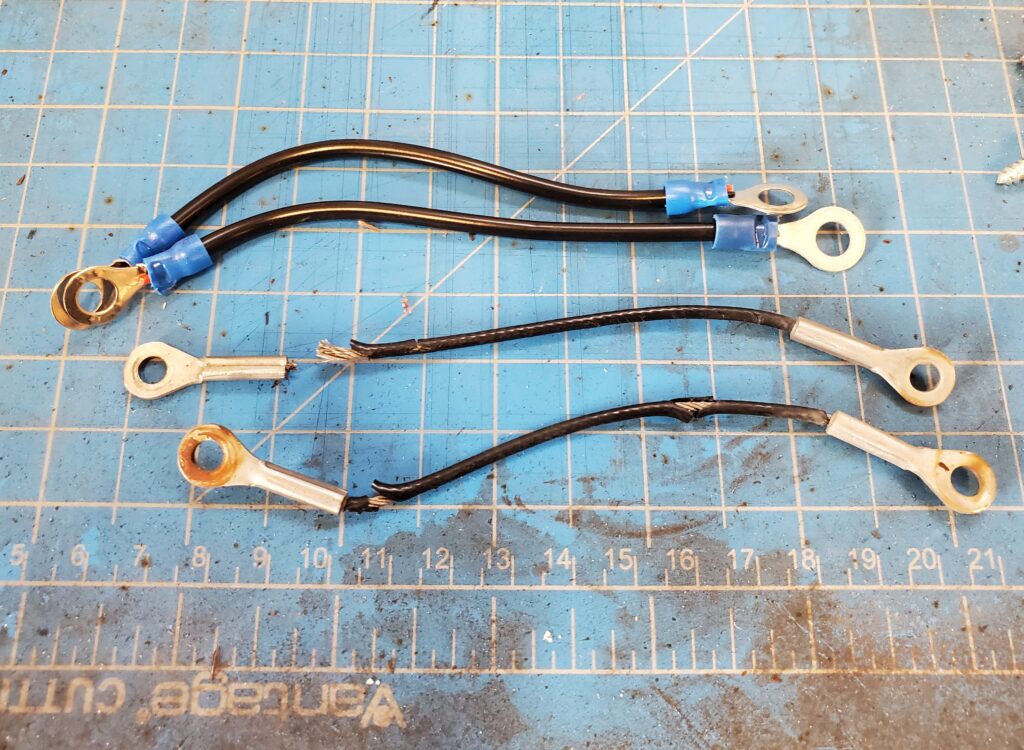
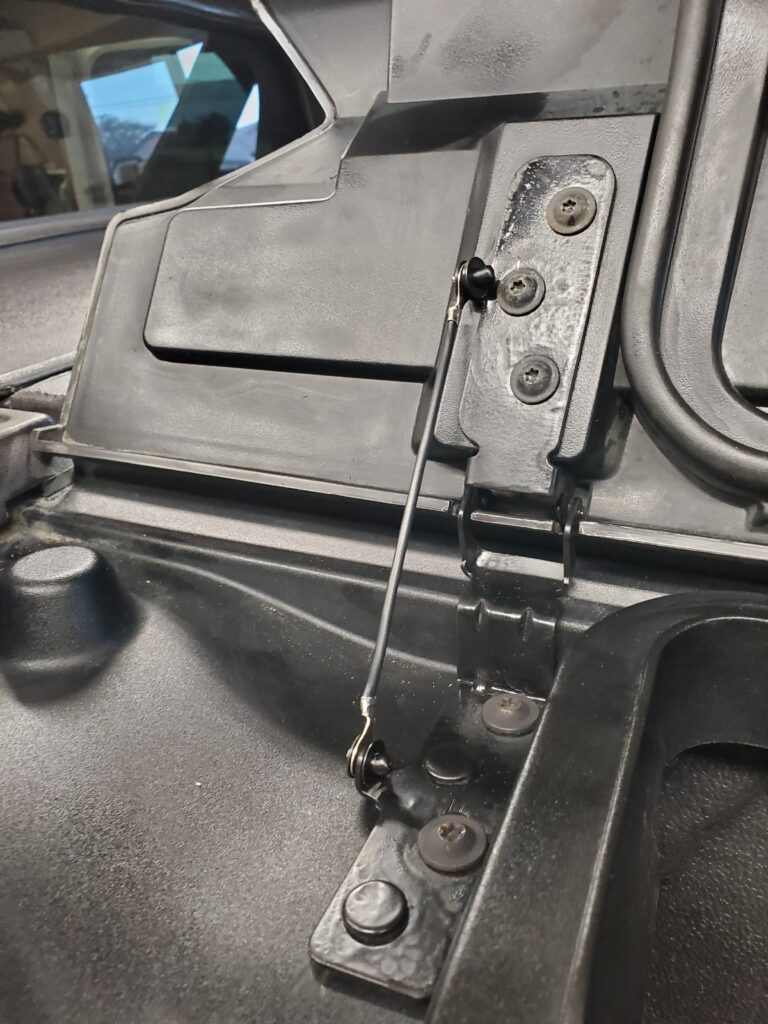
Can you tell where I painted ? No ! Only half way up the lower panel.. Yes the match is that good. No more rust. Now for round three of the hatch cables. They still keep braking apart. This time I got some steel cable and some real cable crimps,
And yes this made for a much stronger cable. I even put some heat shrink on the steel cable.
There ! take that.. Dare you to break.. If you do I have lots of pop rivets and cable.
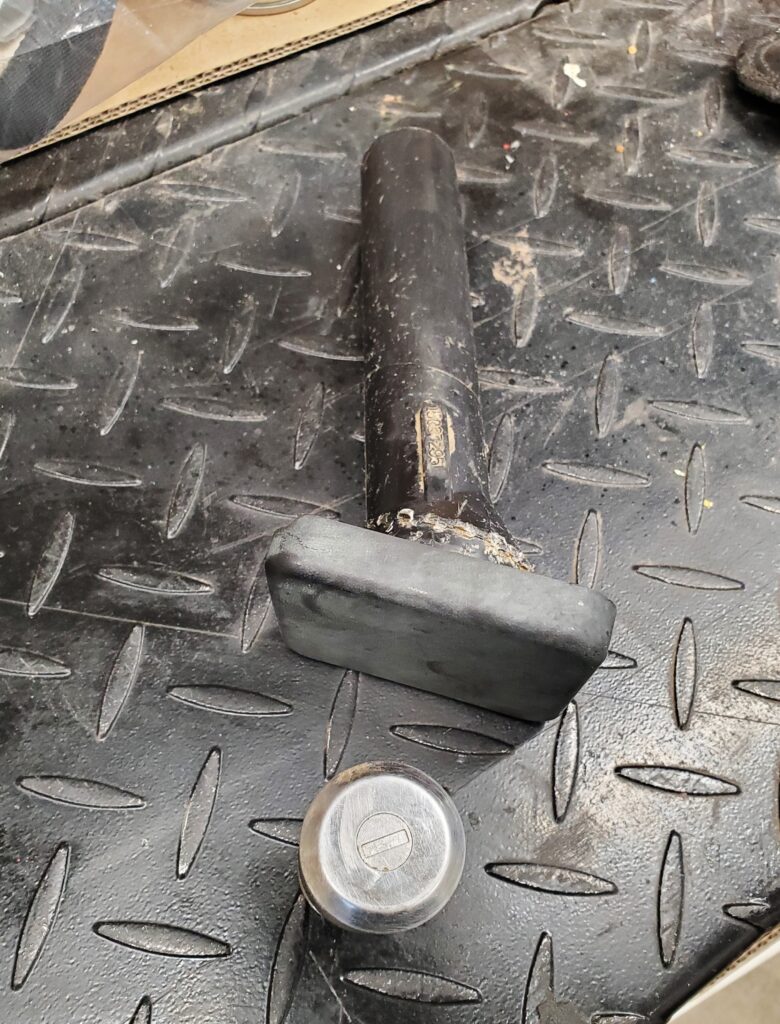
Today I got the chance to go parts shopping and I got the tools & jack, plus a new end for the tube where the handle goes in the bumper. With lock but no keys.
These things are in excellent condition. I put the jack away under the right rear seat. The other tools I used to “try” to lower the spare tire.. Got it down about 6 inches and hit a stuck part.. So there’s some work to do.. The bumper cap needed a good cleaning and it needs to be installed.
As for putting that locking cap back.. No I don’t have the key and it’s not needed. So let’s figure out the lowering of the spare shall we… Well that was fun.. NOT! Five hours later I got the tire down. After years of cranking the spare up under the back of trucks, some brainy engineer thought we needed a safety catch. Just in case the cable broke. Ya right.. That happens all the time… NOT! The cable mechanism to lower the spare works great.. It’s not seized up nor is the cable rusty. But the safety catch was seized.. Sure glad I’m doing this now, in the shop, with all my tools. There’s no way you can do this on the side of the road. I’m fixing that dumb idea.. I have a grinder !
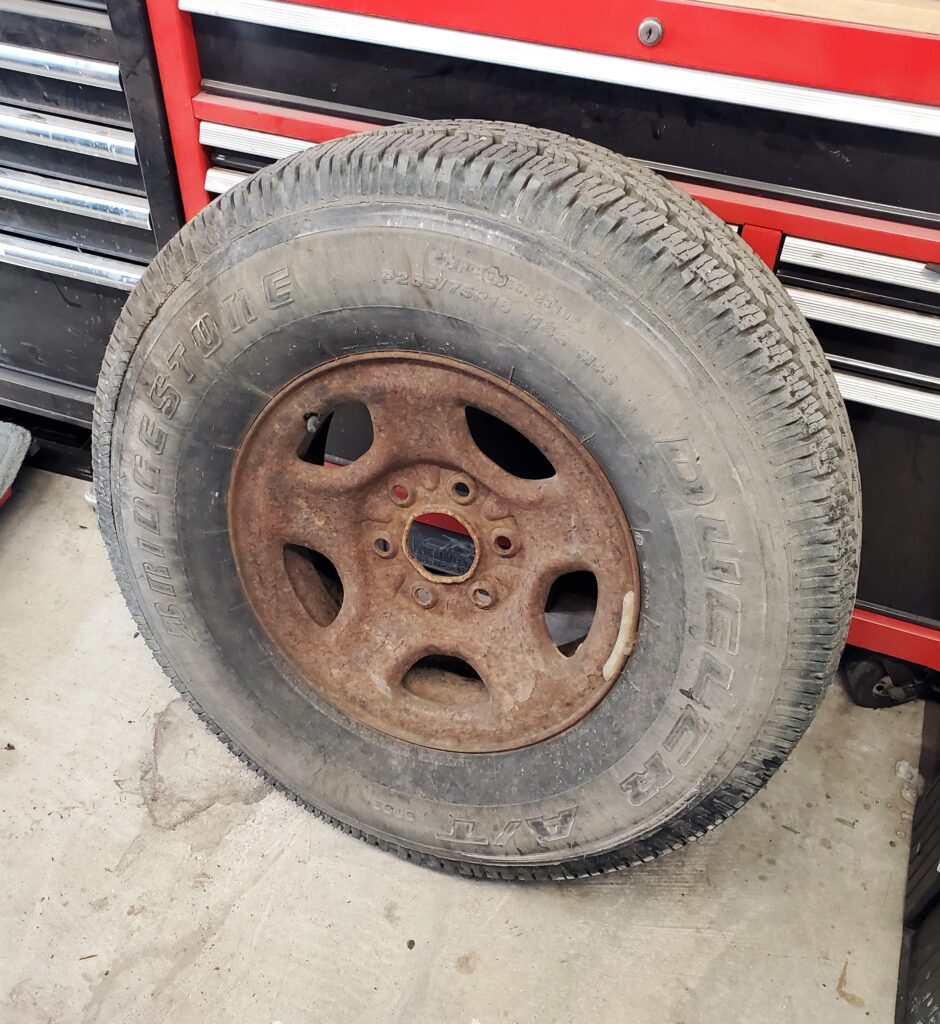
Here’s what my spare looks like. Good tire and still holds air, just a ugly looking rim. Let’s make it look better. Just some black rust paint is good enough.
There! Now I won’t be embarrassed to use this spare. But hopefully I will never need it. I took the whole spare tire holder mechanism out too so I could make it not look so rusty.
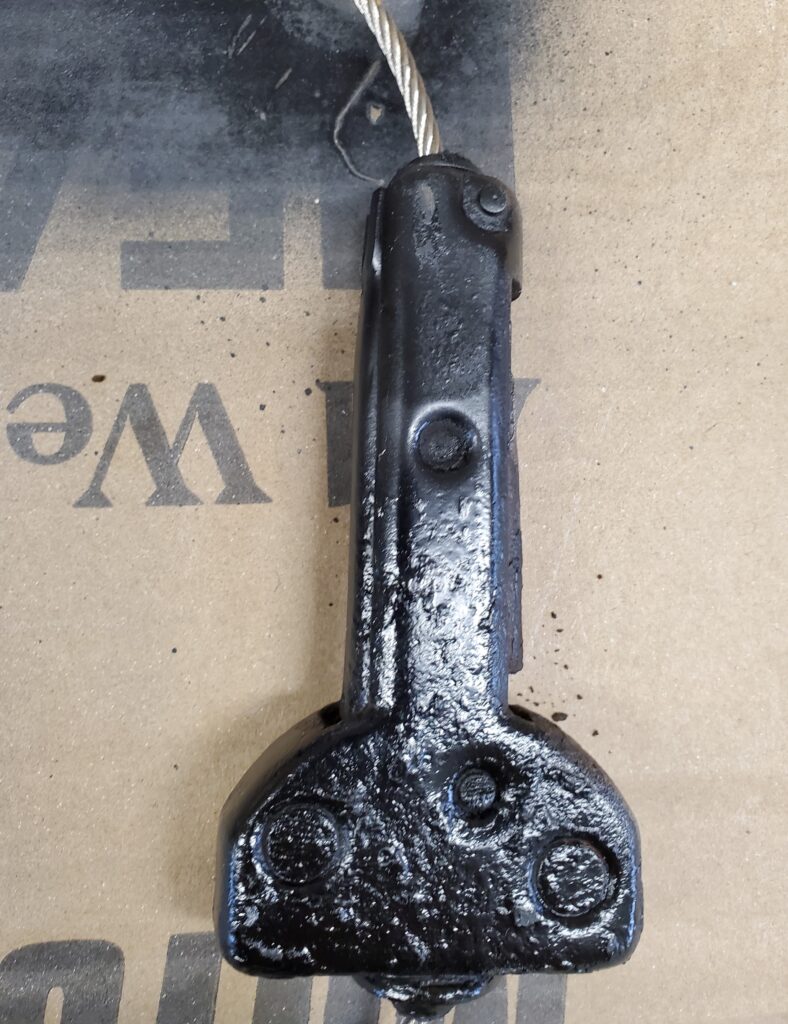
And fix that safety latch for good.. Here it is and it no longer has a hook / catch.
It was seized up so bad that no amount of lubricant was going to fix it.. PLUS it’s riveted together. The winch part still works as it should. Most likely because it’s well protected from the elements. I’ll grease the cable lightly before winding it back in. Should be able to put this all back where it was…just better looking. Done and everything worked great. And with that..I believe I’ve got a lot done now. But really never say that. There’s all ways more. Yup.. still some mechanical fixes. And in time new tires. I have a new hood bug deflector on order. That will cover up the paint chips and road rash. I have to change the flashing relay for a LED one. Change the cabin air filters. And lastly get an inspection done for me and the insurance folks. This will tell me how to move forward with the mechanical stuff. So time for a new page..
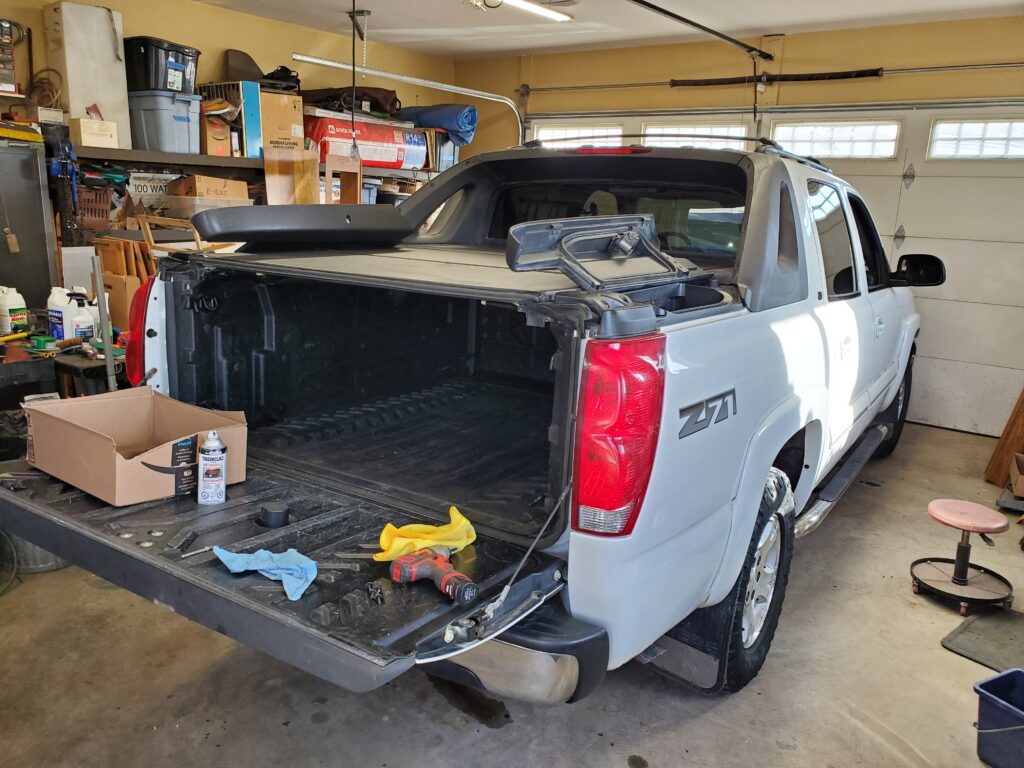
And now with the back end to the bench we have a few things to do.
The tailgate makes a nice work place…
Remember the list !
Remove the seats now that I have the proper tool.
Clean the carpets. New floor mats are coming.
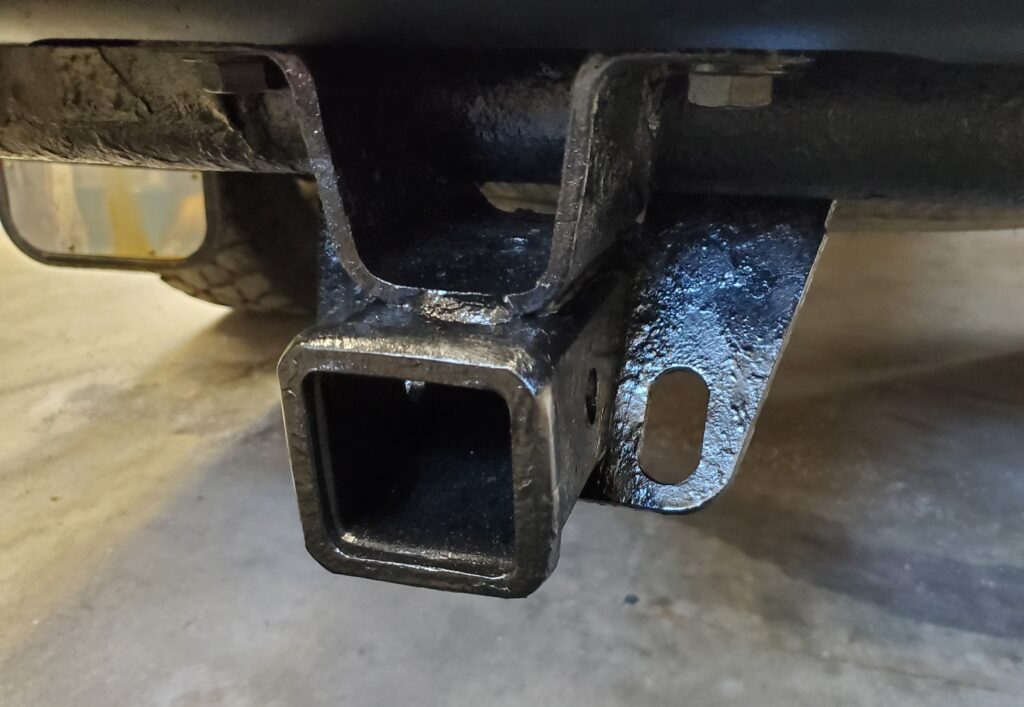
Paint the trailer hitch. Can’t have it rusty.
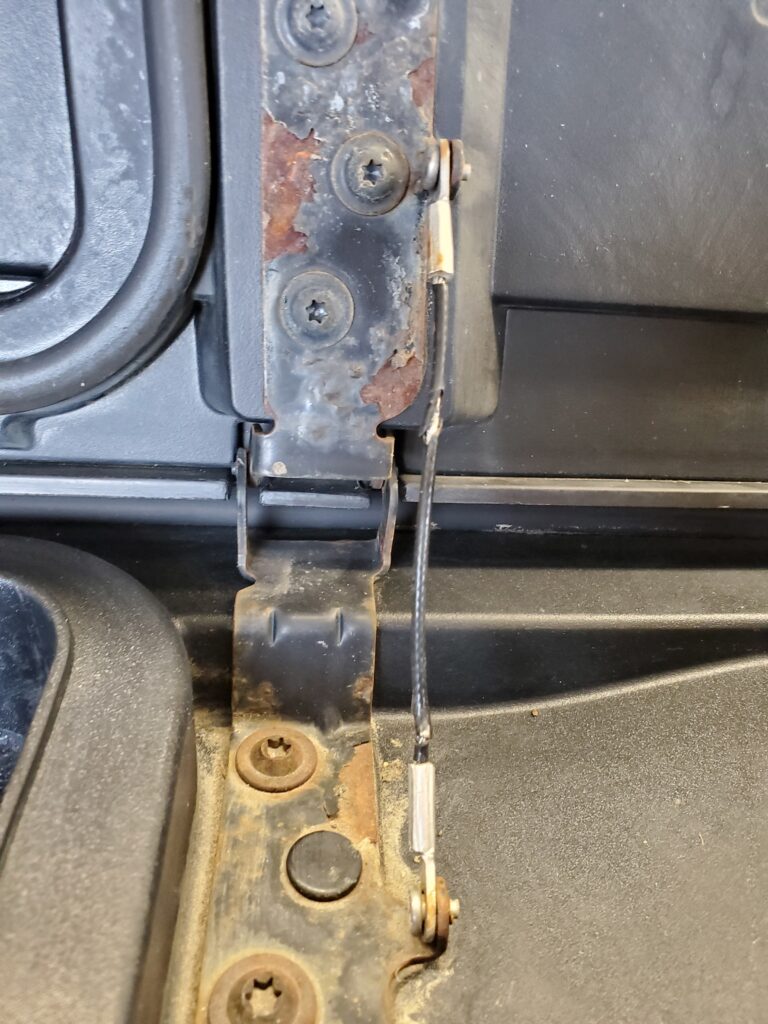
Repair drivers side rear hatch cable.
Fix leaking gaskets on the box covers
Ok don’t get upset, but I skipped to #4 on the list. And I decided to replace both. This is what I’m talking about. And we are looking at the driver’s side. In the above photo I have them both open beyond where they would with the cables. The cables hold the hatches just beyond 90 degrees.
I’m not aware of these being a part you can just buy. So I’ll will be making my own. Mine may not look as scookum as the factory ones.. But then again those broke ! The passenger side is so close to breaking I may as well make two sets.
And those hinges are rusty. Nope can’t have that .. As you can see these are riveted on, so not easy to replace. I may use small bolts, or pop rivets just don’t make them tight. And the pop rivet idea works.
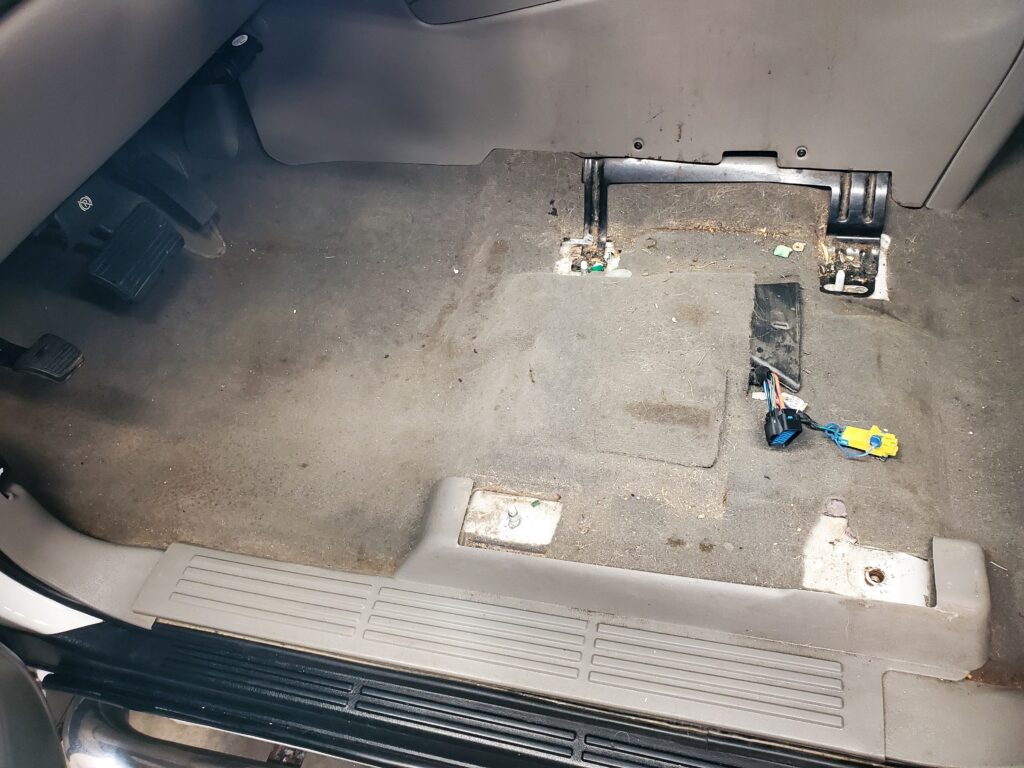
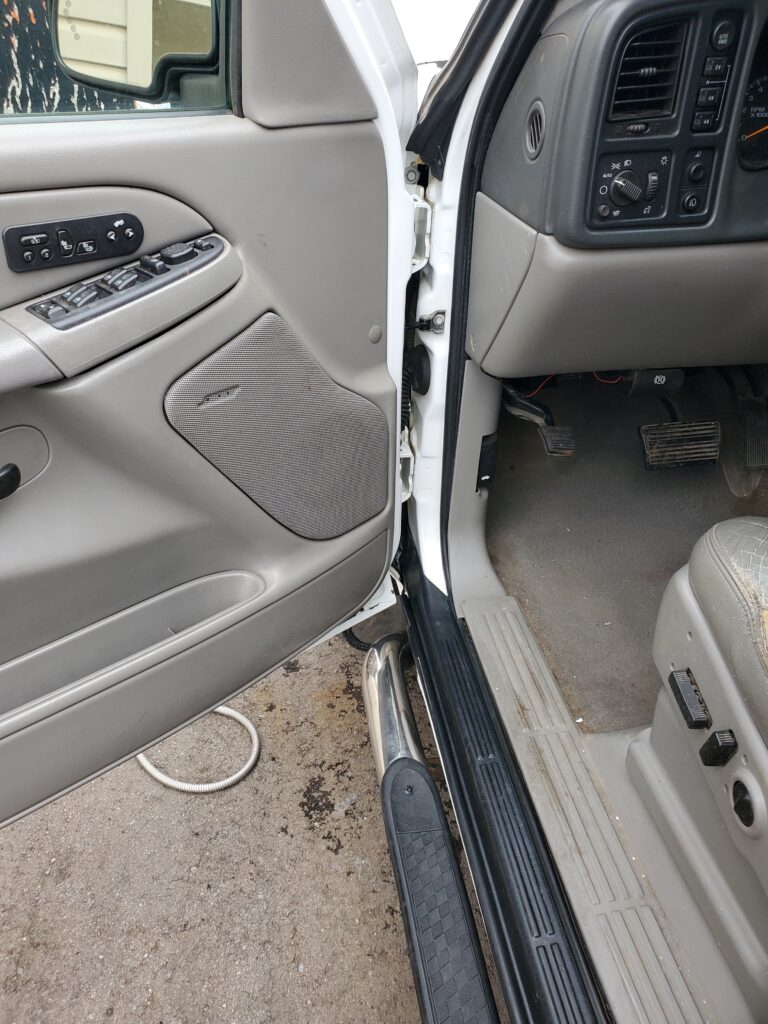
Yup that’s electrical wire and crimp fittings. I’m cleaning the hinges and painting them too. So skip back to #1 on the list. Drivers seat ! Came out easy with the right tools. And I’m $1.75 richer. I wonder what I’ll find under the passenger seat ? A quarter ! Now I have two bucks !
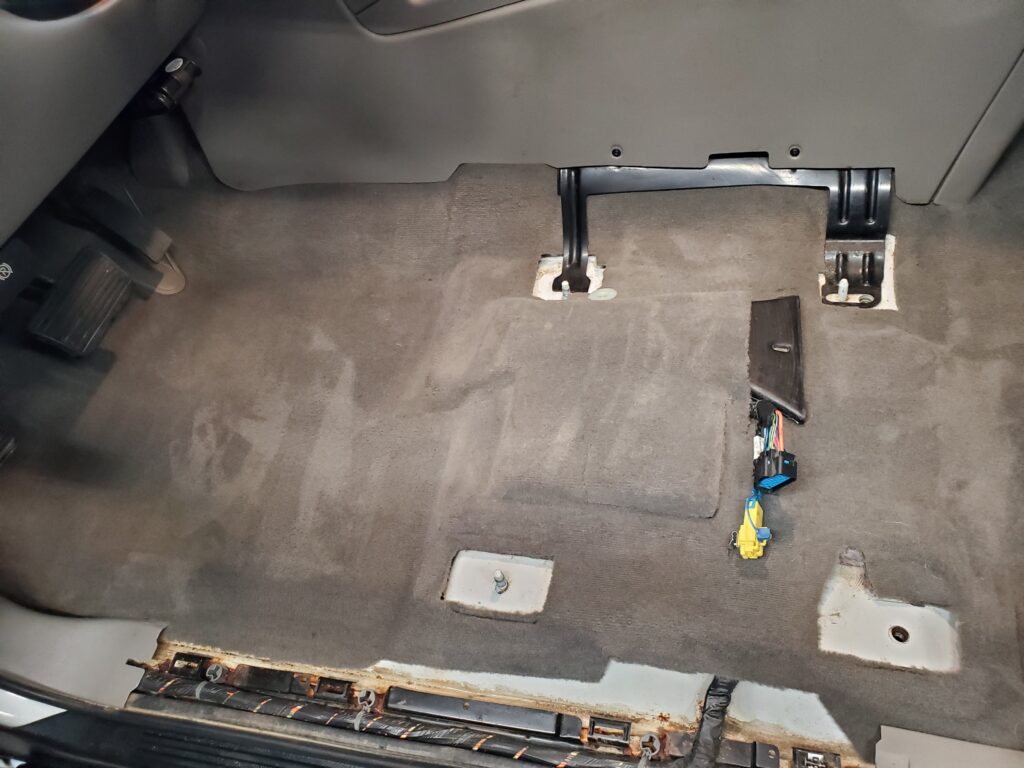
Not near as bad as it could be.. This should clean up real easy.
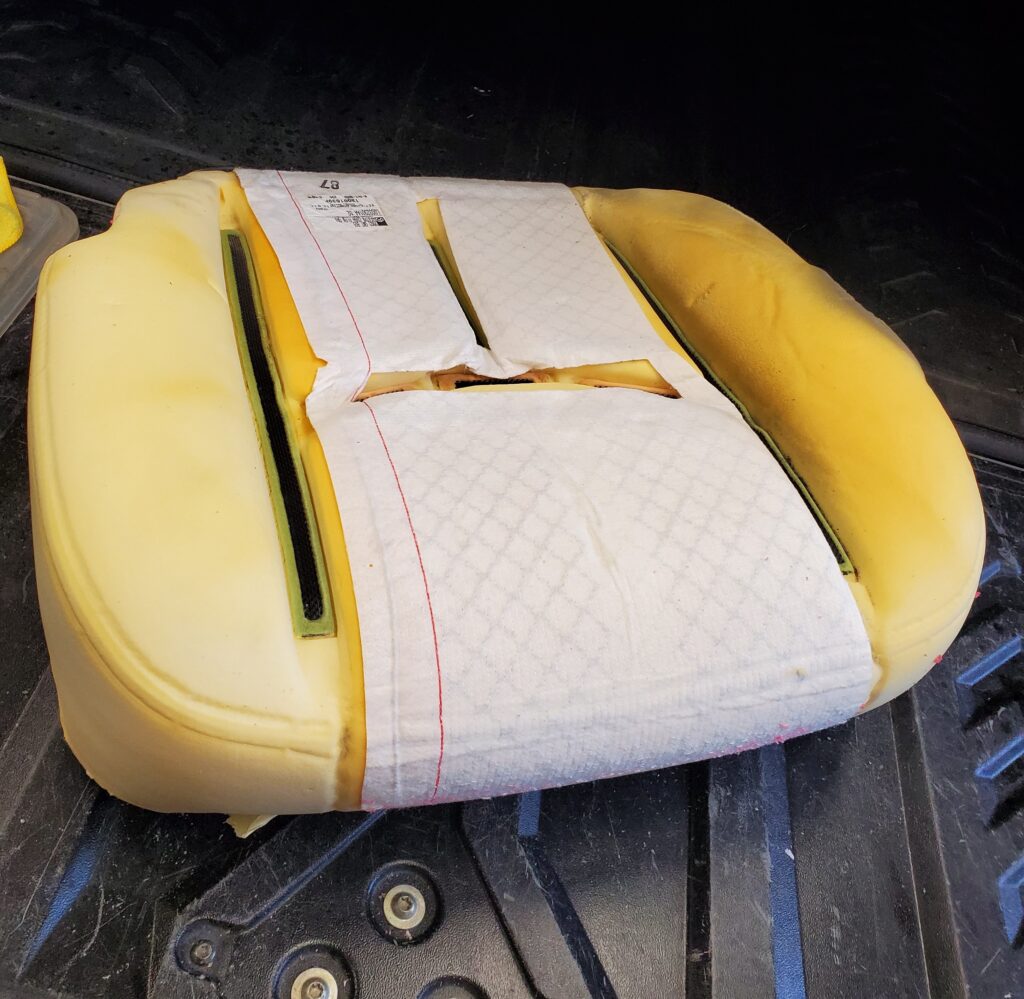
Yes it sure did ! Once it’s dry I’ll put the passenger seat back. The drivers seat will have to wait. Number one and number two are done. Well my fix for the side hatches did not work. The crimp on the wire was not strong enough.. So I’m making new ones with a stronger crimp and better wire. And I’m waiting for some pop rivets to arrive tomorrow. In the meantime I’ll remove the bottom seat cover. I was pleased to see the heater pad to be in perfect condition.
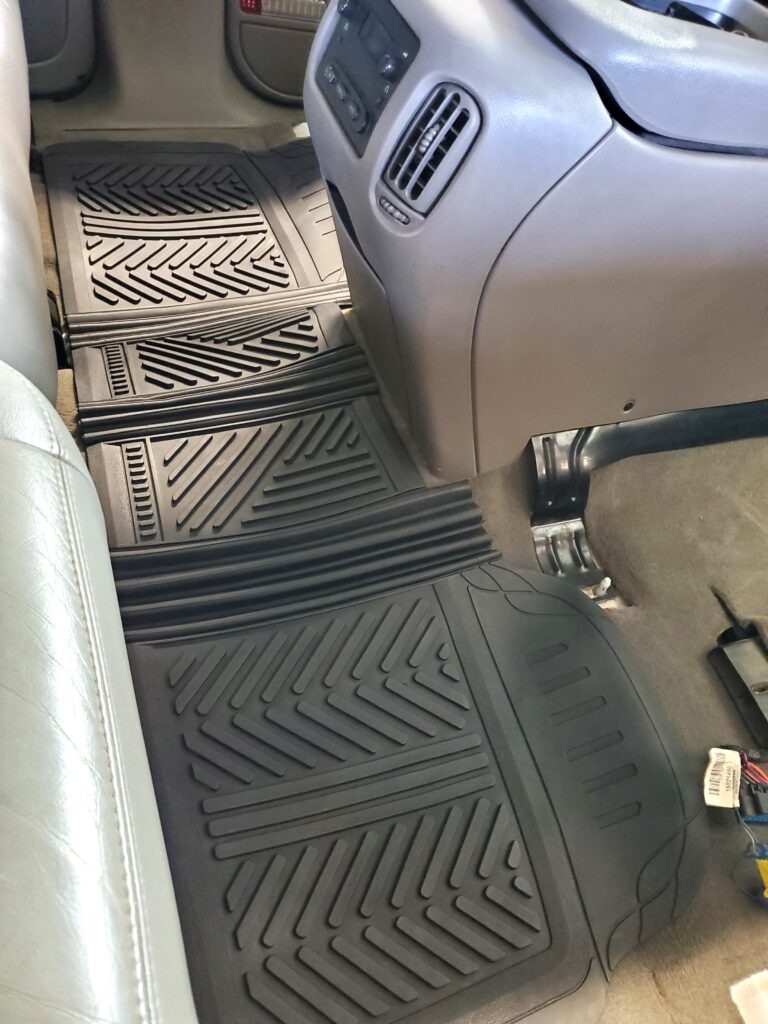
I’ve watched the videos on how to install these covers.. so I should have no problems. Oh my new floor mats came yesterday. The carpets are dry today so here they are.
The rear mats even cover the hump! That great…
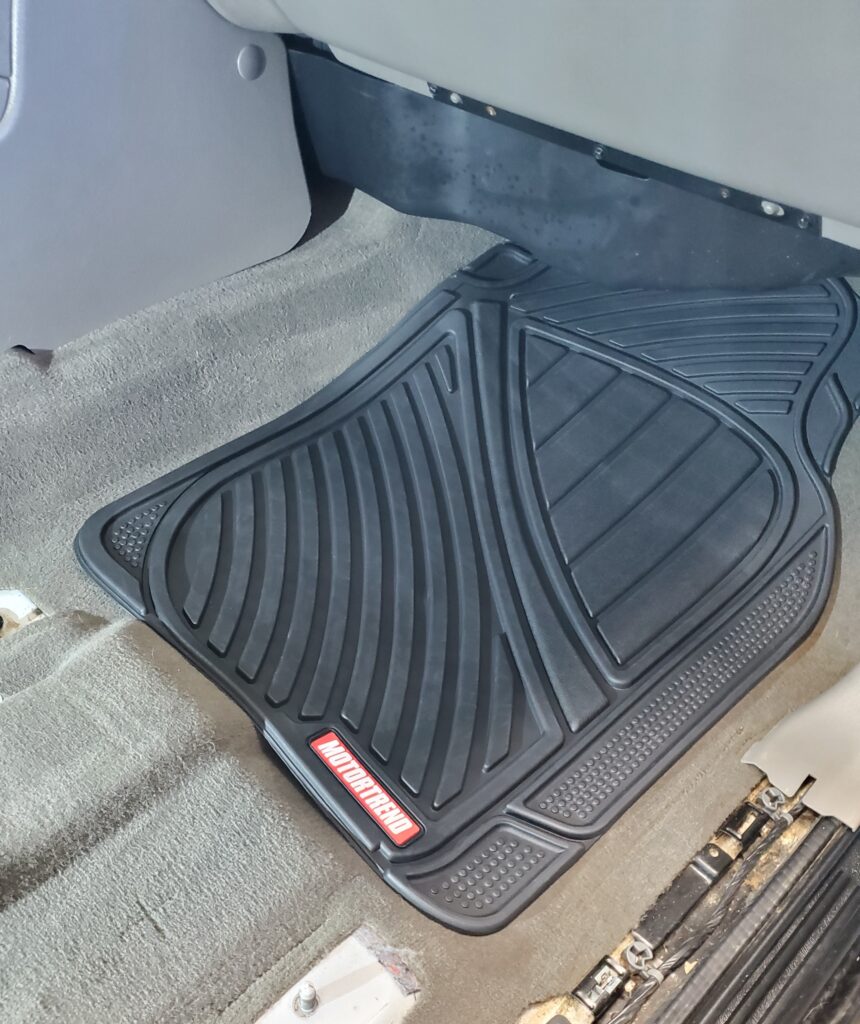
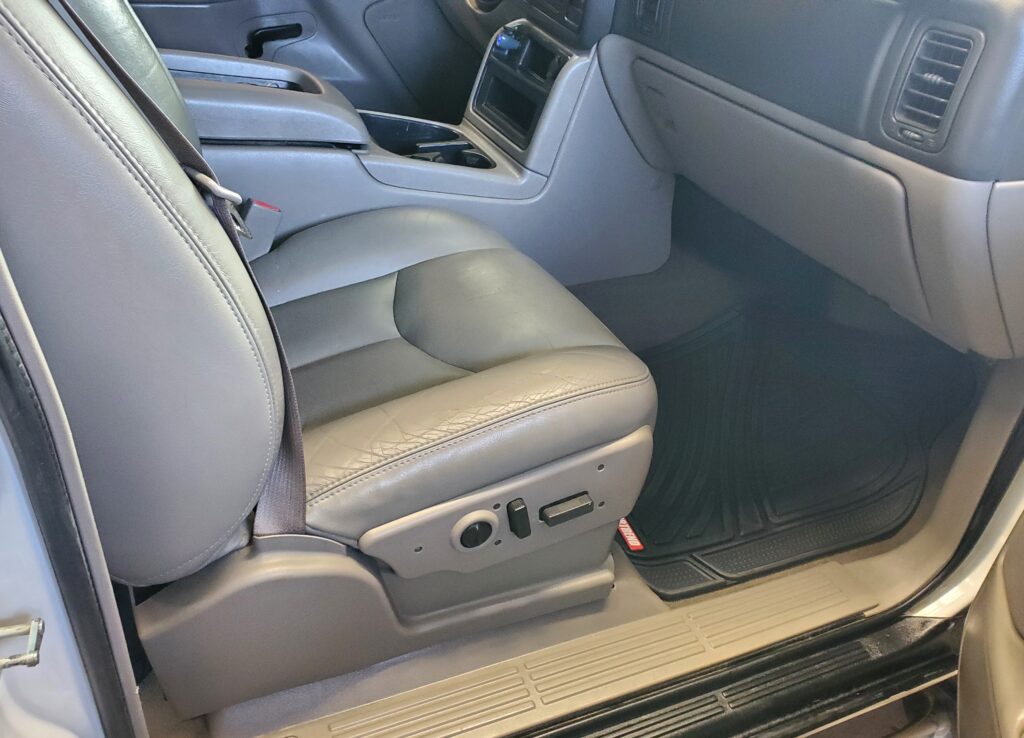
The front’s are very basic but do the job of protecting most of the carpet. Sorry about jumping around from one thing to another. However I’m waiting for things to come, dry… and that’s how I work anyway. Passenger seat is back in, and it’s never going to look this clean again.
But I will try. There’s still a few things on the list, and I’m finding more… but let’s not rush into it. One more thing I did take the tailgate handle apart ( I know how ). Cleaned and lubricated and it works great. There’s protection product that blackens the plastics on the rear parts. It’s a nice contrast with the white.
I’ve got two days till the seat cover comes so I’ll work on the hitch and the spare tire mechanism. And the (hopefully) final assembly of the side hatches. Also paint the bottom of the doors.
Yeah! This time it works, and looks close to factory.. , So far so good.. Much stronger than my first attempt. As for the spare tire lowering mechanism… I’ll need the tools from an auto wrecker to make that work. That means today is hitch painting day. Done ! And paint the bottom of the doors too. It’s taking a while to work through the list.. Meanwhile the hitch is all painted up nice, and I use some undercoat spray on other bits under the rear.
Yes it does not look new that’s for sure.. But it’s got rust sealer under the paint.. should do well.
And with this photo you can see I’ve installed the new seat cover. Was not hard to do.. And that’s the list all done, except for some bodywork. That’s next .. So here’s a new video.
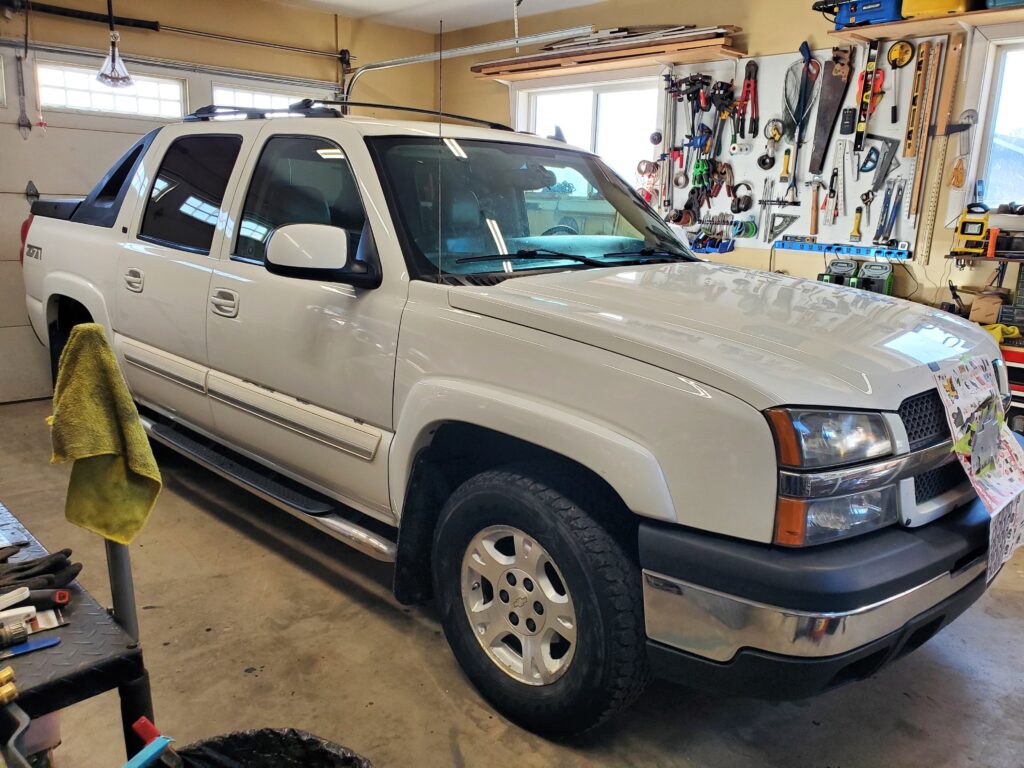
With all washing done outside now it’s time to welcome the Avalanche into the garage.
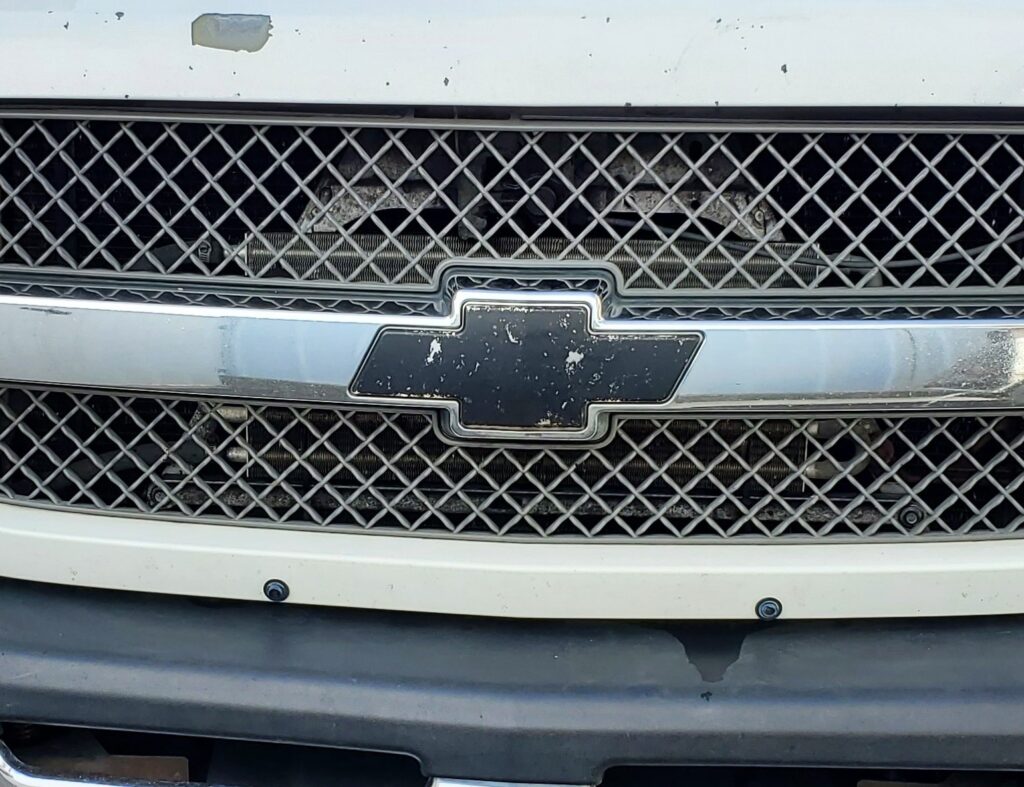
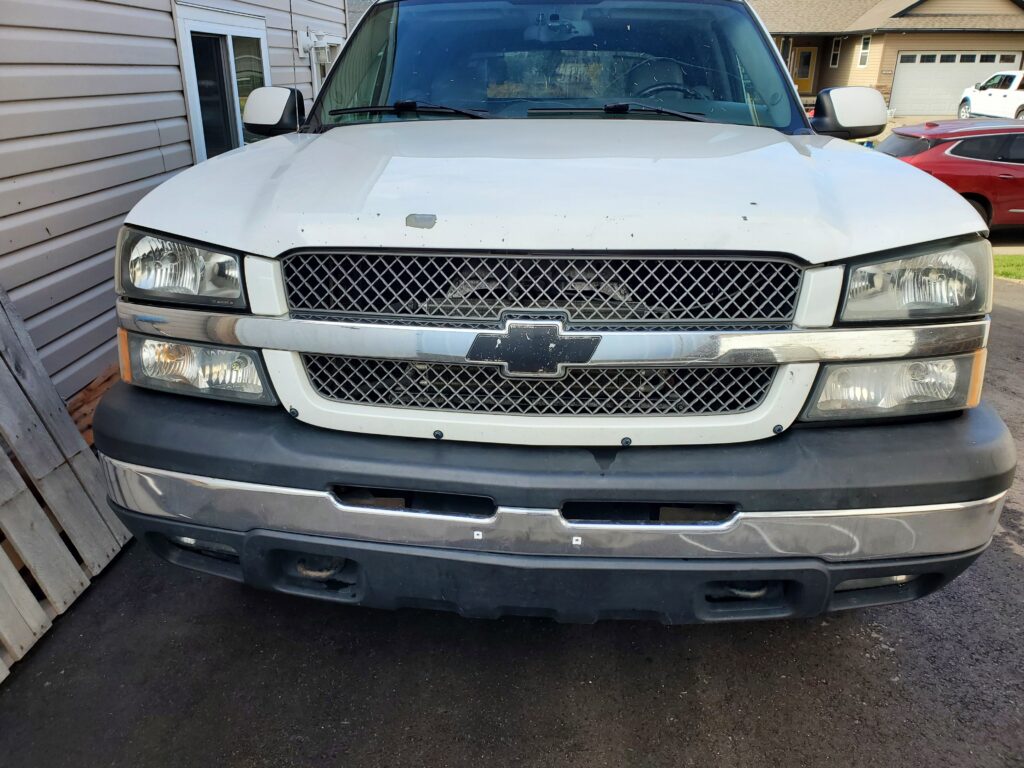
What’s going on with the grill… Well that’s me changing the messed up flat black Chevy bow tie back to gold. Sorry it was bugging me. No I’m not sorry…
That looks bad, and if your going to shine up the rest of the front …well we need to fix that.
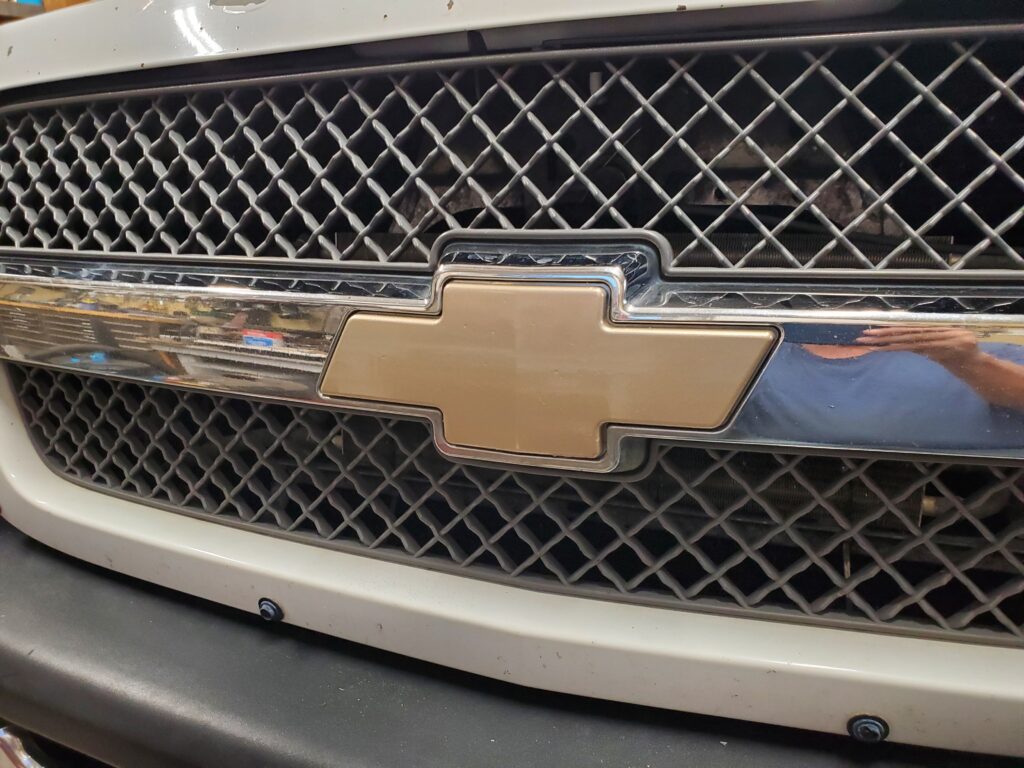
More to my liking!
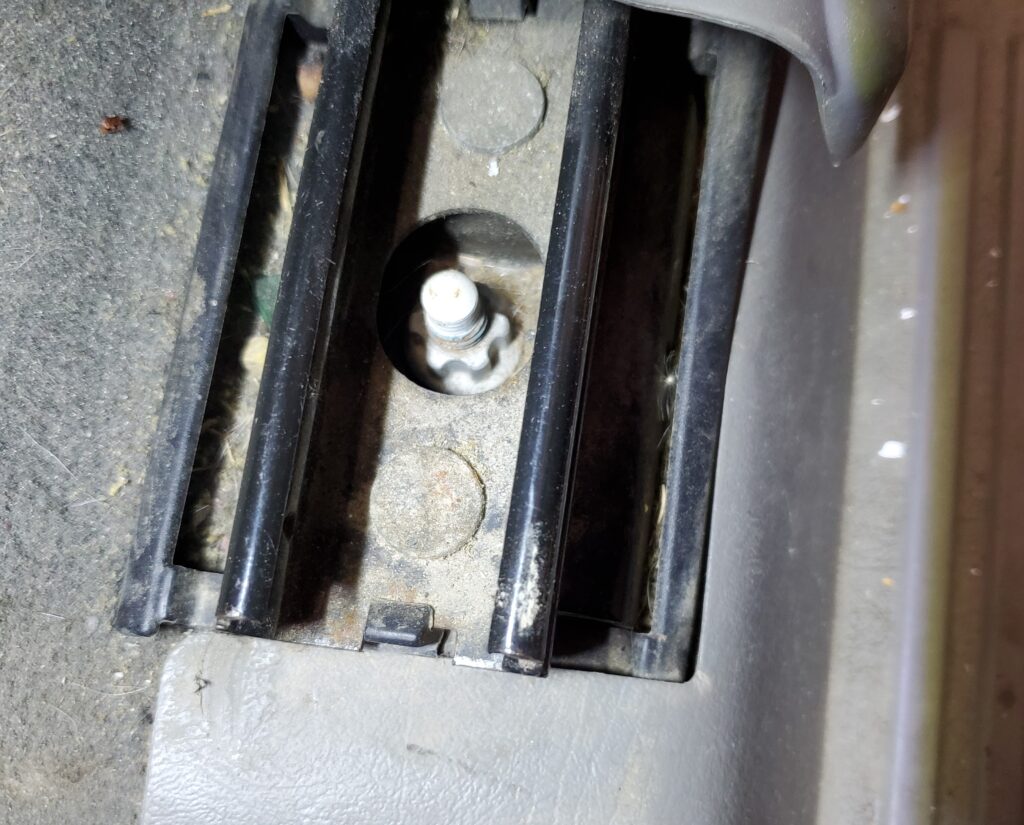
I’m doing other things too. While we are up front I changed the daytime running lights and the turn signals to nice bright LED’s When they arrive the fog lights will be LED’s too. And there will be more to change in the interior. I also tested the trailer plug , and it shocked me by working 100% correctly. Today I got my new key fobs, 4×4 buttons, and new LED door lights, Now it’s time to rid the Avalanche of the parasite called a “remote start”. Of coarse it’s not working, and of coarse it’s causing problems. This means the driver’s seat may have to be removed. Two reasons for that… easier to work under the dash, and I need to replace the leather seat bottom. And wouldn’t ya know it.. there is special bolts holding the seat.
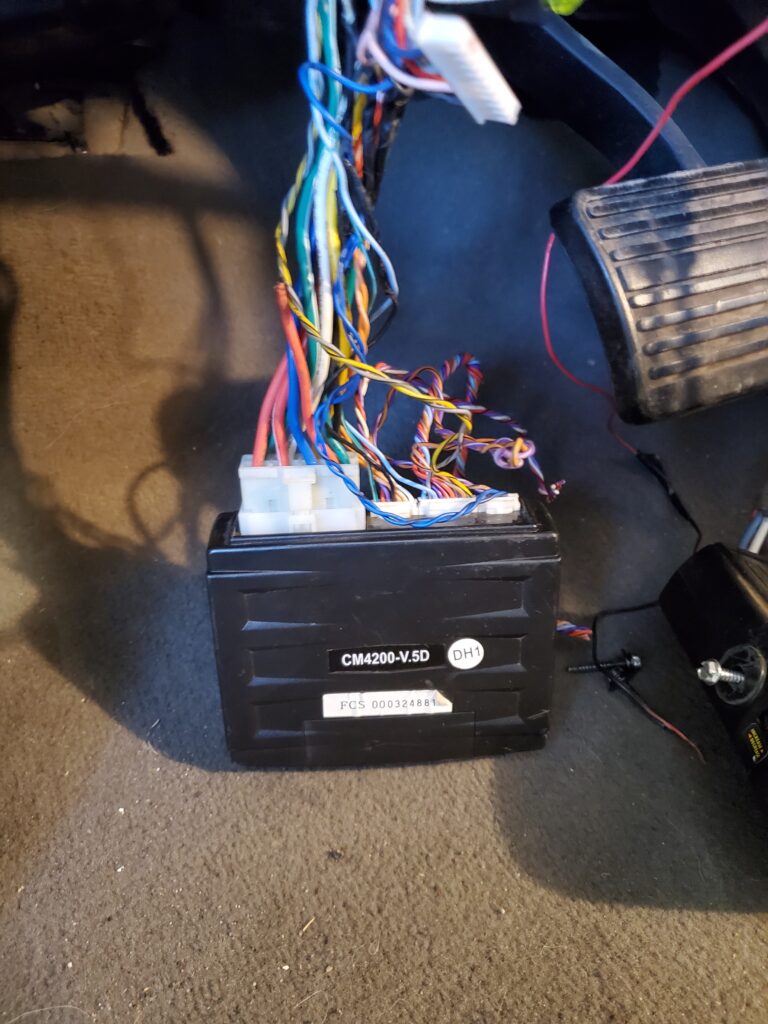
What the heck kind of nut is that! I’ve ordered the right sockets. Due to arrive in a few days. In the meantime I will work under the dash with the seats in. So I took the dash apart.. only takes me a few seconds because I’ve done this many times. Now I can find that problem black box.. AANNDD Found it !
And it’s 5 lbs of wires.. Looked up the wiring diagram for it to make sure I have all the connections.. Now your going bye bye.
And this is what I think of aftermarket remote starters. That’s the round file !
And With that done.. I was able to program one of the new Chevy key fobs I just got.. WE ARE GOOD ! While I have the dash apart I’m going to do some cleaning and change the older brake controller for the new ” Primus IQ” trailer brake controller. I have now done a good cleaning of the interior, except for the driver’s seat and the carpets. I have a week to do those things. Here’s a new video #2..
I’m finished with the front of the Avalanche for now, so today I’ll turn it around and back it in. There’s a bit of work to do on that end of things. Here’s my list..
Remove the seats now that I have the proper tool.
Clean the carpets. New floor mats are coming.
Paint the trailer hitch. Can’t have it rusty.
Repair drivers side rear hatch cable.
Fix leaking gaskets on the box covers
And of coarse install the new seat cover when it comes. One last photo before I turn the truck around.
All spiffed up except for the front of the hood. Let’s start a new page for that list.
I’ve lost count of how many Avalanches I’ve had over the years !
What ! Ok I’m told this is number seven.. What can I say… I love’m !
I have a post about those many many Avalanches .. HERE
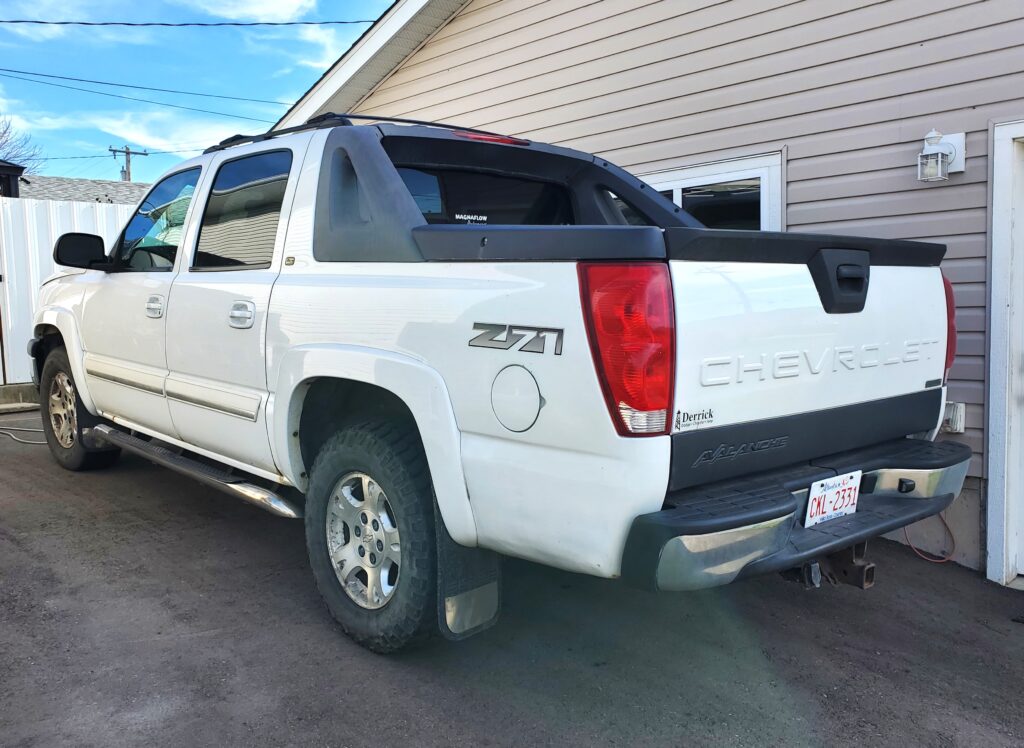
All I have for now is the photos from the ad.. and the Avalanche is still in Edmonton because it needs a left front hub replaced before a long trip. I’m in no hurry, and will pick it up when I get a ride up there.
It looks good in these photos.. And the body is way better than others I’ve seen, the interior is also very good. However we need a bit of mechanical work. Oh .. runs and drives, the motor and transmission also seem fine..
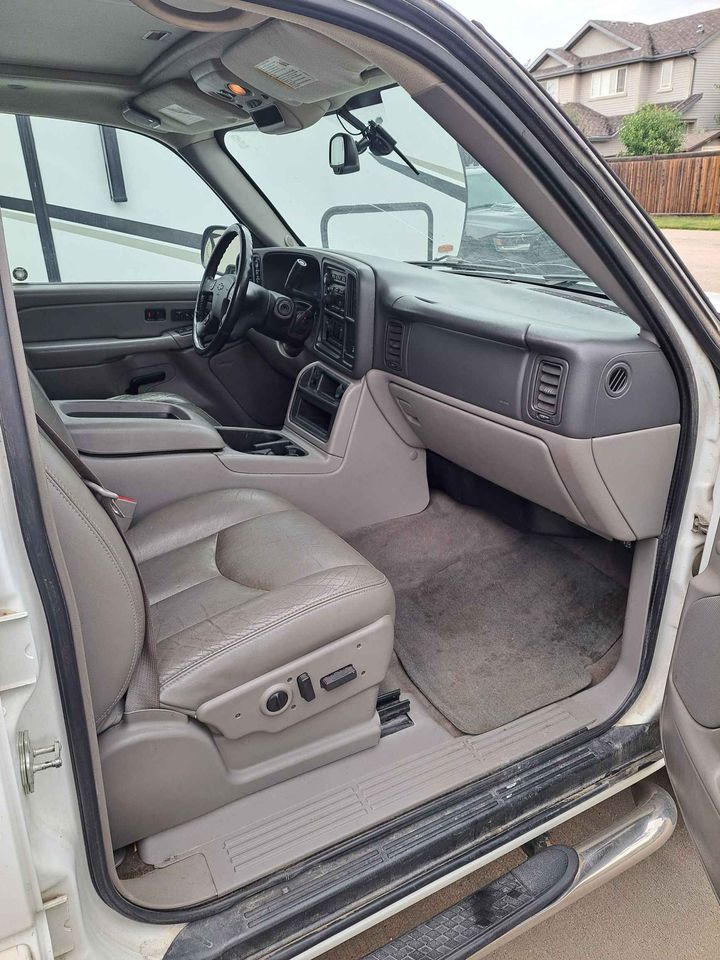
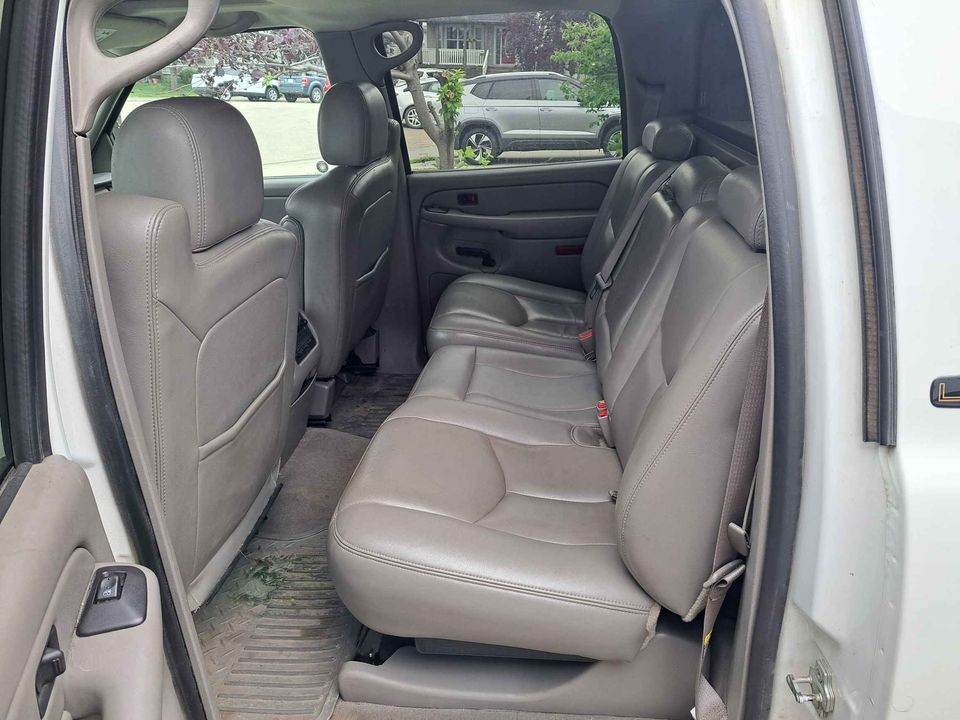
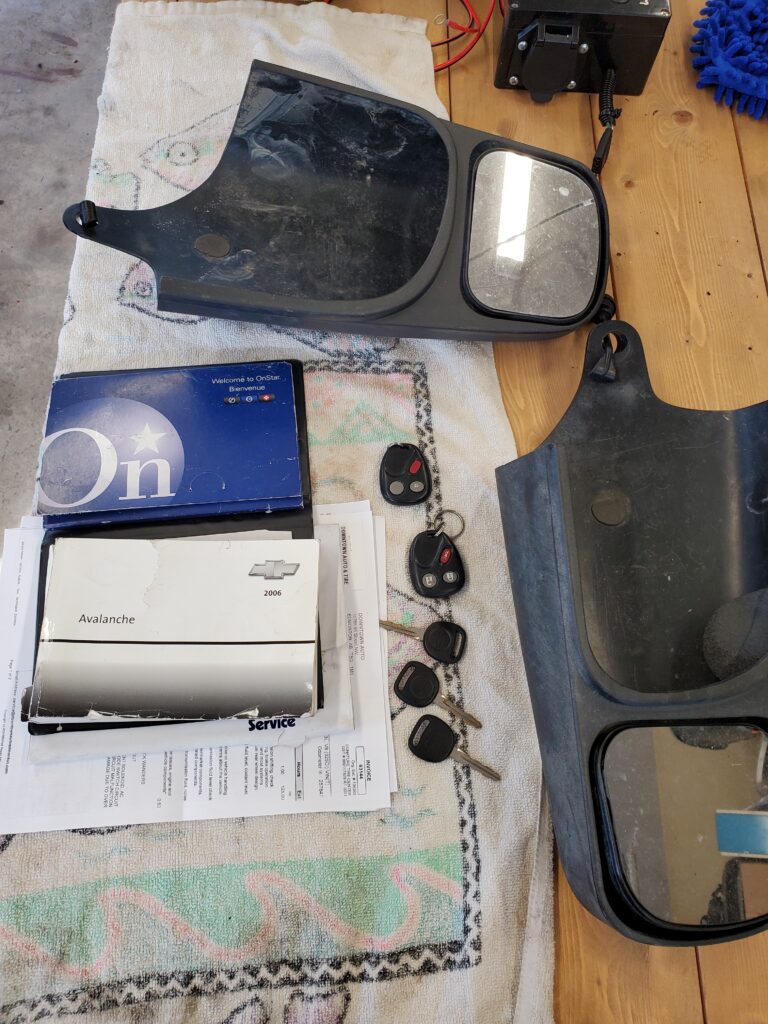
I’ll start with the positive stuff first. This one is a Z71 off road package with the 17 inch wheels. The model is a ” LT ” which is the deluxe model of that year. As you can see leather heated memory seats, Bose 6 CD stereo, Power folding mirrors, Trailer towing package, Auto climate control, Steering wheel controls and all the usual stuff that Avalanches have. And as an added bonus this one has the 4:10 rear end gears for better towing. Roof rack and the owners manual is in the glove box too!
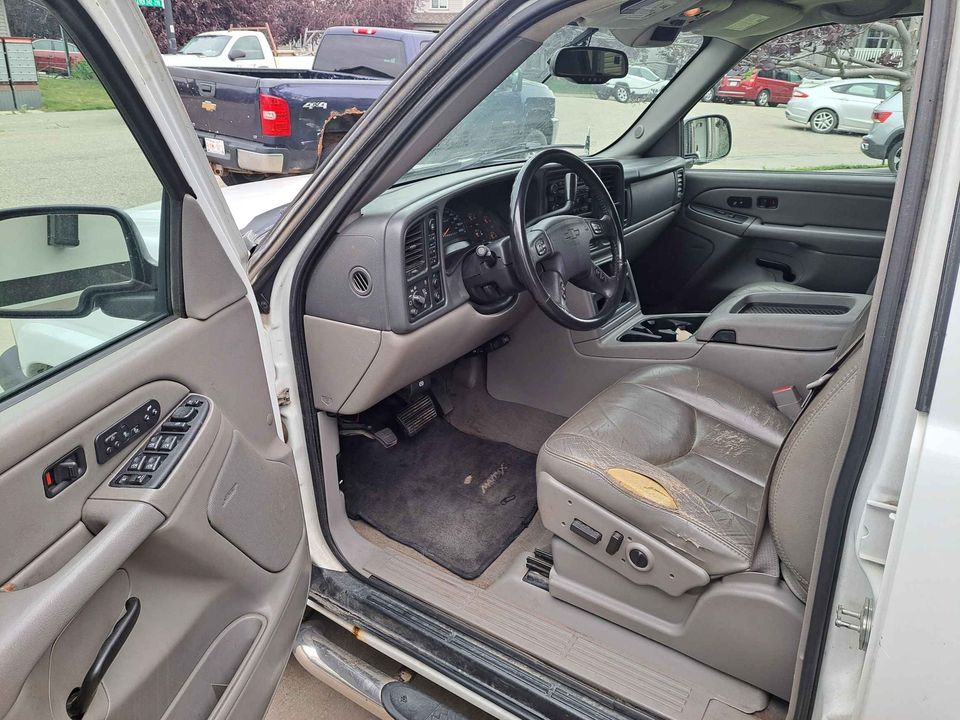
Ok enough of that… Now for the BAD ! The driver’s seat has a tear in the usual place.. They always do. But that is an easy fix, and it’s cosmetic..
Let’s see where to start.. Right away I need a new left front wheel hub, and possibly CV boots on that side too. The muffler is rusted out and the tail pipe is missing.. Too loud for me ! The check engine light is on… Told it is the O2 censer? We will see. The rear diff is wet from a leak.. The windshield has a big crack.. ( Alberta ! ). Someone installed an after market remote start piece of crap.. and of coarse it does not work and the cause of the locking not working.. I suspect the AC needs work too. The battery is old but okay for now. Needs a good cleaning too… But that’s just fussy old me .
The Avalanche went to a shop my daughter uses for an inspection of what’s up.. what’s wrong , what’s needed…. Here’s the quote.
“Hello Rob, here is a list of items we found during the inspection you can let me know if you would like an estimate for any of it. WINDSHIELD CRACKED, STEERING WHEEL OFF CENTRE , TRUCK WANDERS, POOR SHIFT QUALITY, PASS SIDE DAYTIME RUNNING LIGHT OUT, DRIVERS FOG LIGHT NOT WORKING, CODES FOR KNOCK SENSOR, EVAP VENT SOLENOID, AC REFRIGERANT PRESSURE SENSOR, MODE SWITCH CIRCUIT MALFUNCTION AND KEY IN IGNITION CIRCUIT MALFUNCTION ( there’s that f@%&g remote start), FRONT LEFT WHEEL HUB, MAY HAVE DAMAGE DUE TO OVER HEATING AND SEIZED CALIPER, Needs TIRES LT265/70/17 Thank you Alish.”
I corrected some spelling and added the comma’s. Well I knew of all these things but question the caliper. No mention of three of the things I was told by the fella selling the Avalanche. And they are.. The missing exhaust system, and the cracked CV boots. And the wet Differential ? Sooo The Avalanche is going to the muffler shop in Edmonton and they will also replace the hub. Not going to fix anything else for now just want to get it home..
Sure enough they found the caliper to be damaged, so got that replaced and new brake pads. Driver’s side axle boot is split , but I’ll fix that. It’s funny no one is mentioning the rear differential ? The Truck should be good now to drive back home safely. So I’m taking the bus to Edmonton this weekend and do just that. And that worked out good. Got all the fixes done quickly and at a very reasonable cost. Drove the Avalanche the three and a half hours home without any issues. The steering is still a little loose. Or an alignment is needed, and I think the front axles are protesting. But the truck was WAAAAYYY quieter and the cruise control worked perfectly. I could be hearing and feeling the 8 year old tires.
We are home !
And I’m taking inventory of the things I found inside.. The manuals, inspection sheets from 2021, key fobs, the proper antenna and a pair of RV mirror extenders.
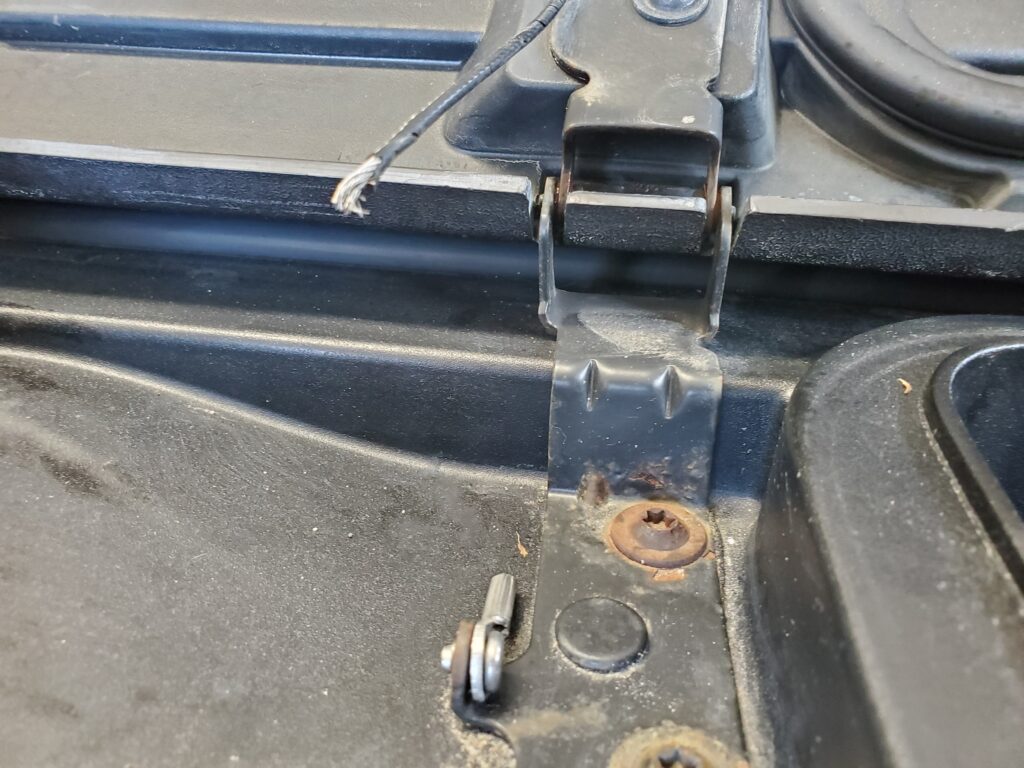
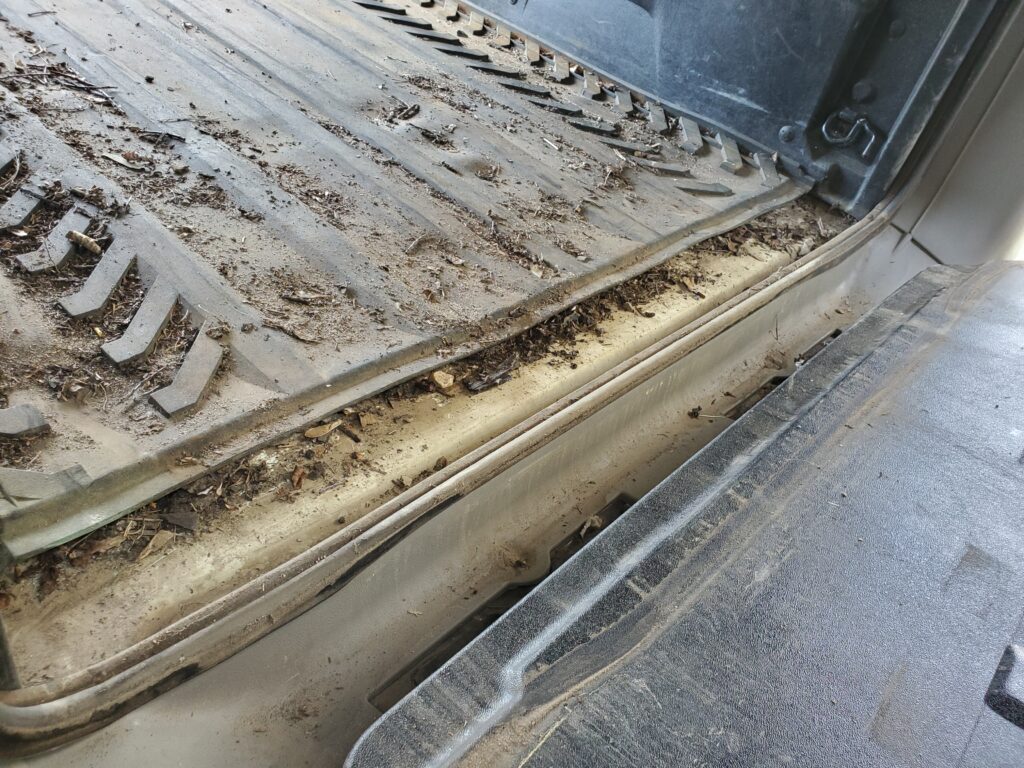
I thought I’d better make sure the mid-gate works. Sure enough the cover that covers this gap and folds with the mid gate has come off it’s mounting, and there’s what seams like 19 years worth of dirt too.
So there is certainly some cleaning to do… I’ll start tomorrow. Mostly the interior and the motor bay.. I thought of a way to fix the broken mounting ears on the cover.
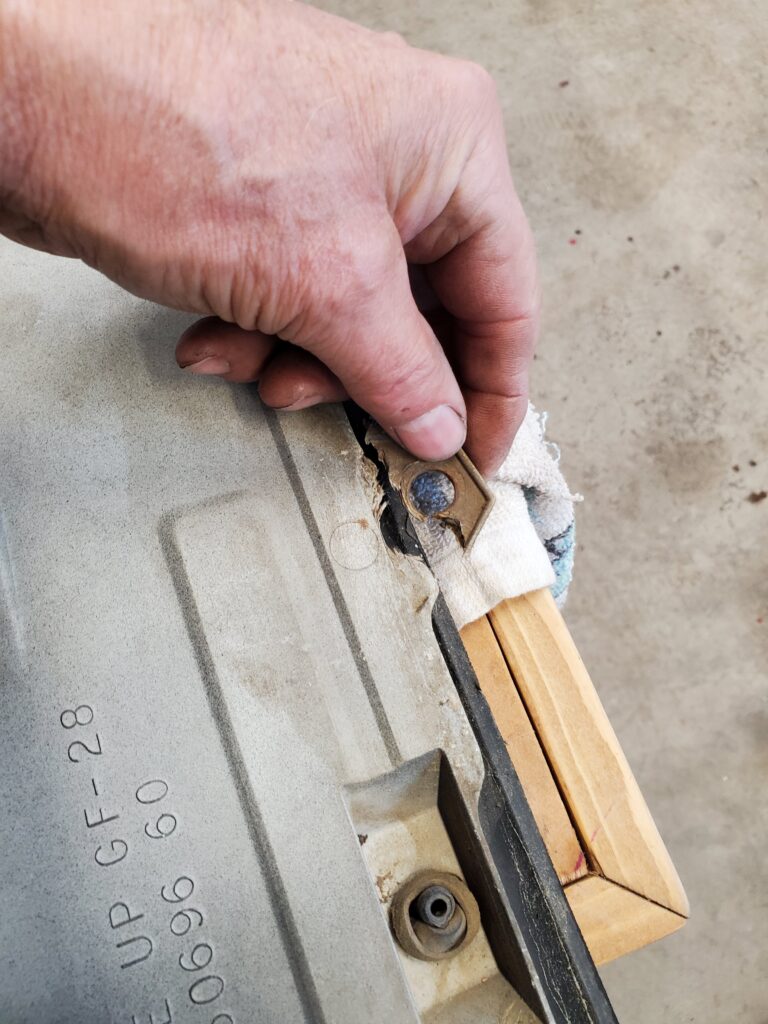
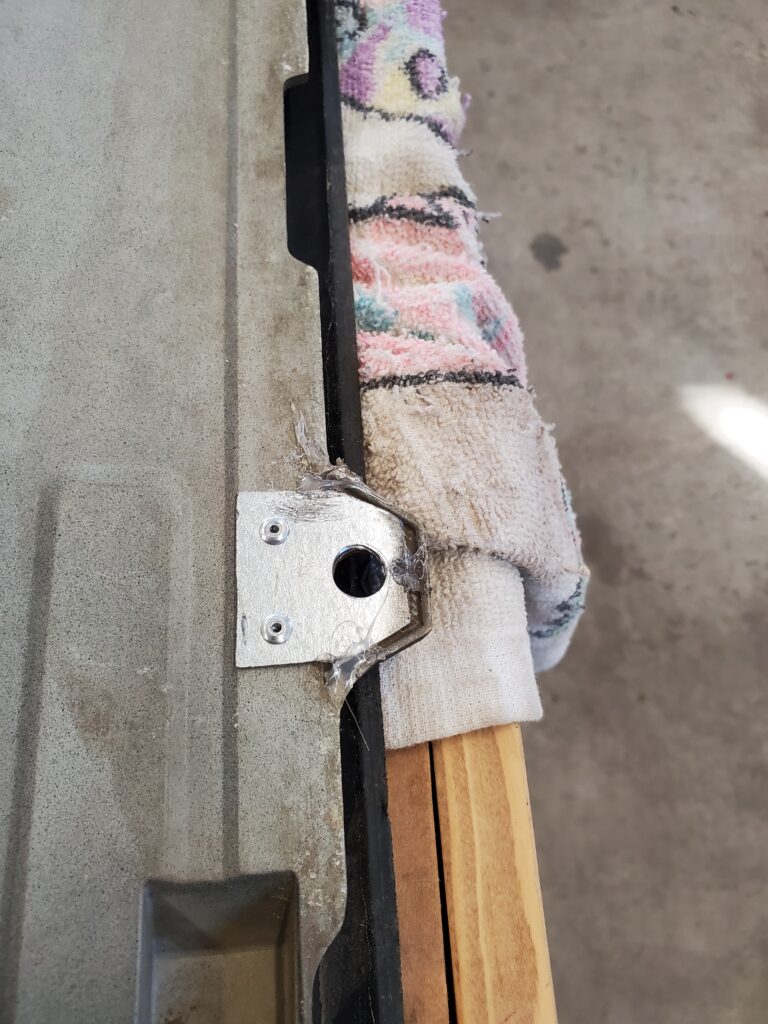
This is some kinda moulded fibre something ? And these hold the whole thing in place.. I’ve seen this before. They brake if you jam something up front and it catches the lip. Here’s my fix. …
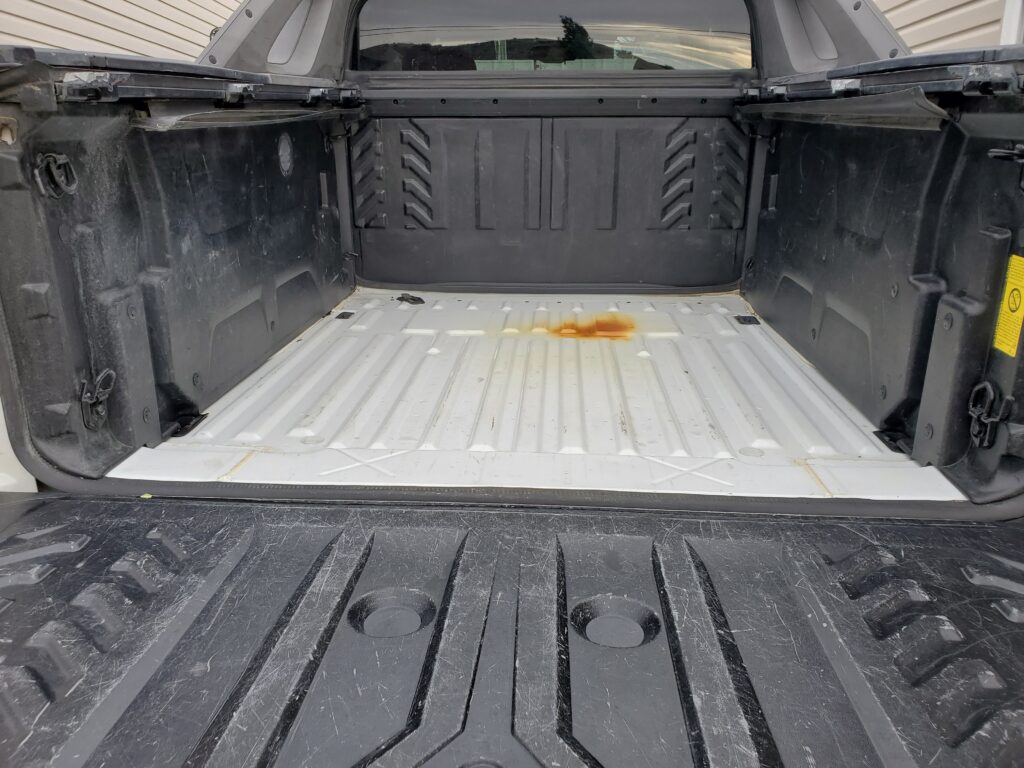
Pop rivets ! and a custom metal ear. After the cargo area was clean and dry, I re-installed the cover.. Speaking of cleaning… How’s this..
That looks like a rust stain.. Nope it’s from heat ! And that’s what you get for not replacing the tail pipe from the muffler back. Good thing the rubber mat is not damaged. As I clean I’m realizing that the body and all the “avalanche” bits and pieces are in very good condition. No dents.. All the covers and cubbyholes work the way they should. While I had the pressure washer out I cleaned the door frames. Also treated some rust spots.
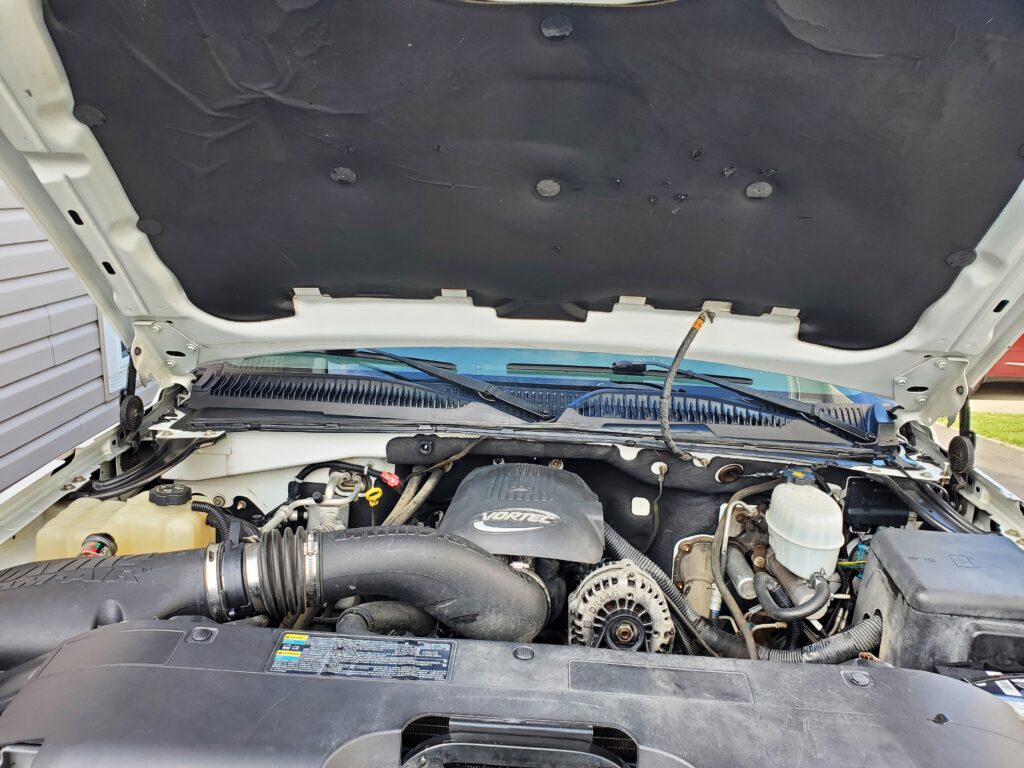
Looks great ! Original white paint by the way. Someone liked those “Bose” speaker emblems a lot.. They just had to have them. The interior will get it’s turn for cleaning in the garage soon. But the motor is next while it’s outside. Darn I forgot the “before” photo.. But anyway here’s the after.
It wasn’t super bad.. mostly dusty. Just as long as I feel better. I took the two headlights into the garage for a good polishing. And then I used a ceramic coating on them.. Yup they are better too.
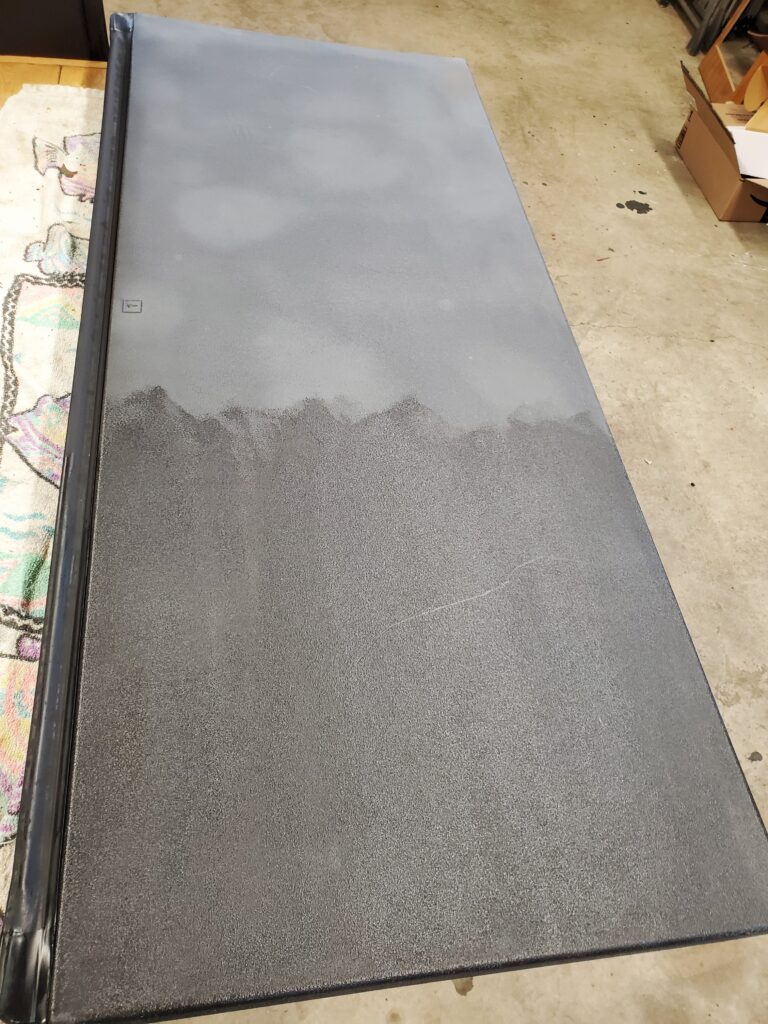
Now the turn and DRL’s look not as good. Oh well… One more thing too do while I have room in the garage.. Clean and treat the box covers. Found a good product for fixing the faded grey.
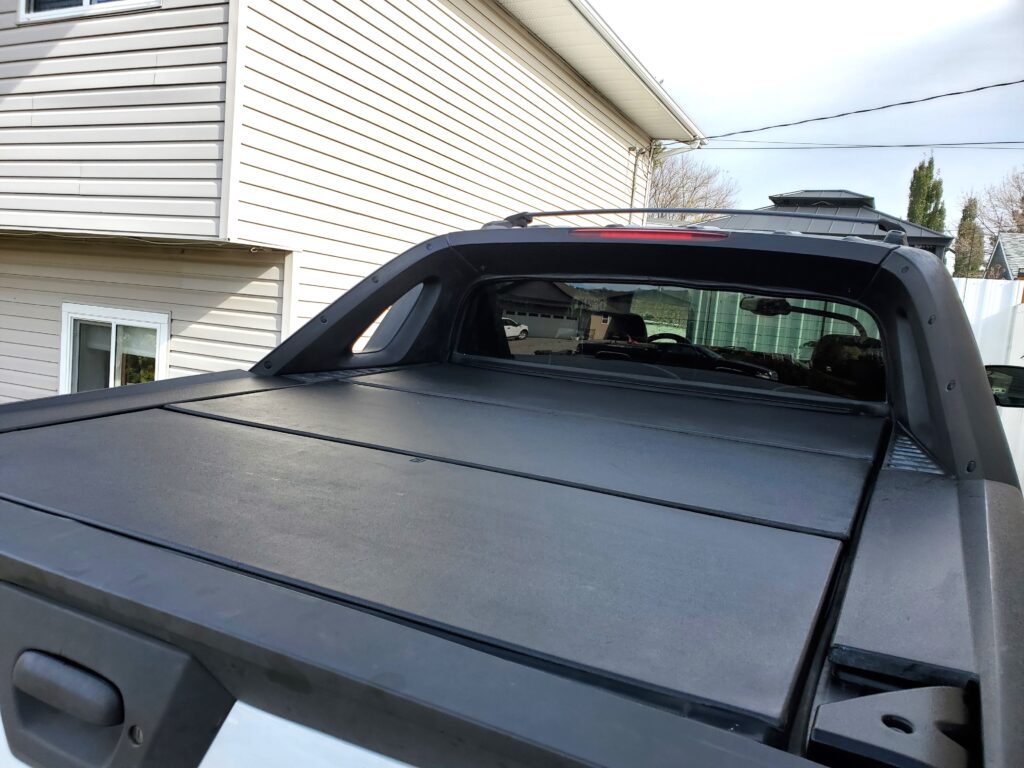
Supposed to last a year.. We will see.. But it really did remove many years of fading. And now they look new and so does the other plastics !
Looks like it’s wet.. But it’s not. So with the messy stuff done, it’s time for the Avalanche to visit the garage… But first here’s a new Video I made..
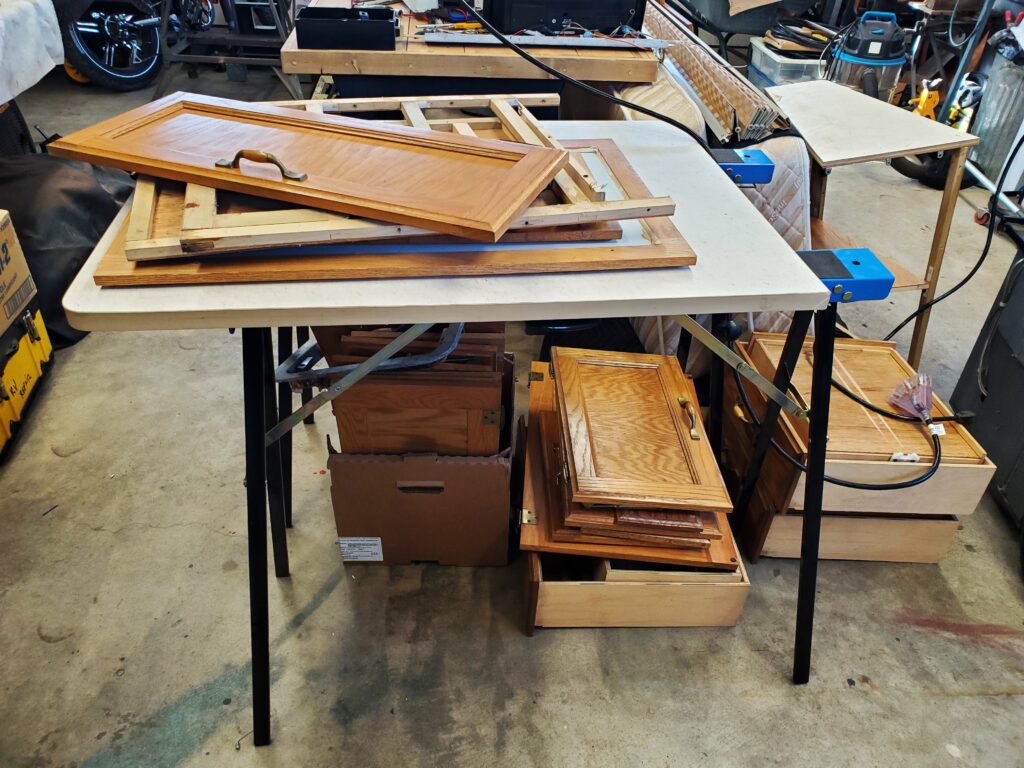
Or at least the doors and drawer fronts. Then they will be ready to install in the spring.
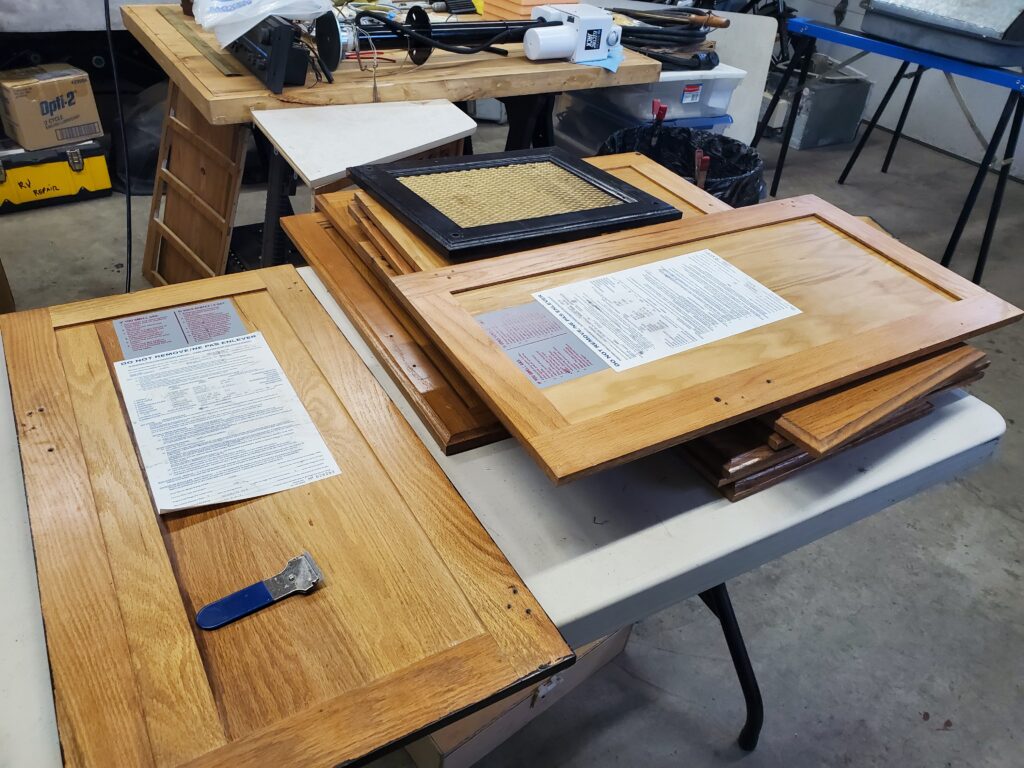
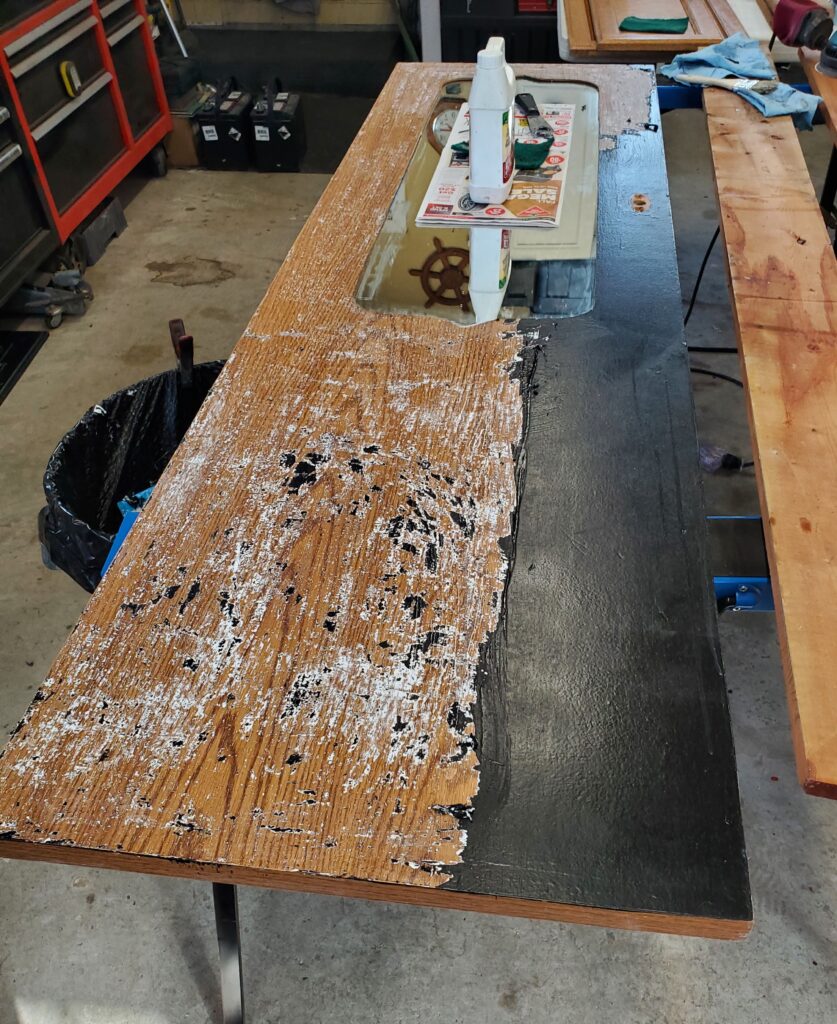
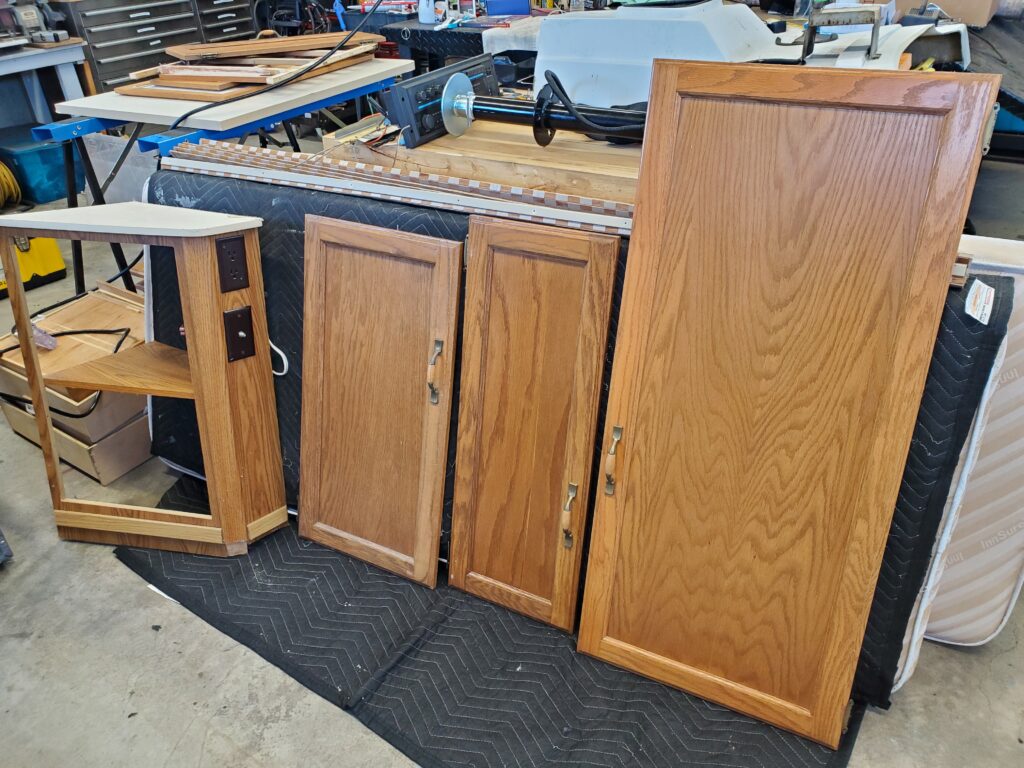
Above we have the two doors from under the sink from both trailers. One painted black on the front only , and one not. I’m carefully removing the build sheet from our trailer to apply it over Dave’s door. You can also see the black painted furnace cold air intake on the pile. This is unique to our trailer so it’s the only one I have. I stripped the black paint off and now it looks like new. Wood plugs cover the screws on this and also on the two wall mirrors.
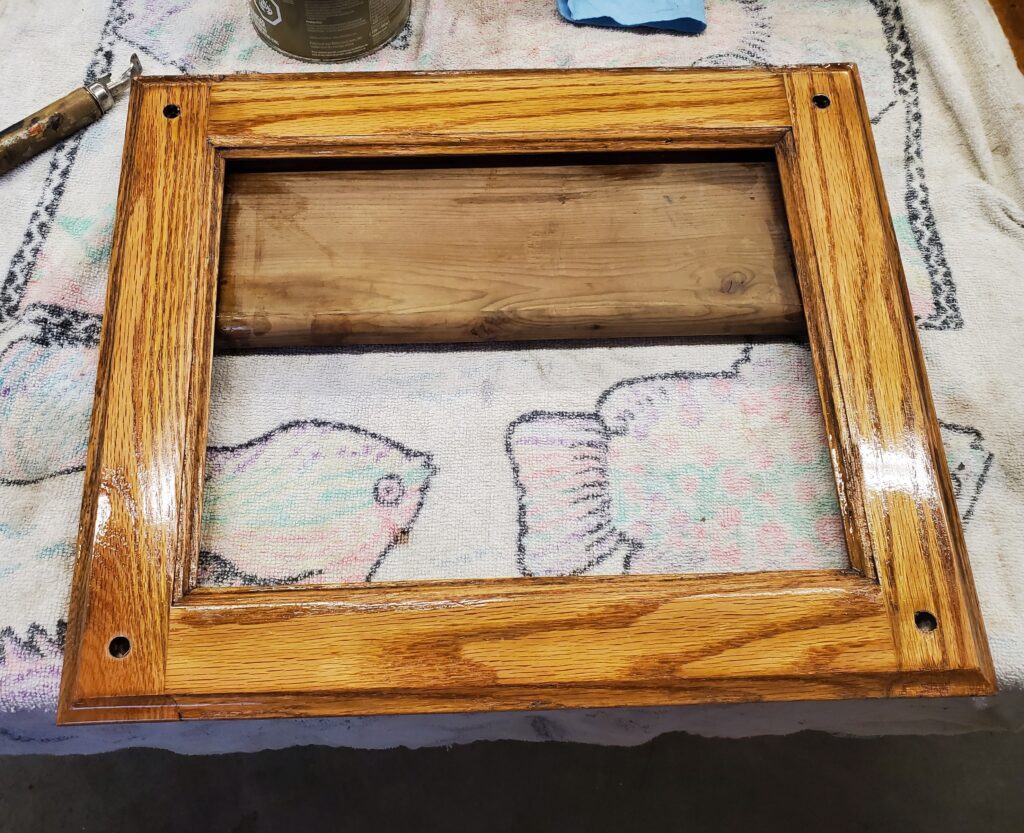
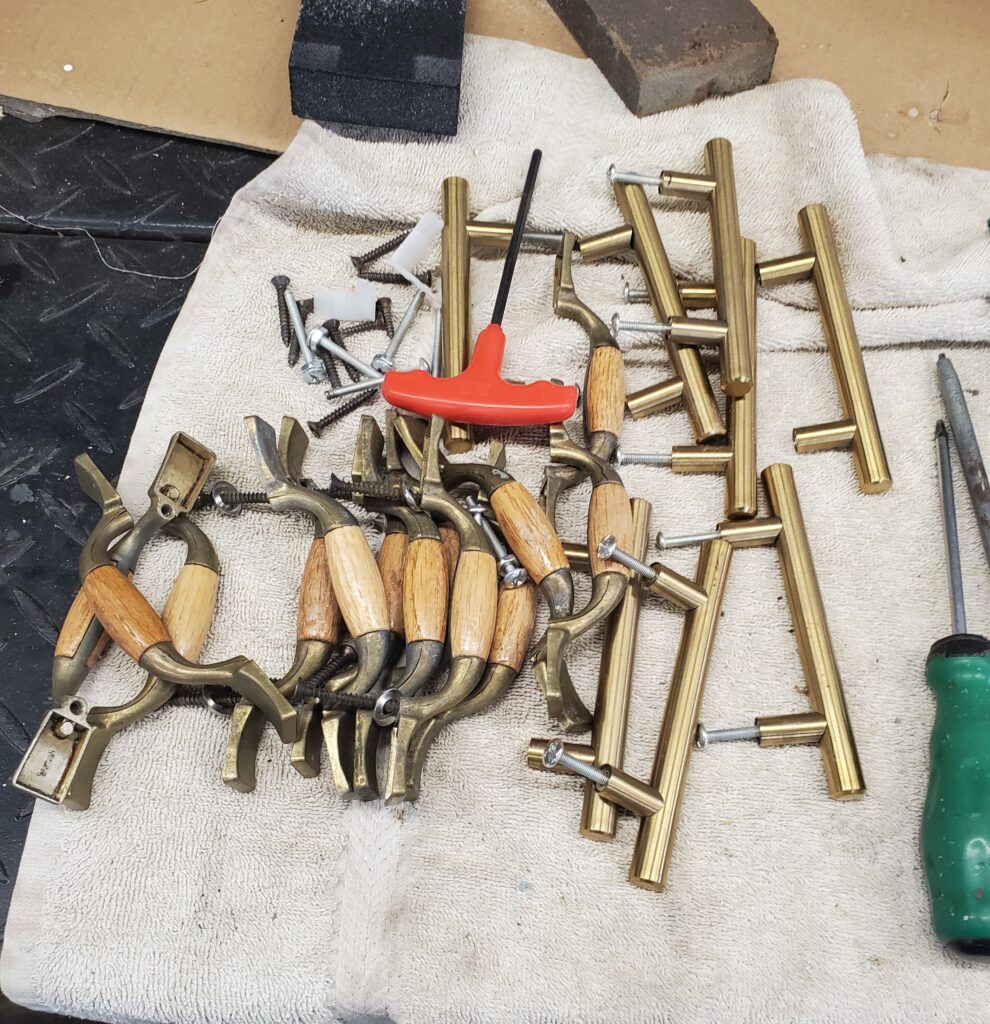
This is finished with Minwax Polyshades classic oak satin finish. All the doors and fronts will get this treatment. They will also get new handles to match the gold ones used in our trailer.
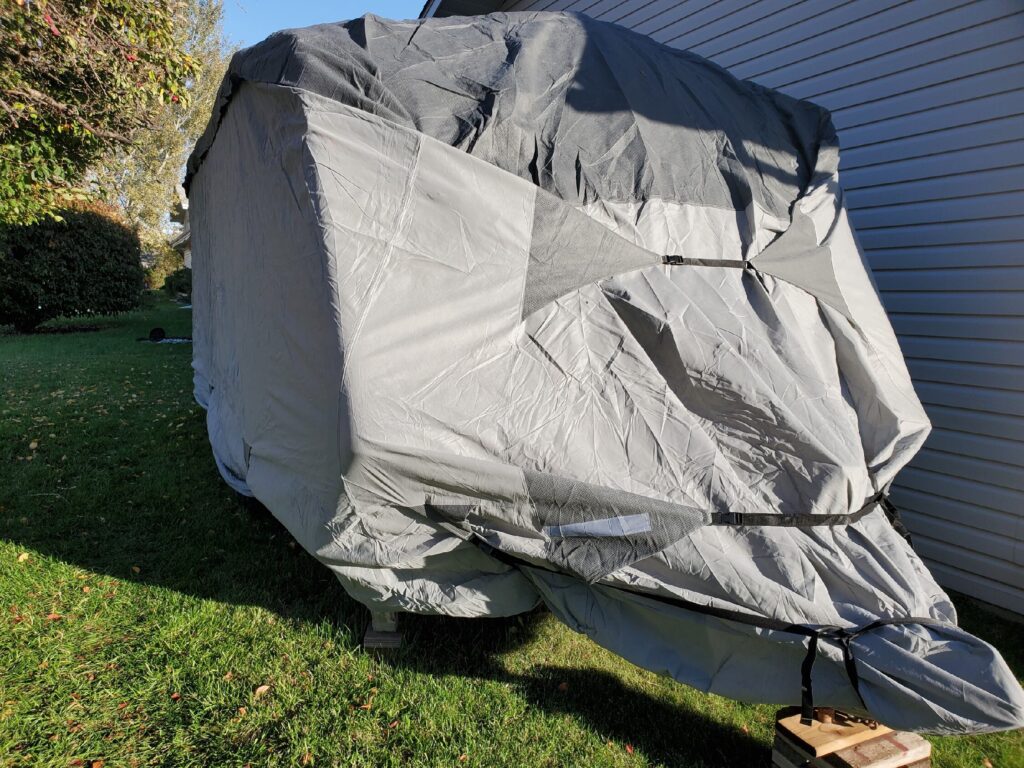
Here’s the old and the new. And the old are looking old. Got more of the gold ones coming. I should say that I removed anything that can be taken to the garage to work on.. The trailer is about to get covered , and will stay that way till spring. One other thing I removed was the bathroom door. It too was painted black only on the outside. Nope I can fix that.. Here’s a few photos showing the transformation.
Stripping the door down using a friendly paint stripper. Then I applied a dark stain, wiping it off right away to even out the colour.
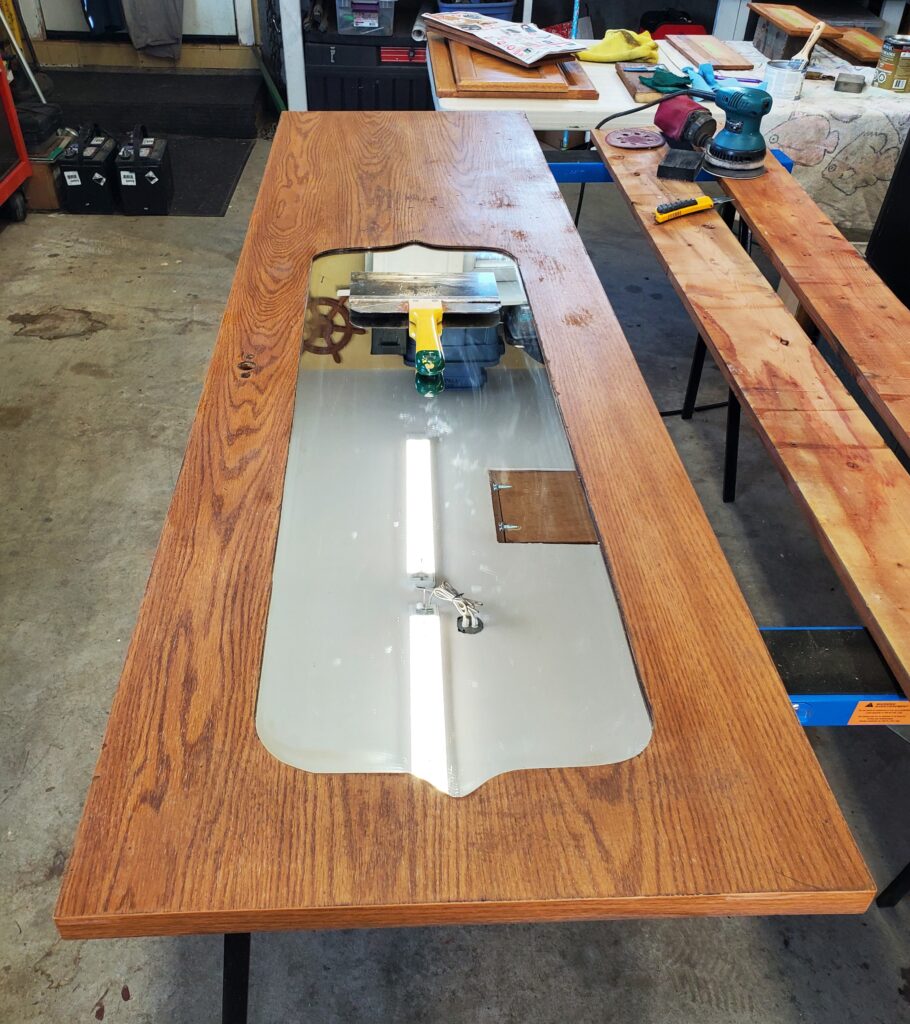
Still needs a second coat but now we have an oak door on both sides. But the satin poly finish will make it “pop”. Meanwhile I’ve been collecting some of the electrical goodies.
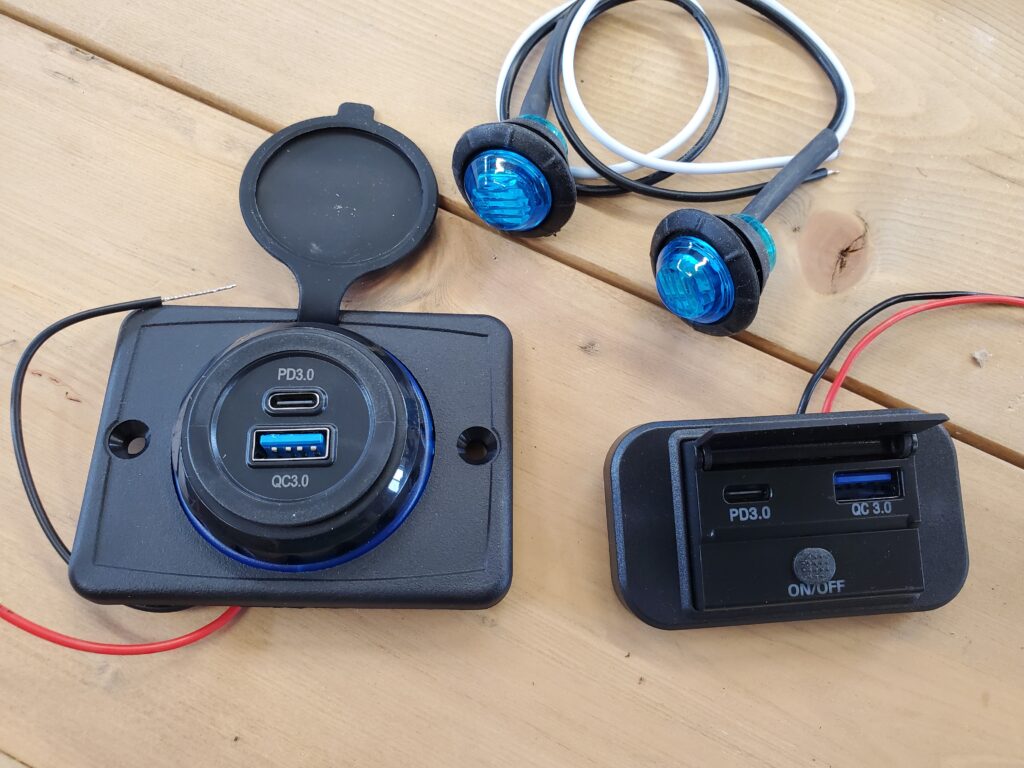
Blue penny lights to use as night lights. ( I have more coming). And two different types of USB charging ports. I like the one on the left. These will be replacing the useless TV cable outlets.
Now I’ve finish all the re-finishing that needed to be done. All the parts and pieces have been stored back in the trailer. Except for the ones that will be modified like the night stand. It was a warm day so the cover went on too.
I like to keep mother nature away for my RV’s as much as I can. These covers breathe and repel water too. All ready for winter !
March 2025..
It did great over the winter with the cover.. Soon we will be packing all the camping stuff into the Award for our move back to Grand Forks , BC. And that’s a good place to start a new post..
Let’s have a look inside shall we. This isn’t my first interior design rodeo.. Yes it needs a bit of work. We want to keep the black and white theme but tone it down a bit.. In other words less back. We’ll start with a video tour.
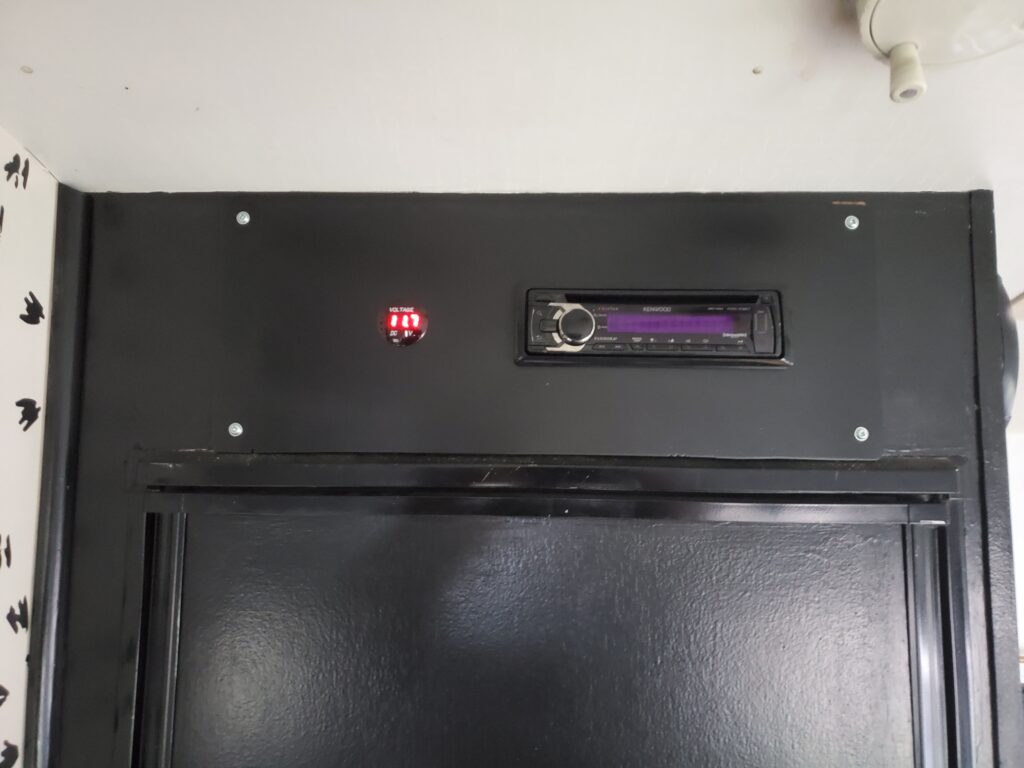
See what I mean.. Some things are not ever to be done and some things should be left as they were. And there are things that need a change. Like the stereo situation.. The fancy little blue tooth thingy.. Nope not my thing. This is my thing…
I had all these things in my garage, the Kenwood stereo, voltage readout and an old aluminum sign which has donated many pieces to different projects. Oh look the batteries are in need of a charge. A week later the battery is not showing signs of charging… Hmm. Not that we will be camping on the batteries …but that means the inverter charge isn’t doing it’s job. Have to check on that.
September 9th:
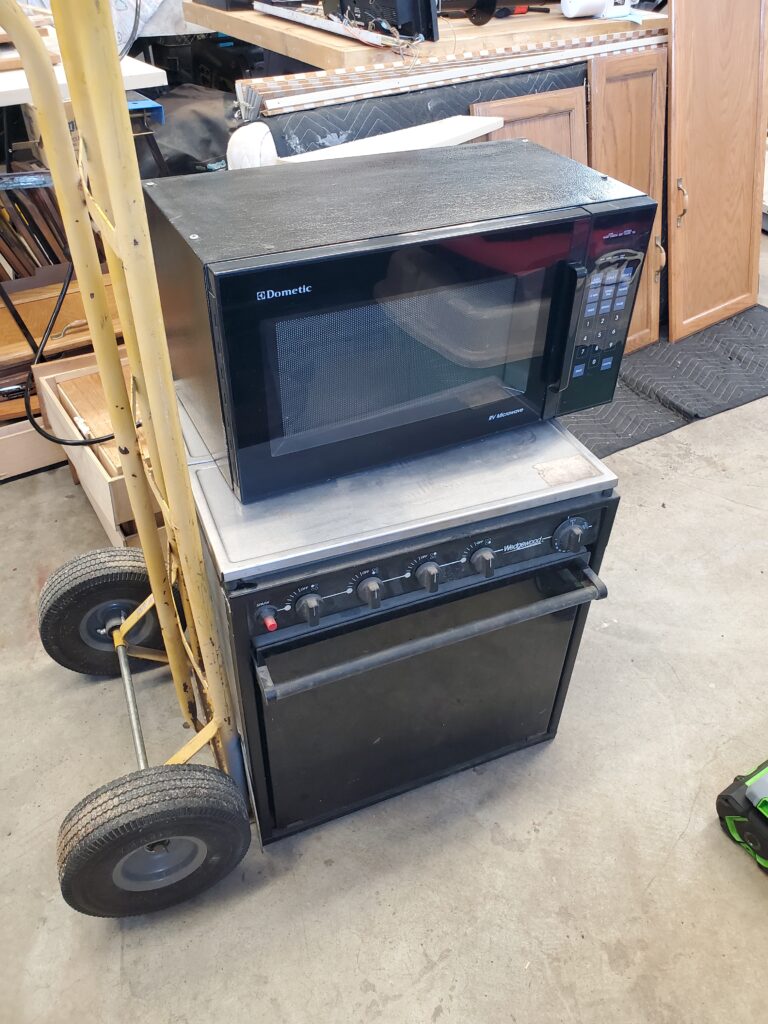
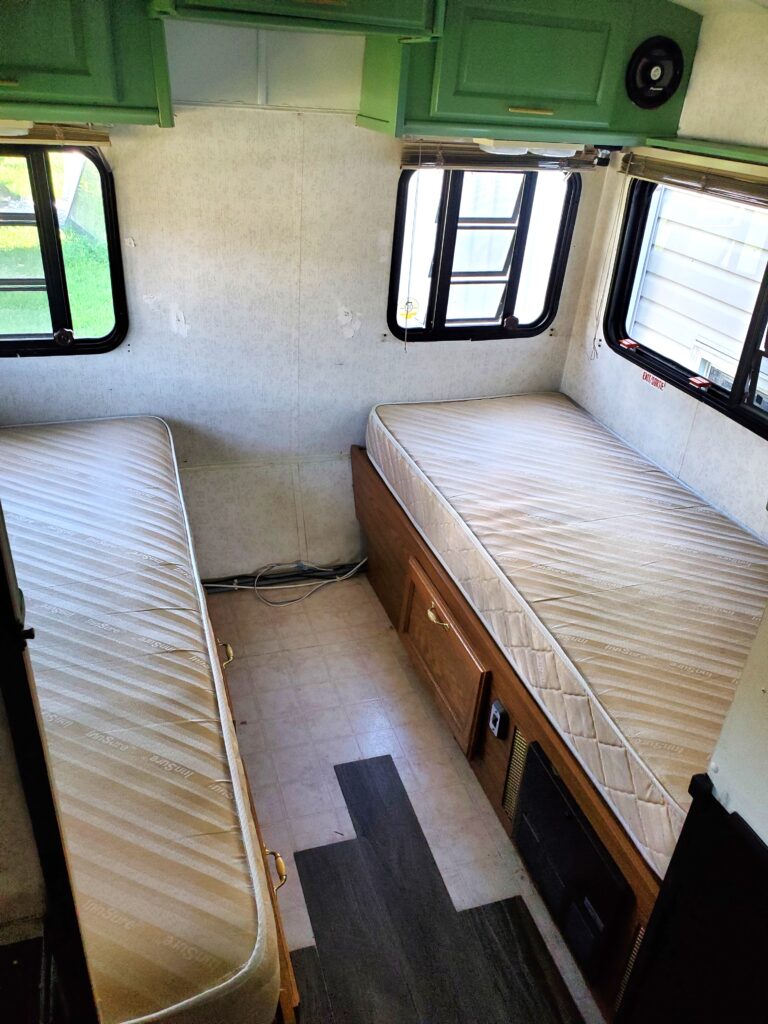
Road Trip ! I took my truck to my friend Dave’s to steal parts from his old Award trailer. Came back with lot’s of goodies. Some we need like the two twin mattresses, Hot water tank, Roof AC unit, stove, microwave, cabinet doors and drawers. Plus other bits and pieces.
I’ll use that small corner cabinet in the new living room I plan to make… Later.
Exact same stove and microwave… Ours are still good.. Only need the steel cover off the stove
I’ve got plans to use some of this stuff. Can we say ” night stand with two drawers” OAK !
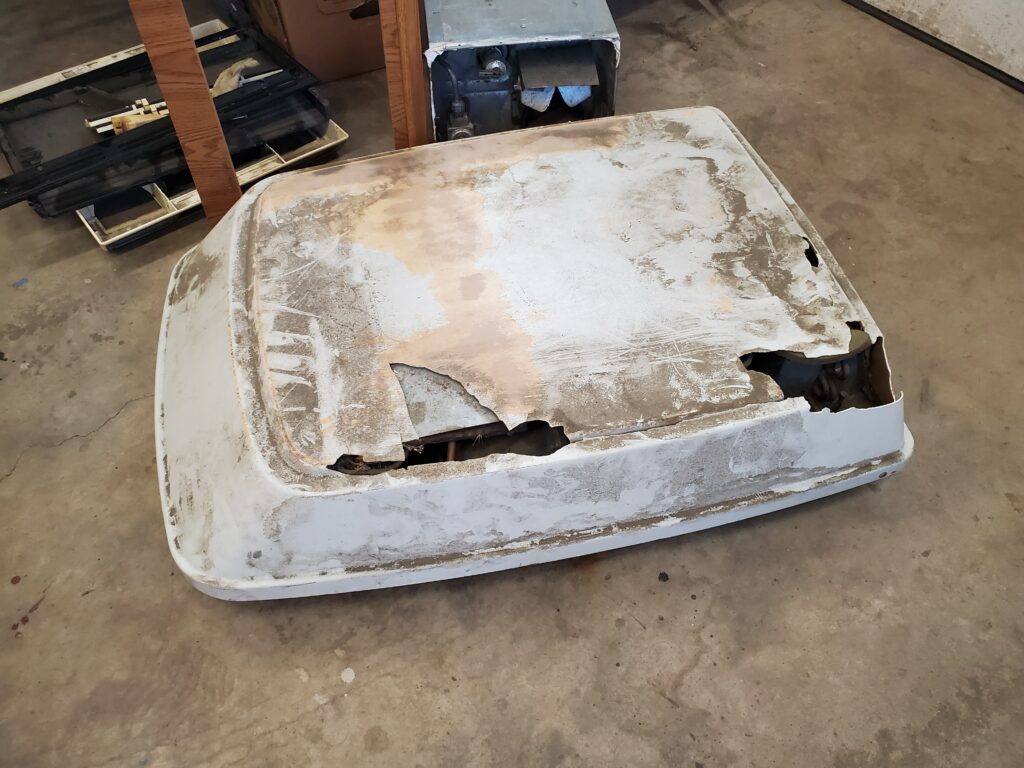
I’m going to clean this AC up and test it.. If it works I’ll swap it with mine … but not the cover, that’s toast. And not before I Re-test the AC in the trailer. Same thing goes for the hot water tank… I’ll make one good one out of two..if I have too.
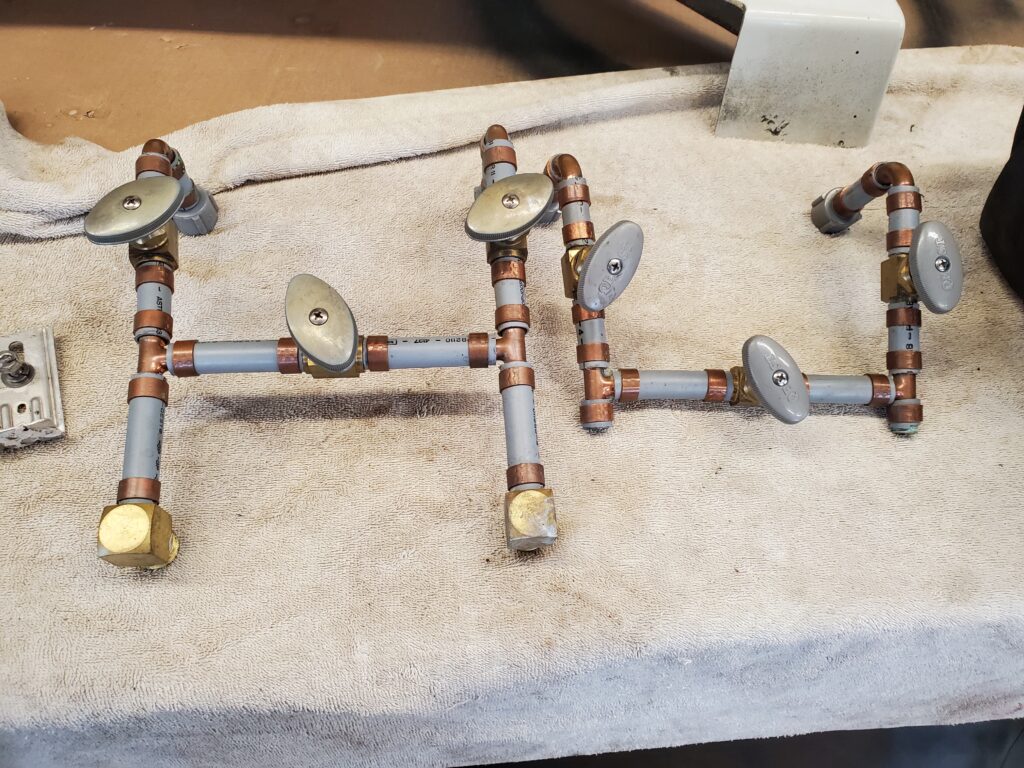
Here’s the AC from Dave’s trailer.. After the wasp nests, leaves and other crap has been cleaned out. The control panel on top for the test. It’s alive ! works as it should blows 58 F on high.. That feels cold enough. Then I tested the one in the trailer.. It too seems to work.. same temperature. Both on a 15 amp circuit. These are not big AC’s only 1100 BTU’s But if you try to run them on a long 14 gauge extension cord I don’t think that works well. So I have a spare AC.. And about the hot water tank.. Dave’s Award trailer had the exact same by-pass set up for the hot water tank. But his worked !
I cut the two ends off to make a straight through by – pass with no valves. Now I can install this and things will be back the way they are suppose to be.
And of coarse along with those goodies came two twin mattresses that were in a 30 ft Award trailer. They need toppers but these are hard to find and are a perfect fit. Next Spring you will see a big transformation inside the Award. But in the mean time I can work on the cabinet doors and drawer fronts.. Let’s start a new page for that shall we !
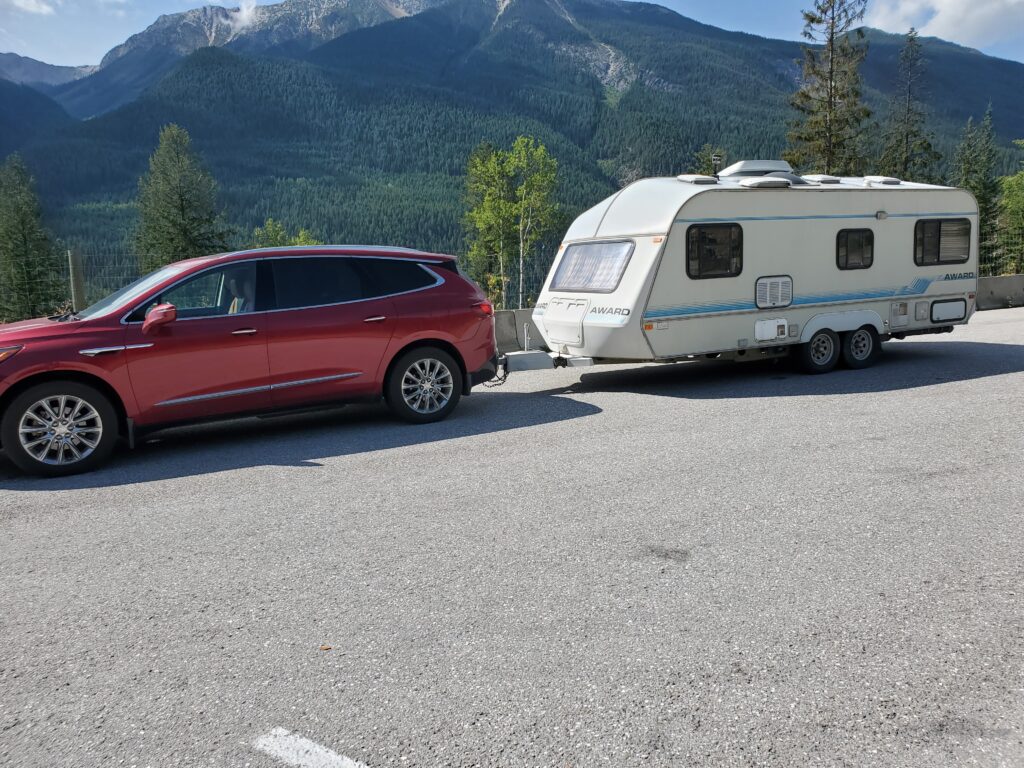
Yes that’s an SUV in the mountains near Banff Alberta. No equalizing hitch, Steep hills, No problems ! However it would have been a nicer trip with the equalizing set up.. and more air in the Buick’s tires. Things got a bit too bouncy at times. Also I suspect too much weight up front in the trailer.
Here’s a new video I made… a tour of the outside:
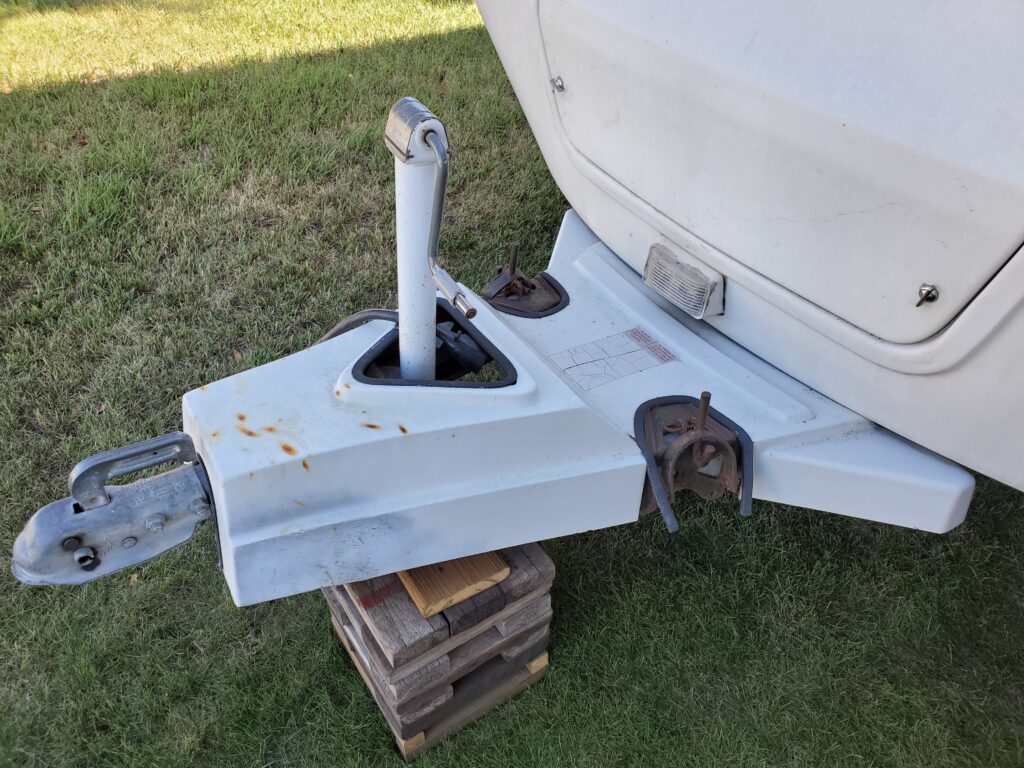
We’ll discuss the interior in a different post. Let’s see and start at the front of the trailer. Some of these things are unique to Award trailers. Like the hitch and tongue.
That’s a very good coupler but there is no way to lock it. Interestingly it fit a 2 ” ball, most travel trailers are 2-5/16″. The whole hitch is very narrow so you can turn sharply without jack knifing and hitting the corner of the tow vehicle. I plan to change the jack for a power one.. Notice no batteries up here, and the propane tanks are in the front hatch. No need for a cover. All part of keeping things slippery.
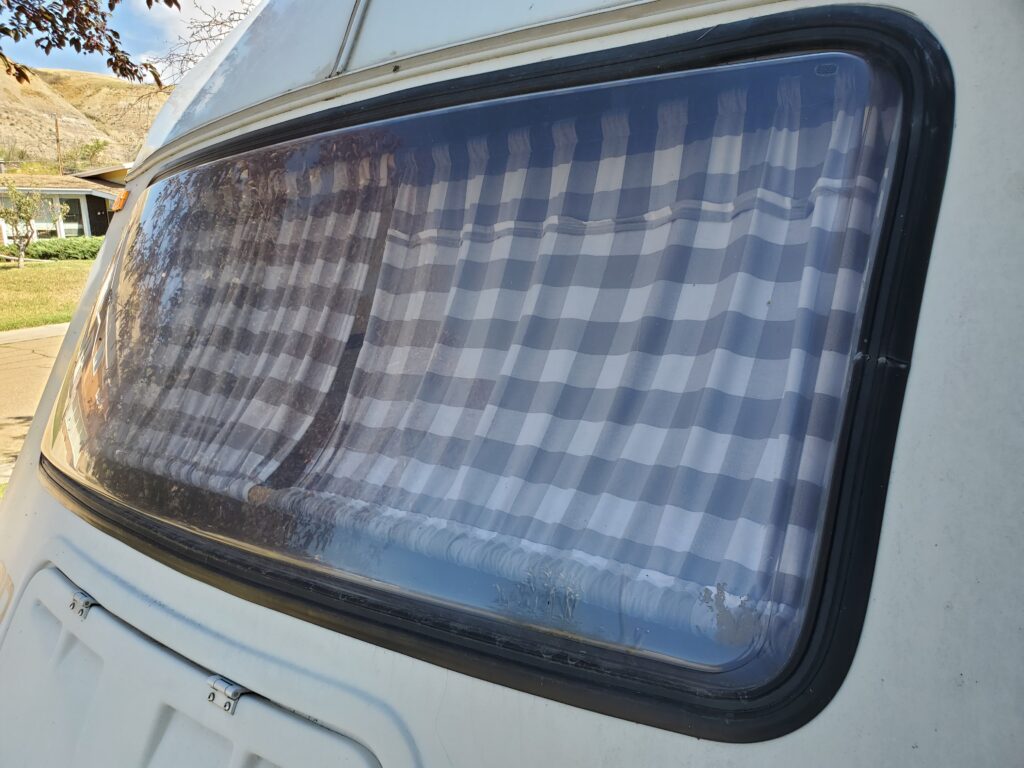
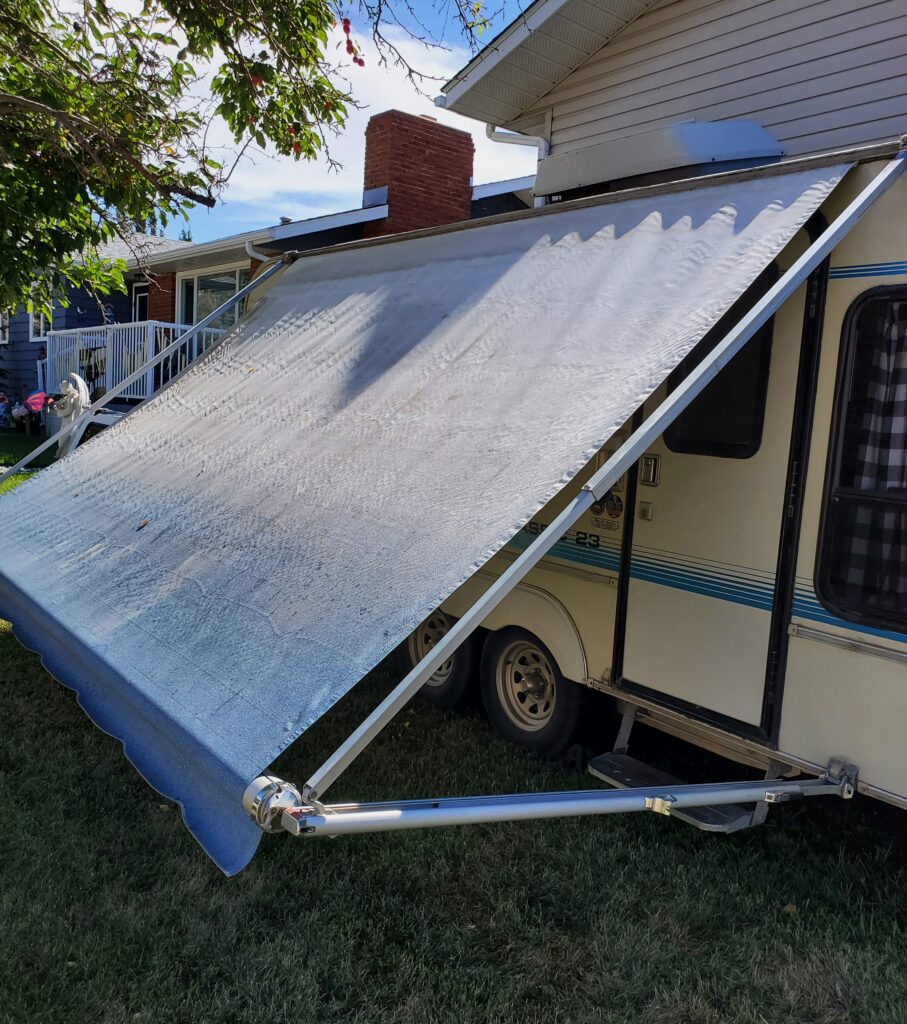
The front window is very unique to the Award trailers. It is two pieces of curved lexan with an air space. You can’t get these anymore, but this one is near perfect … even the rubber trim looks new. Mostly the trailer body needs a bath and a polish. Next year I would like to replace the vinyl insert on the trim. I opened up the awning today.. Just want to make sure it works ok and no damage.
Could use a bath, but very good condition. This pleases me. I’ve inspected around the trailer 100 times and have found very little to complain about. I let the awning dry in the warm breeze. That’s when I found a broken piece on the front rafter slide. New piece ordered. Oddly the strap wasn’t even in it’s slot… just tied up at the end. We can’t have that.. It’s needed to open and close the awning evenly.
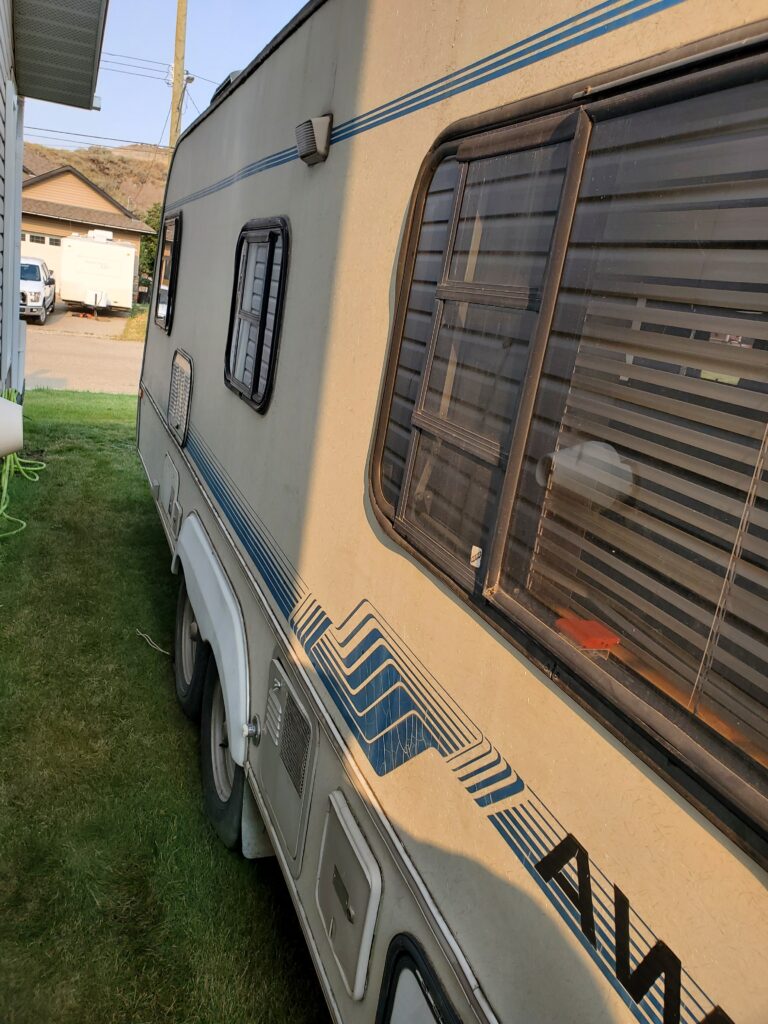
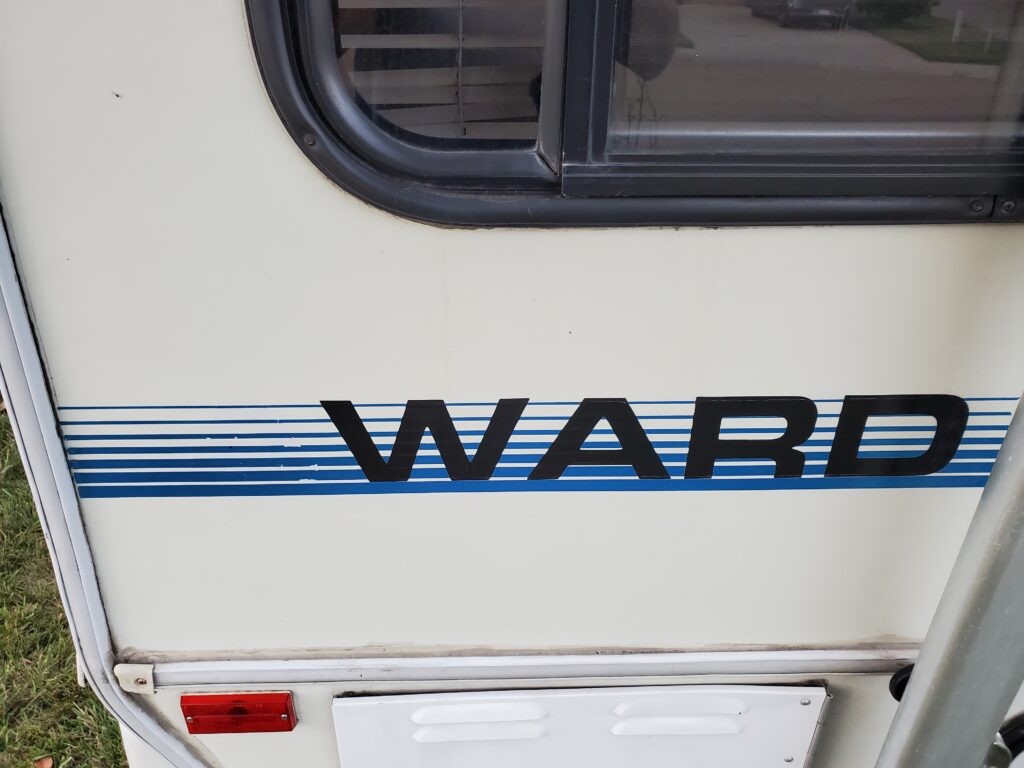
The business side of the trailer! Like I said in the video .. I think it’s great that all the heat producing stuff is on this side. I don’t need to replace any of these doors and hatches. Just the two keyed locks. Which is now done.. they are keyed alike, and I have four keys. I’ve ordered the electric jack for the front. Once that is replaced the outside is good for now. Oh Oh I was washing the trailer mostly the roof and the vents. But I decided to carry on and do every thing. Has to be done before any re-sealing. Then I can install the two vent rain covers. Well I discovered the window in the door had sagged down on one side leaving a gap for water to go though. I’ve had problems with these in the past.. There is very small tabs inside that hold the glass, and one was broke off. A small block of wood works, can’t see it , it’s inside the frame. FIXED! Also it has bugged me that two of the “A’s ” are missing from the decals.
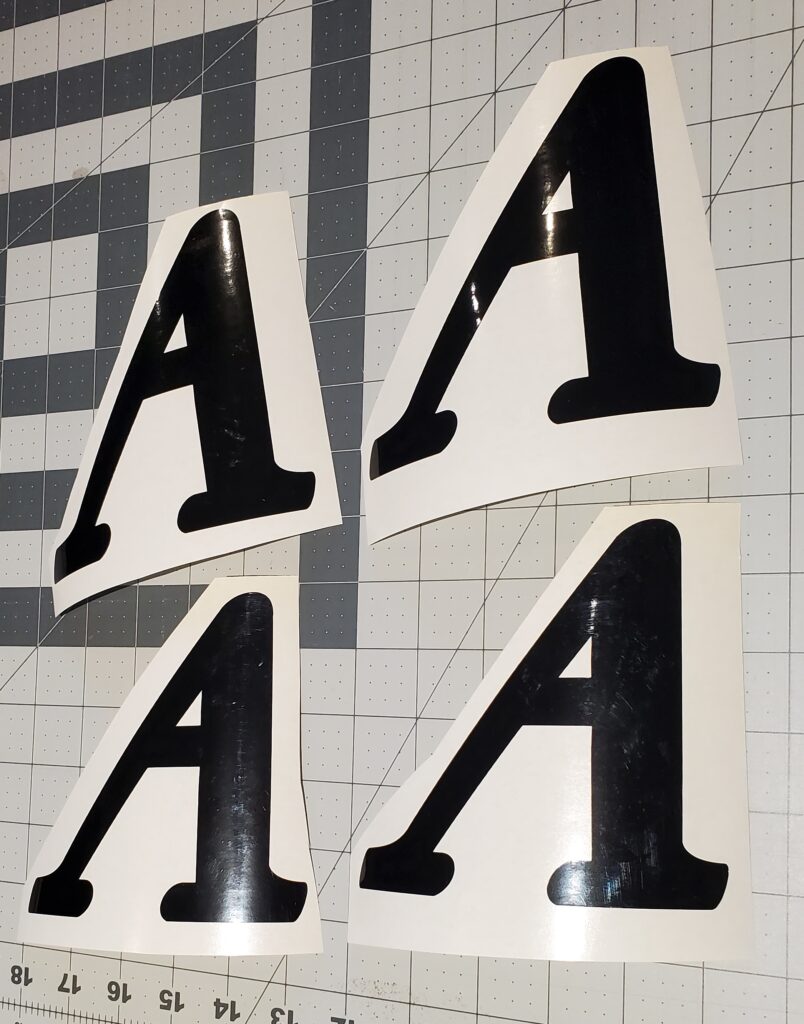
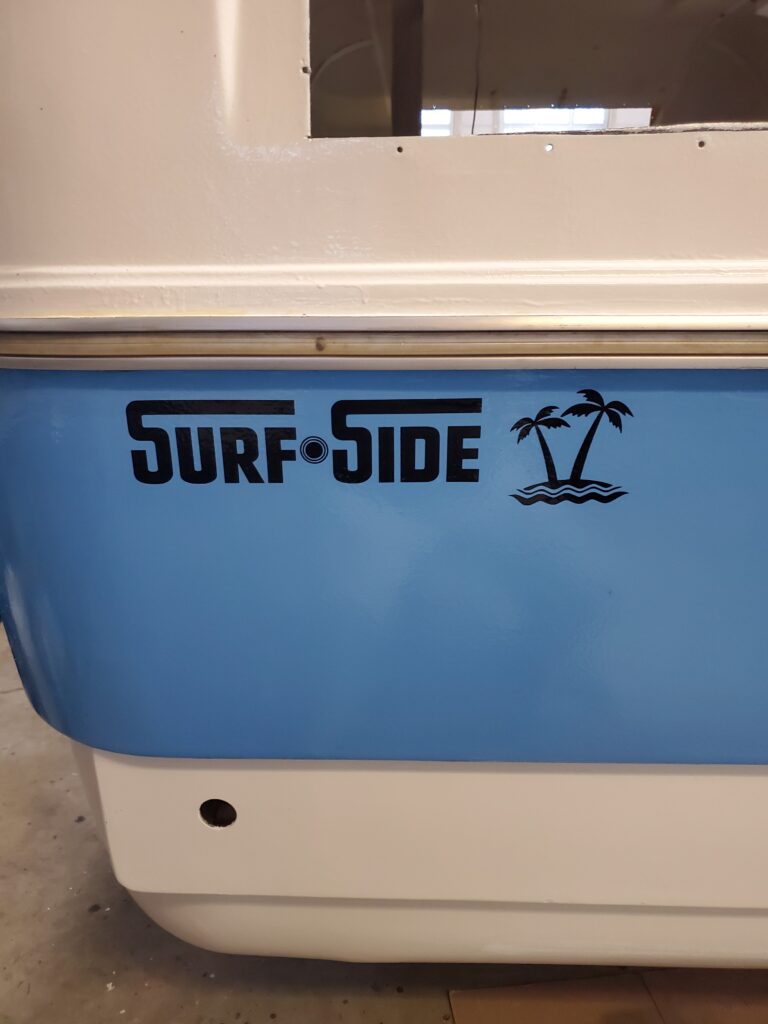
Must be my mild OCD or something… But this really does bother me. So I fired up the Cricut cuting machine and make four new “A’s” that are just a bit fancier. I have lots of 3M sign vinyl so why not.
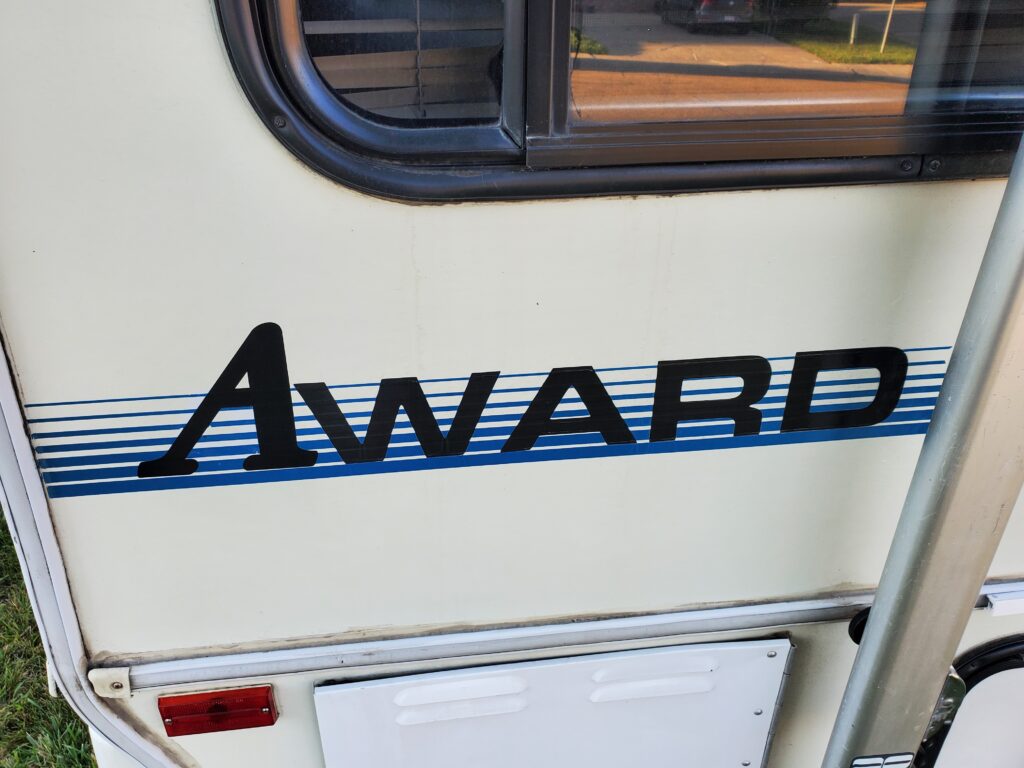
There is actually five places that say “Award” on the trailer two of then being the front nose. Both those are in poor shape from road rash.. So I may just take my eraser wheel to them. Well here is the new fix ..
Not so boring . I made new decals for the first Surf Side trailer I restored too. The folks on the fiberglass trailer forums loved it…
Anyway I like things to be nice.. Sooo I will do the sealing and install the covers and say good to go for the winter. However while I was installing the new sliders for the awning rafters I decided to give the awning a much needed bath. It was a nice warm day so the awning would dry. While I was rolling it back up the ratchet cam decided to let go of the spring. Good grief.. what next ! So I had to take that apart and investigate. The wheel that the cam grips was badly worn. So I used a file to give it new teeth. Works great again…for now ! My new electric jack came , but I’m leaving that job for the spring.
The inside…well that’s a thing that needs a chat on a new post..
This is the photo from the ad. Yes the battery compartment door is bent.. First thing I did was straighten that..
So let’s talk about the trailer.. By going back in time
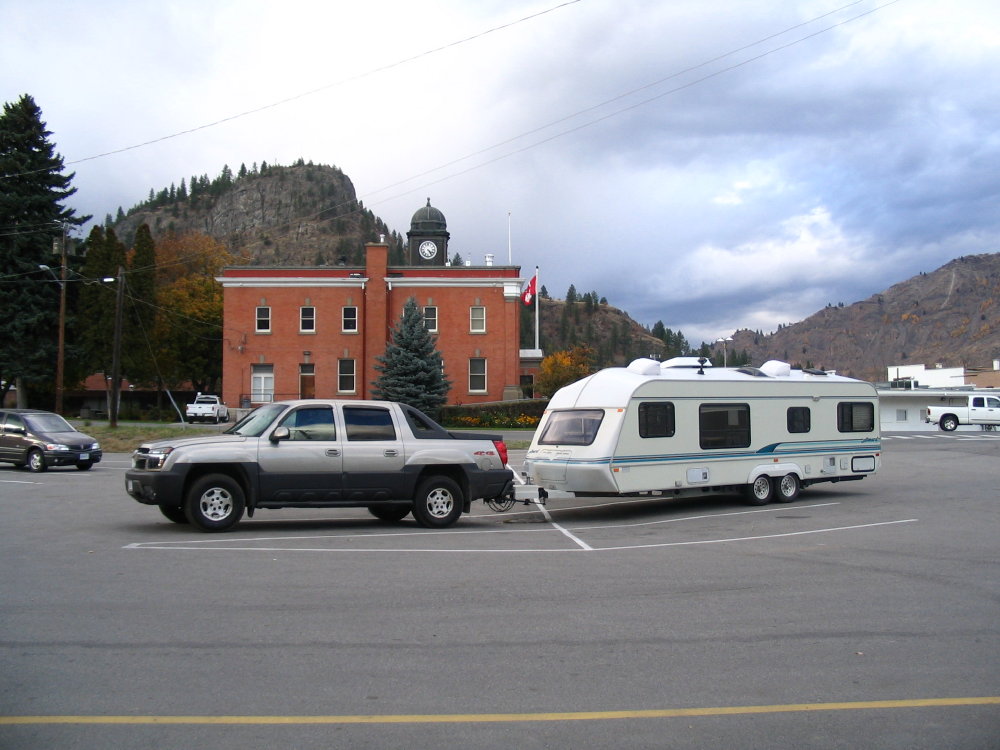
We had a 1994 27ft Award trailer for many years back in 2005. One of the best trailers for towing and rolling down the road. We took that trailer through all four western provinces. Here’s a photo of our rig..
Very aerodynamic and a not an intimidating size this makes these trailers road warriors. Plus they were made in Canada, and had features not common for those years. It’s because of these things ( and I’ve had enough of crappy old stuff) That I went looking for another Award trailer. Award made these trailers in three sizes.. 30ft, 27ft and 23ft. And very few of any size for sale in the western part of Canada. This 23 ft popped up and despite the 4 hr drive to get it I jumped on it.. And like our first Award trailer this one is a one owner trailer. Or in this case more like one family. The granddaughter inherited the trailer a few years ago. Unfortunately that young ladies had some black paint and a bush. So not looking at all like it was from the factory.
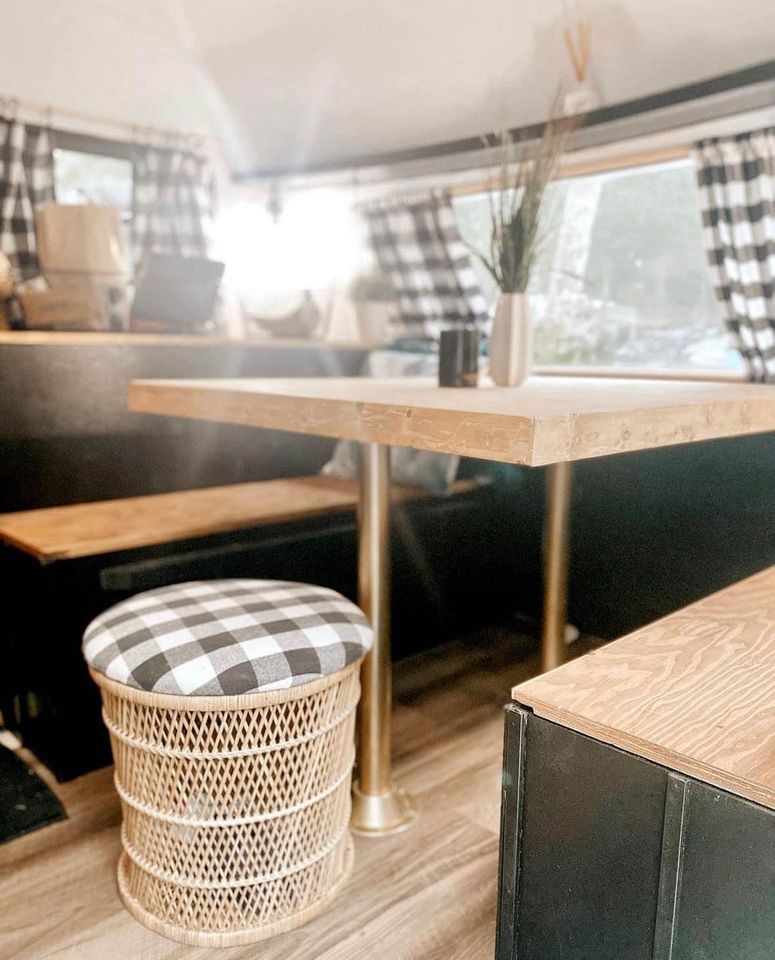
I get it.. oak is not everyone’s thing. And she tossed out the couch and chair up front, then built ( and I mean BUILT) a dinette with a BIG table. A table made from 2×6 lumber !
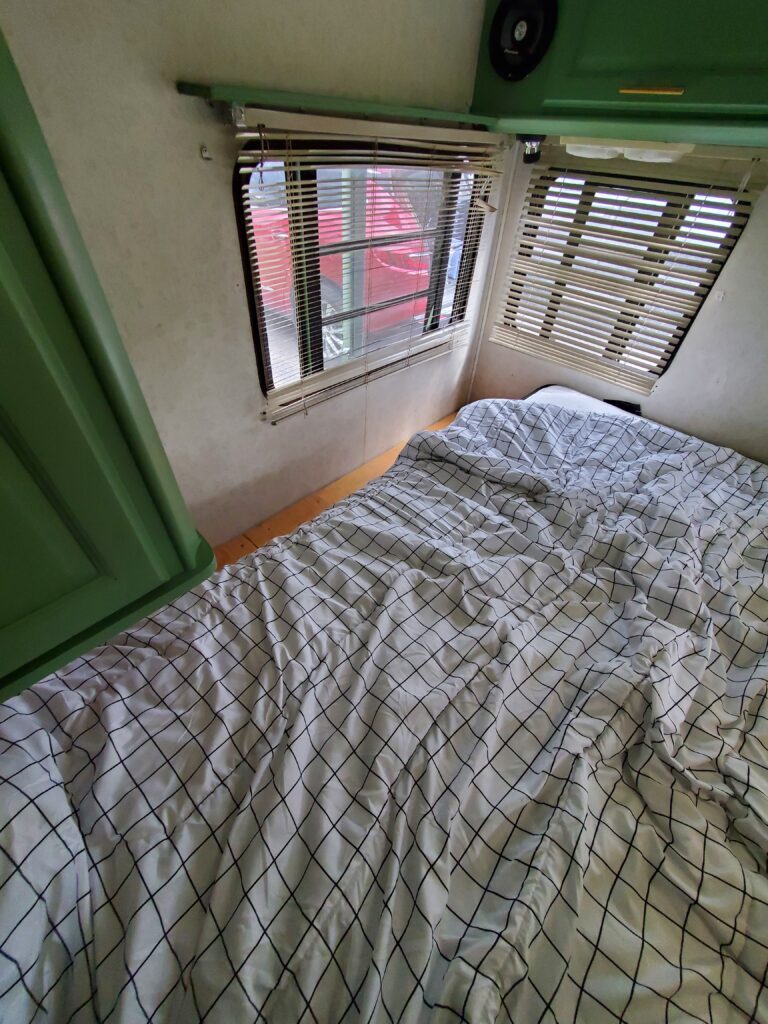
That’s cool… BUT it added a lot of extra weight to the front of the trailer. She also put some plywood pieces over the twin beds in order to use a queen mattress. And kept the mattress..
Fortunately none of that was attached . So I took all that away when I got home. We have decided that the twin bed would be better for us.
Opps she ran out of flooring. That’s ok a piece of carpet will work for now. And I’ll need to build a new night stand. There was a floor to ceiling cabinet there. I want a night stand, so it’s better if I make one.
Enough complaining about someone else ideas on improvements.
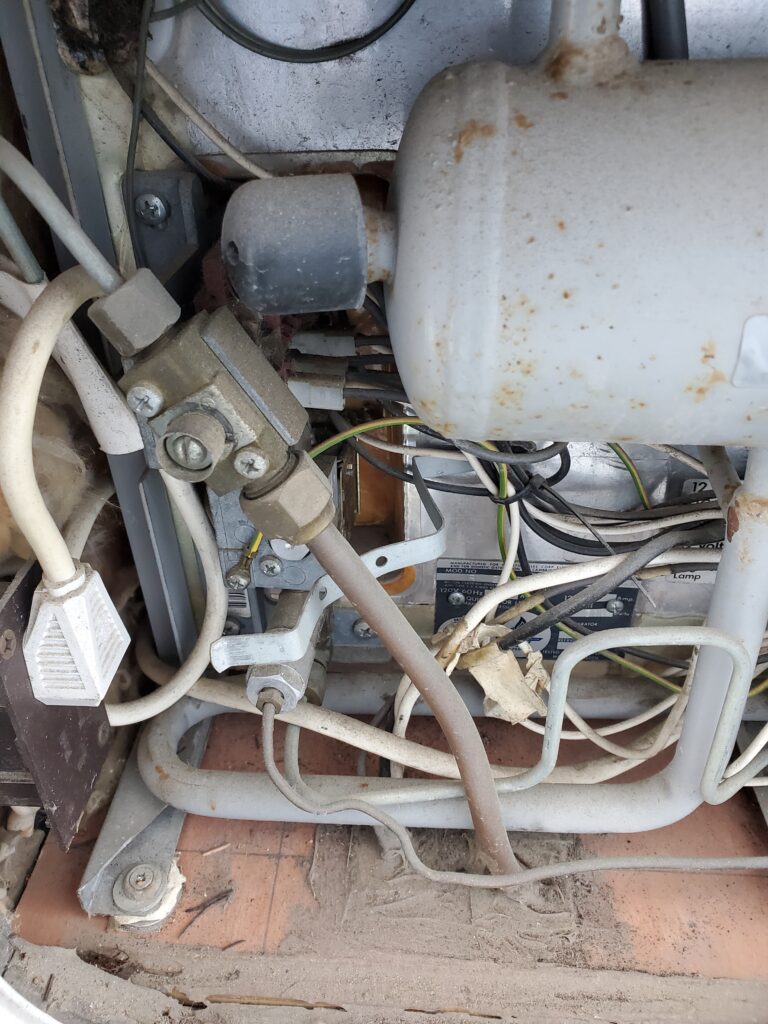
I’ve dealt with worse things. What I have bought is a very solid 31 year old trailer. It was mostly stored under cover. And that shows on the outside. The big things for me … A working large two door fridge. Electric and propane. No electronics too. Have a look…
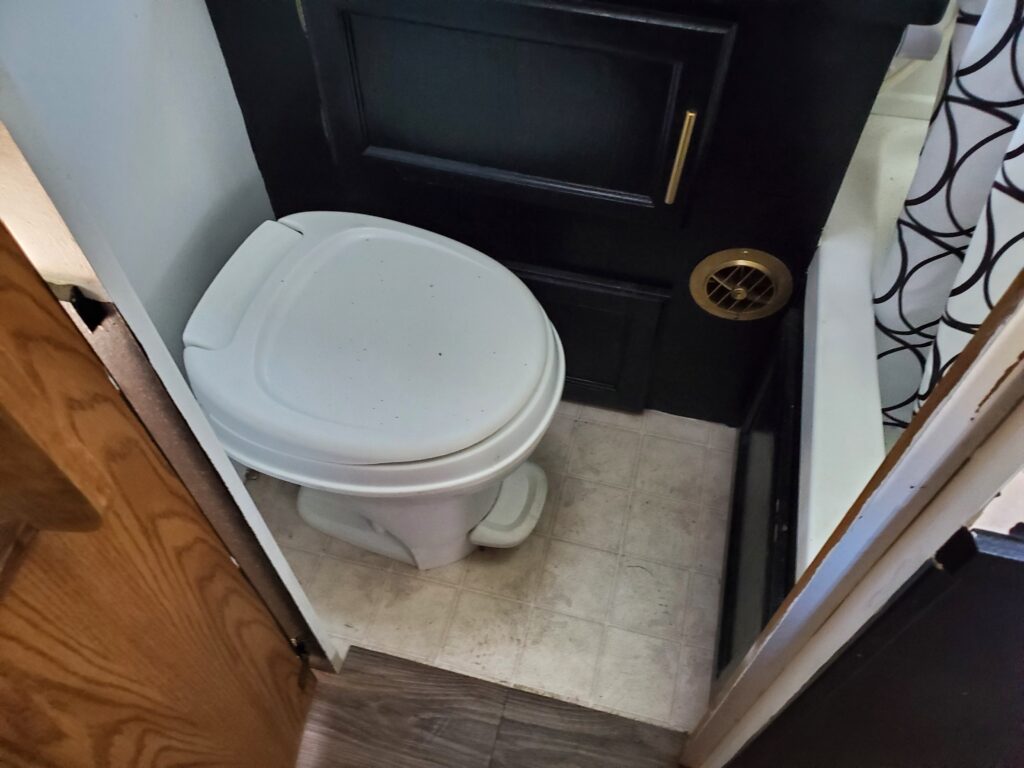
I don’t see any circuit board here. Therefore it works ! Second thing .. solid floor. I could not find any bad stuff. I do think the sky light over the tub leaked at some time.. Some crunchy bits in the ceiling over the tub only. Don’t ever plan on using the tub for anything but storage. My 94 and my friend Dave’s had rotten floors. It can happen from plumbing leaks or in Dave’s case water sitting on top of spay foam used for insulating the under side of the floor. Not this trailer. The plywood looks old under the trailer but still strong. The plumbing works good no leaks, pump works as it should. All the lights work. The toilet is a newer one that’s taller and more deluxe.
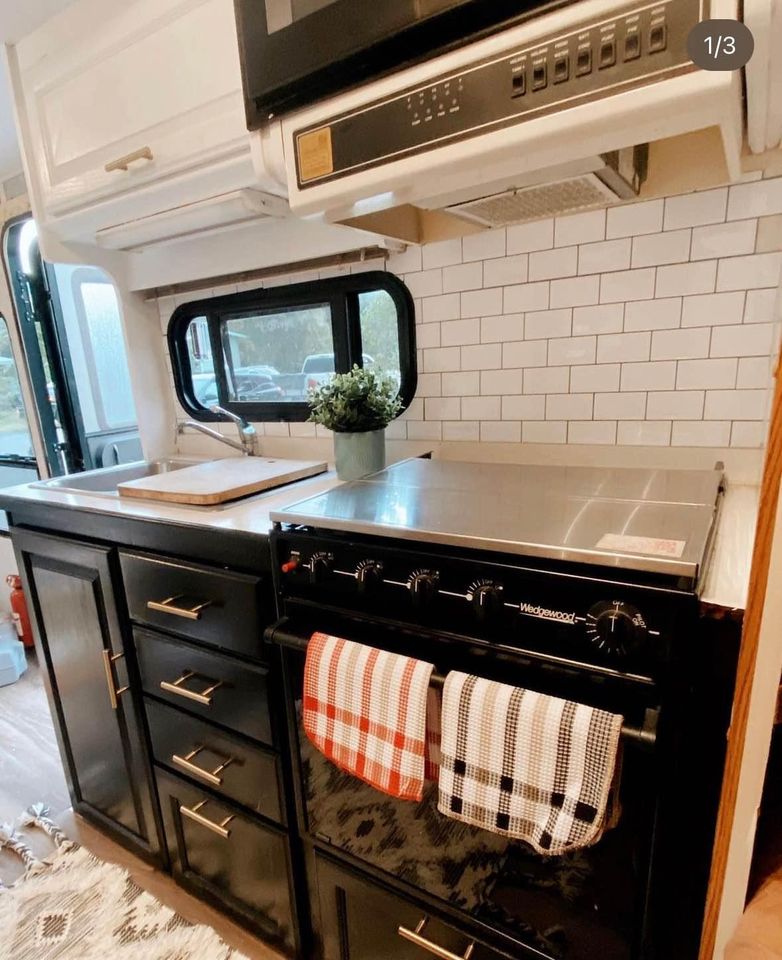
Opps again with the flooring.. No big deal. There is work to do… Not sure I like the gold heat vent. It’s part of the decor.. I know.. Surprisingly the wife likes the black and white theme. Who’d a thunk that.. So the plan is to make more curtains like the front ones for the bedroom.
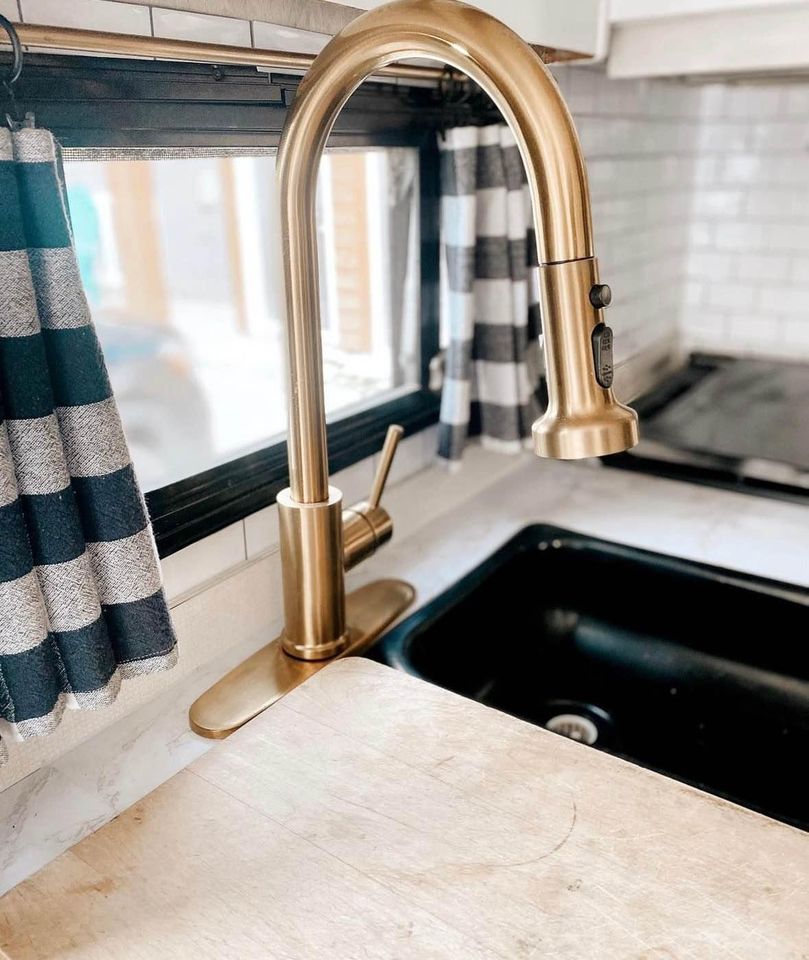
No you can not successfully paint a stainless steel sink. And mac-tac self sticking wrap a counter top is not good either. The faucet is nice ! That’s the factory wood sink cover.. YES ! Oh no I’m complaining again. You know we have our own ideas on the ideal set up for a trailer would be. So having some things that need changing is a good thing. For example the sink being painted… We would prefer to have just a single sink. Never saw a good reason for the double. More counter space would be better. So.. to go from a double to a single will require a new counter top. Prefect I’ll get to use new Formica instead of vinyl sticky stuff. Both the bathroom and the kitchen need this done. This post is getting long so time to start a new page…