Now comes the fix’n and put’n back together!
June 2025
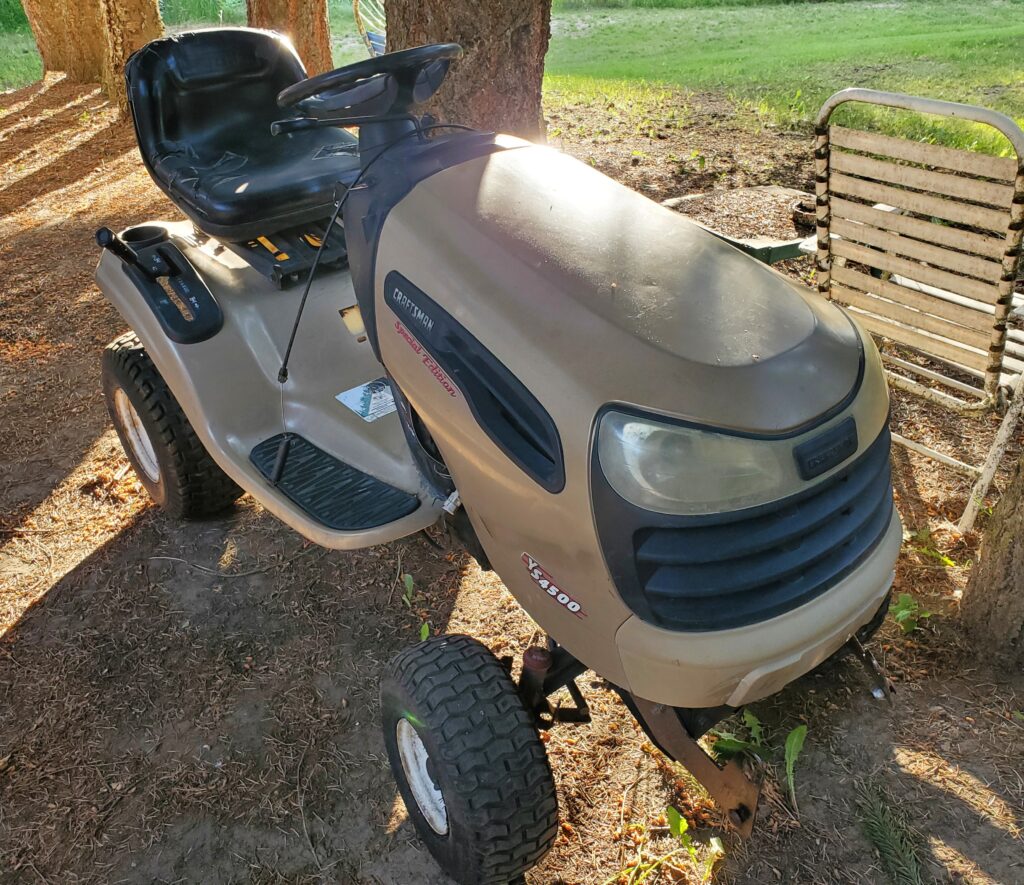
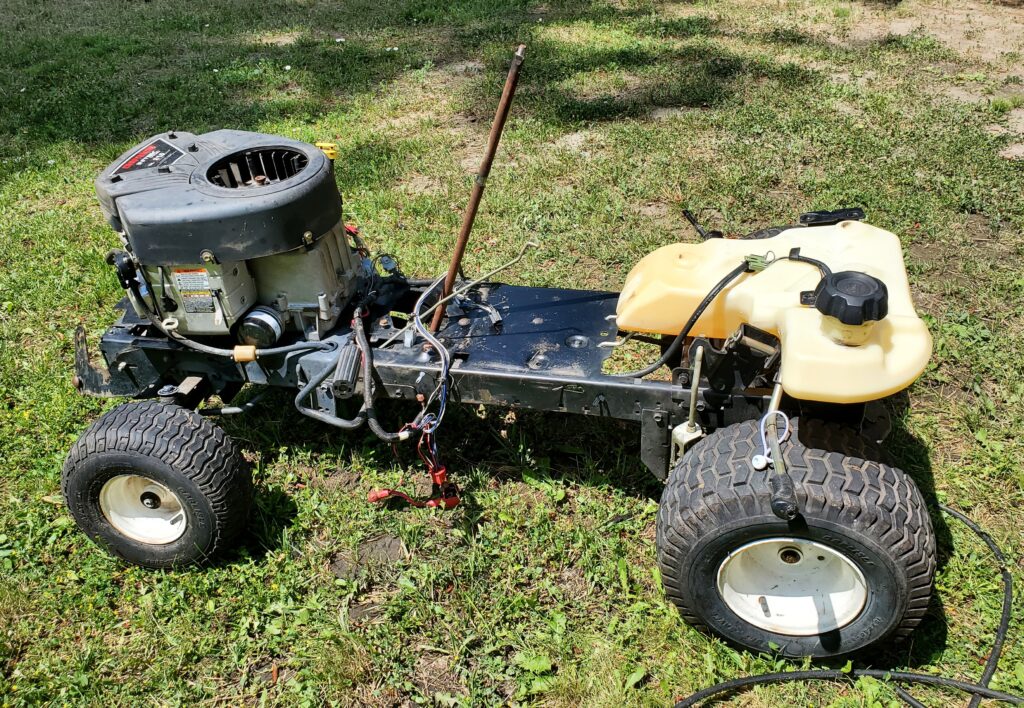
Do I need a tractor to cut the lawn ? Well sort of.. My right leg isn’t working as good … so pushing my EGO mower I run out of steam quickly. Hills like we have are hard. I borrowed one just like this and way easier for me. I feel like I could cut everyone’s grass. So there. Also I got this one cheap.. And yes it needs some work, but we drove it onto the trailer.. It runs ! Yes it has a mower deck. I removed it because they get caught on the ramp of the trailer.
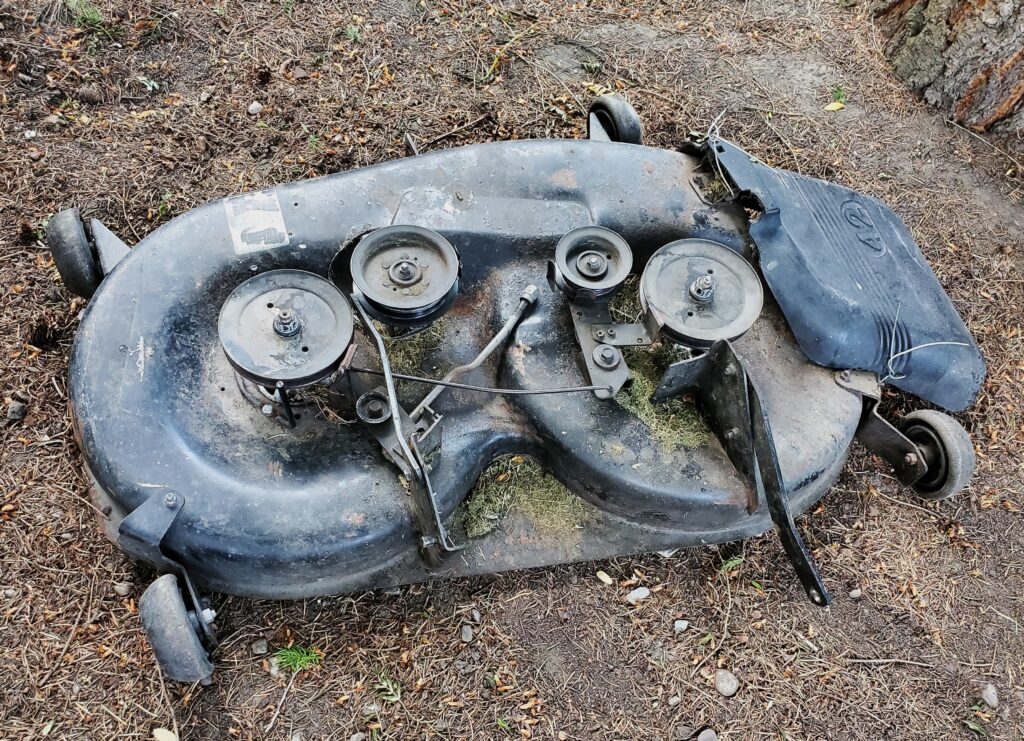
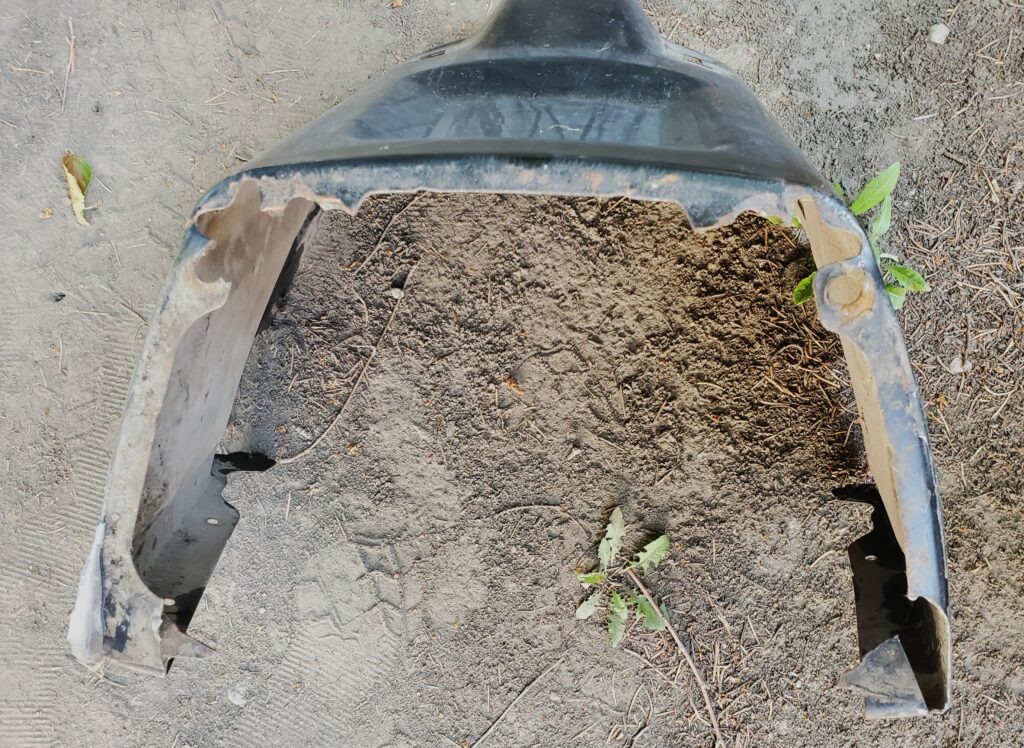
Just your typical 42 ” deck. Not rusty, not missing parts.. Only the plastic chute is held on with wire ! Oh and it came with a bagging system.. BONUS..
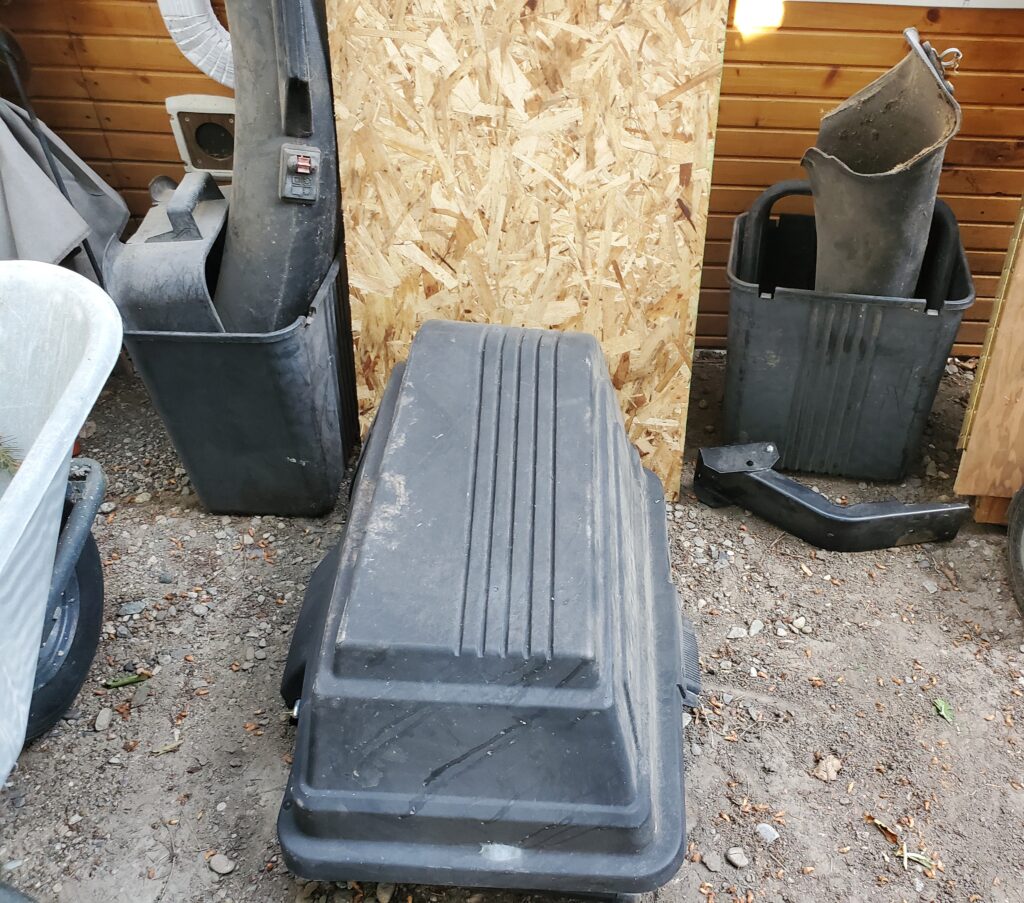
Not broken.. and the good hard bagging system too. This tractor was one of my favourite Craftsman mowers. ( my very favourite has foot peddle controls) But for my needs the leaver control works better. In the past I have had many of this exact tractor go through my shop. So I know all about them. Here’s a photo of one ..
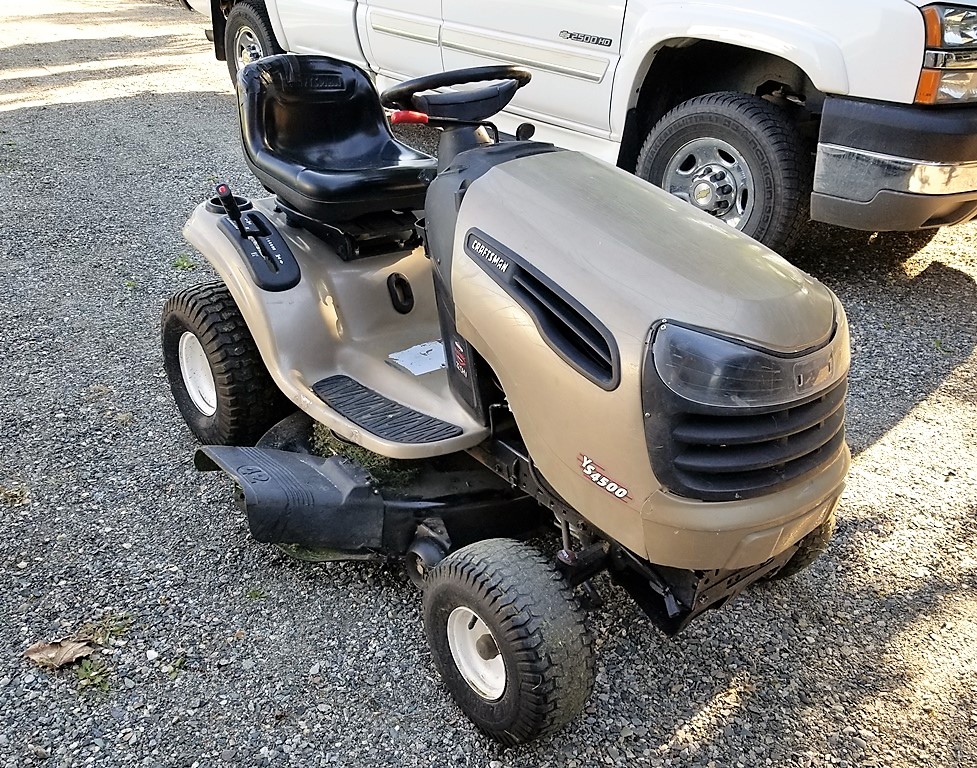
Proof ! This photo was taken in May 2018.. And was taken after I worked a little magic on it and now ready to sell. Now fast forward to 2025.. and these are worth much more than the $500 I was asking.. More like $1200. One of the issues that most of these mid 2000’s YT , YS and even the D series had was and weak dash and the metal console that held the steering wheel and other controls. I did a video on the problem and my fix foe it. This new YS3500 also has this problem.
Old video from 2016..
So I have some work to do.. and no shop.. I’m working outside. It’s going to wait till later July after our camping time. However I’m picking away at some things. I’ve cleaned the deck so I can see what’s needed. Blades for sure and the belt that’s missing.. The spindles seem good just need some grease. I’ll need to make a way to mount the deflector back on.. Straighten out a few bent things.. and we are good.
Here’s a short video showing how bad the steering is. The plan is to take that whole dash and tower apart so I can weld some extra support. I’m also working on restoring the deck.. It’s getting a rust treatment with “Krudkutter” as seen in this photo.
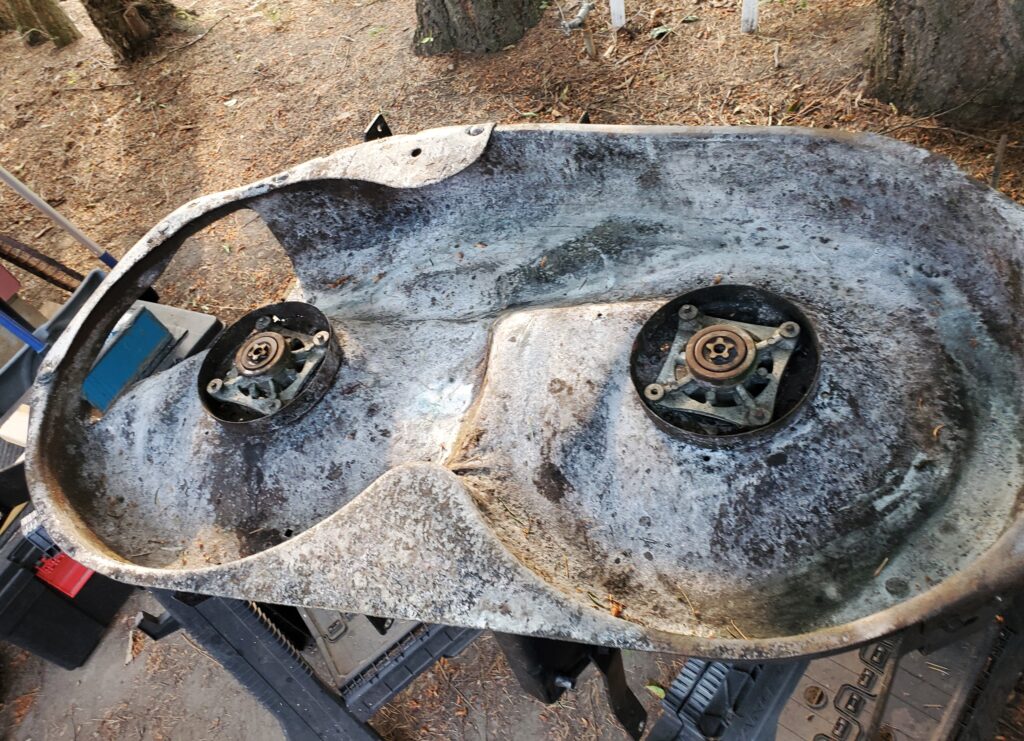
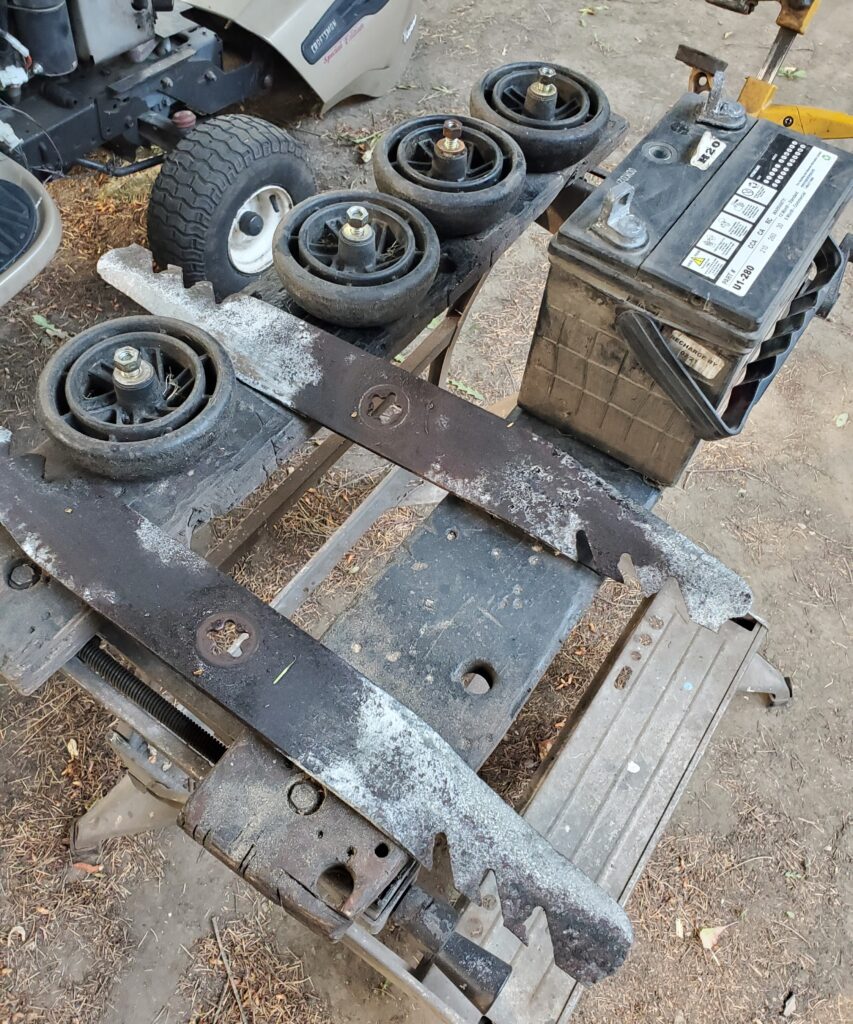
Turns the rust white. And then a coat of paint. The arbours and blade mounts are in very good condition. So are the gauge wheels… Blades not so much.
New blades are on the way. Today I had some spare time so I got to taking the steering and the console / dash apart. A great opportunity to clean some grass and crap out from all the spaces.
Here’s the bottom of the console. Only one bolt still had the ear to hold it on. And someone used JB weld to “try” and fix it. I will weld new metal, and all six bolts will have something to hold onto.
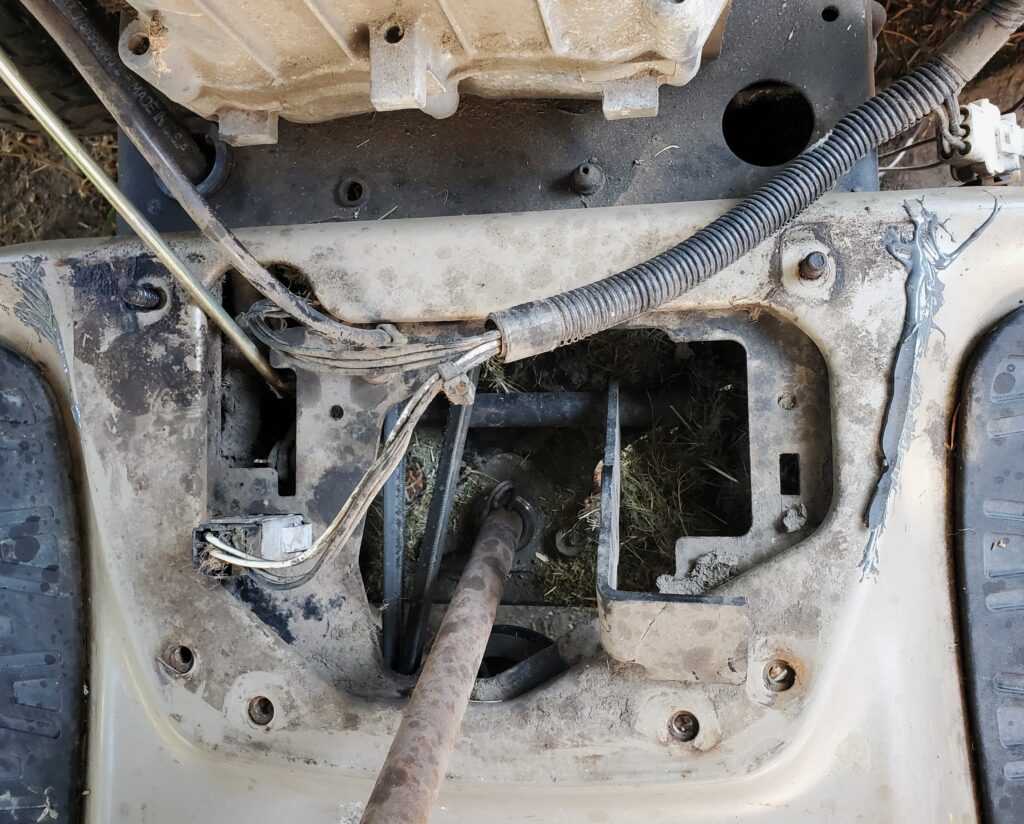
Here’s where it mounts.. You can do better with wider metal. By the way with the console taken away there is only four more bolts and the fender / foot well comes off for a good cleaning. Which did happen…

There you have it.. I don’t take stuff apart unless I’m going to clean it. And ! The the naked tractor is very easy to clean…
I should have done a before & after photo.. Trust me it was very dirty. Good time to lubricate the moving parts now. Then put the body back on.. And that’s a good place for a new page…
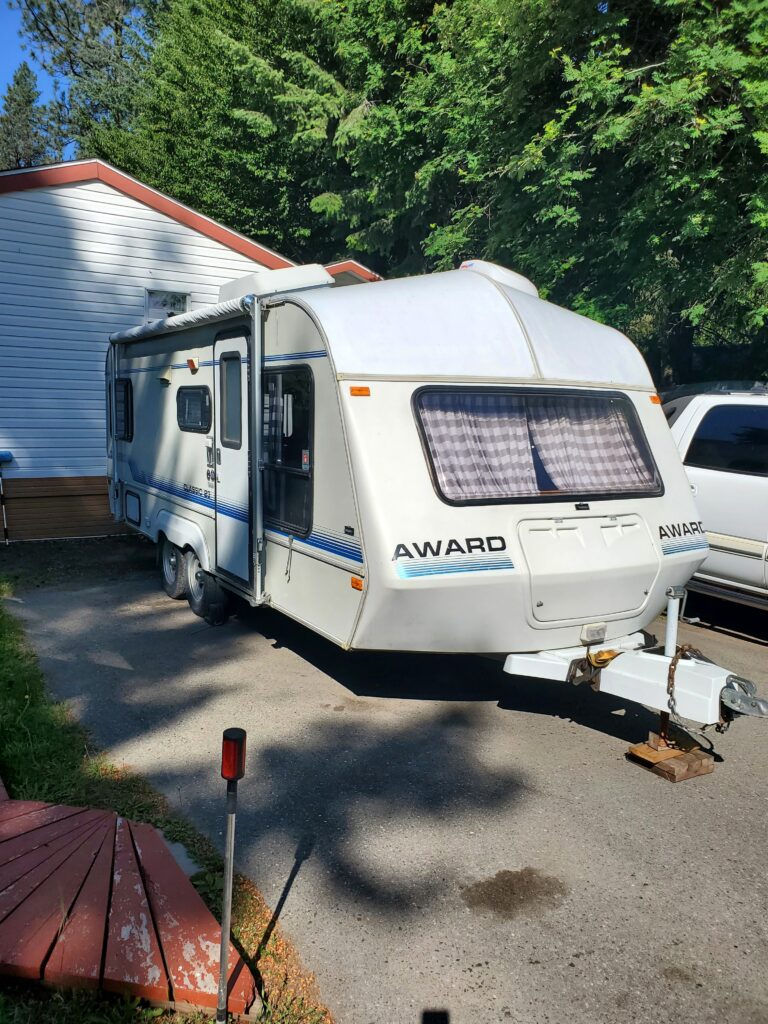
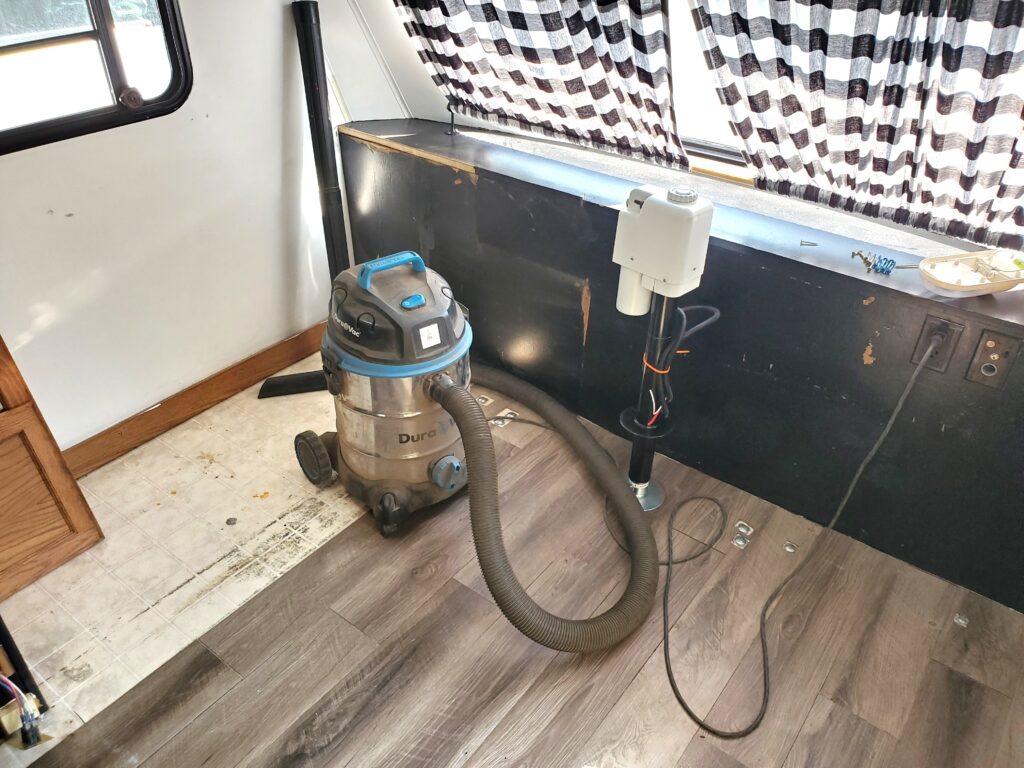
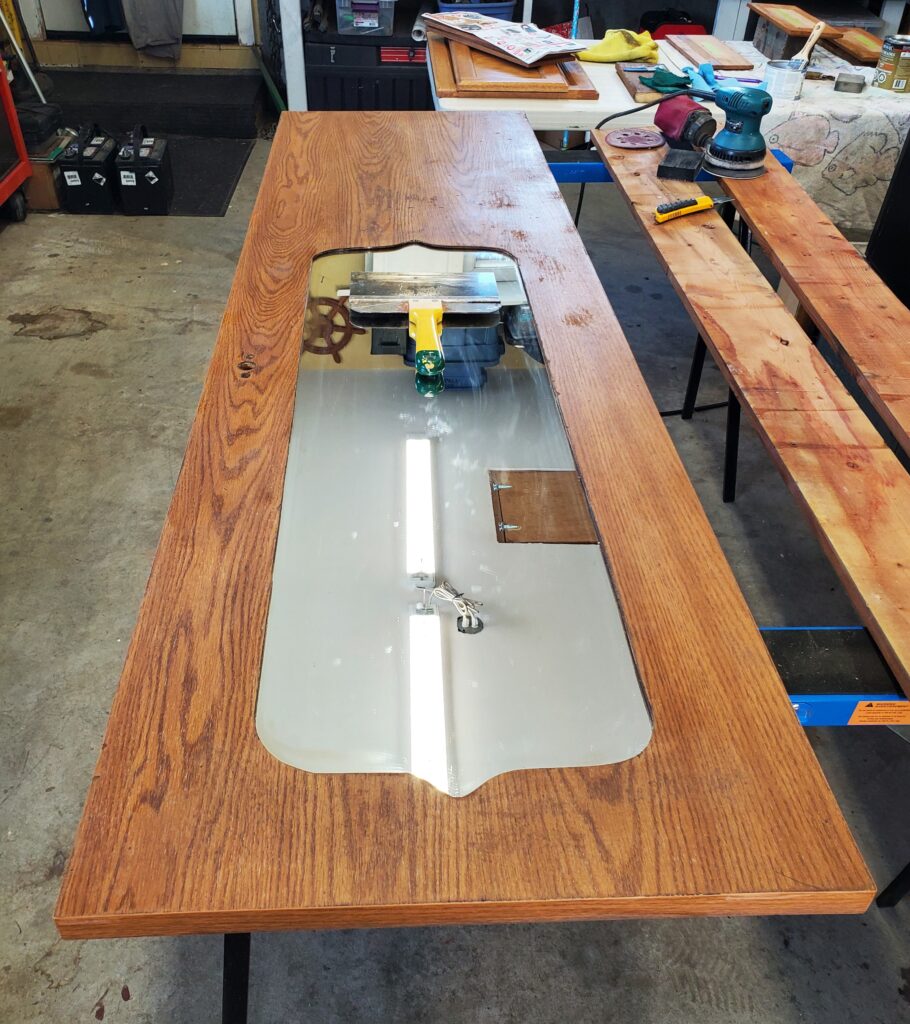
And here we are in the driveway of our new home in Grand Forks. Ready to do some work before “Family Camp”. I have a list of things to do and a month to do them. I’ll start by removing the heavy dinette at the front of the trailer.
This photo is from when I was buying the Award. That lady is responsible for a black & white decor.. The table was taken out last year… Now to deal with the rest.
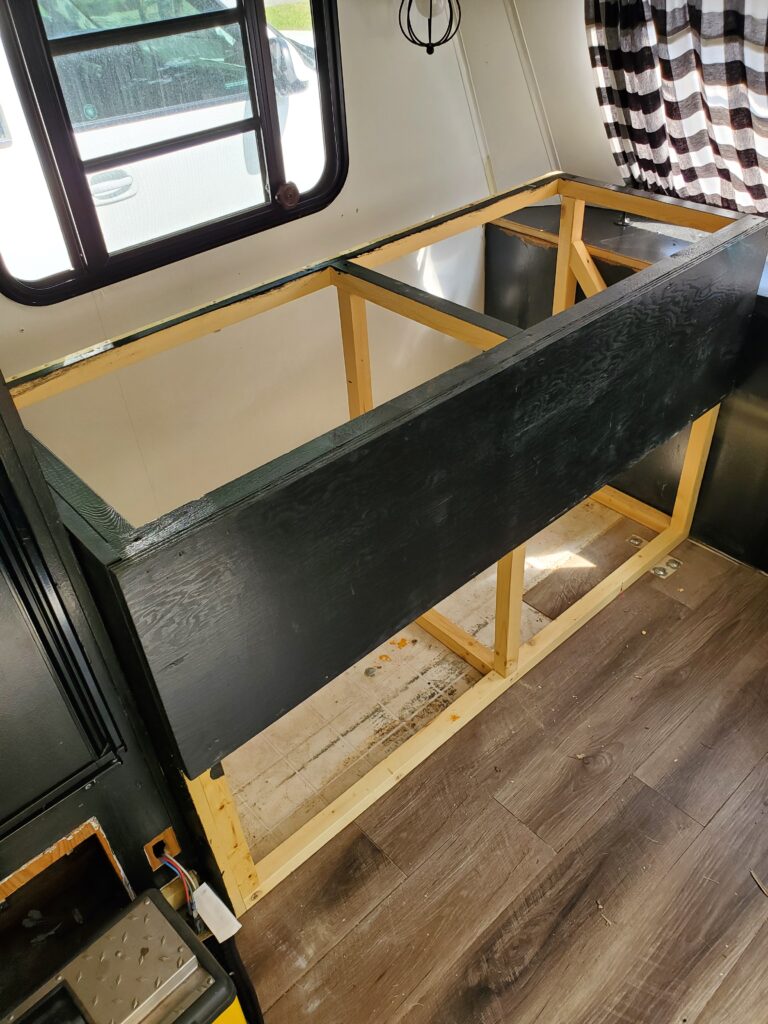
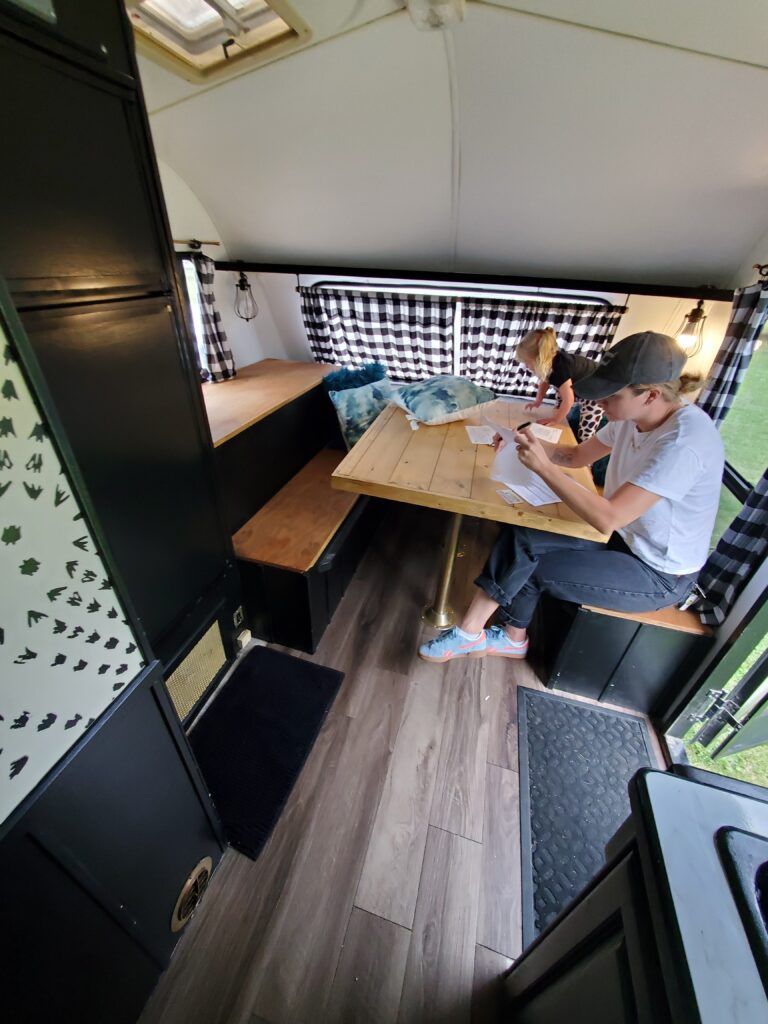
Wasn’t hard to remove the cabinets.. Now we have lots of room . However the flooring did not go under this side of the cabinets.
This one of two dinette seats. Well built ..seams a waste.. Maybe I can “re purpose” them.
We will use some carpet that our friends removed from a bedroom to solve the lack of flooring. At least for this summer. Here’s a video I made today…
Ok.. Let’s make a list of the things I will do this month. Outside stuff first:
And for the interior….
And of coarse there will be other details.
Here’s the first snag.. The jack does not fit the clamp.
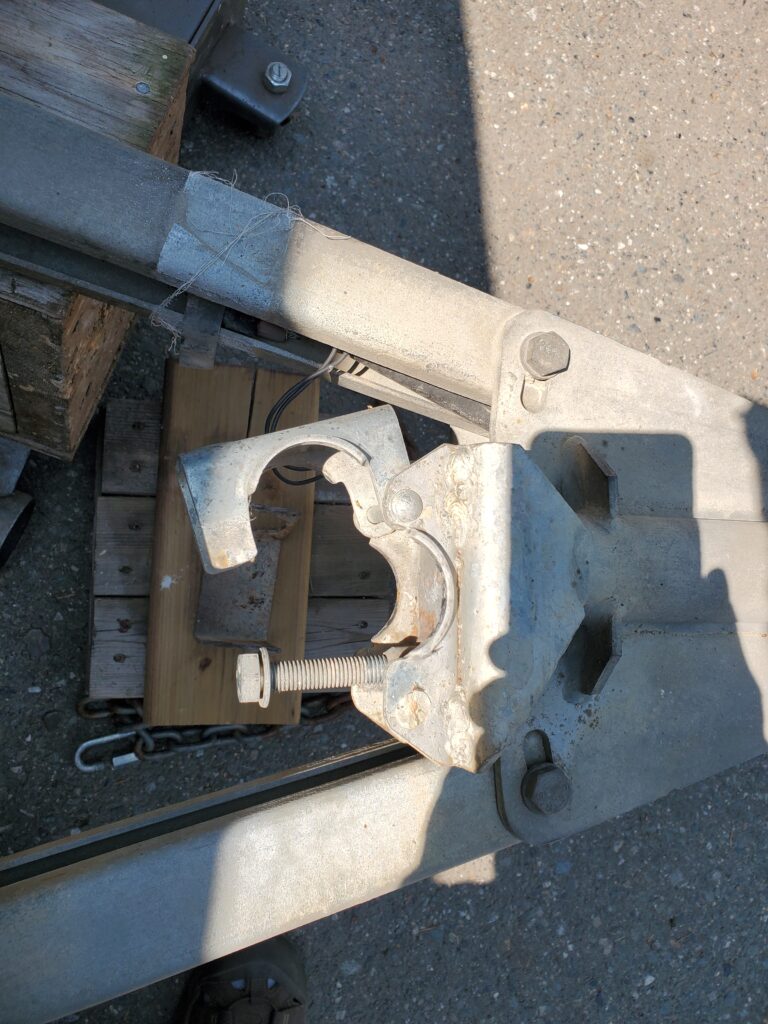
That clamp is for a 2 inch diameter jack and the electric ones are all 2-1/4 ” So this needs to be modified. I removed the clamp and there was four holes which fit a 2-1/4″ muffler clamp. Bolted and welded… Not a problem for a cutoff wheel. So two clamps and that worked great.
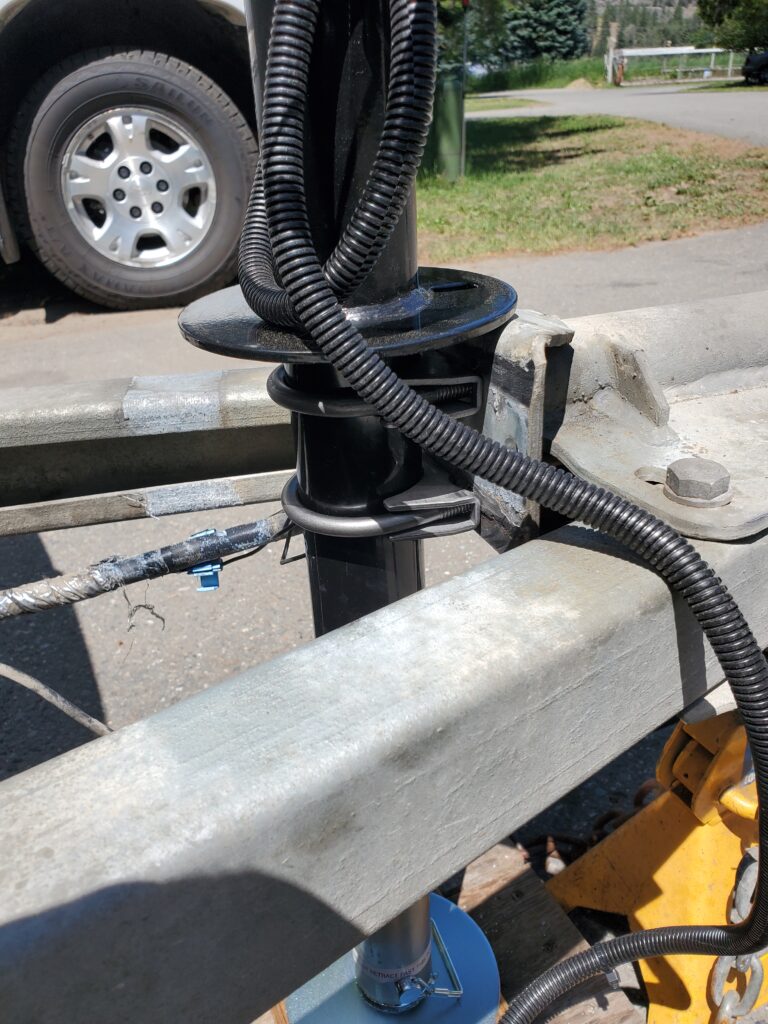
Just need to patch the wires in to the cable (seen on the left) and we are done.
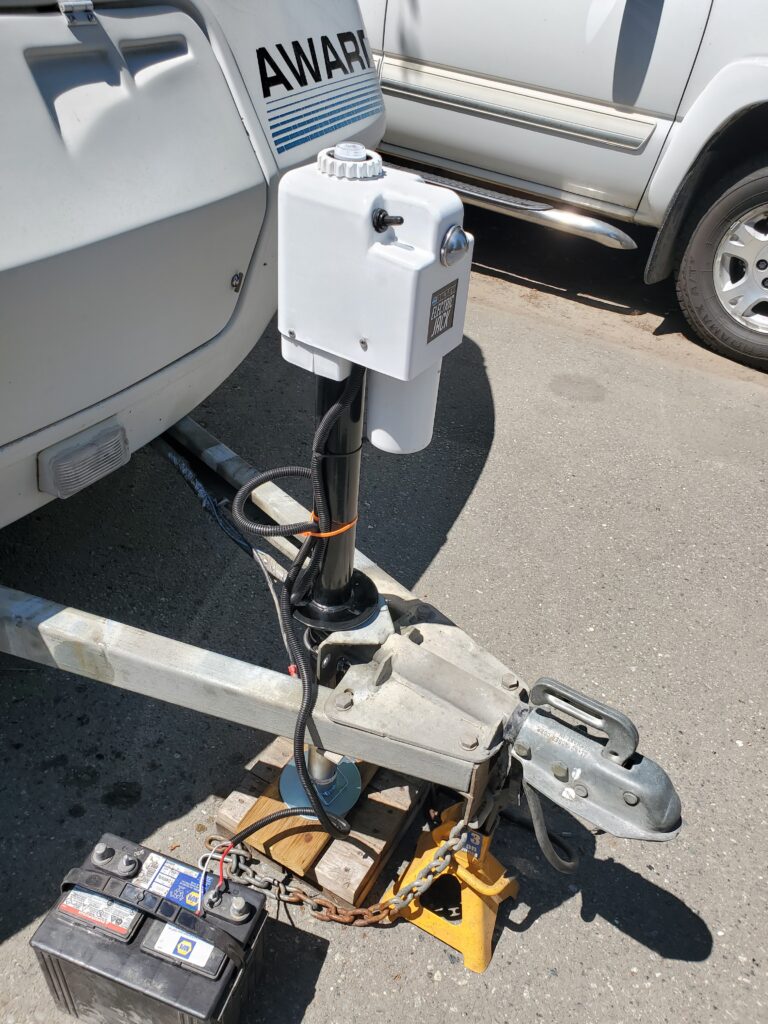
Nice big removable foot and that tucks up high for travel. So with that done I’m going to concentrate on the interior so we can get the out fitting done. The black paint is touched up and cupboard door installed.
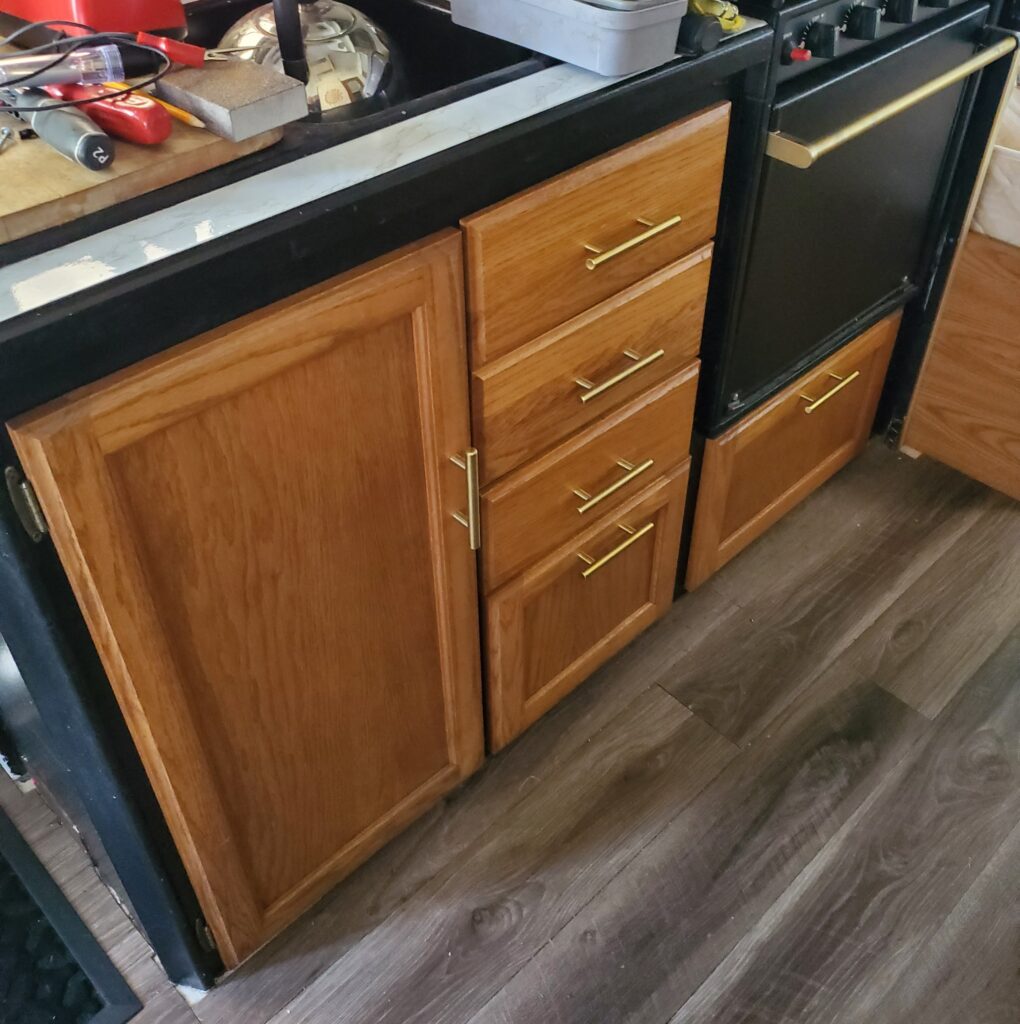
That’s looks better than just black.. I cut a piece of the carpet for the bedroom floor..
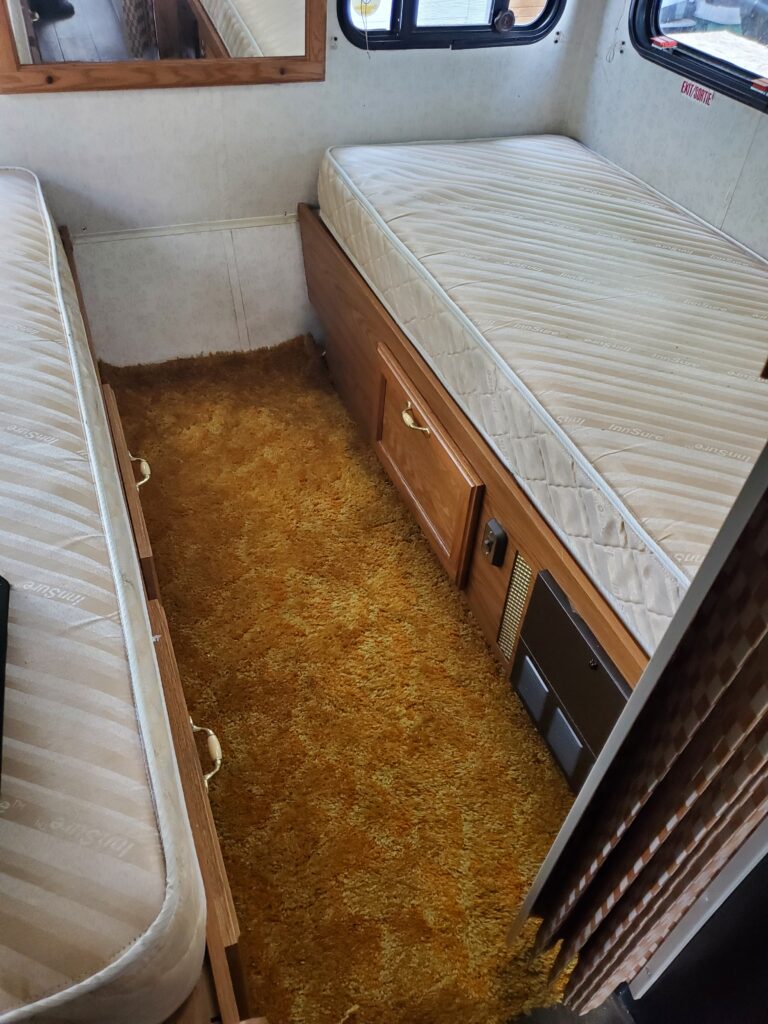
That’s a nice soft place now. The accordion door is back too.. Then I did take time to install a USB charging port on the front wall where we will sit..
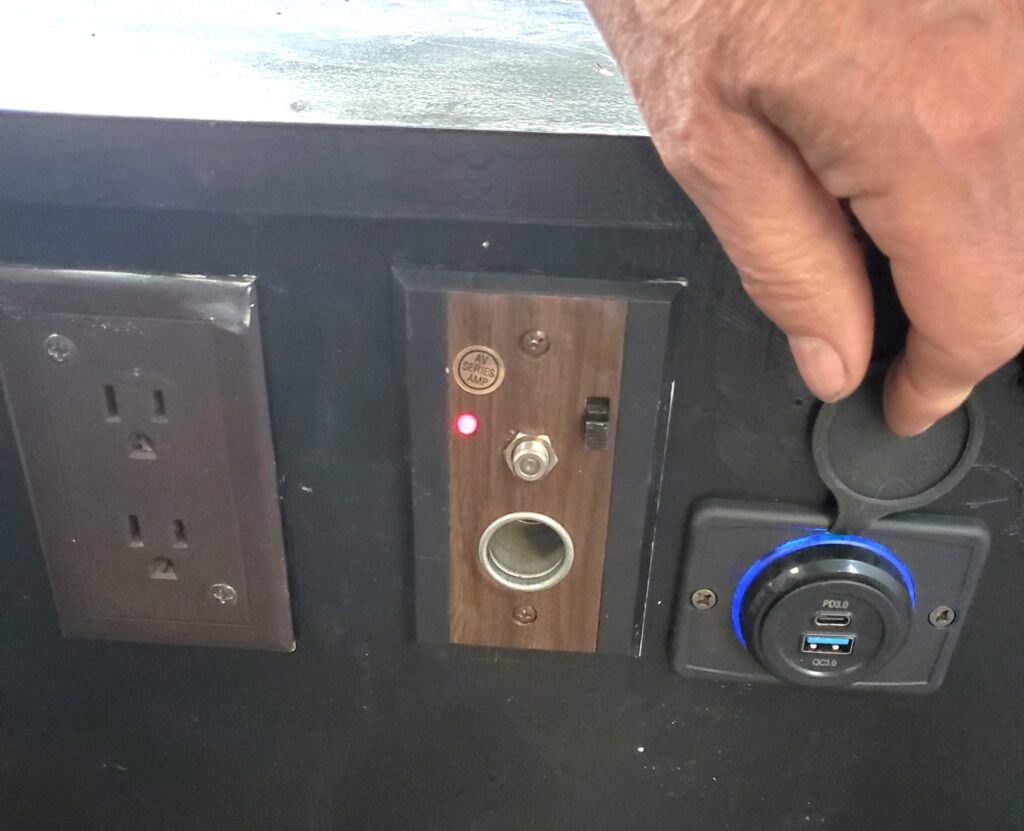
That will be handy. Next will be the carpet for the front space in the trailer. And the bedroom curtains.
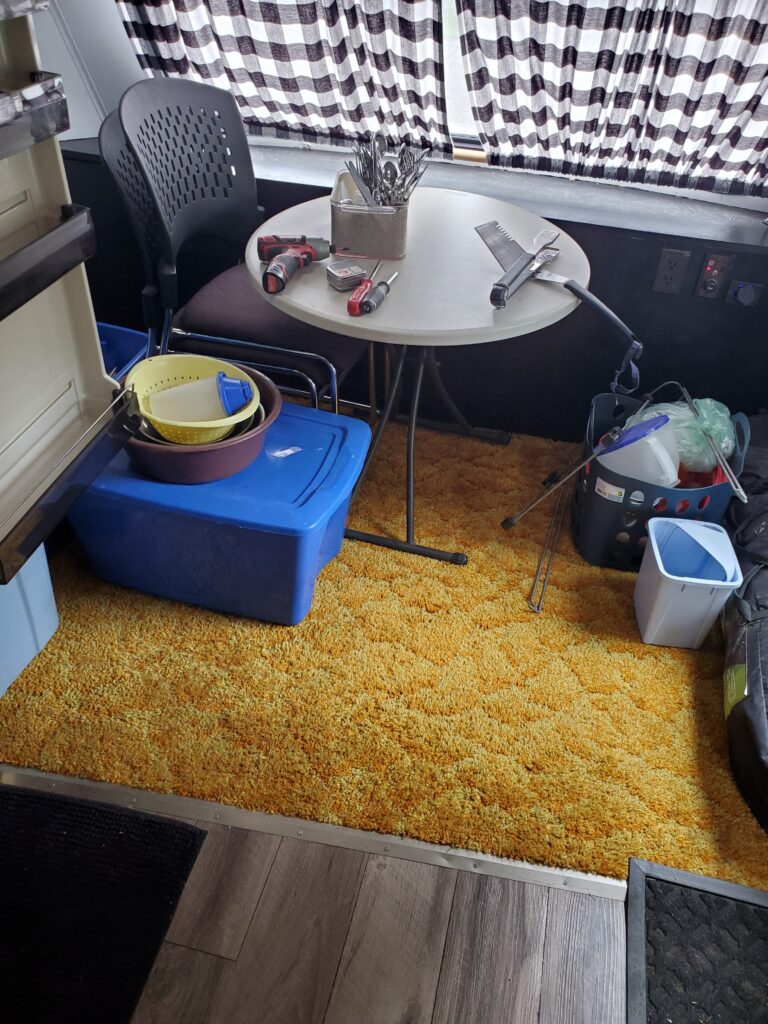
The new carpet.. Hey it’s what we have.. Only for this year.. The table and the two chairs you see are what we will use. Tubs will work as storage for this year too.
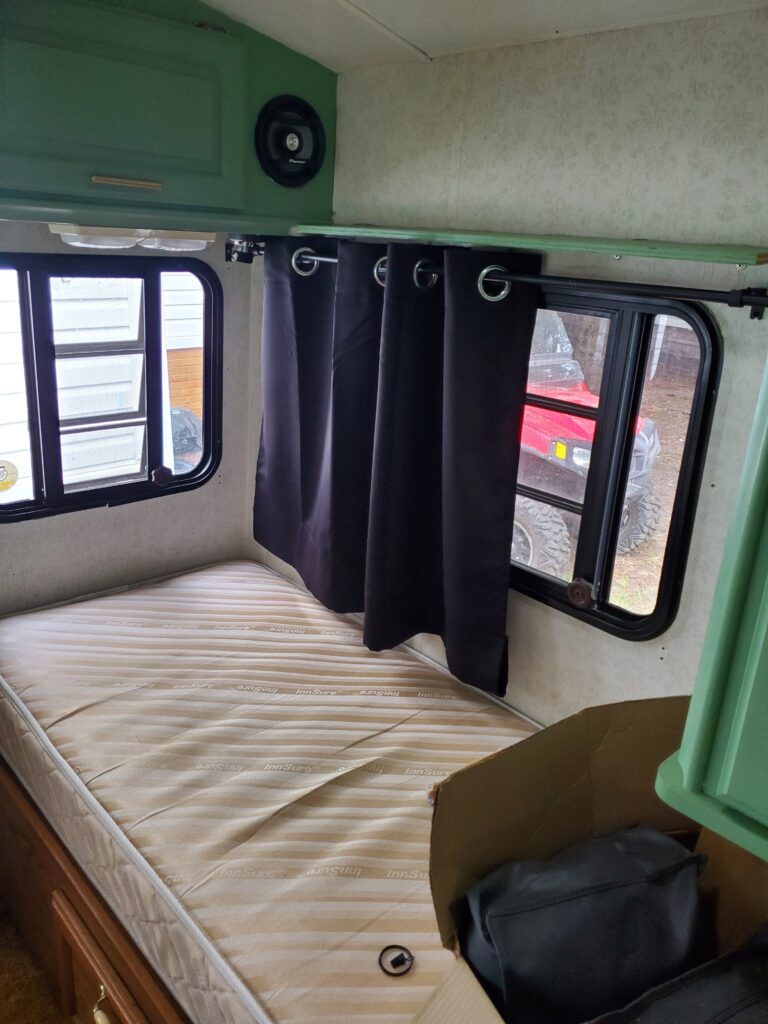
Here’s what the blackout curtains look like. The mini blinds went to the dumpster.
The best deal on Marketplace was only an hours drive. With almost all the goodies I like. However those HUGE wheels need to go bye bye.. They give the ATV a lumpy ride. I have a set of stock wheels to replace them and I’ll sell the big set. I did have a few extra features on my previous 570 RZR, like power steering, horn, glove box, Here’s a photo from the past..
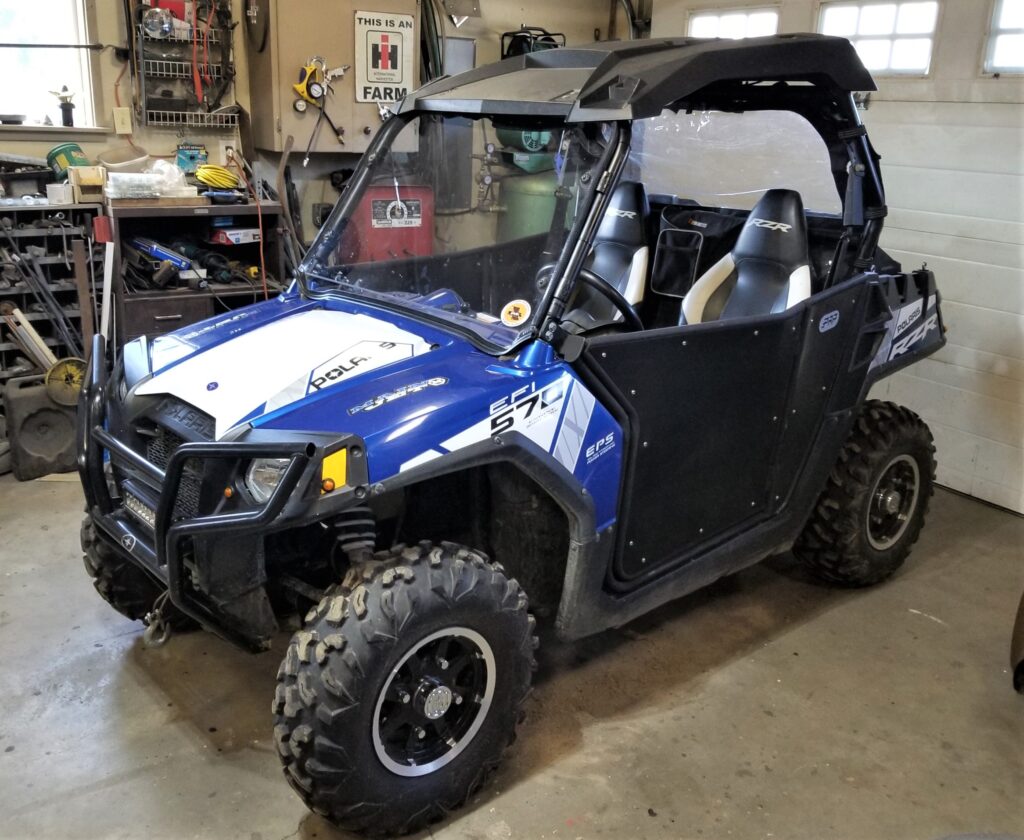
I also had a bush guard and a LED light bar. And in the back a nice lockable trunk that fit my chainsaw. But you know I will personalize the new RZR.
So I had already purchased a good trailer in anticipation of finding a 570 RZR. And it turned out to be the perfect size and tows very nice.
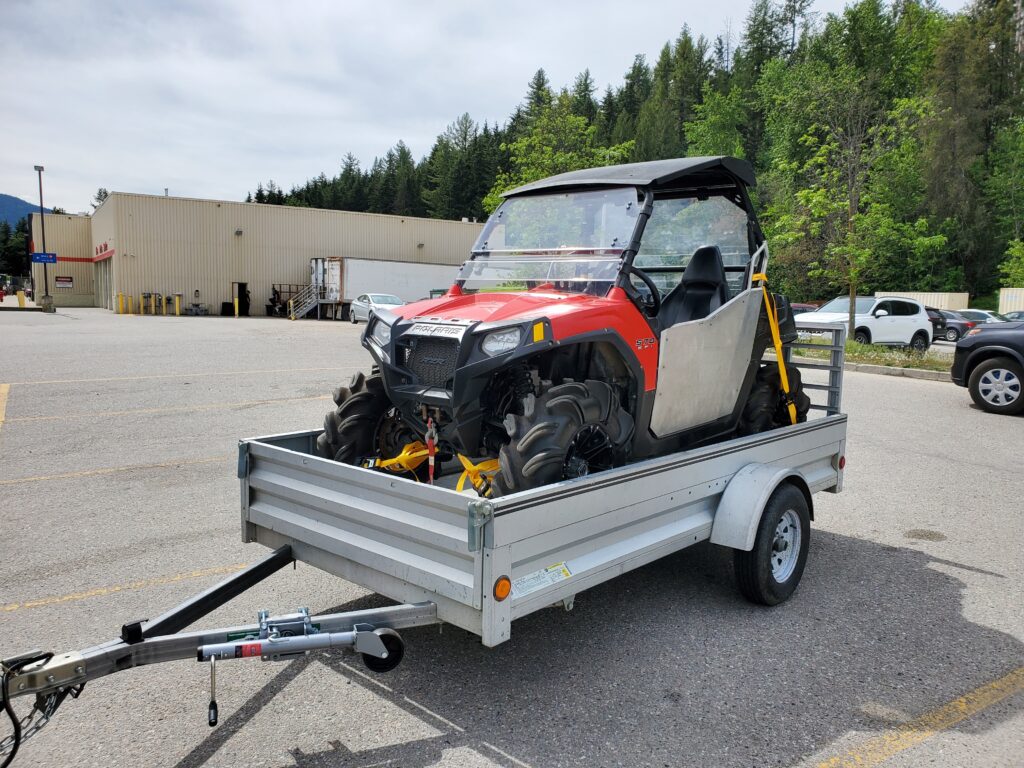
I’ll be storing the RZR in the trailer with a cover (ordered). Remember I bought a set of factory wheels with tires from a local person.. They are the perfect size for the 570 RZR, and look the same as what I had before. However the tires are badly worn. New tires have been ordered.
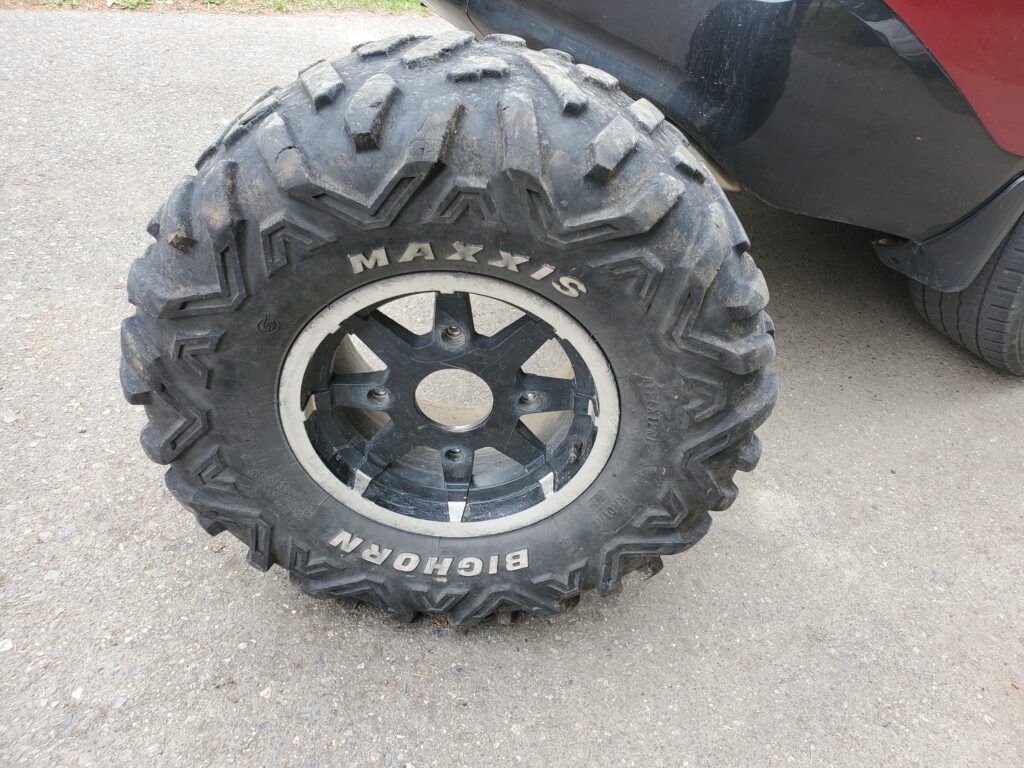
Missing the centre caps , Oh well . Mechanically the new RZR is good.. I did drive it on a trail for a km, and ran it through the gears.. All good ! But any thoughts of keeping those big wheels disappeared…with a rough ride.. and they rub while steering.

Comes with Polaris aluminum doors. The seats are good , and that bag between the seats is the same bag I had.. Handy! Not sure about those ammo boxes in front of the seats. The dash is a little bit messy. I’ll need more switches when I’m done adding things. Ordered the switch plate that holds five rocker switches.
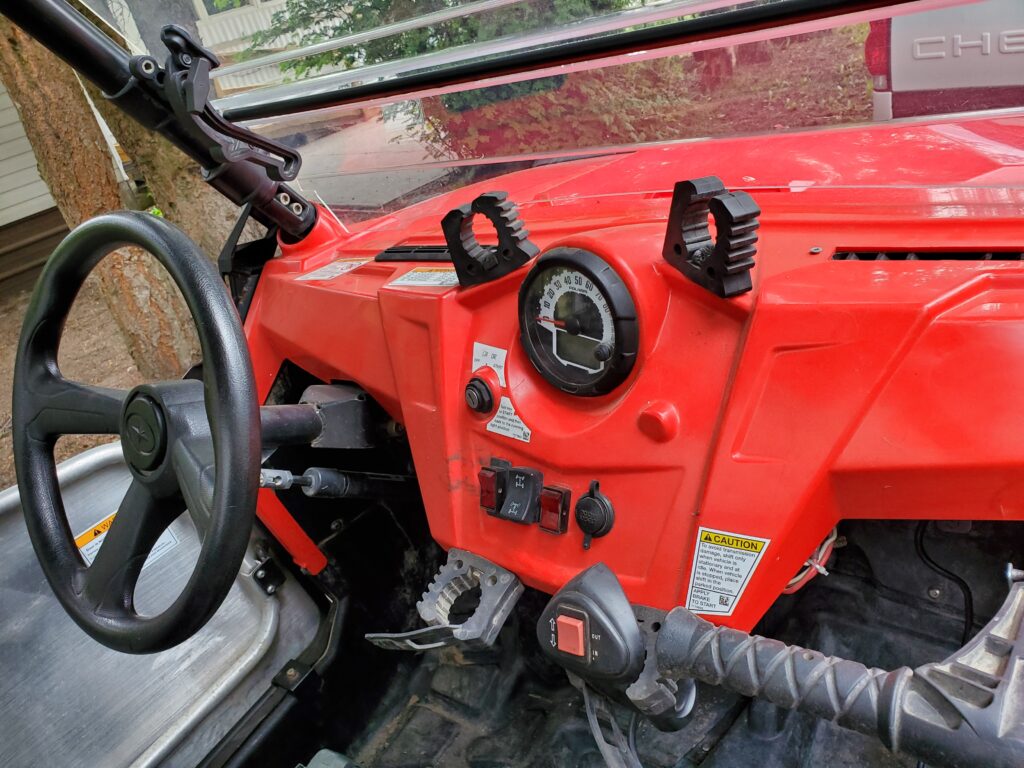
The far left switch is for the heater fan !!! Yes this RZR has HEAT. You can see the defrost vents. The next switch is of coarse the factory 4 wheel drive switch. The little red switch is an interior light on the roof. I’m thinking of changing that to one with it’s own switch. And of coarse the standard 12 volt outlet. That will get moved to on the top of the dash for a future GPS. And the winch control will change to a wireless one, plus a dash switch.
A whole bunch of goodies came this week. That will clean up the dash, give me a horn, and identify themselves. And here they are..
![]()
They make a nice lighted rocker switch for everything ! In the middle slot will be the factory 4×4 switch. Not sure about the placement order of the switches yet.. Hey my new tires have arrived.
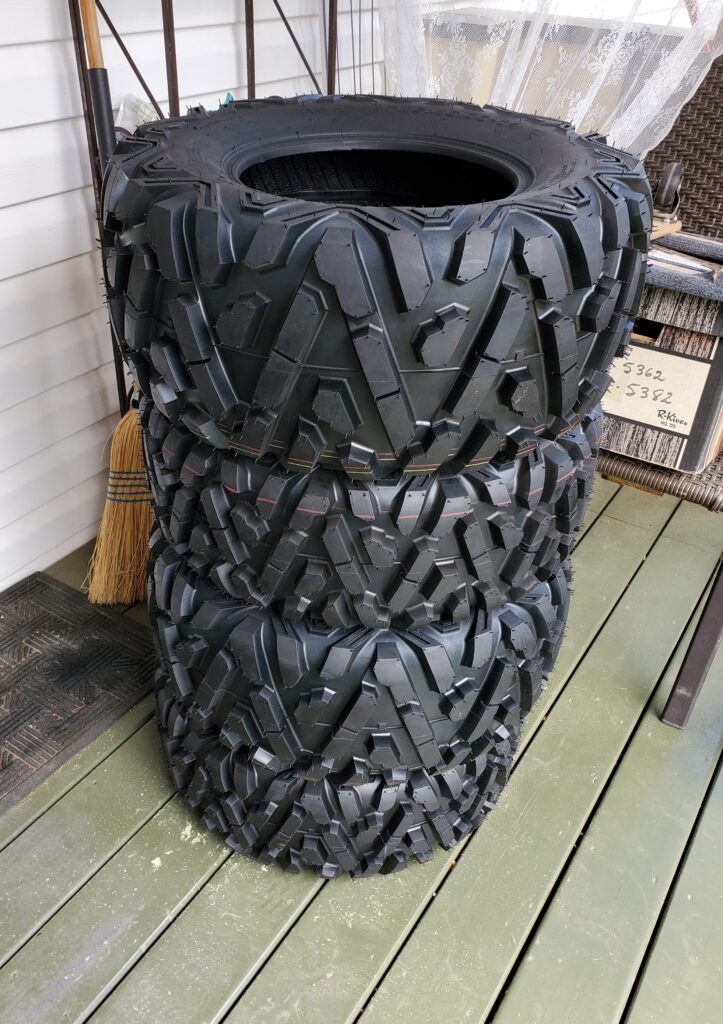
The proper size and hopefully a smoother ride.
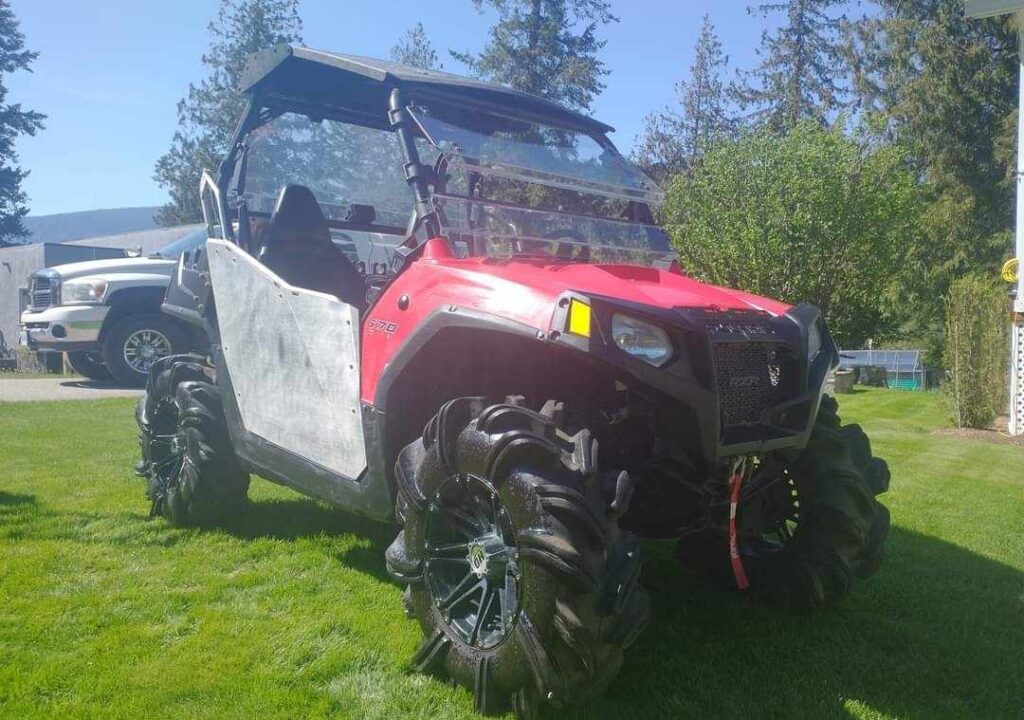
Update.. All serviced now and the new tires installed. Removed a few annoying things.. And now introducing my new 570 RZR…
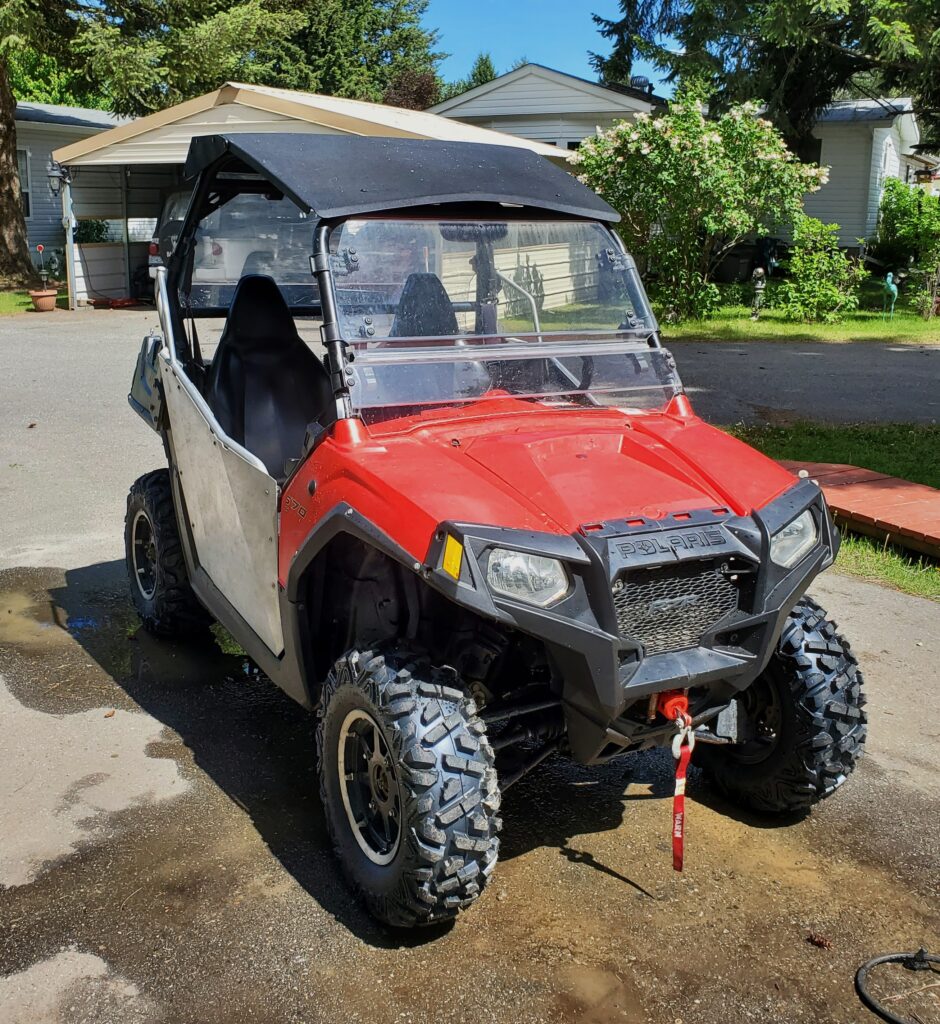
Don’t those wheels look more realistic. There is still a few things to do on the dash.. But for now it’s back on the trailer with the cover on. Maybe a few rides in June . Oh And I did sell those big tires and wheels.. Looking forward to hitting the trails..
Yes I did get to go on a ride. It was great ! Despite the dust I was very happy to be out on the trails again. 71 kms and the Red RZR did just fine.. Only one hiccup with the headlights not working in the tunnel. I just assume they would work ..but nope.. So I’ll have to have a look see what’s going on there. Could just be the switch. Any way I shot a quick video on the rail trail at the first tunnel. The camera adjusted to the lack of light ,but my eye’s didn’t.
Another ride is planned for the end of the month, and I’ll have a better mount for the camera. And I’ll have the headlights working too by then.
This has worked out very well for us.. Buying a place without seeing it ( other that photos) is a bit scary. But we were not disappointed. The house was clean, and all in very good condition. Having to wait a day for our stuff to arrive was ok. Gave me a chance to remove the TV shelve and mount in the livingroom. AND also really look to see where things will go..

Boxes everywhere ! This photo shows a day later when most of those were gone, and most things found their home. Here we are in a Modular Home.. And the rooms are bigger than in our other houses. We love it ! Yes some decor is not what we like but some of it grows on you..
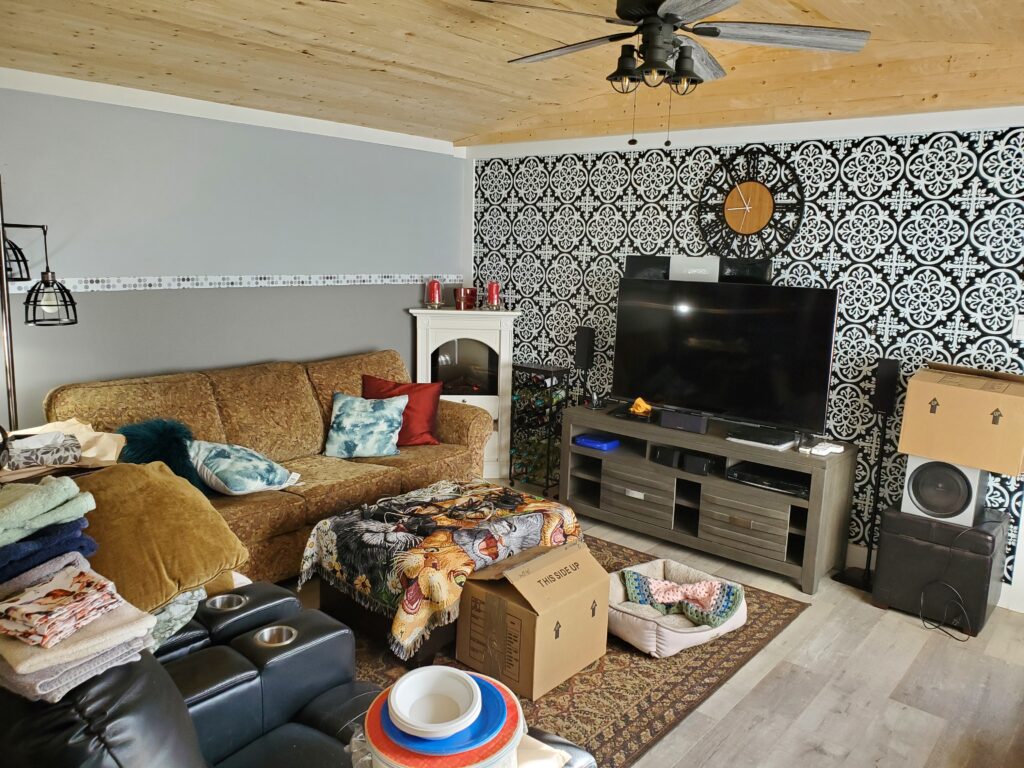
Our furniture fits just fine in this room.. But that wall behind the TV … we all can agree that needs to go. No it’s not wallpaper.. it’s floor tiles ! It would be best just to continue the lighter Gray paint there. There’s more to like about our new home than a bit of questionable decor. Every room has ceiling fans and very nice lighting. Two full size bathrooms, the en-suite has a wonderful large shower. And let’s not forget the view out the dinning room windows.

Yup.. That’s the Kettle River out there. And nothing but a hillside on the other side.
It’s been just over three weeks since we arrived here and we are loving it.. Feel very fortunate to have such a lovely place to live. I made three videos that say it all..
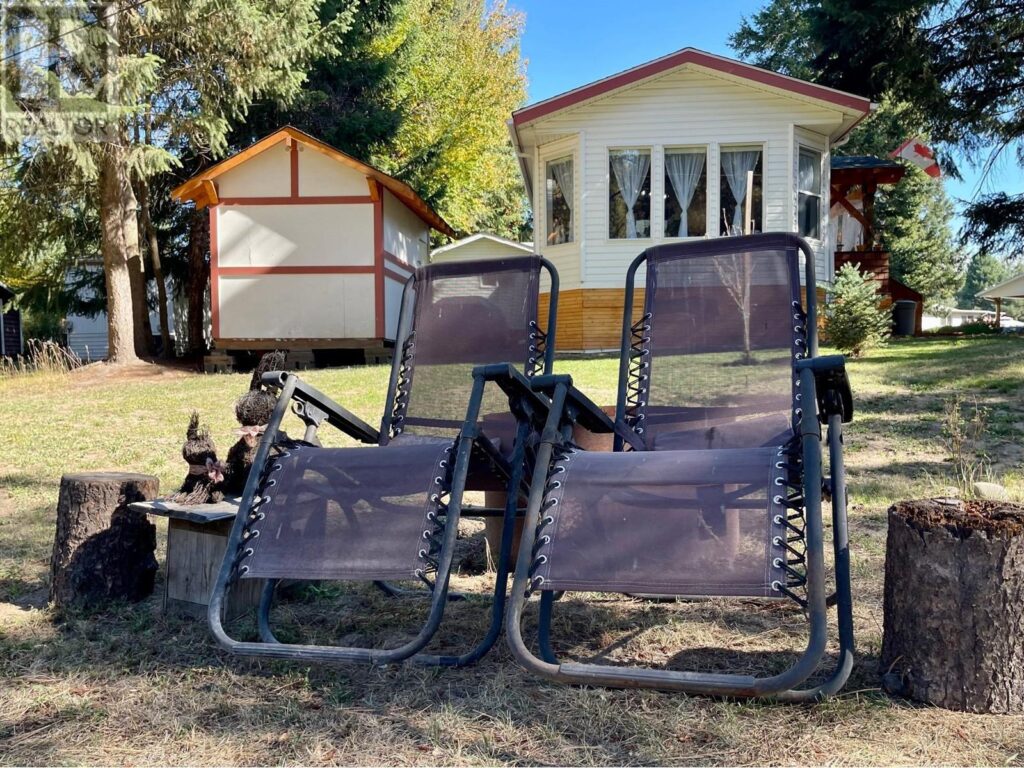
And this next one is a tour of the yard..
And finally an interior tour. All shot with my DJI action 4 camera.
So as you can see it didn’t take long to settle in. Still a few things to do ..but no hurry now. Even the cat is settled in just fine. I’ll close this chapter for now.. Thanks for following.
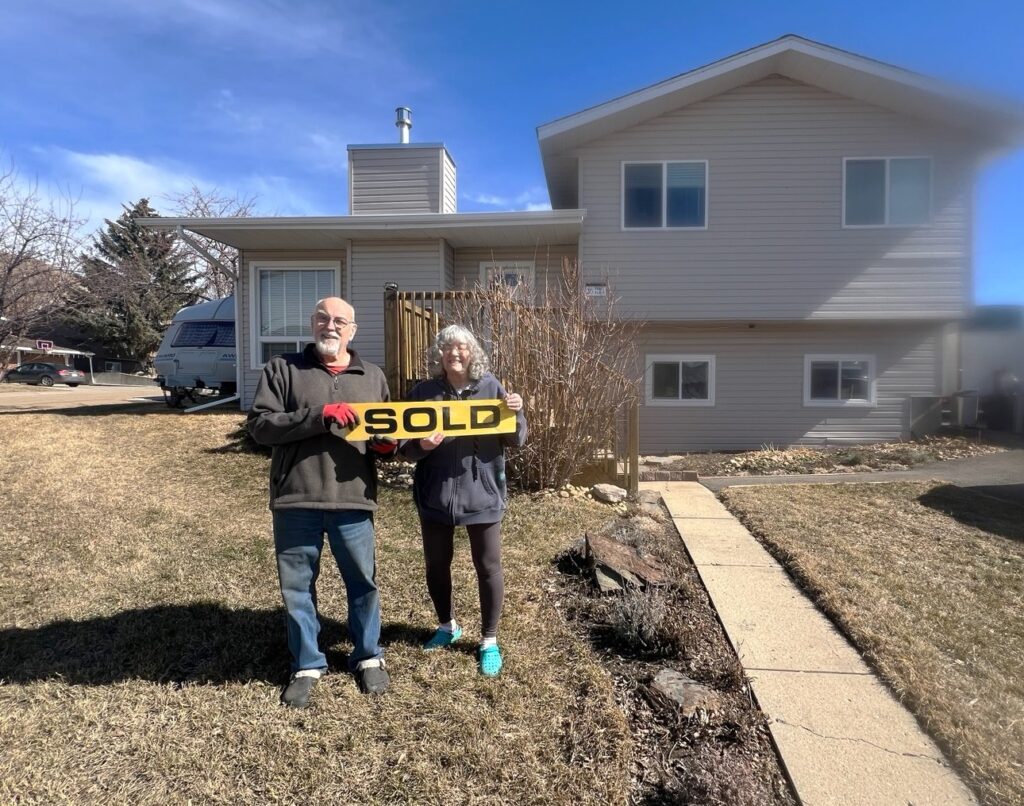
Our agent took this photo when she came to take the sign away.
Lots has been discussed and pondered and decisions made about this whole process. And even then plans can change quickly. It’s all normal for something like this big move. We’ve set up the utilities, House insurance, the park permission ( ya that’s something) , The movers are booked, The Uhaul trailer is booked for the first trip of shop stuff at the end of March. We’ve been selling and giving away truck loads of stuff. We’ve got a new doctor waiting for us in Grand Forks… Feeling lucky on that one ! Lawyers are set up for the selling and buying. The weather is getting better too ! My next step is to load up the two small utility trailers so they are ready to park on the big car hauling trailer for the free ride to Grand Forks ..again at the end of March. But I’m waiting for a warmer day..
That day has come! The snow is all gone and it was a day of washing dirty things and building the puzzle of stuff in the utility trailer. Here’s my bundle of joy…
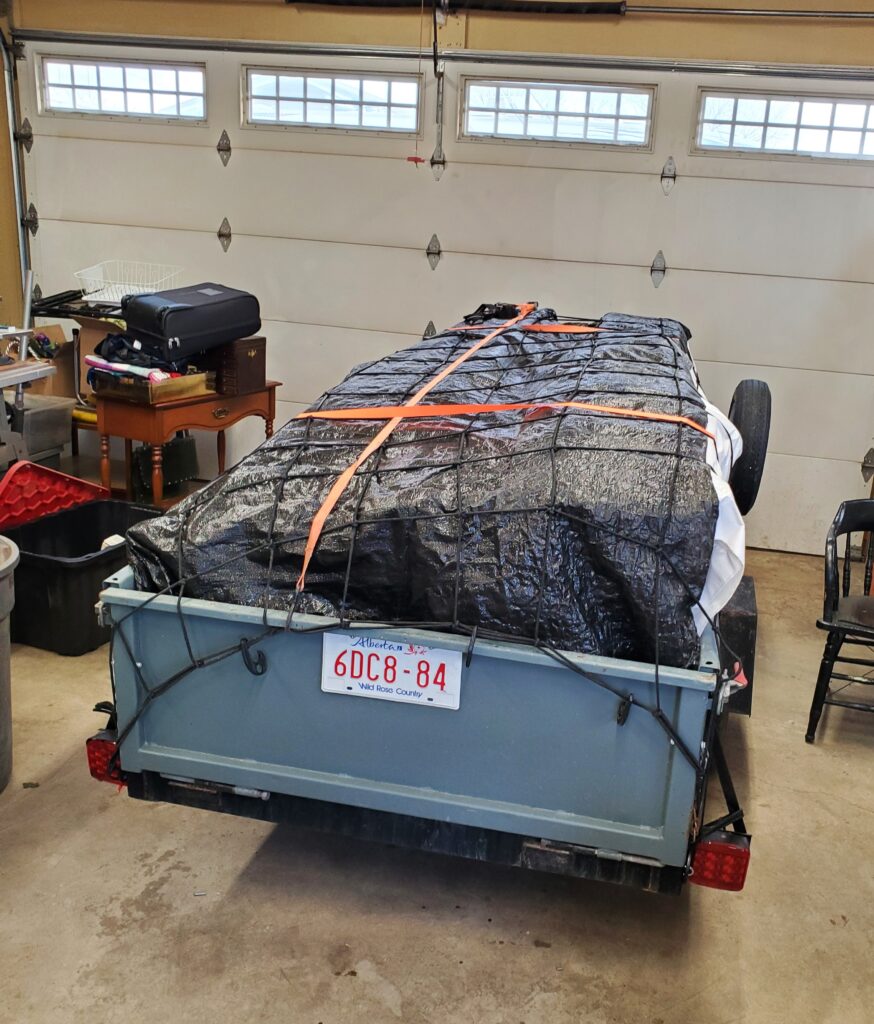
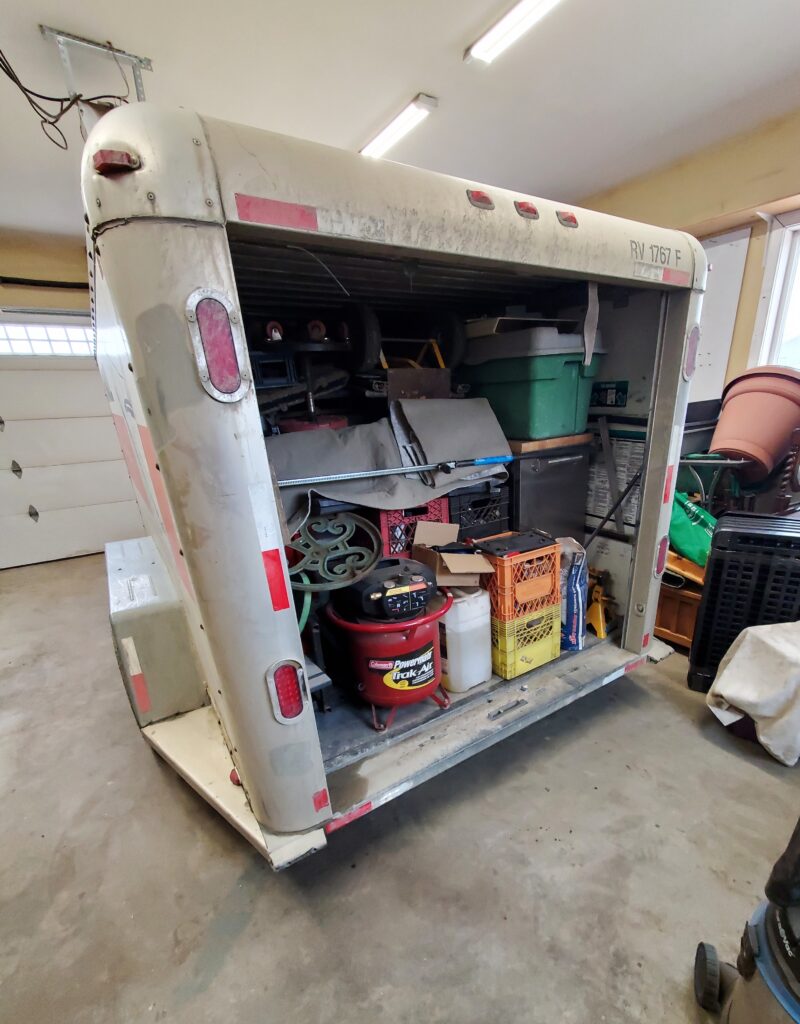
So that’s 3 bikes. Mower , Snowblower, small tiller. Some yard tools , loading rams… It will be topped off with the wheelbarrow. And more straps ! The stretchy net really works great to keep the tarps from flapping . And I topped off the enclosed trailer with more stuff too…
![]()
Don’t need to worry about this stuff …Just close the door. And then open it carefully later..
It’s great to have this done a week before we load them up for the free ride to Grand Forks…….. I have emptied the shed and gathered up the hoses. Cleaning up under the deck and getting things through the gate and out of the yard.
Next : It’s Friday and we picked up the Uhaul trailer for the shop stuff. It only took us just 2 hours to load the trailer…
Looks like we could have fit more in there.. But we ran out of stuff ! I allowed two days to load the trailer. There is a few things for the Avalanche to carry like the ladders, pressure washer, Shop vac and the trailer mover… No big deal.. Got all day Saturday to do that.

Look how empty the garage is…
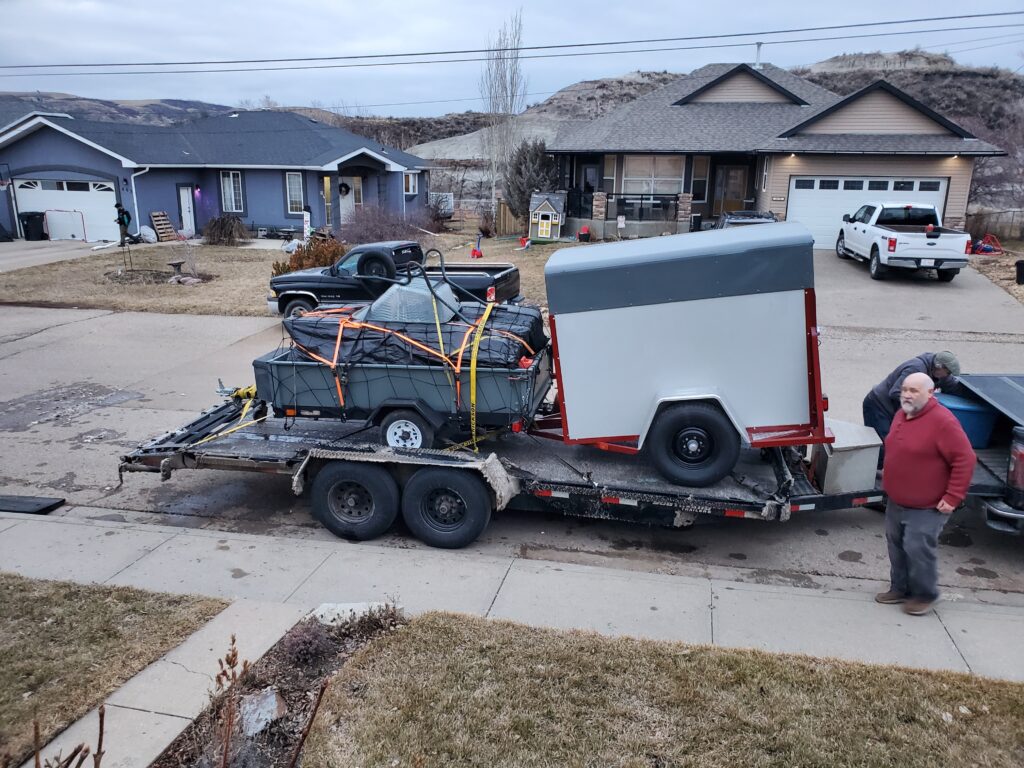
Tomorrow is driving day ! Trip # 1 to Grand Forks. I was planning to take more photos and maybe a video.. But we were busy and the drive was through the snowy , slushy foothills of southern Alberta. But sunny when we got to BC. Here’s the car trailer with the two utility trailers loaded on and ready for the trip. Notice the caked on ice and snow from the trip here.
Both loads were heavy… But we got them there and unloaded and the rental trailer returned the next day. Did some running around on the Tuesday and back to Drum on Wednesday. We visited the trailer park twice because I had things to go there for our room mate. That was the first time I got to see our new home. It looks exactly like this photo…
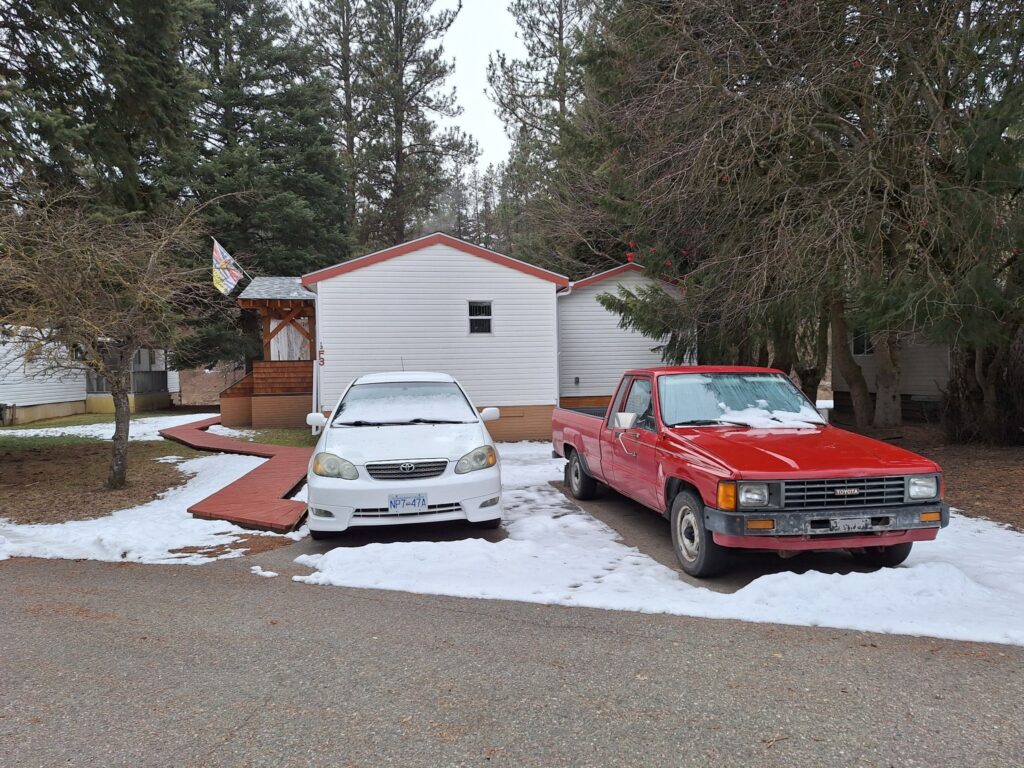
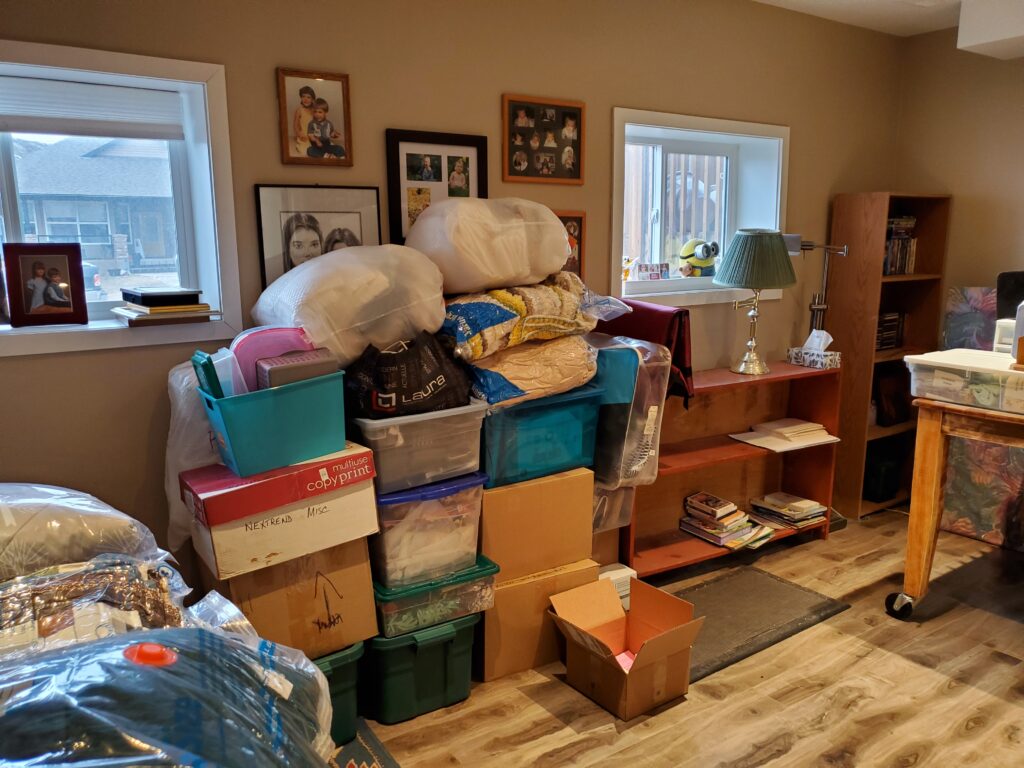
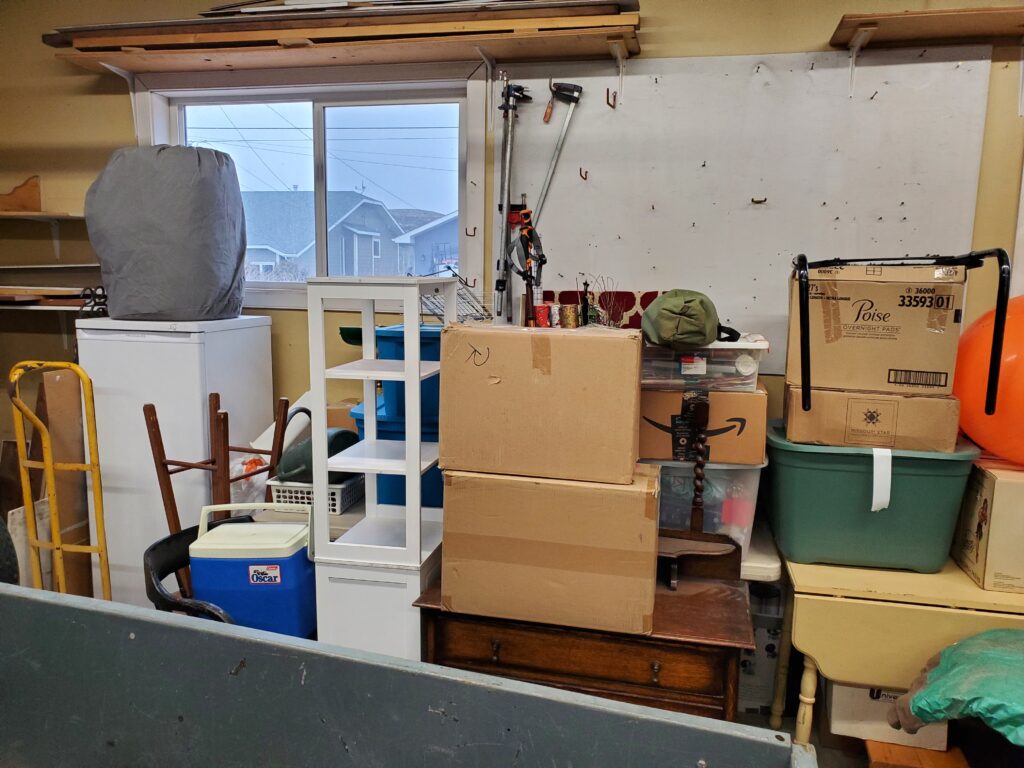
Without the snow.. Even the two vehicles are there. So now we continue packing sorting and tossing stuff with help from Maureen’s Brother & Sister. Even though the movers are going to do the packing …we have to sort through and decide what to let them pack.. The result is a big pile in the family room.
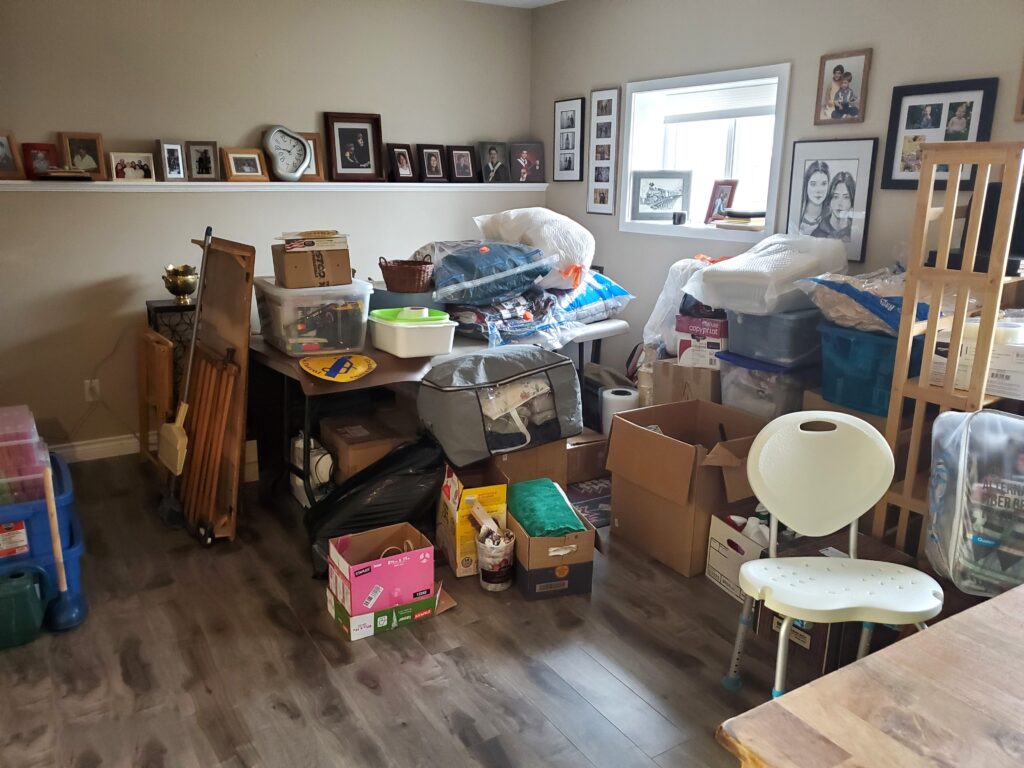
And this is just some of the stuff. However the crawl space storage is empty ! In a few days the movers are coming to do the packing and load the truck ( or trucks) the next day. That leaves us here for two days with an empty house to finish the cleaning .. And that won’t take two days because we have done most of that already. And a big truck showed up to pack the house and the truck..
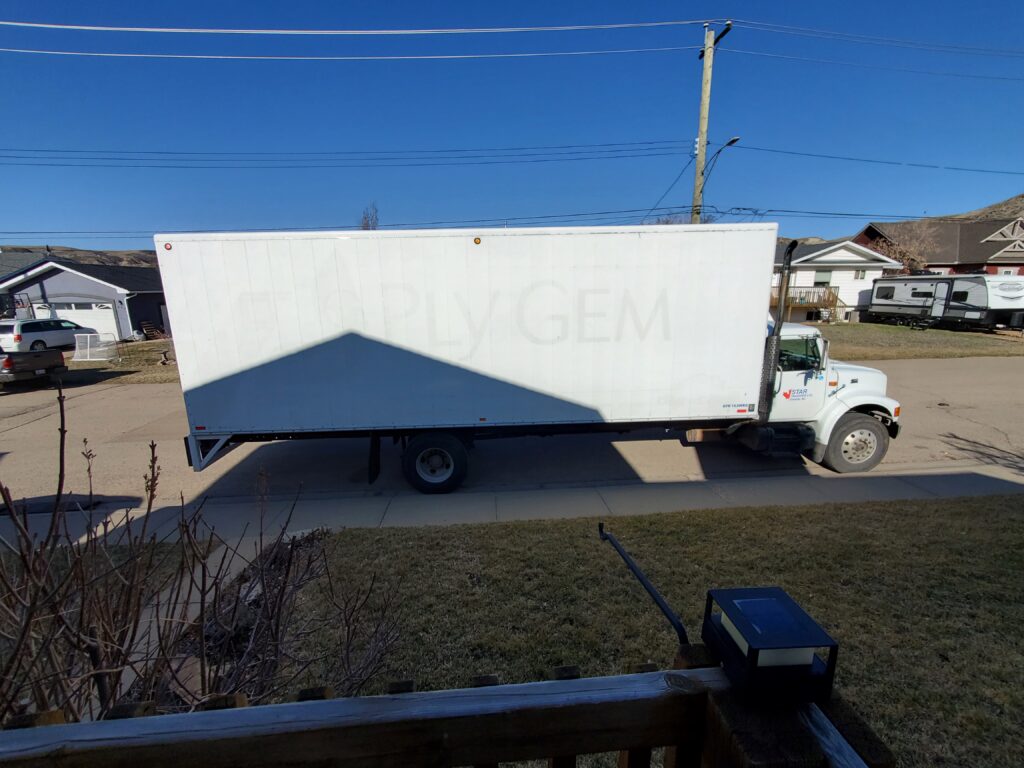
That should work.. and when it left it was 90% full. And on the 15 th we were ready to roll early in the morning..

Award trailer all hooked up and we just left.. not looking back.. Ten plus hour drive back to Grand forks.. Time to start a new chapter and a new page in this post..

It’s not like you wake up one morning and list the house that afternoon.. No we waited a whole day.. Then listed. The idea has been brewing since my Son move WAYYY up north and the other family member moved back to BC in early January. So why are we here ? No friends, no family and no support. Now the question is can we even move back to BC.. Grand Forks specifically. Why yes we can.. Not to a full size house, those are defiantly beyond our reach. However (Good News for us) Two manufactured homes came up for sale in different rural (Adult 55+) MH parks. These are priced much lower because you are only buying the unit and rent the parking spot / pad. One of the homes even had a garage! So we had a choice.. However we found out that the one with the garage had issues.. So we settled on the second one that was in the Almond Gardens Mobile Home Park… Rural Grand Forks, where I always wanted to be.
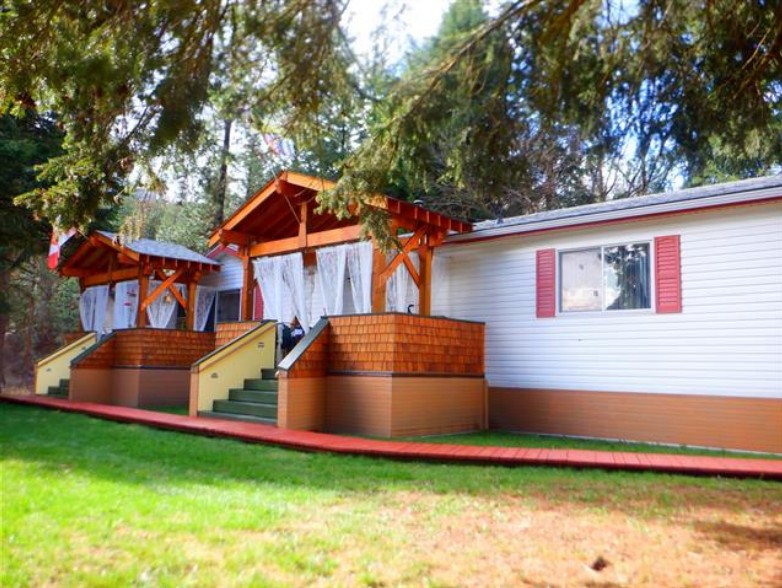
Our house is now sold ! done deal… So we put in our bid on the (F3) home in the Almond Gardens Mobile Home Park. And that is a done deal too. It’s a big unit.. 16 wide x 76 long with an edition room , making it 1400 sq ft. AND .. it’s a riverfront lot ! This is very different for us. Just a garden shed.. No Garage ! No basement !
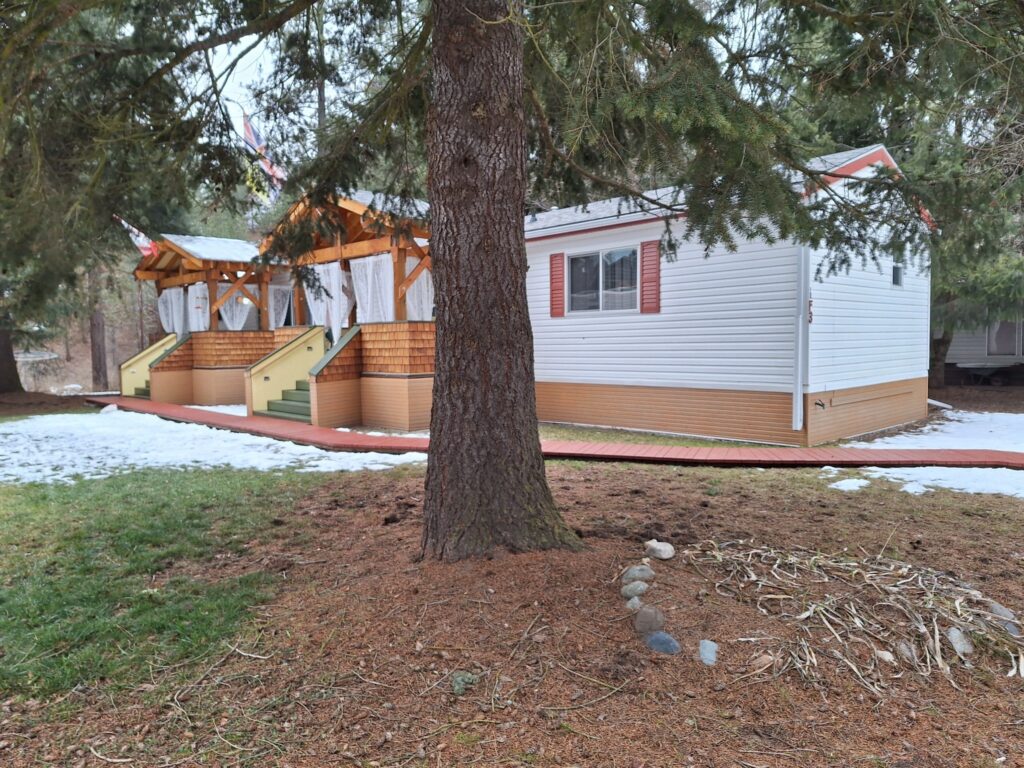
Don’t much care for those two porches… Or the wood sidewalk. But this next photo makes up for all of that……
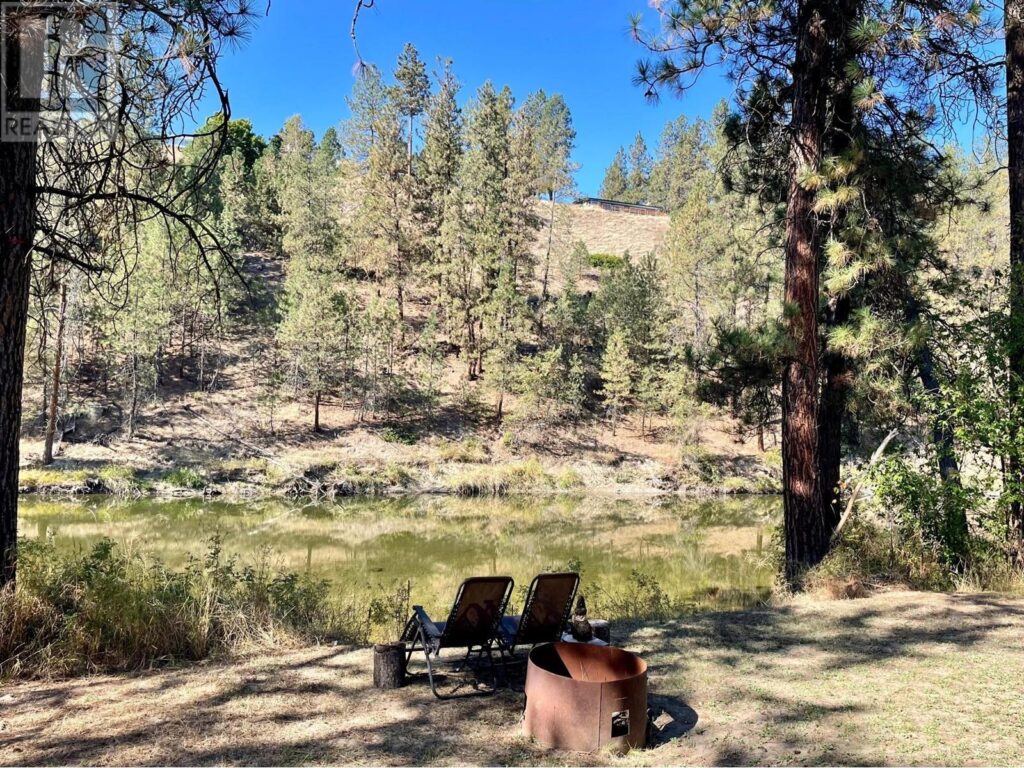
Our back yard… And yes that’s a good fire pit.. And yes that’s a post card view from our dinning room of the river we all love… the Kettle River
See what I mean ! We think it’s worth every penny. We have friends in this park.. And will likely make more. That’s the sense of community that we miss. So can’t wait to settle in.. But there is work to do before we go..
Here’s a video I made just the other day talking about the whole deal…
Yup sitting in my wonderful heated garage on a very cold day. Thinking about the stuff I need to get rid of. Like I said some things are staying with the house/ garage. But the rest is just stuff. This will be purge number five for us. There is a lot of things that have to be done , like pieces of a puzzle they are need to fit into the process. Realtor’s may take care of the buying and selling of the homes. And the movers will pack up and deliver our stuff to the new home, but there is so many more details that we are busy with.. I’m not going to get into all those things but just believe there is lots to do. I’m also not going to get into the new home too much, because I’ve only seen photos. But I will show you one more that is a good example of the decor we are (in mid April) walking into..

Yes that is an old GE stove that has been restored.. We’ll use it . I don’t expect those stools to be there. I hope not ! White cabinets are nice, and the wood ceiling is just fine… however that wallpaper in the living room behind the TV has got to go. It’s a big kitchen ! There’s another whole half to the right not in the photo, it has the sink & dishwasher. Don’t forget this unit is 16 ft wide. Ok I’m going to show one more photo..
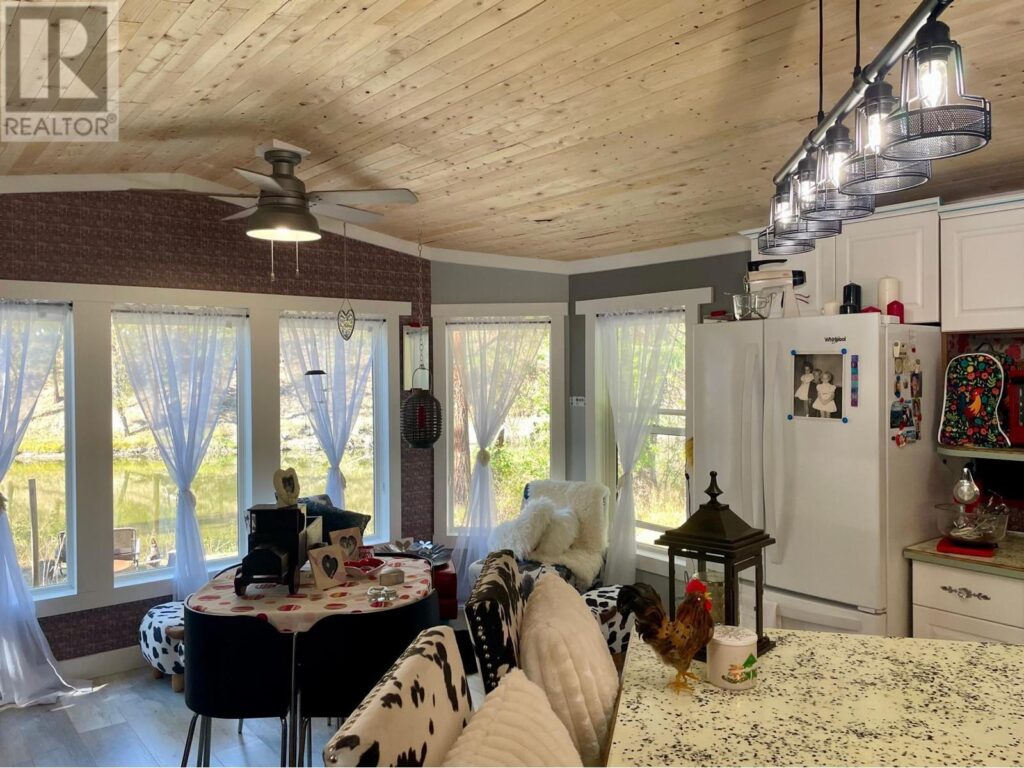
This really shows the Dinning room and the view of the river. Looking forward to that view. But enough of the new place…
Let’s return to the current place and see how much we have done.
Here’s the family room in the basement. Sold the sectional couch and the big TV.. Gave away a truck load of unused stuff from the storage crawl space. This pile is packed and ready for the movers. Oh there’s lots not packed yet… But that is the movers job. This pile is what we sorted through and repacked after purging the unneeded things. As for the garage (that’s my job) it’s doing better.. But it just got filled with other stuff from a different storage.
My three tool cabinets used to be on this wall. On the far left is our new smaller freezer waiting for the movers to take what’s left in our big freezer (closer to the move) that big freezer stays with the house. We are now one month from the big move.. And two weeks from the first trip to GF. I will interject here with a new video…
Now we work our way to the end of March and that first trip.. And packing the utility trailer that’s parked in the garage.. And let’s start a new page for that process…
So let’s keep going shall we…. It’s time to re- install the axle and the hubs. Easy when you have new bolts and parts. And this allows me to double check the squareness of the hitch. Only 1/8″ out.. not enough to cause a problem.

And bonus ! That means it’s not seized anymore. Cleaned up the hubs and replaced the broken wheel stud. The grease is still good, which really surprises me. And the outer bearings are like new ! So a little paint and then put them back on, with new grease.

I’m thinking this will be presentable. Those dust caps are interestingly big. They are threaded on too. I need to get some 3/4 plywood now for the floor and the tailgates, so I can weld the hinges in place and finish the painting. And I had to make a new frame for the lower tail gate using some pieces from the top tail gate.

This is my new frame… taller when closed and over laps the top one to hold it closed.. It was the opposite way originally on the trailer. this will be 3/4″ plywood and the top will be only 1/2″. The hinges are in place and work great ! You can remove the tail gate only if you have it horizontal.

It’s not heavy so easy to remove if it’s in the way.
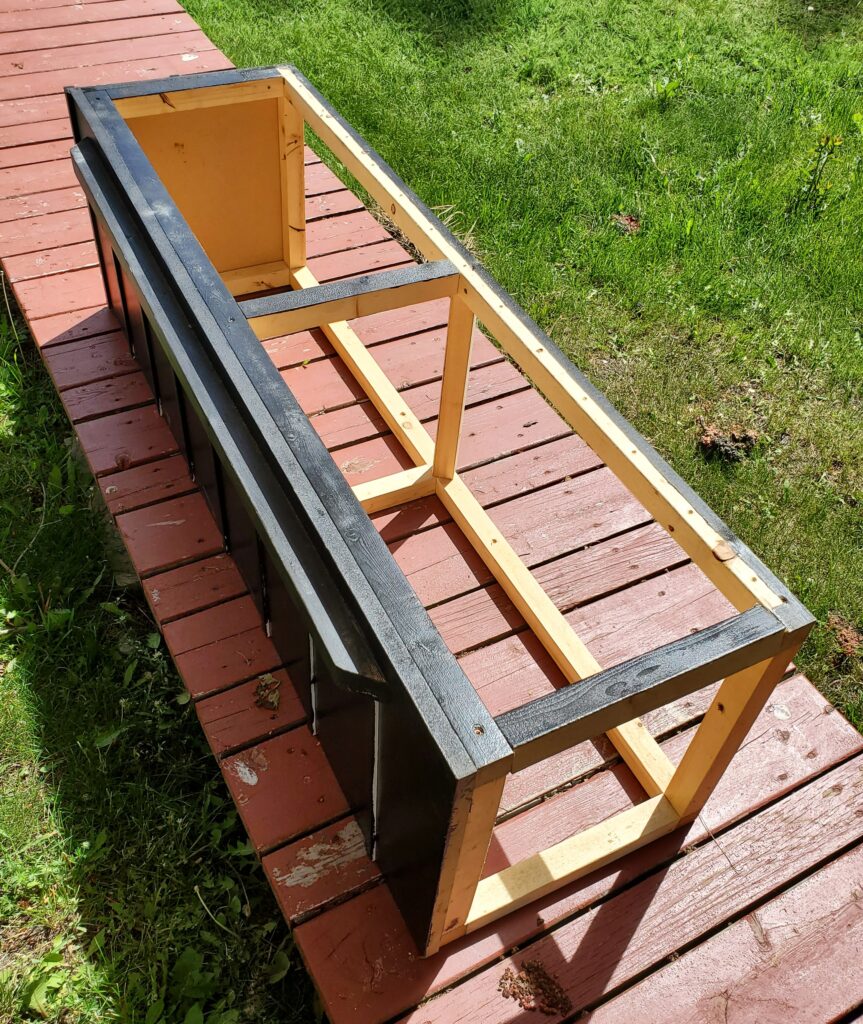
I now have all the plywood for the trailer.. so a few cuts and some grey solid stain on the good side for the outside. This is the front panel.

Two coats of the grey, and this one is done and ready to install.
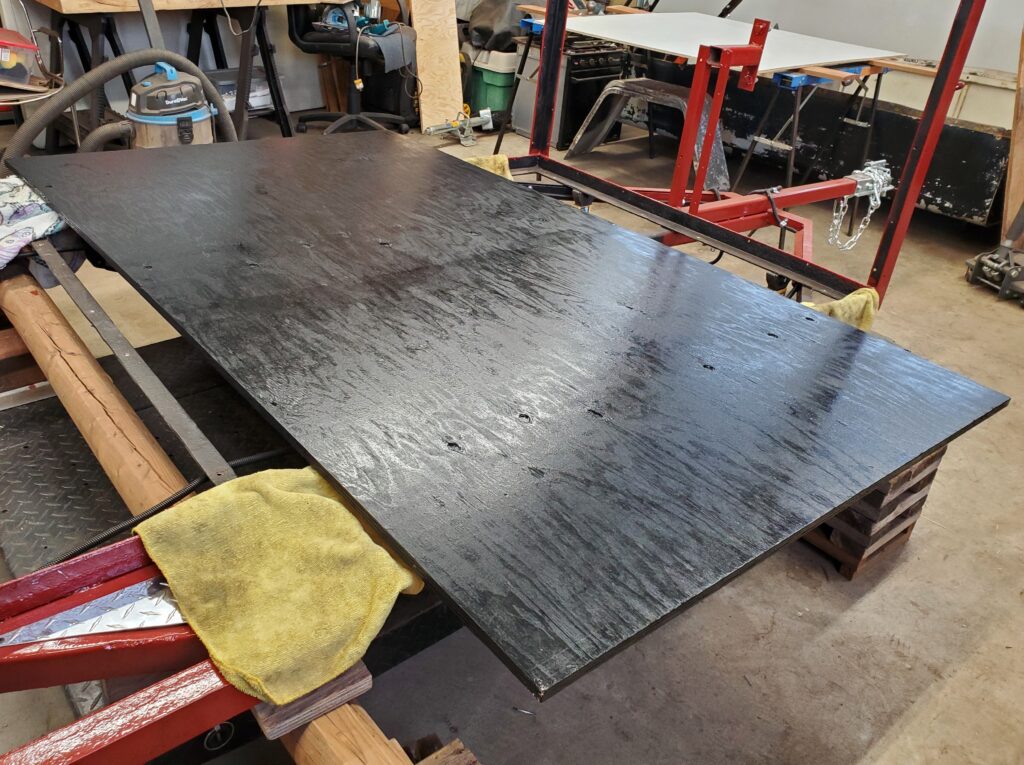
The 3/4″ floor sheet gets a black enamel paint on the under side. When it was dry I flipped it over and slid it into place. Then the front wall could tuck in there too.

And there’s a peek at the way things will look. The sides are next. I kinda wish the grey was a little darker.

And there we have it… a three sided box..of sorts. Not painting the plywood inside because it will stay dry and will be subject to abuse of all kinds.

Also I’m going to put 3/4″ fillers along the sides of the floor. I’ll also be trimming off the excess bolt threads flush with the nuts. I’m cleaning up the fenders next, because they can also get put back on. They are going to stay bare aluminum.

If you look back at the photos on PAGE 2 , you will see a big improvement. They were painted white (or what’s left of that) and covered in moss. My jack is possibly coming today and once that’s on I’ll put the wheels back too. Time to clean up the garage and juggle things around for work on the roof. No jack yet so the trailer mover is needed..

Wow everything fits in the garage! I’ve already pried the pieces of the walls from the slots. Time to clean up the inside and paint that first. And then I realized why the roof was not heavy, and not rusted ! It’s aluminum… Geese do I paint it or sand it down ? Anyway it’s on and soon to be bolted down too.
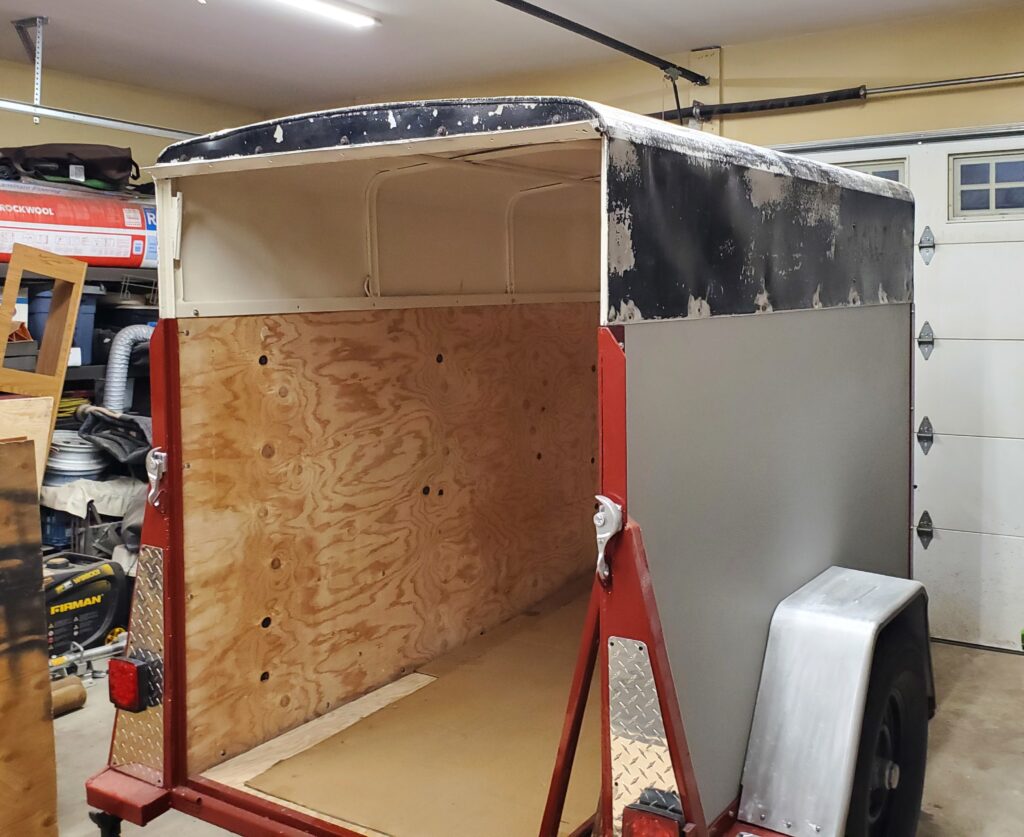
See the nice cream colour on the inside.. Ya no more ugliness. And for those asking the question ..How did he get that big roof up there? well with the help of a beautiful assistant of coarse. I use the pipes that stick out each side so it doesn’t fall off.

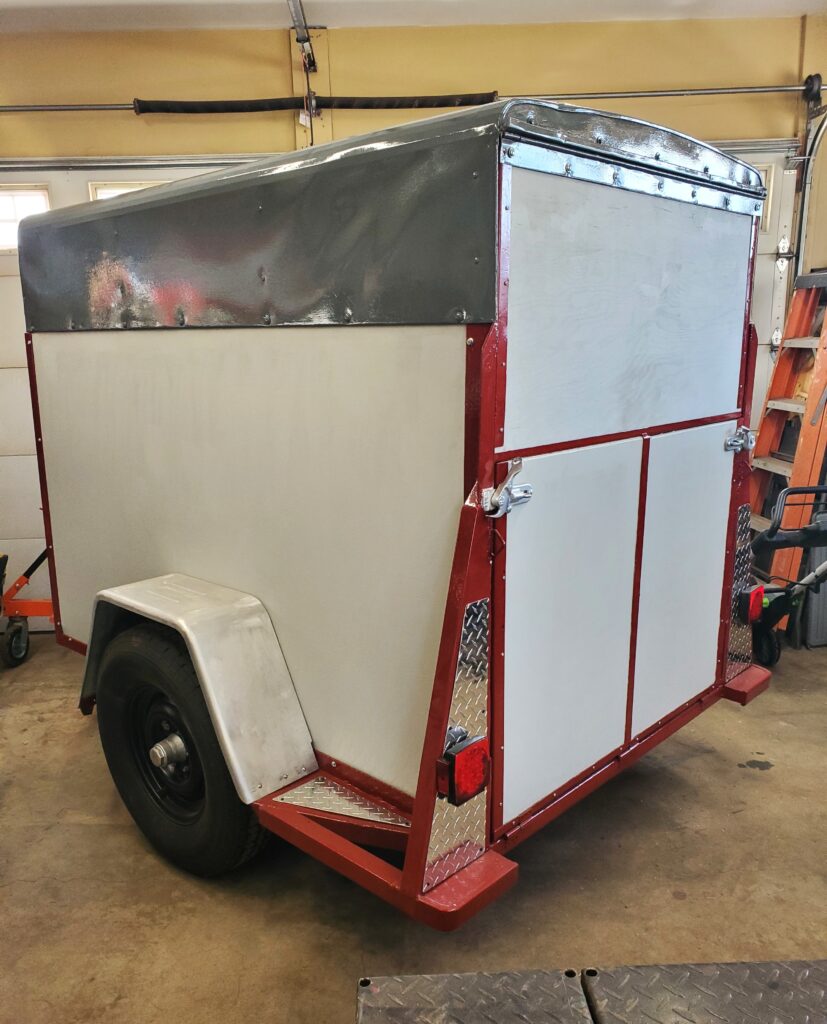
With a bit of persuasion.. it slotted down on the plywood sides. I am going to paint the roof.. It’s pitted quite a lot, so the paint will help keep it nice longer. And done…

It’s not the best looking trailer. Using what paint I had has it’s challenges that way. But it’s in like new condition, which is the real goal. Hope my jack shows up soon. But next is the tailgates. And now I’ve painted the lower panels and will bolt those in place soon. Meanwhile my jack finally came today just a week before Christmas.

And it’s a perfect fit , and a perfect height. So the front stuff is all done. On to the rear doors..
DONE !
Perfect ! Everything works as it should. Ready to hit the road. I’m keeping this little guy for awhile. Will keep you posted. And one final video….
So as I close off this trailer project , someone suggested a before & after photo…
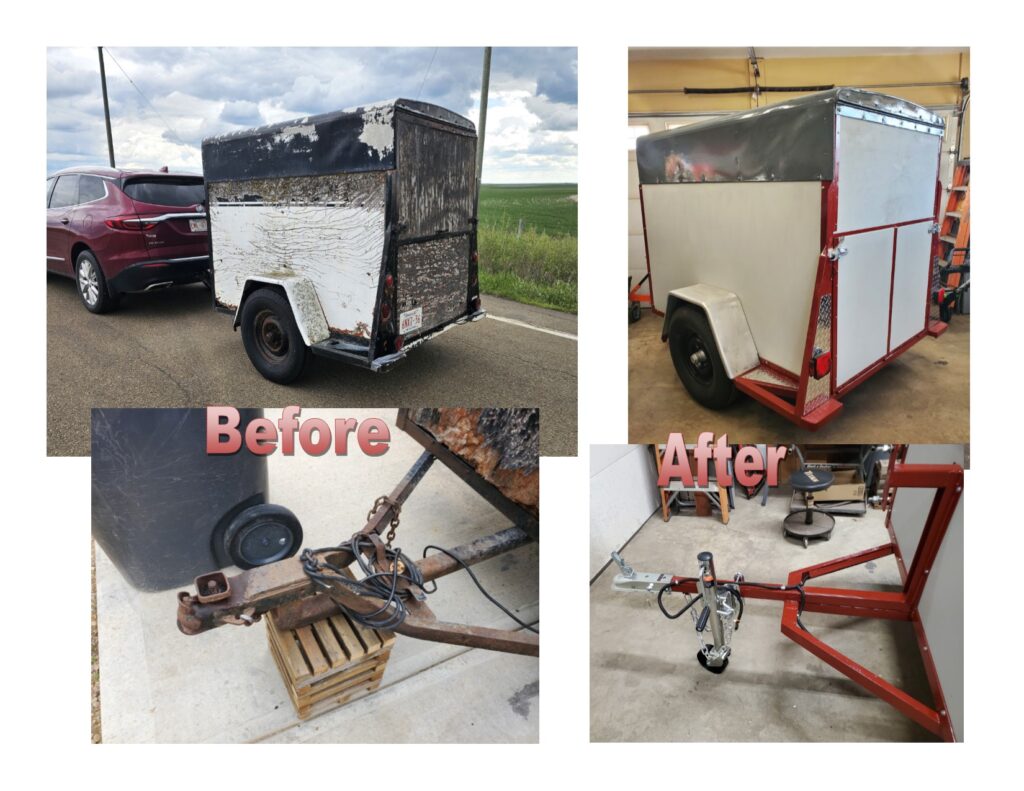
All Done!
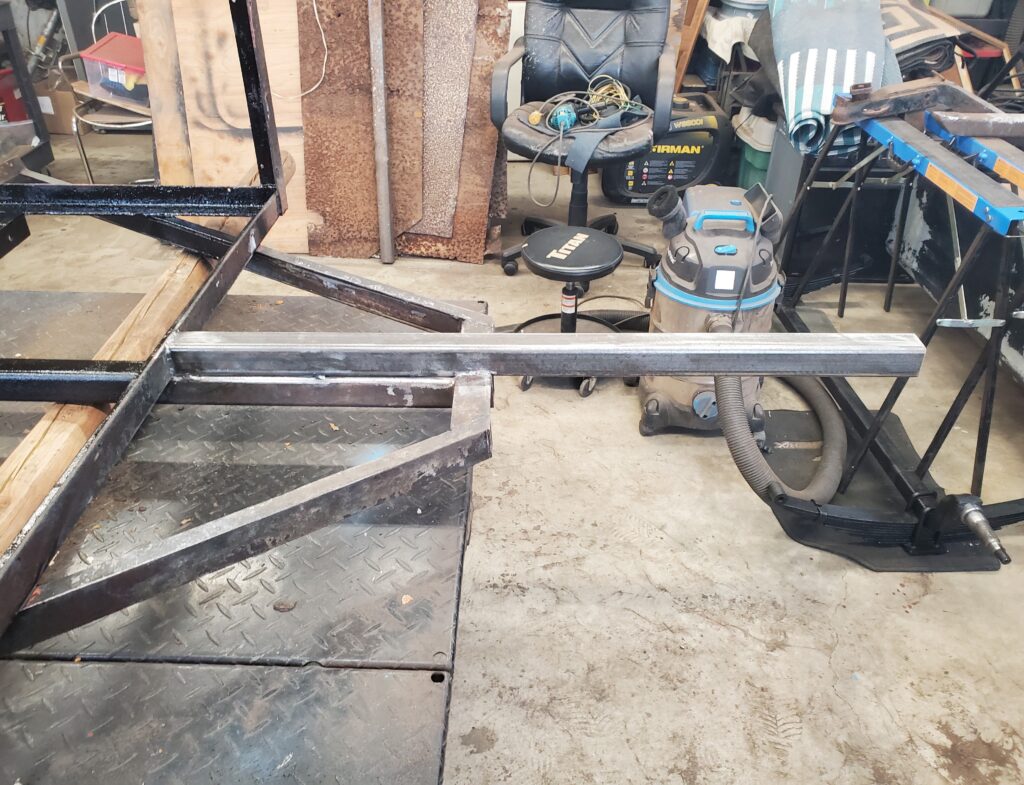
Couldn’t line it up with the old tongue one under this one.. it was not true. But the frame of the trailer is square so I’m going with that. Worked out good . one more piece to weld on the front and some hooks for the safety chain, but I’m not sure where it goes. However I am sure where this goes… The front cross plate.
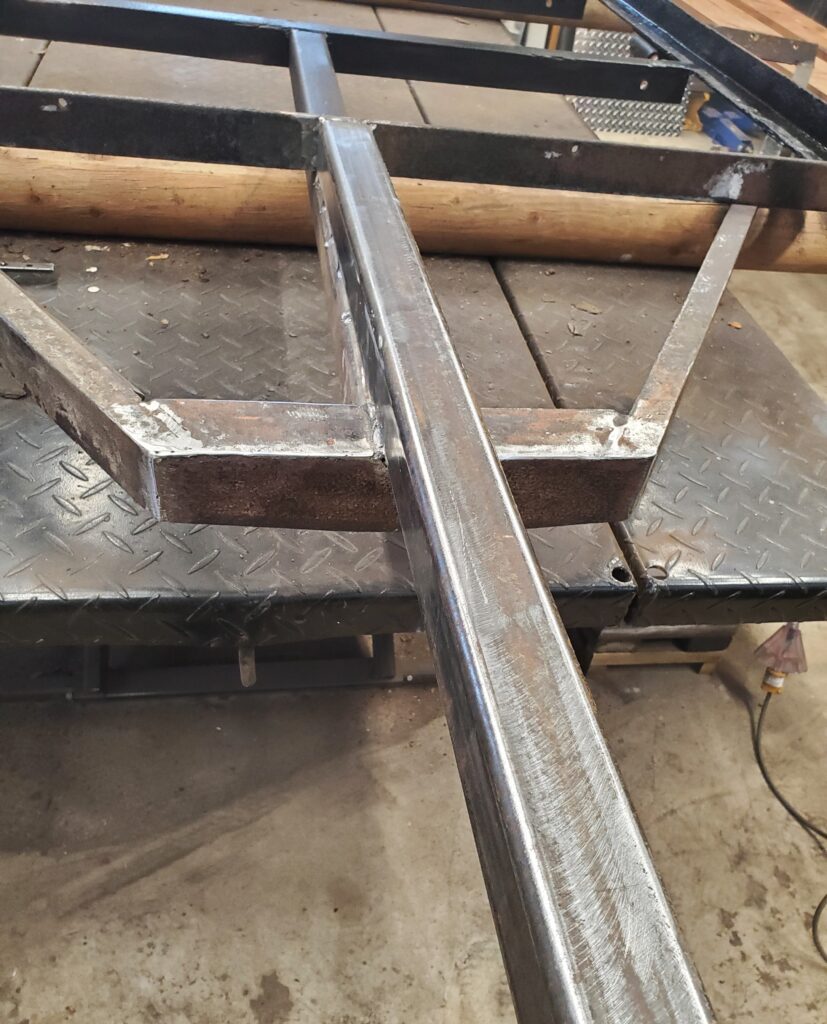
It’s really just a cover for the tubes so they don’t fill with crap. I almost forgot about a spare tire mount.. That’s next.

And here’s how I did this.. For extra support this will be bolted to the front wall, and that is planed to be 3/4 plywood. And we are ready for some paint…

Yes nice colour… That’s my little bit of brown to make the red darker. How about a new video update..
Will need two coats as usual, and once that’s cured I can get too the wiring and my aluminum plates. Taillights are coming soon so that should finish up the wiring. So let’s make a place for those lights.
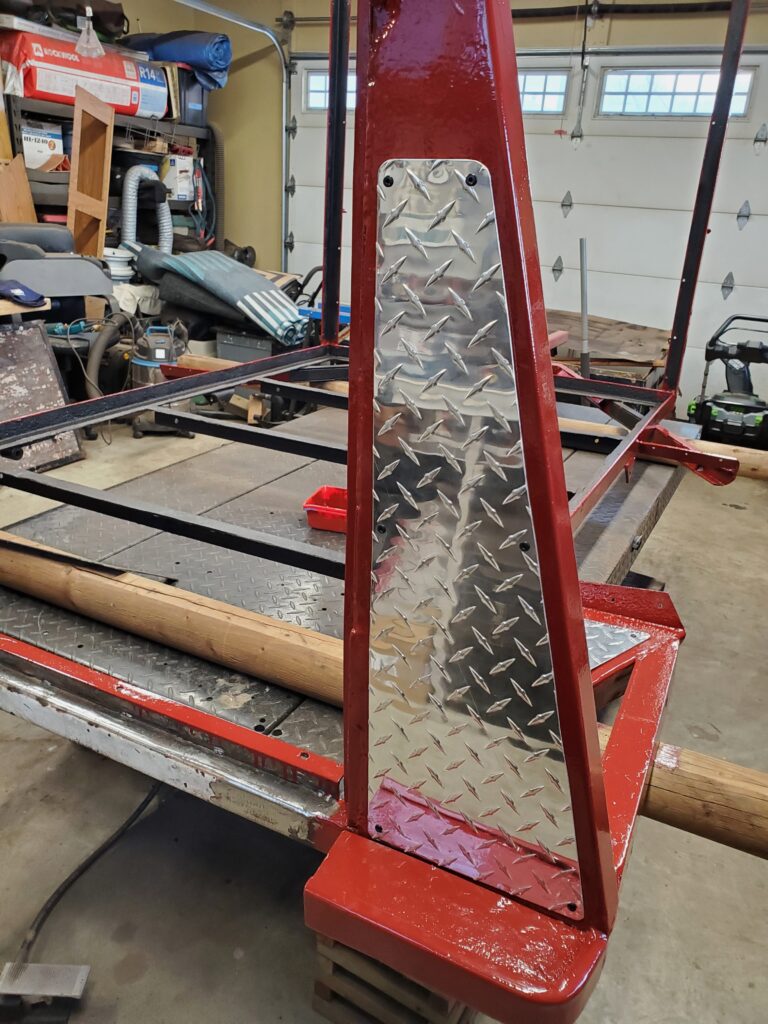
Yes it’s my one bit of fanciness. But really it’s to cover the holes from the old lights. And with some of the extra aluminum sheet I made these purely decorative triangle plates..

Now time for some wires.. And as always I run ground wire direct to the lights. Using the frame as the ground can end up being unreliable over time. Also all the new LED lights that I use have a ground wire coming out with the other two. This trailer will have the simple wiring. That’s a four pin plug with just three wires running down each side to the back. Here’s the harness I found in my stash.
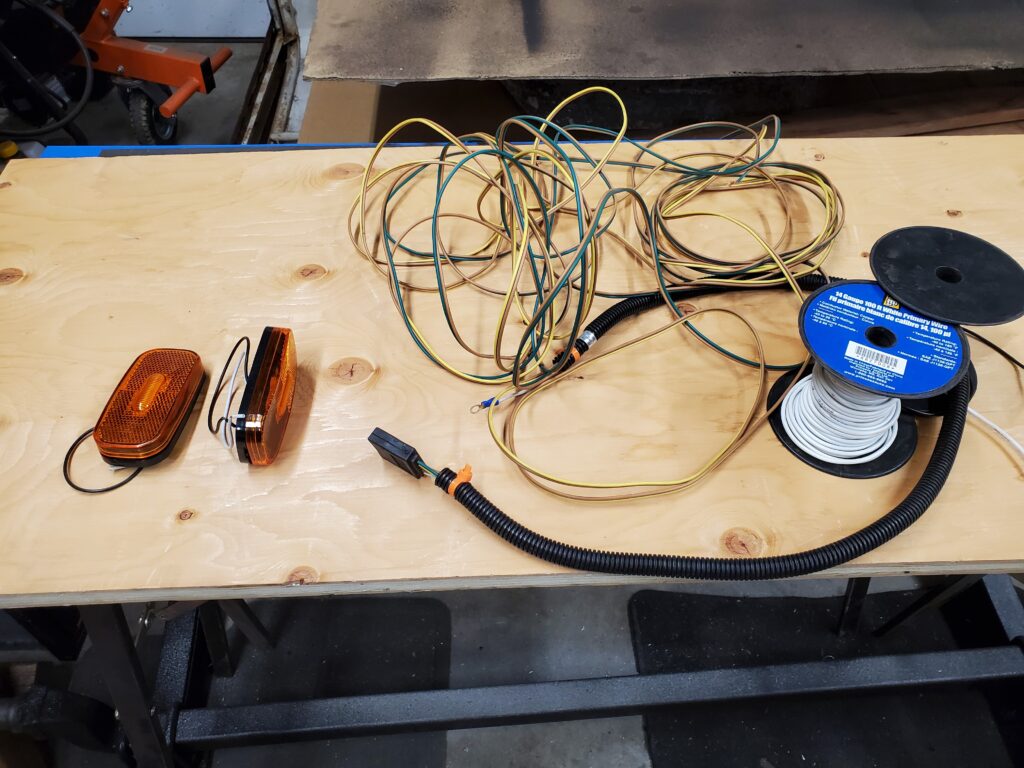
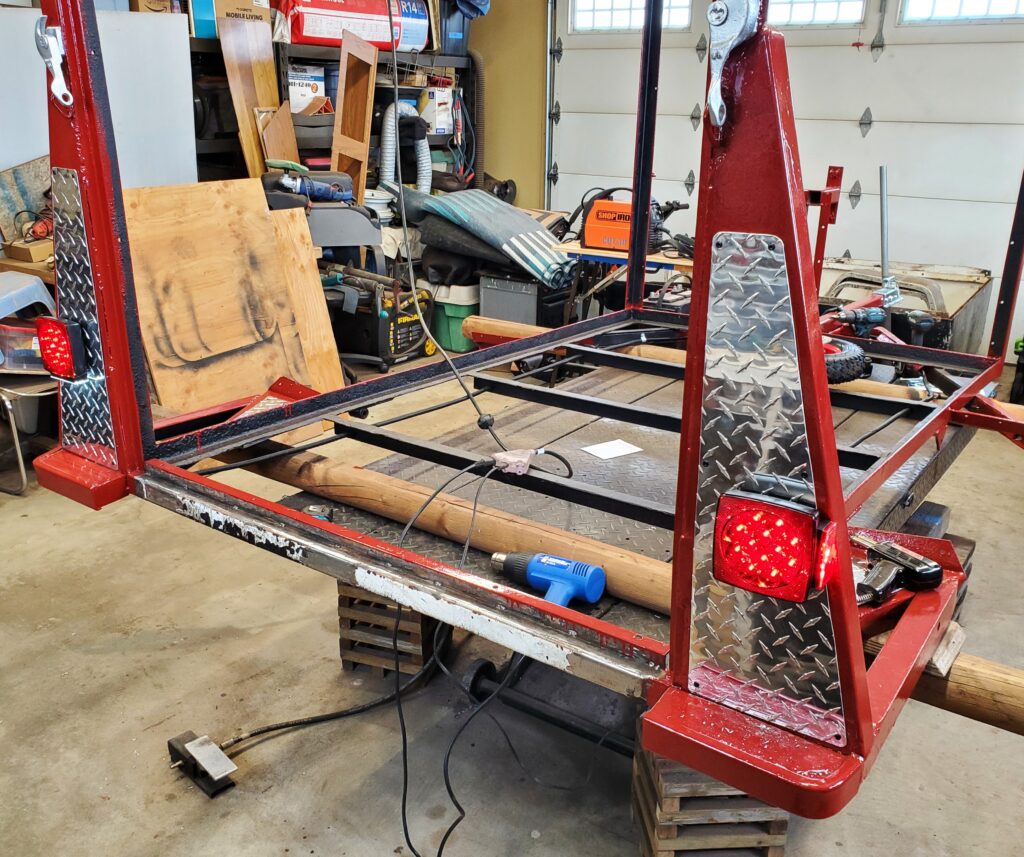
And two amber marker lights …also from my stash. No penny lights on this trailer.. we are going more conventional, but still LED’s. And they have a nice home on the front angle brace.


See ! Ground wires.. yes they put a wire ring to attach the ground wire to the body / frame. But not me.. I was going to go with the long skinny lights like I used on the Westward Ho trailer. But I’m going with these because they work best on this trailer.

And the license plate light and side markers are all in one.. Easy peasy.. And as simple as it gets. While I’m waiting for the lights to come, I tipped the frame back on it’s side. This way I can weld the eye that the safety chain will attach too.

Remember the trailer is tipped on it’s side… so the eye is welded to the underside of the tongue. There’s the jack with the BIG wheel that is going on this trailer. While I was in the painting mode.. I painted the good side of the wheels.

Sure would be cool to find hub caps for these. My coupler and tail lights came ! A couple of holes later and….
![]()
There you have it. 1/2 ” grade 5 bolts with ny-lock nuts.. Not coming off any time.. And I got right to work on installing the two tail lights. Solder and heat shrink inside loom, Nothing better. And I got to try out my new trailer wiring tester that I made.

I like these tail lights they are perfect for this trailer.
I tried the wheel jack and it’s too big, and too tall. So I’ll have to see what to do for a jack. Here’s a quick little update video…
And with that it’s time for a new page..

And the trailer stands like this safely while I clean up the underside. I’m having second thoughts about my plans to add a foot to the length. Adding to the tongue length is a very good idea.. But the amount of work to add that foot… maybe not. And there’s other considerations, like the spacing of the cross pieces. So I’m really talking myself out of that idea. And this video tells why.
Yup.. got a new plan.. And since it’s easy for me to tip the trailer by myself … I put it back right side up. Cleaned up the last of the welds on the floor panels. Trimmed the back so my tailgate will work.

That should do it for clearing the tailgate. And I patched the strange shaped hole in the panel behind the left fender.

Not prefect but good. We are not restoring a classic car.. it’s an old trailer. The next thing I did was wire bush the frame… Yes just a wire brush not the one on the grinder. Rather than fill the garage full of rust dust and who knows what. I’m trying something else. The “krud kutter” mild acid and rust sealer.

As you can see it turns rusty metal black. Once dry in a day or so, it will be ready for paint. Most of the metal on the trailer is rusted bad and pitted but still strong. I say embrace it and let it be ! Meanwhile I cleaned up the axle with the springs and gave it a satin black paint job..

It’s not dry yet.. hence the shiny spots. My new bolts and the shackle arms came today so this will be ready when the frame is.. And the wheels are next, so they will be ready too just in case I want to move the trailer. There’s a bit of welding to do for the under side of the trailer. Then it can be right side up for the rest of the work. And I have a plan ! I’ve been looking through my paint and I need to use what I have.. I have the white paint for the inside of the roof. I have a can of the regal red and some brown … so I’ll mix up the burgundy colour again for the lower frame. I still have some grey solid stain I can use on the outside of the plywood sides. And I’ll make up some off white for the roof. I’ll need to buy the plywood. Two sheets of 3/4″ , one for the floor and one for the front wall and the lower part of the tailgate. Two sheets of 1/2 ” for the side walls. Left over pieces will be handy for the Award trailer work. With the welding on the underside done, and the undercoating paint on..

This stuff is easy to spray on.. And this is 80 % of the frame painting done. As part of the welding I did , the filler pieces where I cut the bumper are in place too.

When all is dry it’s time to go right side up for the final time. And now that we are sittin pretty I have a plan for the tail lights. So I do need to remove the old ones.. The torch came out for this and off they came.

You will see later what my plans are. Now it’s time to weld the plywood protector piece back on.

And there you have it. The 3/4 plywood floor slips into this at the back of the trailer. It’s now time to work on the trailer tongue. And also time for a new page….